Good evening lovely readers! No blog post from me yesterday as I had a rare 'night off': James Juniors had a sleepover at Grannies' house and I was treated to a night at the movies (we saw 'Non Stop' with Liam Neeson - great action movie!) To make up for it, I have a whole set of cards to share with you today: my very first set of Undefined hand-carved stamps.
If you're a Facebook follower of The Crafty Owl, you may have seen today's thread that has been about what would you carve with yours followed by some guesses as to what I carved with mine. The Undefined Carving Kit is a great set with everything you need to cut and mount four stamps. This first set I carved was for Rebecca, who given her passion for swimming had a clear idea of what she wanted her stamps to feature - water, in a big way. So after much sketching and carving, this is what we came up with:
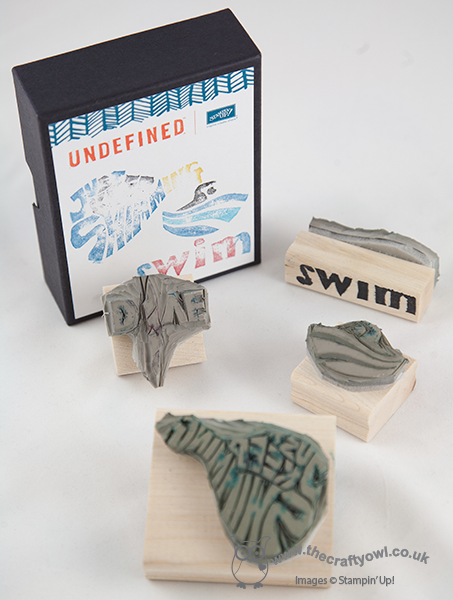
All of our stamps had something to do with swimming - the stamps themselves don't look that interesting, so I made a simple card to showcase each of the designs to give you a better idea of what they look like. So here's the first one, an abstract swimmer:
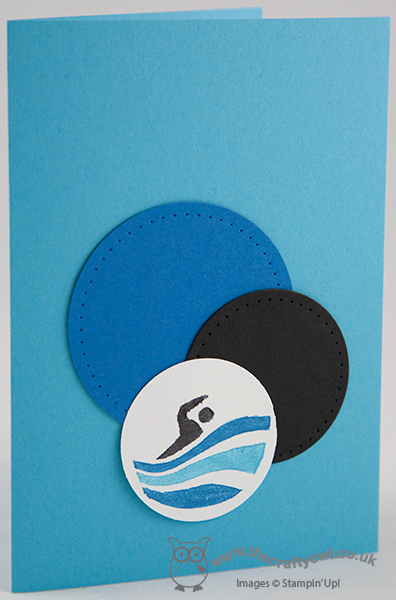
I simply mounted him with some paper pierced circles on a watery blue background. Here's a close up of the carved stamped image:

You can tell it's a hand carved stamp as it's nowhere near as sharp as a traditional SU! stamp, but then it's great fun to be able to create something unique that you carved yourself. Here is the second stamp - this time, a diver:
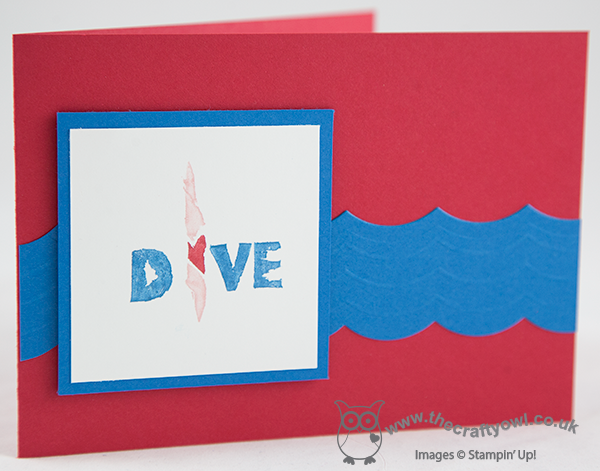
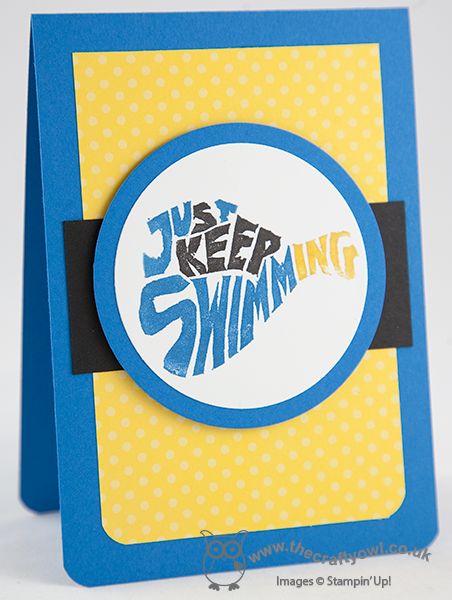
I used my Borders scoring plate and Large Scallop Edgelit to create my waves in the background. The next one was actually the first stamp I carved and it shows - take a tip from me, if you're carving words, which is quite tough, don't start with a curved letter such as 'S' - in hindsight I needed a little more practice before I started this one!

I love the message of this card though - it was something I read on the internet as an inspirational quotation and I thought it was really apt; sometimes it's as much about the motivation and belief that you can achieve, as it is the winning itself. Our last stamp was a fun one - do you recognise this famous fish cameo?
This is my take on Dory from the Disney movie 'Finding Nemo', a definite James family favourite and whilst it might look complicated, as the last of my stamps to carve I had had a little practice by this point, so think it turned out quite well.
I hope you like my first foray into the world of 'Undefined' - it really was fun and Rebecca LOVES her stamps, which is the main thing! I will have more to share with you another time as I still have Ben's set and mine to carve. if you would like more 'Undefined' inspiration, check out Stampin' Up!'s Undefined Pinterest page, where you will see lots of amazing creations!
Back tomorrow with another project; until then, happy stampin'!
Stampin' Up! Supplies Used: