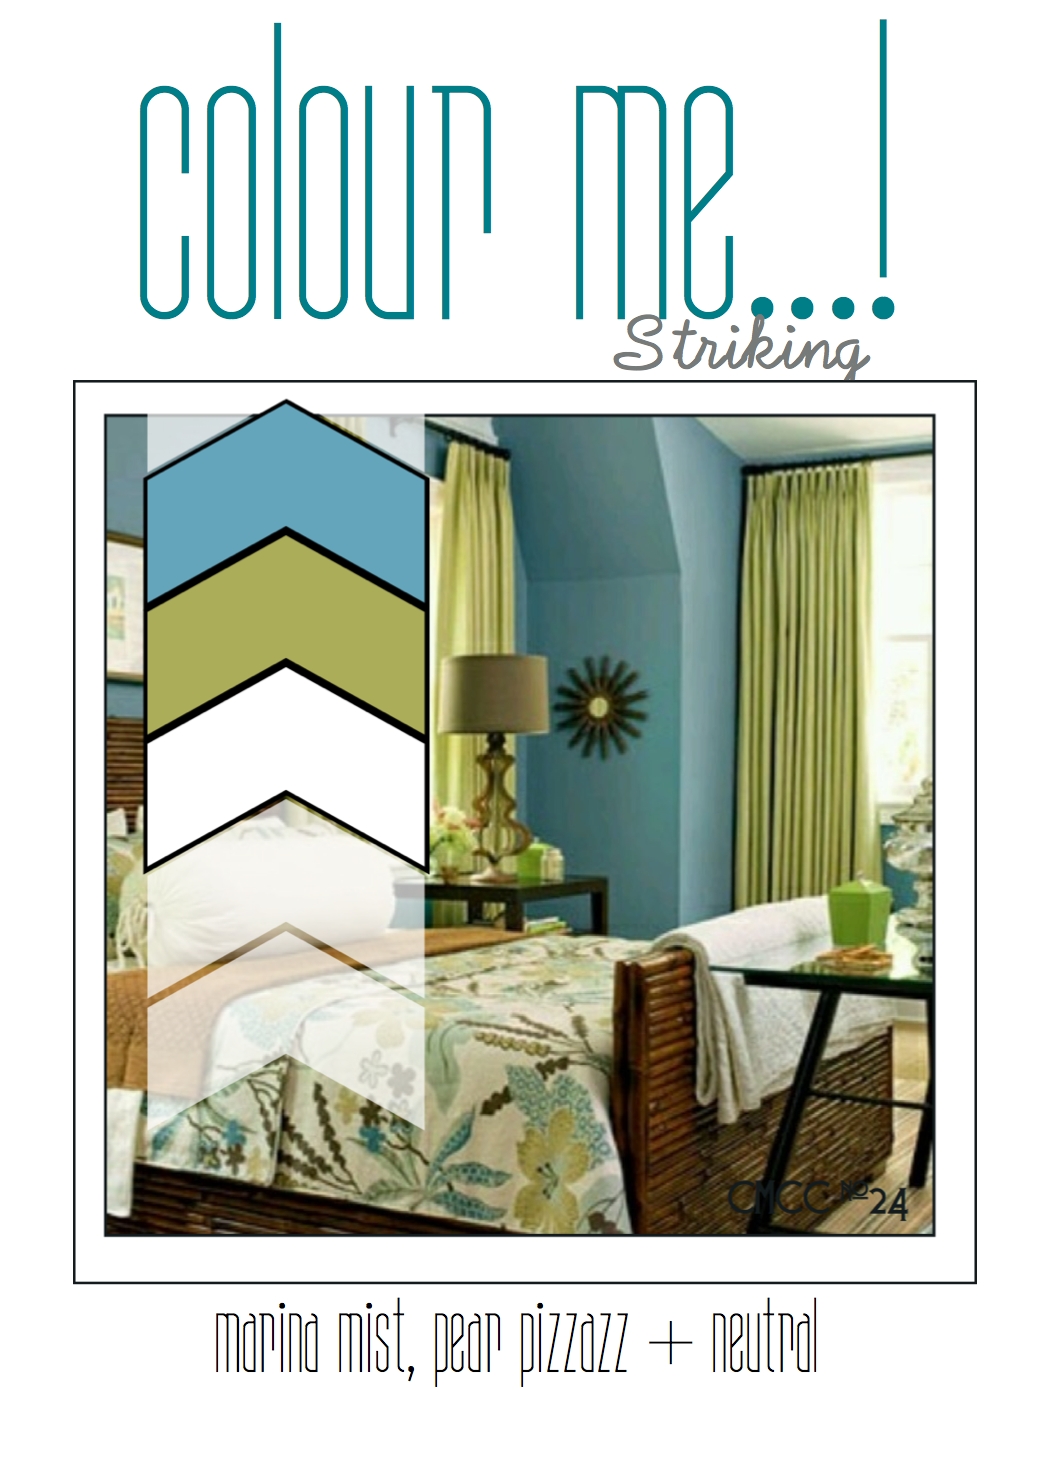
by Joanne James16. June 2014 20:56Today's creative post uses the colours for this week's Colour Me...! Challenge (although I am not linking up this week as the challenge has already closed) and I've used this week's sketch over at CAS Colours & Sketches for my layout:
I decided to get out my 'So Very Grateful' stamp set for this card - I can't quite believe this set will be leaving us at the end of the month, I love it and don't feel I've used it anywhere near enough. This is a good time to point out that whilst there's always lots of focus on those items in the main catalogue that are retiring, we sometimes forget about the lovely stamps that are in the Spring-Summer seasonal catalogue that will also no longer be available after 30th June. If you still have items on your wishlist, you've only got a couple of weeks to find out whether they are being carried over into the new annual catalogue or whether they will be gone for good. So, here is my card:
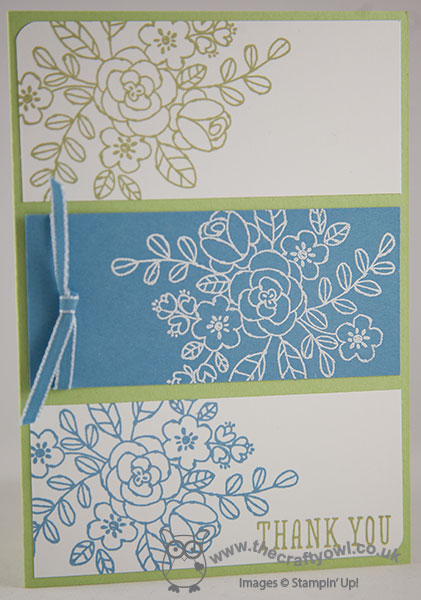
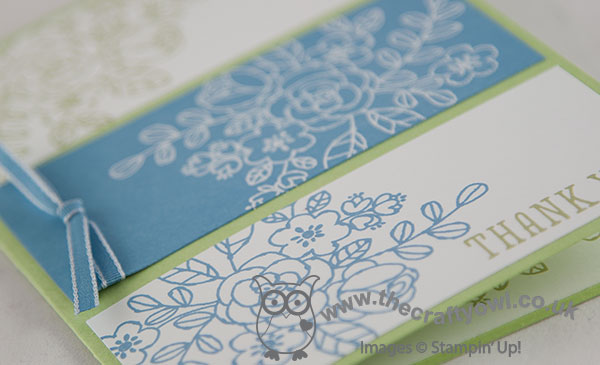
I used a base of Pear Pizzazz then decided to create three clear panels for my card and stamped the main flower image from the set in the challenge colours on white for the outer pieces, then stamped the same image in Versamark on the central panel of Marina Mist and heat embossed in white. I finished the central panel with a piece of 'vintage' Marina Mist taffeta ribbon and lastly added my sentiment to the bottom panel.
This card makes me think of the old saying 'blue and green should never be seen, unless there's a colour in between' - I have to say, I think this card looks really fresh and old saying or not, I'd have to disagree!
Back tomorrow with a sneak peek; until then, happy stampin'!
Stampin' Up! Supplies Used:
by Joanne James15. June 2014 20:58Well today might be Father's Day, but in the James household there has been an apparently altogether more important celebration - the oldest of my James Juniors, Rebecca, turned 9 today. Her birthday always falls near to Father's Day, but as they actually clashed today she informed Daddy that every day is Father's Day and you'll only be 9 once - so one definitely trumps the other! My lack of blog post yesterday was due to my sheer exhaustion having held a day of party celebrations at home for Rebecca with a little group of friends - I'll tell you more about this another time as this is a Project Life page in the making! - so today I thought I would share the card I made for her.
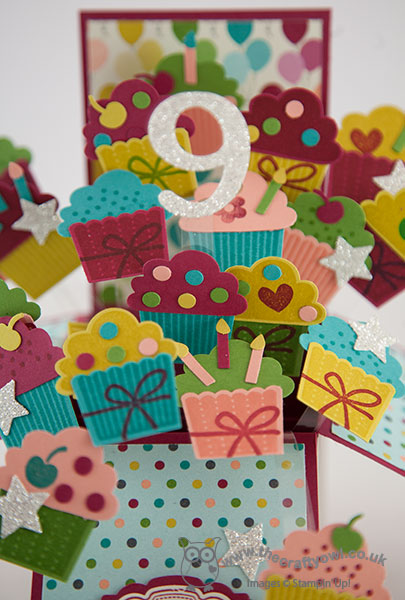
I finally had a go at one of the 'card in a box' cards that are currently all the rage in the papercrafting world and decided that mine would feature my favourite DSP for birthday cards, Birthday Basics, and one of Rebecca's favoutie foodstuffs - cake! Well, cupcakes to be precise; here is my card, which is A5 size when folded flat:
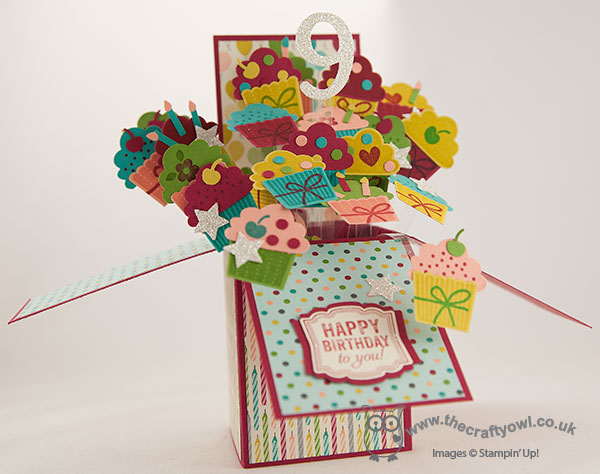
I took the opportunity to use my 'Create a Cupcake' stamp set; it's on the retiring list, but the co-ordinating punch is staying and there is more cupcake loveliness just around the corner :-) Now I know this card does look rather on the crowded side with cakes popping out all over the place and nicely wobbly on their acetate supports, but when a card is for a 9 year old, excess is the name of the game - along with a little glimmer. A nice sparkly number 9 and a few sparkly stars complete the card. And Rebecca's verdict: "Perfect!"
Back tomorrow with another card; until then, happy stampin'!
Stampin' Up! Supplies Used:
3190a3a9-54ff-4bda-b350-8f1ca7cf1ce5|0|.0|96d5b379-7e1d-4dac-a6ba-1e50db561b04
Tags: Card in a Box, Birthday Basics, Create a Cupcake, Cupcake Builder Punch, Artisan Label Punch, Label Love, retiring stamps, Shop online, Stampin' Up, Stampin' Up Card, Stampin' Up Card ideas, Stampin' Up Supplies
Cards | Stamping
by Joanne James13. June 2014 22:51Good evening everyone! Apologies for my lack of post yesterday; Rebecca was selecte to compete in an inter-school athletics competition yesterday that unexpectedly took me out of the house for most of the day and then I had a get-together with my lovely team yesterday evening, so I really wasn't at home all day. Today I have been super busy with my preparations for Rebecca's birthday weekend and along with baking and decorating a two tier cake today and finishing off the decorations, this is truly the first time I've sat down all day!
So today I have the last of the cards we made at this month's card class using the Springtime Hello stamp set:
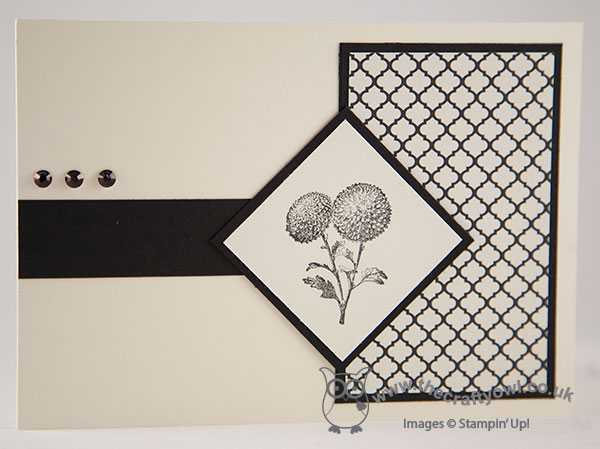
I had a request for a black and white card using the set and this is what I came up with. This is quite different to the other cards we made (you can see the full set below) and the monochrome colour scheme and clean and simple lines of the card make it look quite sharp and modern. Just a simple piece of Modern Medley DSP matted on Basic Black, and then the flower image stamped in black, mounted and positioned at an angle to the DSP, and a central strip to draw your eye to the image, with 3 rhinestones coloured black with a Sharpie marker to add a little accent. I left my card sentiment-free as this is the sort of card you can use for any occasion.
That's all from me; I need to get some sleep before the onslaught of a group of 8 and 9 year olds tomorrow ready to craft and party in style! Back tomorrow with another card; until then, happy stampin'!

Stampin' Up! Supplies Used:
by Joanne James11. June 2014 21:17With Father's Day coming up this weekend, I thought I should share a few more suitably themed cards with you for anyone in need of last minute ideas! Today's card has both something old and something new - here's my card:
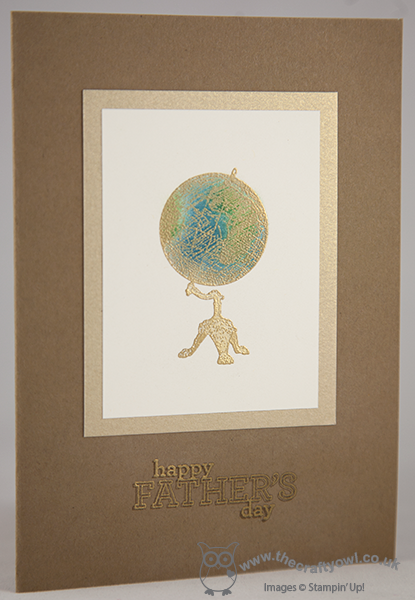
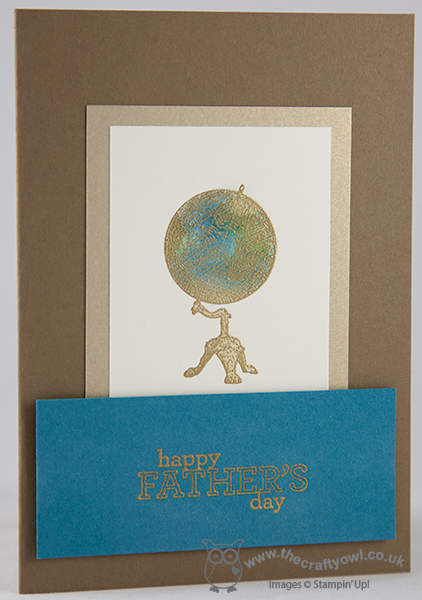
I used Soft Suede for my card base, then created a simple central panel by stamping the globe image from the new Traveler stamp set in Versamark and heat embossed in gold embossing powder. I created a mask for the globe using a piece of scrap cardstock, then carefully sponged in the colours on the globe using sponge daubers and Island Indigo, Garden Green and Encore Gold inks. Here's a close up of the central image:
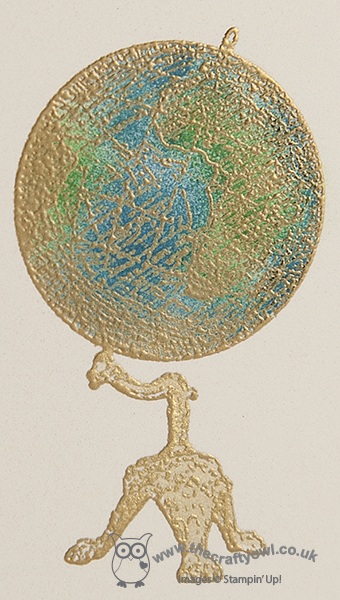
This is one of those cards that looks so impressive in real life and the colours are really vibrant against the gold. I then matted this panel on some brushed gold cardstock and finished the card by stamping the 'Happy Father's Day' sentiment from the Delightful Dozen stamp set (it's on the retiring list) and heat embossing in gold, then stamping it in Versamark again slightly offset to create a shadow and add some depth to the card. I also created a slightly altered version of the same card, this time stamping the sentiment on a piece of Island Indigo to inject a little more colour - browns have their place, but I don't believe that just because cards are for men, they shouldn't have some brighter colours too.
These cards would work equally well for a male birthday or other masculine card with a change of sentiment; or maybe even a graduation or travel-themed card. That's all from me today; back tomorrow with another card. Until then, happy stampin'!
Stampin' Up! Supplies Used:
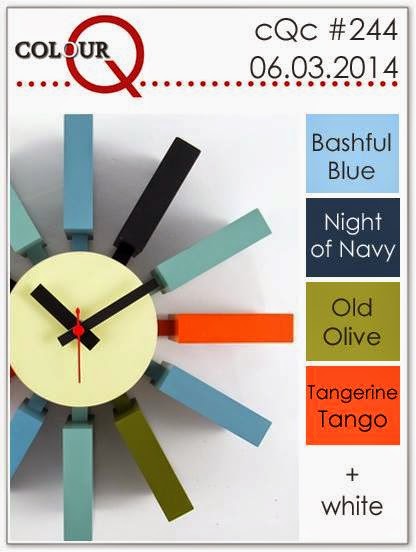
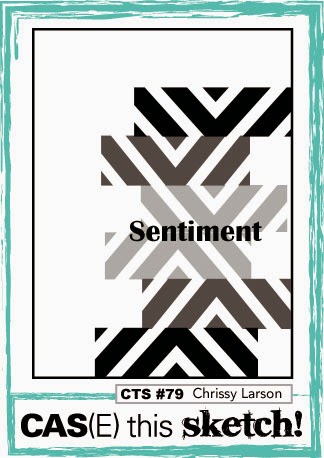
by Joanne James9. June 2014 23:10Today I'm sharing a card I made using this week's sketch over at CAS(E) This Sketch and the lovely colours at Colour Q:
My Dad had a knee replacement operation last week and so I wanted to send him a 'get well soon' card that would brighten his day - here is my card:
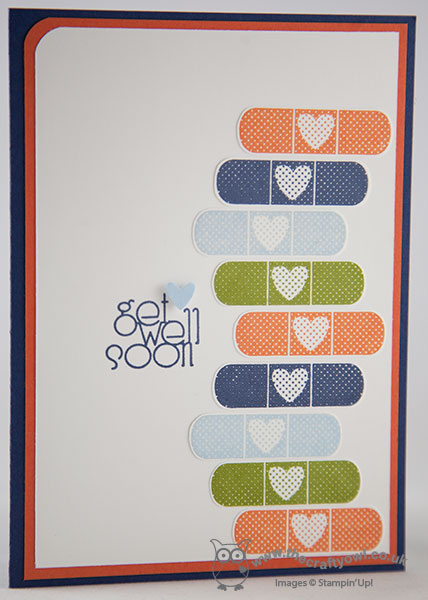
I used a base of Night of Navy along with a mat in Tangerine Tango and using the sticking plaster from an old 2013 Sale-A-Bration set, Patterned Occasions (minus the attached sentiment), stamped it in the challenge colours and cut them out and adhered them to my card following the sketch layout. I coupled them with a simple 'get well soon' sentiment from the ever-so-useful Delightful Dozen stamp set (due to retire at the end of this month) and added a tiny Bashful blue heart punched with my trusty owl punch to finish.
I love the look of the stuck-on sticky plasters, which works so well with the get well theme - I'm sure my Dad wishes his knee could have been fixed that easily!
Back tomorrow with another card; until then, happy stampin'!
Stampin' Up! Supplies Used:
36cb73d0-162d-4e36-a4a1-198996bceed2|0|.0|96d5b379-7e1d-4dac-a6ba-1e50db561b04
Tags: Delightful Dozen, masculine cards, Owl Punch, Sale-a-bration 2013, Shop online, Stamp-a-ma-jig, Stampin' Up, Stampin' Up Card, Stampin' Up Card ideas, Stampin' Up Supplies, corner punch, Patterned Occasions
Cards | Stamping
by Joanne James9. June 2014 11:18Happy Monday lovely blog readers! Lots to do this week, but the sun is shining so all is good with the world! Today I am sharing my first 2014-15 Annual Catalogue 'sneak peek' with you - yay! Whilst there is some sadness as we say goodbye to the old catalogue - and I'm not done with it yet! - there is also the excitement of the new and today's clean and graphic card contains a little of both.
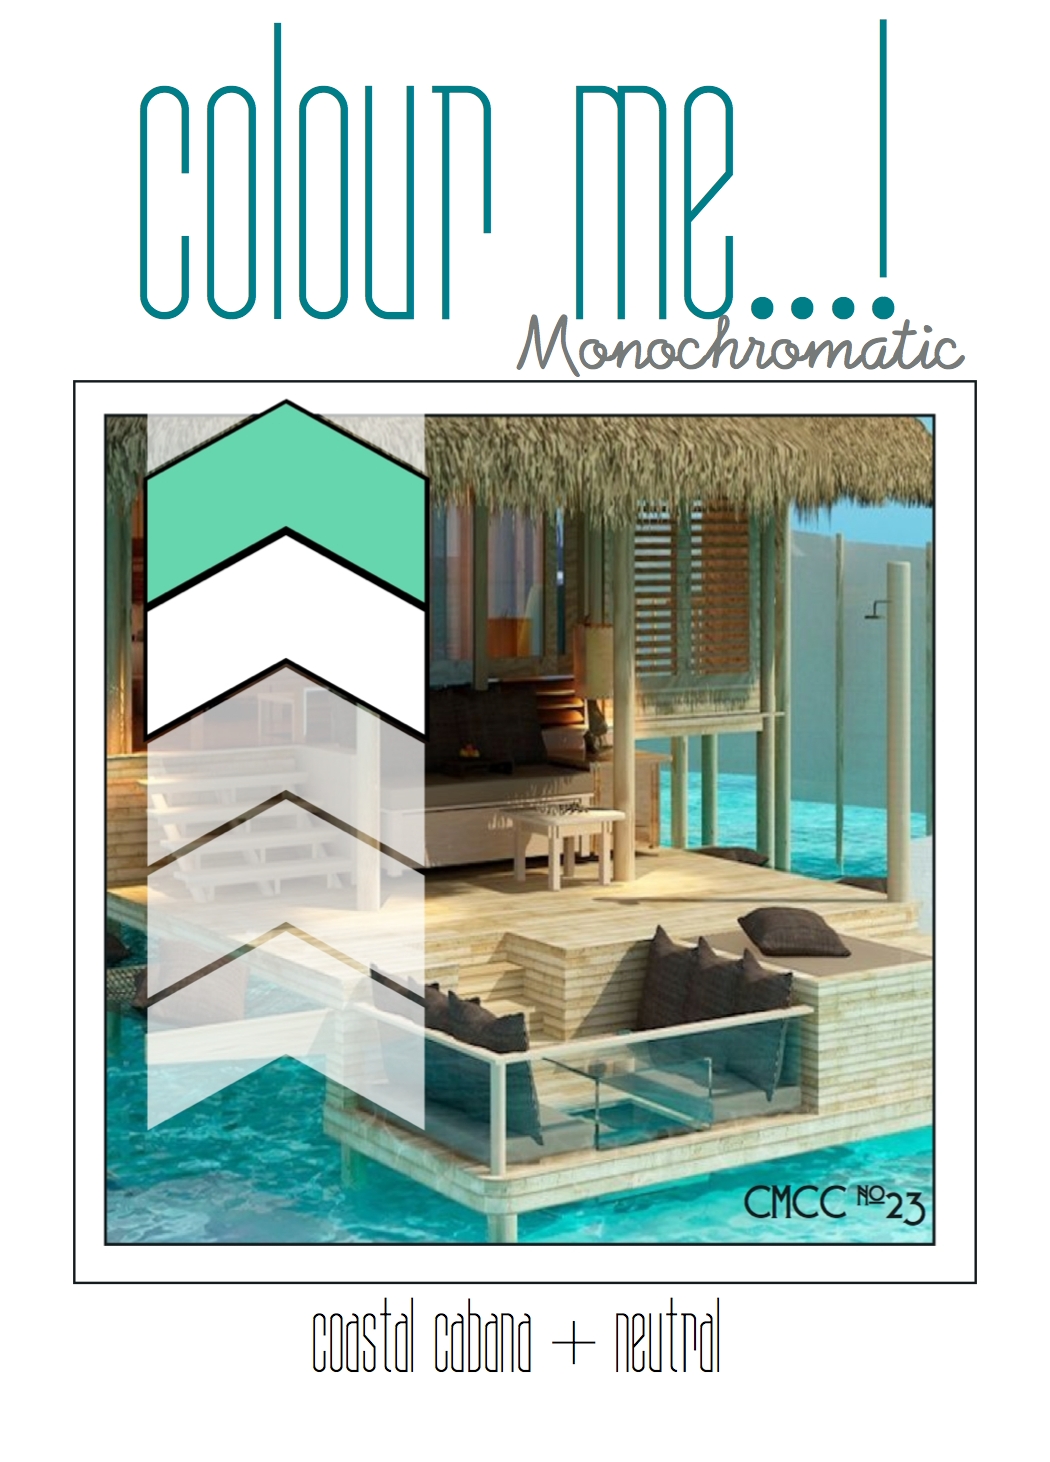
Today's card is this week's entry for the 'Colour Me...!' challenge where we are working with monochromatic Coastal Cabana:
The card I'm sharing features one of the stamps form the new 'Traveler' stamp set that I was asked to demonstrate recently at the Stampin' Up! UK Regional training event in Telford recently. This set is a collection of old fashioned images with a travel theme and I must confess the first time I saw it I did wonder what I was going to do with it as 'vintage' really isn't my style and this isn't a set I would have selected by choice. Turns out I've had great fun with it, mostly creating unusual cards that are much more in keeping with my style; if you look at today's challenge entry you'll see what I mean:
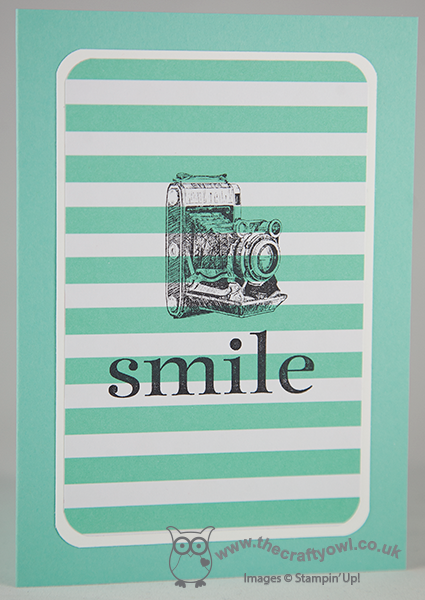
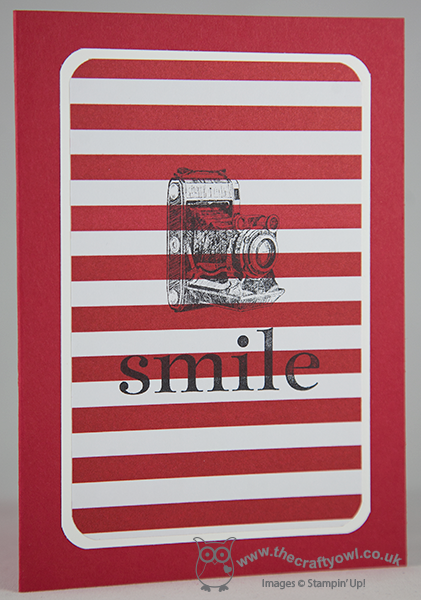
This card uses a Coastal Cabana base, then the focal panel is a piece of white and Coastal Cabana-striped paper from the Fresh Prints DSP stack, onto which I've stamped the old fashioned camera in black stazon, coupled with the 'smile' sentiment from the retiring Happy Day stamp set - I will miss this stamp set so much! I then rounded the corners and matted onto a piece of Whisper White cardstock before adhering to my base. So a super simple design, but I think quite effective. Quite a modern take on such a vintage-looking stamp and it also makes the DSP look quite different when used in this way. The striped paper so reminds me of deckchairs!
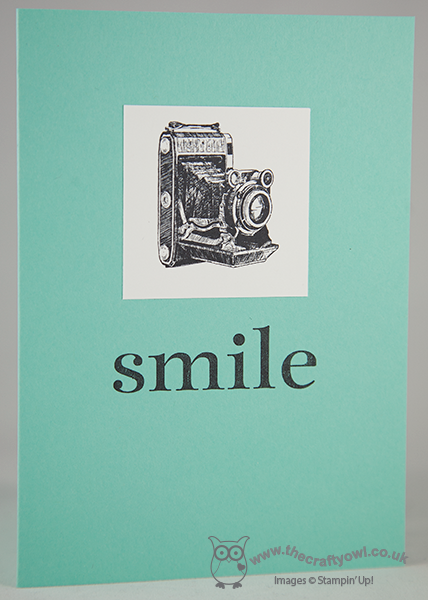
Whilst I was playing with this stamp and colour, I also created a co-ordinating card using a single central block:
Then inspired by the other striped paper in the Fresh Prints DSP stack, I created the same pair of cards in Real Red:
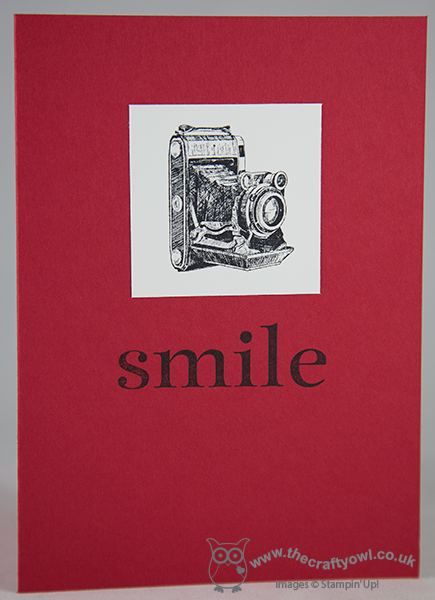
I like these too but the Coastal Cabana is my favourite! Hope you like today's sneak peeks - more to come in coming weeks! Don't forget the retiring lists are still active; if you're after the 'Happy Day' set, click on the link to the shop below as it will only be available until 30 June.
Back tomorrow with another 'blast from the past' card; until then, happy stampin'!
Stampin' Up! Supplies Used:
by Joanne James8. June 2014 21:36This has been the busiest of weekends, with so much going on: we bought Ben a new bike as an early birthday present yesterday - it has become quite apparent as we've been cycling since this year that he had outgrown his previous one and the middle of August was such a long time to wait - and he doesn't seem to have been off it since, along with the usual homework, swimming and a special golden wedding anniversary party today. Not much time for crafting although I did make a quick card using this week's Mojo Monday sketch layout and Pals Paper Arts colours, so a really quick post from me to share it with you:
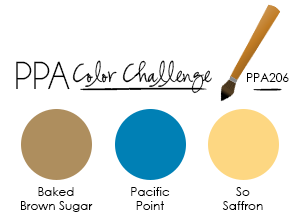
I haven't played along with Mojo Monday for a while and saw this sketch and had a few ideas of what to do with it and thought that this week's PPA colours would work well for a brighter masculine card. I must confess that things didn't come together quite how I planned though and with limited time I eventually settled on this card:
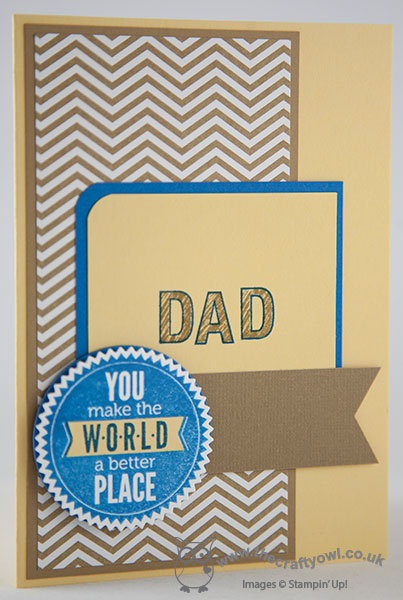
Some simple layers and patterns in So Saffron and Baked Brown Sugar and a pop of Pacific Point in the stamp from Starburst Sayings, echoed in the mat for the So Saffron panel with 'Dad' in a double-layer of sketched and outline alphabets. I made this card with Father's Day in mind and the thing I like most about the card is the sentiment - there are two James children in this house who absolutely would agree with this statement.
Back tomorrow with another project; until then, happy stampin'!
Stampin' Up! Supplies Used:
by Joanne James7. June 2014 20:55Today I'm sharing the original card I designed for this week's challenge over at The Card Concept, which I also adapted for my Springtime Hello card class this week. Here is this week's challenge colour palette:
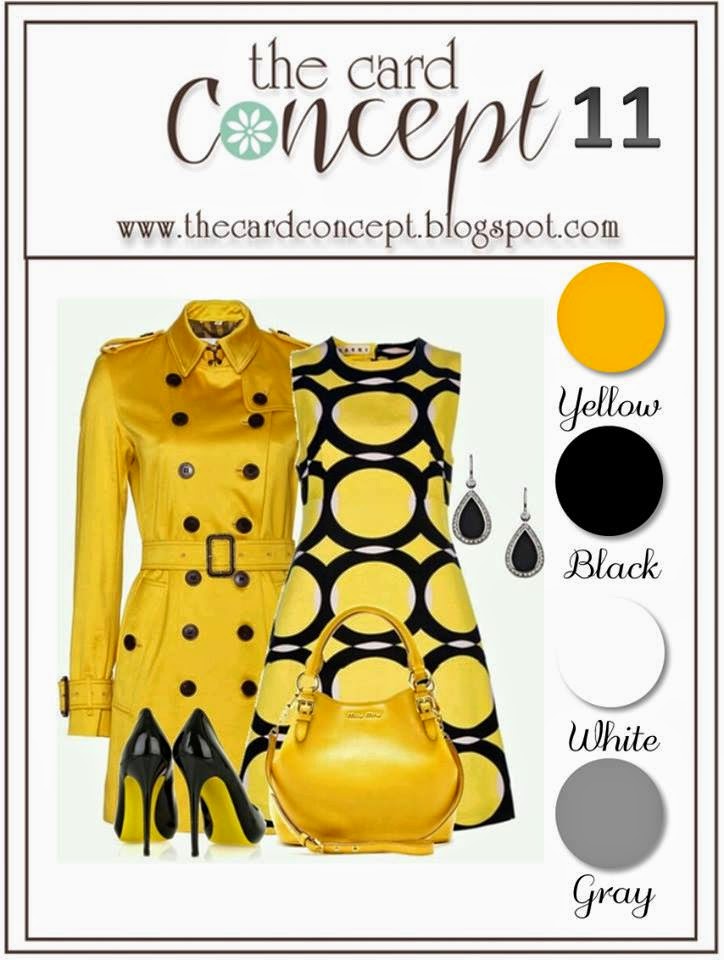
This card is quite different to my previous entry (you can see that card here); much more 'Classy and Elegant' this time around I think - here's my card:
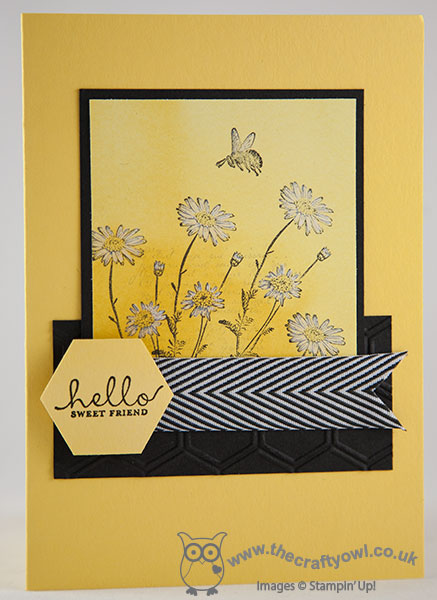
I used Daffodil Delight for my card base and layered up from there. I dry embossed a piece of Basic Black cardstock with the Honeycomb embossing folder, then layered my main stamped panel onto this. I repeat-stamped the daisy stamp from the 'Springtime Hello' onto a piece of Watercolour Wonder DSP so that the panel would have a lovely washed background, and also stamped the text stamp from the retired 'French Foliage' set in Smoky Slate behind this, having stamped off twice first to give a very faint image. You could substitute this stamp with one from the 'Background Borders' set, which is currently reduced and still available on the retired list. I then stamped the bee and using my aquapainter, I washed white kraft ink over the bee's wings and the daisy flower petals to give a subtle hint of natural colour, whilst allowing the yellow of the DSP to show through. I finished with a piece of Basic Black 3/4" Chevron ribbon and heat embossed my sentiment fro the Six Sided Sampler set in black embossing powder onto a punched hexagon and popped it onto a dimensional.
I hope you like today's card; back tomorrow with another project. Until then, happy stampin'!
Stampin' Up! Supplies Used:
78975a09-b85c-4eee-828c-ac9a94da521d|0|.0|96d5b379-7e1d-4dac-a6ba-1e50db561b04
Tags: Shop online, Springtime Hello, Six-Sided Sampler, Hexagon Punch, Watercolour Wonder, Hexagon Embossing Folder, Aquapainter, Big Shot, Stampin' Up, Stampin' Up Card, Stampin' Up Card ideas, Stampin' Up Supplies, Honeycomb Embossing Folder
Cards | Classes | Stamping
by Joanne James6. June 2014 09:00Today marks the 70th anniversary of the Normandy Landings in World War Two, with the start of the invasion on the 6th June known as D-Day. There are commemorations taking place both at home and abroad today to remember those Allied personnel who lost their lives on this day and to recognise the bravery, commitment and sacrifices of those service personnel who fought during the war to free Europe from Nazi occupation.
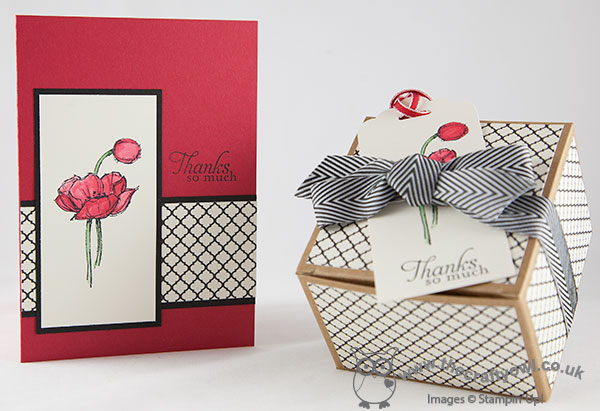
So it seemed a fitting day to share with you a recent commission. I was asked to create some cards and gift boxes as thank you gifts for some teachers who had led a school trip to the World War Two battlefields recently. A red poppy, the traditional form of remembrance, is the star of this card:
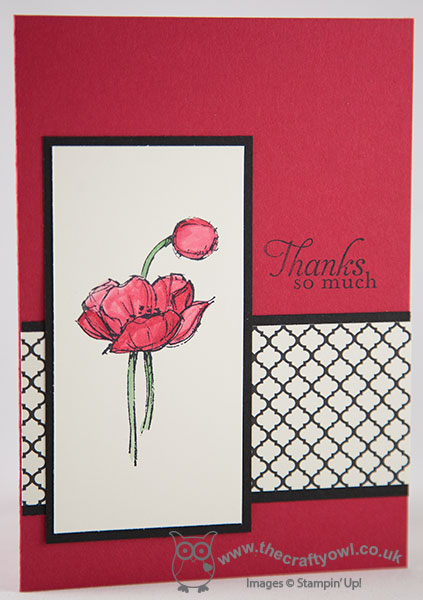
I chose a simple Real Red background and created a layered border using Modern Medley DSP. I stamped the poppy from the 'Simply Sketched' hostess set in Black stazon onto Very Vanilla, then coloured using Real Red ink and my aquapainter, with a touch of Garden Green for the stem. I added the sentiment directly to the card base, and honestly didn't feel this card needed anything else. I also made a co-ordinating gift box using one of the kraft gift boxes available in the annual catalogue:
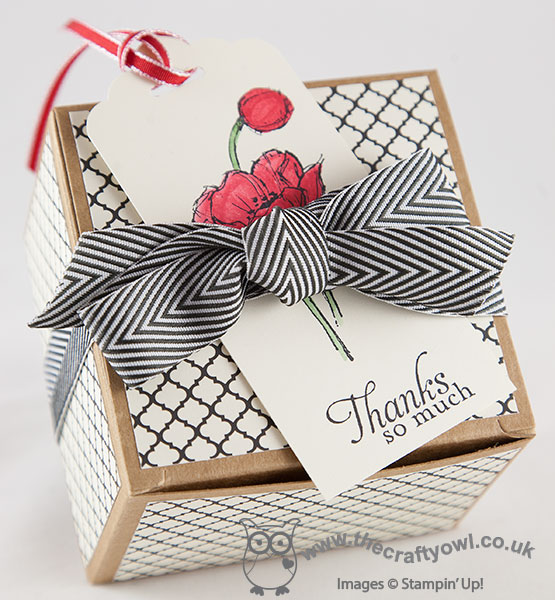
I covered in co-ordinating paper and made a tag with the same sentiment and poppy image on Very Vanilla and punched with my Scalloped Tag Topper punch, finishing with a 3/4" Chevron ribbon bow.
A lovely set to show appreciation and appropriate to share it on a day when we should all take time to remember the courage, bravery and sacrifice of our armed forces, of yesterday and today, who give of themselves in order that we may live relatively safe and secure lives. I for one, am thankful for that.
Back tomorrow with another project; until then, hapy stampin'!
Stampin' Up! Supplies Used:
72e562c8-d7a2-4069-b77a-e93e150acc7a|0|.0|96d5b379-7e1d-4dac-a6ba-1e50db561b04
Tags: boxes, Kraft Gift Boxes, Simply Sketched, Modern Medley, Scalloped Tag Topper Punch, Shop online, Stamp-a-ma-jig, Stampin' Up, Stampin' Up Card, Stampin' Up Card ideas, Stampin' Up Supplies
Boxes | Cards | Stamping
by Joanne James5. June 2014 21:30Today I'm doing one of those things that is somewhat dangerous if you're a cardmaking blogger and your intended recipients follow your blog - I'm blogging a card before I've sent it! So Barbara (affectionately known as 'Aunty Barbie' to Rebecca!) if you're reading this before Sunday - look away now!!!
Sandie's theme challenge over at The Paper Players this week is to create a card around the theme of love, weddings or anniversaries, and as I made a golden wedding anniversary card this week for a very special couple, I couldn't resist linking it up to share it. Here is my card:
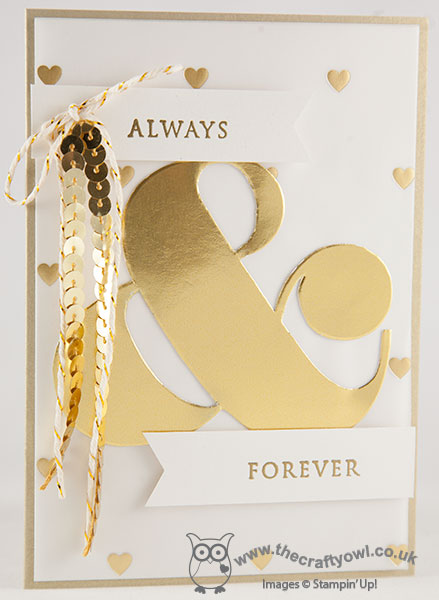
This card is a riot of gold products - 6 to be precise (or 7 if you count the gold Encore stamping inside, but that's mean because you can't see that!) Can you tell what they all are? I used Brushed Gold for my card base, then adhered a piece of Shimmer White cardstock to it, and a piece of gold Fancy Foil Designer Vellum to the top of that. I dry embossed the ampersand out of gold foil sheet and then fussy cut before adhering to my vellum top layer. I then made two flags out of Shimmer white card stock and heat embossed them with 'Always' and 'Forever' in gold embossing powder; these were both partial stamps from the 'This Day Forward' stamp set. I then popped the flags onto dimensionals and mounted them on opposing sides just touching the top and bottom of the ampersand. Lastly, I added a gold baker's twine bow and threaded this with a strand of gold sequins.
I think this card is just lovely - a fitting way to celebrate 50 years of marriage, which is some achievement in my book. Here's to Barbara and Bob and many more happy years together.
Back tomorrow with another card; until then, happy stampin'!
Stampin' Up! Supplies Used: