by Joanne James4. June 2014 10:13Well Sunday's summer sunshine was definitely short-lived; the grey of yesterday has turned into steady and continuous pouring rain so far this morning - yuk! Still, today's card for the CAS Colours and Sketches Challenge will cheer you up I hope; this week it is a double challenge to use both the sketch and colour palette:

Firstly, a quick thank you to the ladies over at CAS for choosing me as one of their winners last week (you can see my winning card here). Someone I asked me recently how I get on with my challenge entries, as I don't often post the outcome here. I sometimes post a win on my Facebook page but the one place I try and keep track of all my wins is my Pinterest board here - so if you're ever interested to see my growing badge collection, pop on over and take a look.
Anyway, onto today's card! I used a piece of paper from the Fresh Prints DSP stack as the inspiration for today's card - these stacks are great and I'm so pleased that there are going to be some new ones appearing in the forthcoming new annual catalogue. Here is my card:
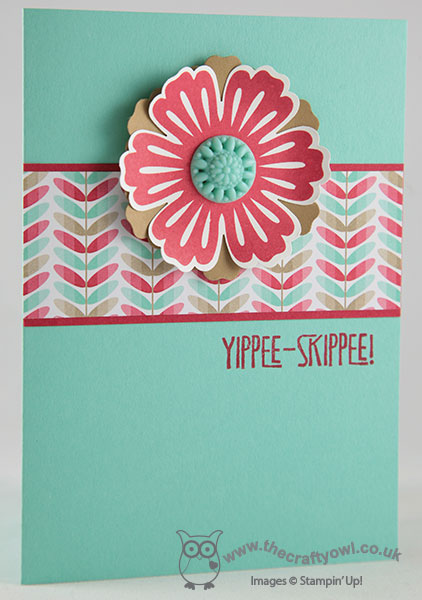
I love this Orla Kiely-inspired pattern - it always reminds me of flower stems, so it seemed appropriate to use a statement flower as my focal point in place of the arrow on the sketch and what better than that old favourite, Mixed Bunch (staying for next year's catalogue - hurrah!) I used Coastal Cabana for my card base and layered my DSP strip on a mat of Real Red cardstock. I then stamped my flower in Real Red ink on Whisper White, punched it out with the co-ordinating Blossom punch (got to love a matching punch!) and backed this with another flower punched from Baked Brown Sugar cardstock, which I offset slightly so that you could see it through the gaps of the petals of the top flower. I finished my flower with an in-colour Boutique Details in Coastal Cabana; it's not often I dip into my pot of these, but it provided the perfect finish to my bold flower here. Lastly, I added my 'Yippee Skippee!' sentiment from the stamp set of the same name in red to the card base.
A clean and simple card that could be used for lots of occasions and brings the challenge colours together nicely. I am also going to link my card up with the challenge over at 'Less is More' this week where the challenge is to use two different stamp sets; pretty good, considering there are only two actual stamped images on the whole card!
Back tomorrow with another card; until then, happy stampin'!
Stampin' Up! Supplies Used:
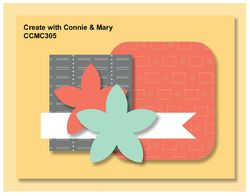
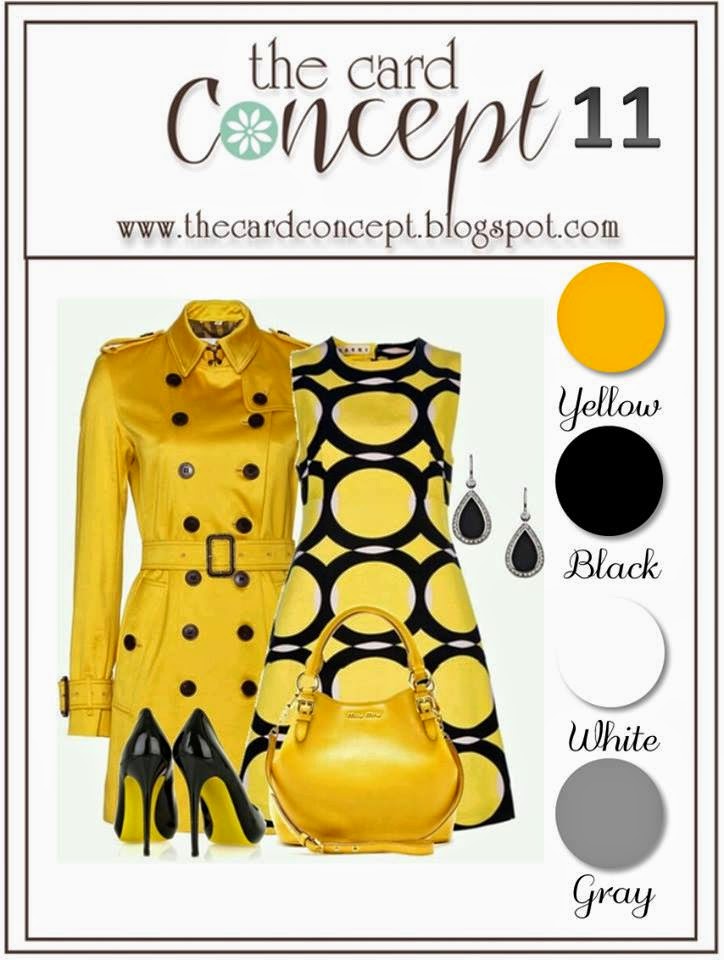
by Joanne James3. June 2014 21:42Today's card started out as my entry for this week's challenge over at Create with Connie and Mary; once I'd decided on my design, I also remembered the inspiration photo over at The Card Concept so used this as my colour scheme:
Here is my finished card:
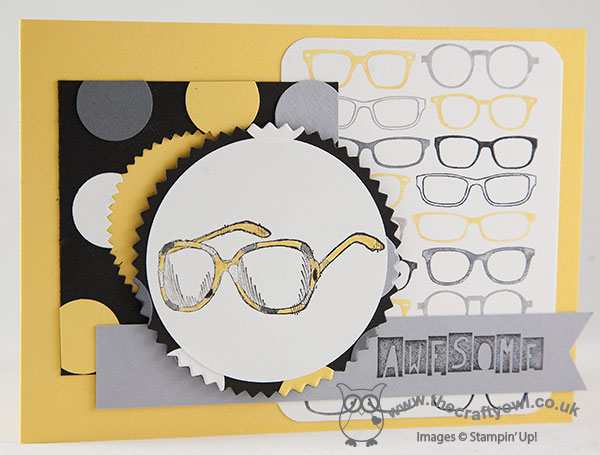
I decided to use the sunglasses (minus the sentiment) from the Spring catalogue hostess set 'To the Point' as the focal point for my card and stamped them onto a circle of Whisper White as I wanted to be able to create the cut out image on the layer behind. I created a patterned layer using punched 3/4" circles on a black square to echo the spot pattern on the sunglasses, and cut out the starburst shape and mat for the circle using my Starburst Framelits. I stamped the retired single stamp 'Spectacular' and my marker pens to create my own DSP background panel, using my stamp-a-ma-jig to enable easy alignment and pattern repeat, and rounded the corners with my Envelope Punch Board. Lastly, I stamped my sentiment onto a flag of Smoky Slate; the sentiment on the original stamp was too small to work here, so I substituted with 'Awesome' from the Cool kid stamp set in the current Spring catalogue (only available until the end of the month).
I had already made a card for the challenge over at The Card Concept, which is scheduled to post later in the week and couldn't be more different to this one, however having chosen my design I couldn't help but think that sunglasses were the only thing missing from the inspiration photo, so I decided to roll with it! My card definitely fits the 'clean and layered' style; the question is, does it really have specs appeal? I'd love to know what you think - feel free to leave me a comment below! I am also linking this card up over at SUO Challenges, where the theme is to create your own background DSP, as I've done here with my 'Spectacular' stamp.
That's all from me today; back tomorrow with another card and news of this week's Wednesday Weekly Deals; until then, happy stampin'!
Stampin' Up! Supplies Used:
by Joanne James2. June 2014 22:28Good evening! A really quick post from me today, as I've been out and about all day today: my regular monthly card class with a super bunch of ladies, piano lessons after school and some admin this evening and now I'm ready for my bed! I just wanted to quickly share one of the cards we made in our class today, featuring the Springtime Hello stamp set:
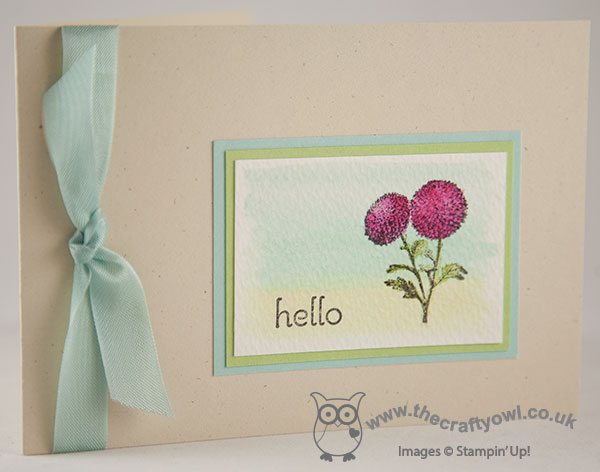
We watercoloured a background using our aquapainters and blended Soft Sky, Pool Party and Pear Pizzazz inks, then overstamped this with one of the flowers in the set and added Melon Mambo and more Pear Pizzazz to the stamped image. We also added the 'Hello' sentiment from the 'A Dozen Thoughts' stamp set. This panel was then mounted onto two mats of co-ordinating cardstock and adhered to a Naturals Ivory card base. The card was then finished with a knot-tied piece of Pool party seam binding ribbon.
A simple card with a lovely pop of colour with the pink flower.
Right my bed is calling, but I will be back tomorrow with another project; until then, happy stampin'!
Stampin' Up! Supplies Used:
by Joanne James1. June 2014 20:13Well, I don't know if I should say it, but as the children are about to return to school tomorrow we have had the most glorious day weather-wise - might summer have finally arrived? Let's hope so! We had a BBQ lunch in the garden, long bike ride and a picnic tea in the country park today - we thought we'd better make the most of the opportunity, just in case it's once again short-lived!
This week is also all about classes: I had the pleasure of running a private party yesterday evening for the lovely Maria and 6 of her friends - you can find out what they got up to on my Facebook page and if you live in or around Northampton and would like to host a similar event, do get in touch - and tomorrow is my regular monthly card class. This month we are featuring the stamp set 'Springtime Hello' and the card that I'm sharing today is a slight variation on one that we will be making in class. It is also my entry for this week's 'Colour Me...!' challenge, where in contrast the colours have a rather autumnal feel:
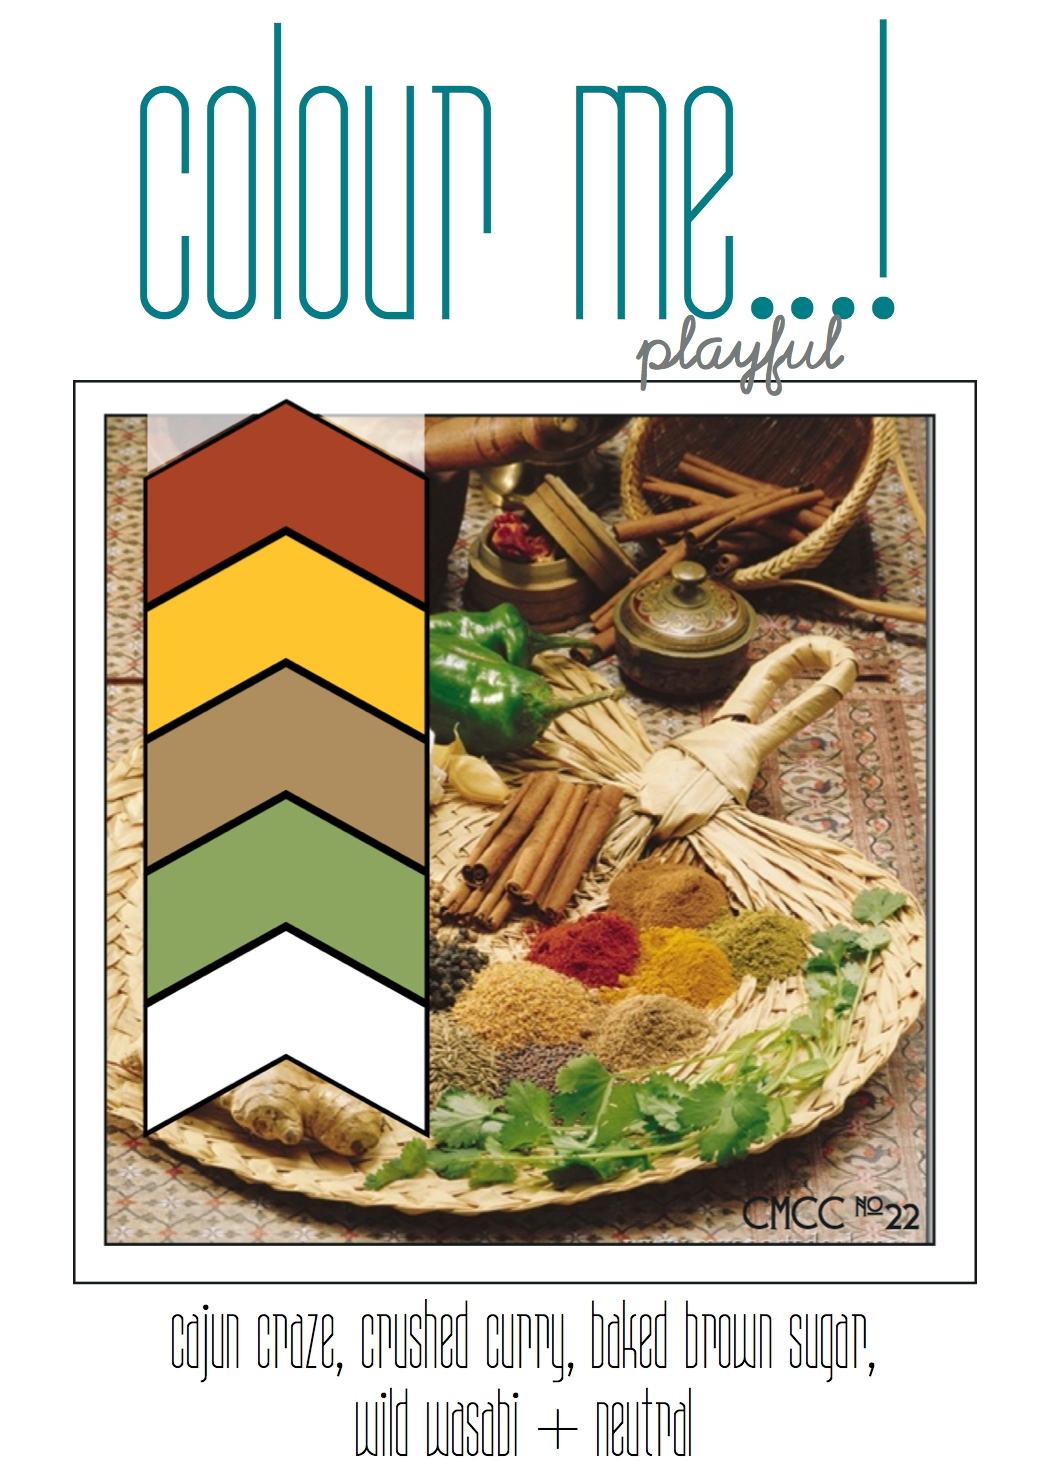
I wanted my card to have a natural feel, so thought these colours would be perfect for my card. Here it is:
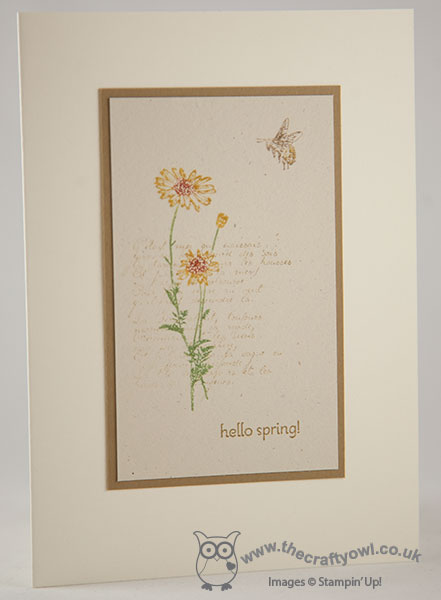
I used Naturals Ivory cardstock for my central panel - I haven't used this cardstock before and it has a great texture for this type of card - then inked up the wild daisy stamp using my Crushed Curry, Cajun Craze and Wild Wasabi marker pens and stamped the flower. I created the script background using one of the stamps in the retired 'French Foliage' set - I inked it in Baked Brown Sugar and stamped off twice before stamping onto my panel so that it would have a very faint background effect. Lastly, I stamped both the bee and the sentiment in Baked Brown Sugar and added a little Crushed Curry to the bee again with my marker pen. I then mounted this panel on a mat of Baked Brown Sugar and centred on a card base of Very Vanilla. I think this card has quite a vintage feel - like a botanical drawing in an old book. This set is in the current Spring-Summer catalogue and along with lots of others is one that will be retiring at the end of the month, so if it's on your wish list, you only have a little while longer to purchase it.
That's all from me - back tomorrow with another card. Until then, happy stampin'!
Stampin' Up! Supplies Used:
by Joanne James31. May 2014 10:41A really quick post from me today as I have a very busy work day ahead, but a bonus project for you too today - read on! I made today's card a couple of weeks ago for one of Rebecca's friends who was celebrating her 9th birthday. It got me thinking - at 9 years old, suddenly some girls are less about cute and desperate to 'grow up', so I needed to make a card that was girly but not too 'cutesie' (I think that's a word!). Birthday Basics DSP is always my 'go to' paper for cards like this - here's my card:

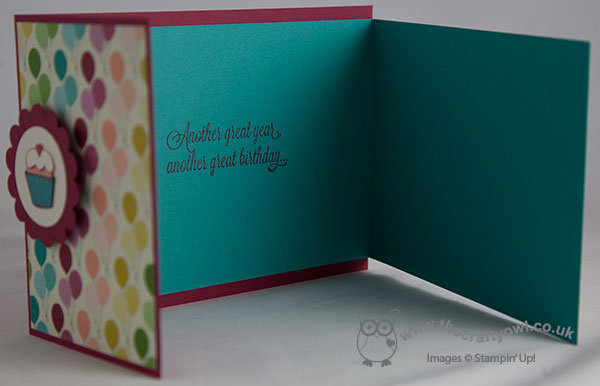
I went for a 'fun fold' card featuring the Another Great Year stamp set. I stamped the main stamp onto Very Vanilla then stamped it again onto a sheet of Crisp Cantaloupe and coloured the words with markers before adhering to the vanilla layer. I then created a fun scalloped circle closure to hold the card shut, with a co-ordinating paper-pieced cupcake taking centre stage, which I adhered with a dimensional onto the panel featuring colourful birthday balloons:

Doesn't that cupcake look delicious? Below you can see how I created the card base from two pieces of cardstock, along with my stamped sentiment inside:
Another reason for my paper choice was that the gift was a gift voucher to spend at a local cycling store for accessories for a new bicycle, and the Birthday Basics paper has the perfect design for a themed gift card holder, made using my Envelope Punch Board:
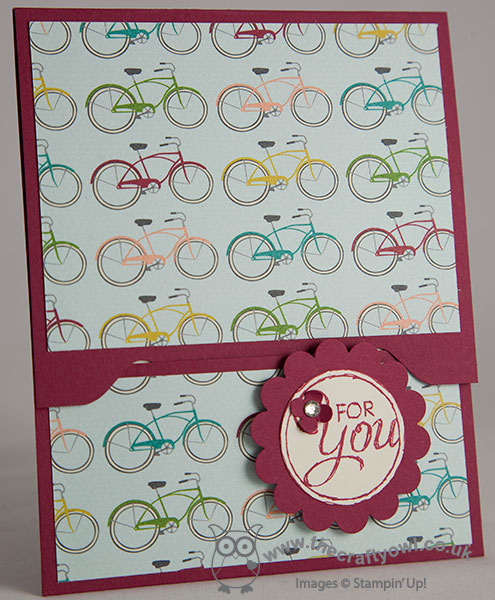
I've made these gift voucher holders before (you can find instructions on a previous post here) - the colours mean that both items look great together. Today's card uses lots of retiring colours and products, so if you need to stock up on any you should hop over to my online store by clicking on the links below - the Itty Bitty Punches that I used to create the little flower on the gift card holder above have already sold out!!
Right, must dash - I need to link today's post up with the current SUO Challenge of 'Something Yummy' - if I'm quick I might just make it! back tomorrow with another project, until then happy stampin'!
Stampin' Up Supplies Used:
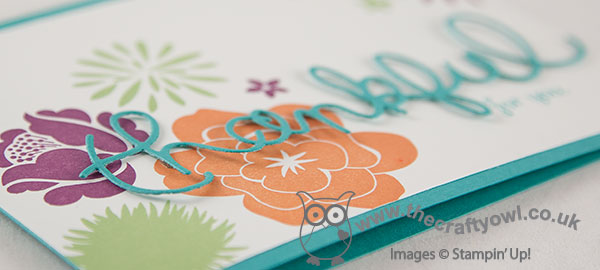
by Joanne James30. May 2014 12:00Yay - it's Friday again! Boy did that come around quick! This week has been half term and having James Juniors at home for the week seems to make the week fly by! Anyway, the weather is supposed to improve this weekend so that will be good. I have a busy, busy day today with retiring lists, preorders, class preparations and more besides, so let's get to it! Today I'm sharing a card that I made for this week's challenge over at 'Less is More' where it's recipe week and we're asked to include a die cut on our card. I've also combined with the vibrant colour palette over at Colour Q this week:
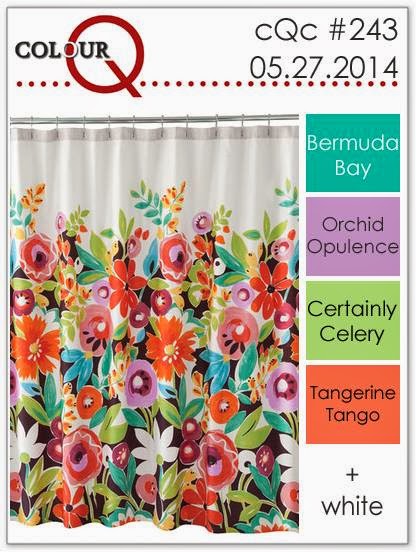
I just loved the bold flowers on that shower curtain in the inspiration photo! I had to substitute a couple of the colours, as they have retired and I don't have them; I used Rich Razzleberry and Wild Wasabi in place of Orchid Opulence and Certainly Celery, so my purple is not quite so electric but my card is just as colourful - take a look:

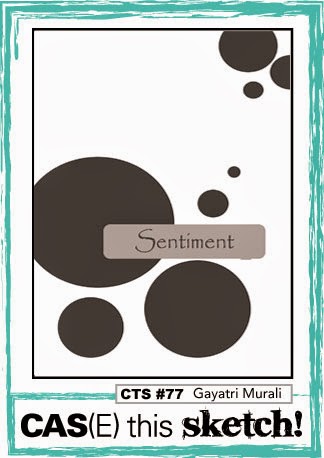
I actually used the same CAS(E) This Sketch layout, turned through 90 degrees, that I used for yesterday's butterfly card for today's background, although it looks totally different here. I used Simple Stems to stamp my flowers, along with the little flower from the Summer Silhouettes stamp set, then used Bermuda Bay for my card base, my die cut 'thankful' - the Expressions Thinlit Dies are currently available on the clearance rack, if you would like to pick up a set for the bargain price of £13.79, I love mine! - and stamped the 'for you' in Bermuda Bay using the Fabulous Phrases stamp set.
This is one of those cards that I finished and just love - the colours, layout, the diecut word, it's so me! Do you ever make a card and like it so much that you think you'll struggle to give it away? I think the recipient of this one will have to be someone special, so if it lands in your mailbox then you should consider yourself very lucky!!
Right - I'm off to peruse the retiring lists and write out my pre-order for goodies from the new catalogue too (and maybe do a little housework!). Back tomorrow with another card; until then, happy stampin'!
Stampin' Up! Supplies Used:
07beaf7b-d99f-4ad9-8388-f05a235941e8|0|.0|96d5b379-7e1d-4dac-a6ba-1e50db561b04
Tags: Simple Stems, Summer Silhouettes, Expressions Thinlits Dies, Fabulous Phrases, Shop online, Stamp-a-ma-jig, Stampin' Up, Stampin' Up Card, Stampin' Up Card ideas, Stampin' Up Supplies, Clearance Rack
Cards | Stamping
by Joanne James29. May 2014 11:57A really quick post from me today as I am having a busy one! Today's card uses this week's sketch over at CAS(E) This Sketch and is an example of something that I don't do very often: it uses a long-ago retired vintage stamp set, Flight of the Butterfly. Here is the sketch:
Here is my card:
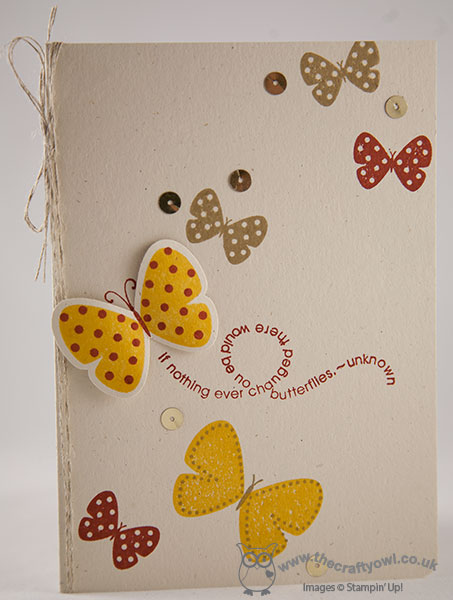
I loved the sentiments that come with this stamp set and I needed a card specifically using the sentiment above, so I combined it with some naturals ivory cardstock and some colours that I had out on my desk for another project that I've been working on this week and decided that this set would work perfectly with the above sketch to create a clean and simple butterfly card. I stamped the butterflies in Crushed Curry, Cajun Craze and Baked Brown Sugar and punched the main one of and just shaped with my bone folder before adhering to my card. I added some linen thread to the spine to add to the natural feel of the card, but couldn't resist a sprinkling of gold sequins too. If you don't have this stamp set, you could easily re-create it with a current set, such as Papillion Potpourri and the Elegant Butterfly punch.
I hope you like today's card; don't forget the retiring list is published tomorrow so do pop back to see all of the things that we will be saying goodbye to at the end of June. Until then, happy stampin'!

Stampin' Up! Supplies Used:
by Joanne James27. May 2014 19:56Well, it's still raining here in the UK and I've even had to resort to turning up the central heating - in May!!! We've had a lovely day catching up with friends today, which hasn't dampened our half-term spirits. On to today's card, which I used this week's colours over at Create with Connie and Mary and LeAnne's sketch at The Paper Players:
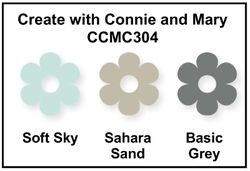

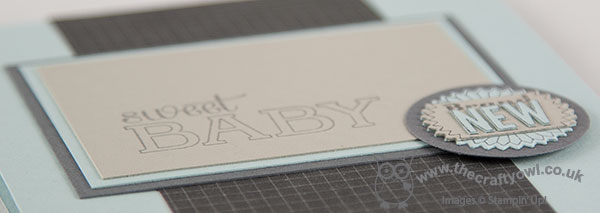
I started out with the colours and must say the ladies over at Create with Connie and Mary almost had me stumped this week! I played around with these colours wanting to use white as my neutral - some of the CCMC design team used white to great effect with this colour combination on their cards - but in the end I went with a baby boy card and didn't use any white at all (go figure!). Here's my card:
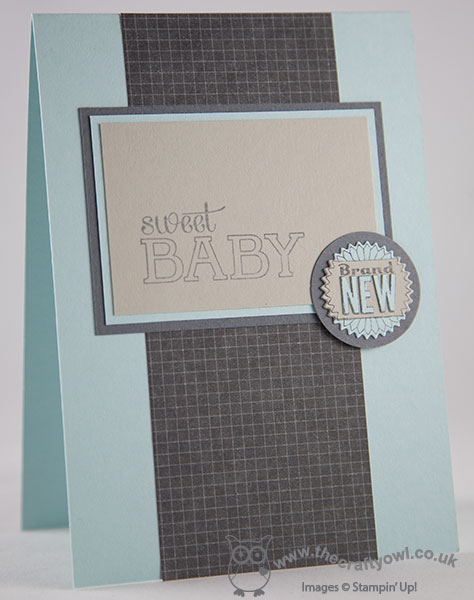
I decided to go with a Soft Sky base and added a strip of DSP down the centre - do you recognise it? This pattern is actually one of the patterns in the Kaleidescope pack, although you could be forgiven for overlooking it as it is quite muted given the other bright and bold patterns in the set. I then used lots of layers to create interest on the main design; I stamped the 'Sweet Baby' stamp from the Baby We've Grown stamp set in Basic Grey onto Sahara Sand, and matted this onto both Soft Sky and Basic Grey. I then stamped the 'Brand New' stamp from the same set in Basic Grey, twice onto Soft Sky cardstock and once onto Sahara Sand. I cut these out with the smallest Starburst Collection framelit and then did a little fussy cutting to create a layered badge: I cut the banner in Sahara Sand and adhered this to one of the Soft Sky pieces, then took the other image stamped on Soft Sky and cut out the individual letters of the word 'NEW' and adhered them to the banner section. This button badge was then adhered to a circle punched from Basic Grey cardstock with a 1 1/4" circle punch and mounted onto my card as per the sketch.
So quite a graphic clean and layered card today and not overly 'baby cute' but still unmistakably a baby boy card I think. I'm just pleased I managed to eventually create something with this colour combination! When I went back to grab the Paper Players sketch image to insert into my blog I realised Ann Schach also used a couple of stamps from the same set to create her baby girl card - you should go check it out on the above link if you want to see an alternative take using the same sketch.
Back tomorrow with another card; until then, happy stampin'!
Stampin' Up! Supplies Used:
by Joanne James26. May 2014 13:51Good morning everyone on this typically wet Bank Holiday Monday! Today I'm sharing my card for this week's challenge over at The Paper Players, where the have the following sketch challenge to play along with:
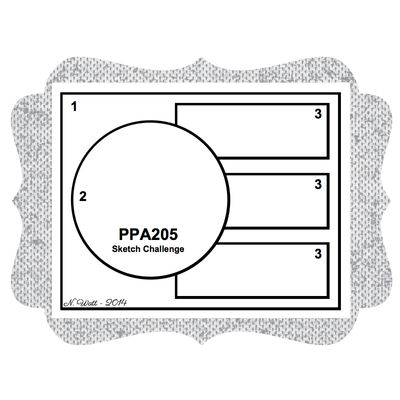
When I saw this sketch, I initially wanted to create a Father's Day card with my 'Look up to Father' stamp, but having seen the great examples from Ginger and Diane, I decided to change tack totally and instead of trees, take the opportunity to use some of my High Tide DSP. Here's my card:
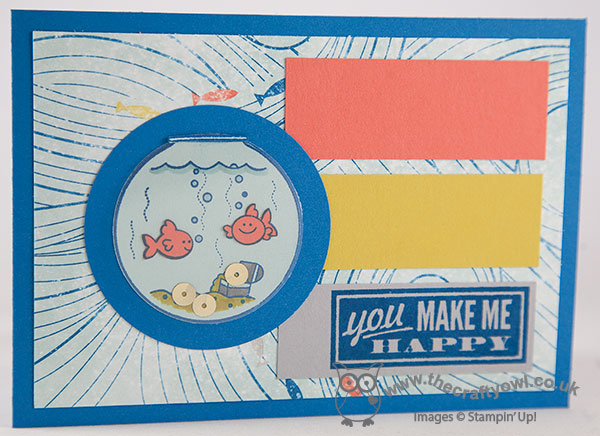
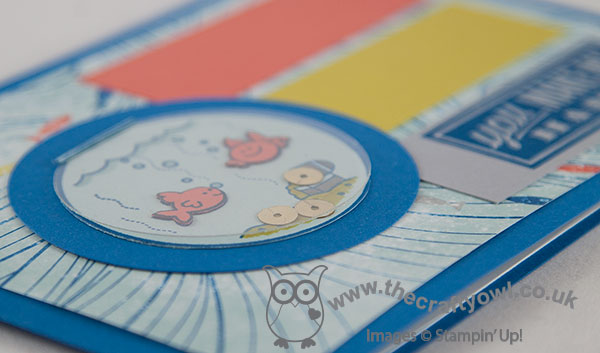
Whilst I loved the swirly pattern on this DSP, I've struggled to use it as it's so busy. I thought it would make a great base for this fishy-themed card though, with the cute fish bowl from Fishin' Around. The DSP gave me the colour scheme for my card, and I stamped the image twice in Pacific Point: once onto Soft Sky, which I fussy cut for my fish bowl, then a second time on Calypso Coral and fussy cut the fish and adhered them to my fish bowl. I added a little colour to the water, treasure chest and sand with my marker pens, then adhered some gold sequins to act as 'treasure' on the sand. To complete the look of my fishbowl, I cut a circle out of acetate window sheet using my Big Shot and Circles Framelits and adhered this to the bowl to look like glass. I mounted my completed fish bowl to a circle of Pacific Point and mounted this last, having first adhered the three strips of plain cardstock in Calypso Coral, Summer Starfruiit and Smoky Slate. I stamped my sentiment onto the Smoky Slate rectangle in Pacific Point ink and chose the 'You Make Me Happy' stamp from the 'Hello, Lovely' stamp set.
I bought the fishbowl set thinking it would make great children's cards, but as I put this card together it occurred to me it would make a fun anniversary/valentine card too when paired with this sentiment. Given the weather outside today, this card does seem somewhat appropriate! Back tomorrow with another card; until then, happy stampin'!
Stampin' Up! Supplies Used:
by Joanne James25. May 2014 20:23Sunday is always a good day, but it's doubly good when followed by a Bank Holiday - looking forward to tomorrow already! We've had a restful day today after yesterday's busy one and also managed our first BBQ of the year, albeit having brought everything inside to eat as it was rather breezy outside. Today's card uses the colours over at this week's Colour Me...! challenge and Jen Mitchell's clean rectangular sketch over at Freshly Made Sketches for my layout:
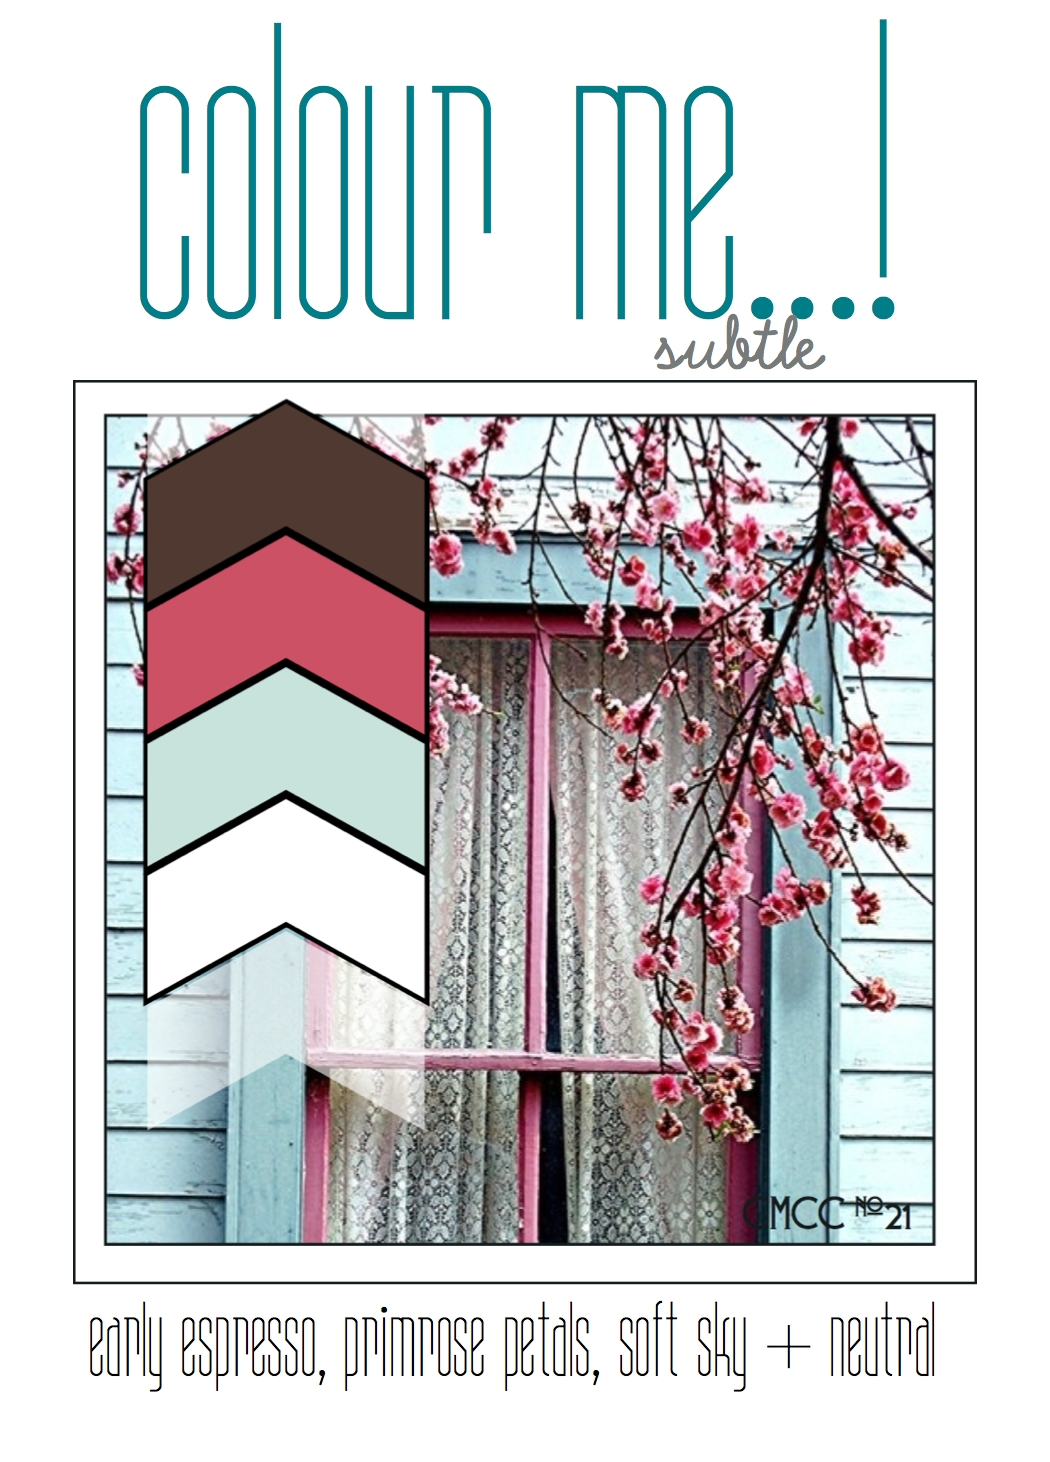
I rotated the sketch through 90 degrees to create my card and took my inspiration directly from the photo alongside the colour palette. Here is my card:
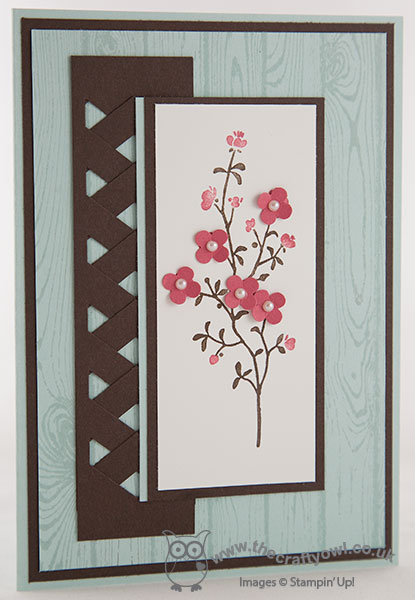
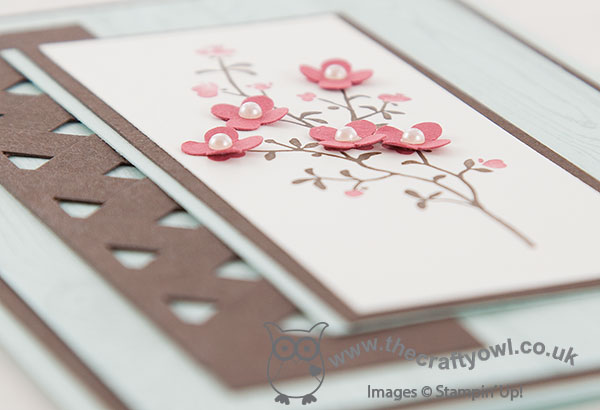
I used Soft Sky for my base and layered with a mat of Early Espresso and then a further layer of Soft Sky that I stamped with the Hardwood stamp in the same colour. I created a trellis using two pieces of Early Espresso punched with my Chevron Border punch and made the focal point of my card the cherry blossom from the Morning Meadow hostess stamp set, which I inked up with my Early Espresso and Primrose Petals marker pens then stamped onto Whisper White. I punched some flowers out of Primrose Petals cardstock using one of my Itty Bitty punches, added pearls to the centres and added these onto the stamped image on the largest flowers to add dimension and interest. I then matted this panel onto Early Espresso and added an off-centre panel of Soft Sky - this goes against the grain from a design perspective for me, but I needed to have the Early Espresso mat onto the Hardwood layer, yet broken with some Soft Sky on the opposite side so that the panel didn't just merge into the trellis and it looks so much better with than without, so convention is out of the window! I also chose not to use a sentiment on the front of my card as I didn't want to add another layer; I decided to keep my sentiment on the inside of my card.
I hope you like today's card; back tomorrow with another card. until then, happy stampin'!
Stampin' Up! Supplies Used: