by Joanne James9. March 2014 22:18Good evening blog readers! Well, what a lovely day - today it was so mild and warm it almost felt like summer! I used my washing line for the first time this year and had a lovely couple of hours out riding my bicycle with the rest of the James family this afternoon, then came home and finished carving my first set of Undefined stamps. More on that later in the week; today I have an entry for this week's Colour Q challenge, where this is the inspiration:
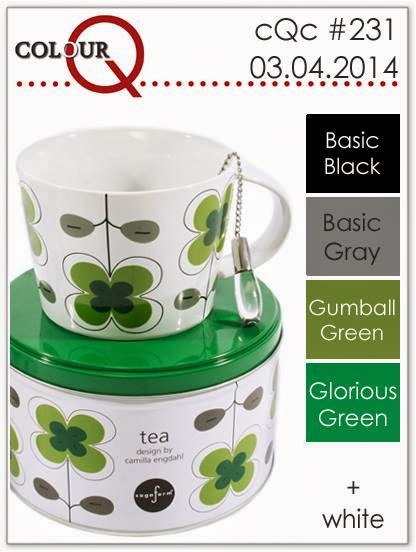
When I saw the colour scheme and clover leaf-type flowers, I immediately thought of St Patrick's Day; whilst not Irish myself (I'm not even wanting to admit my Welsh heritage following the Five Nations rugby results today!) this is the month when the Irish also celebrate their patron saint day, so having made daffodils for St David's Day last week, today it's the turn of the shamrock. I turned to My Digital Studio and created this Lucky Frameable, which could be used either on a card or framed as a piece of home décor:
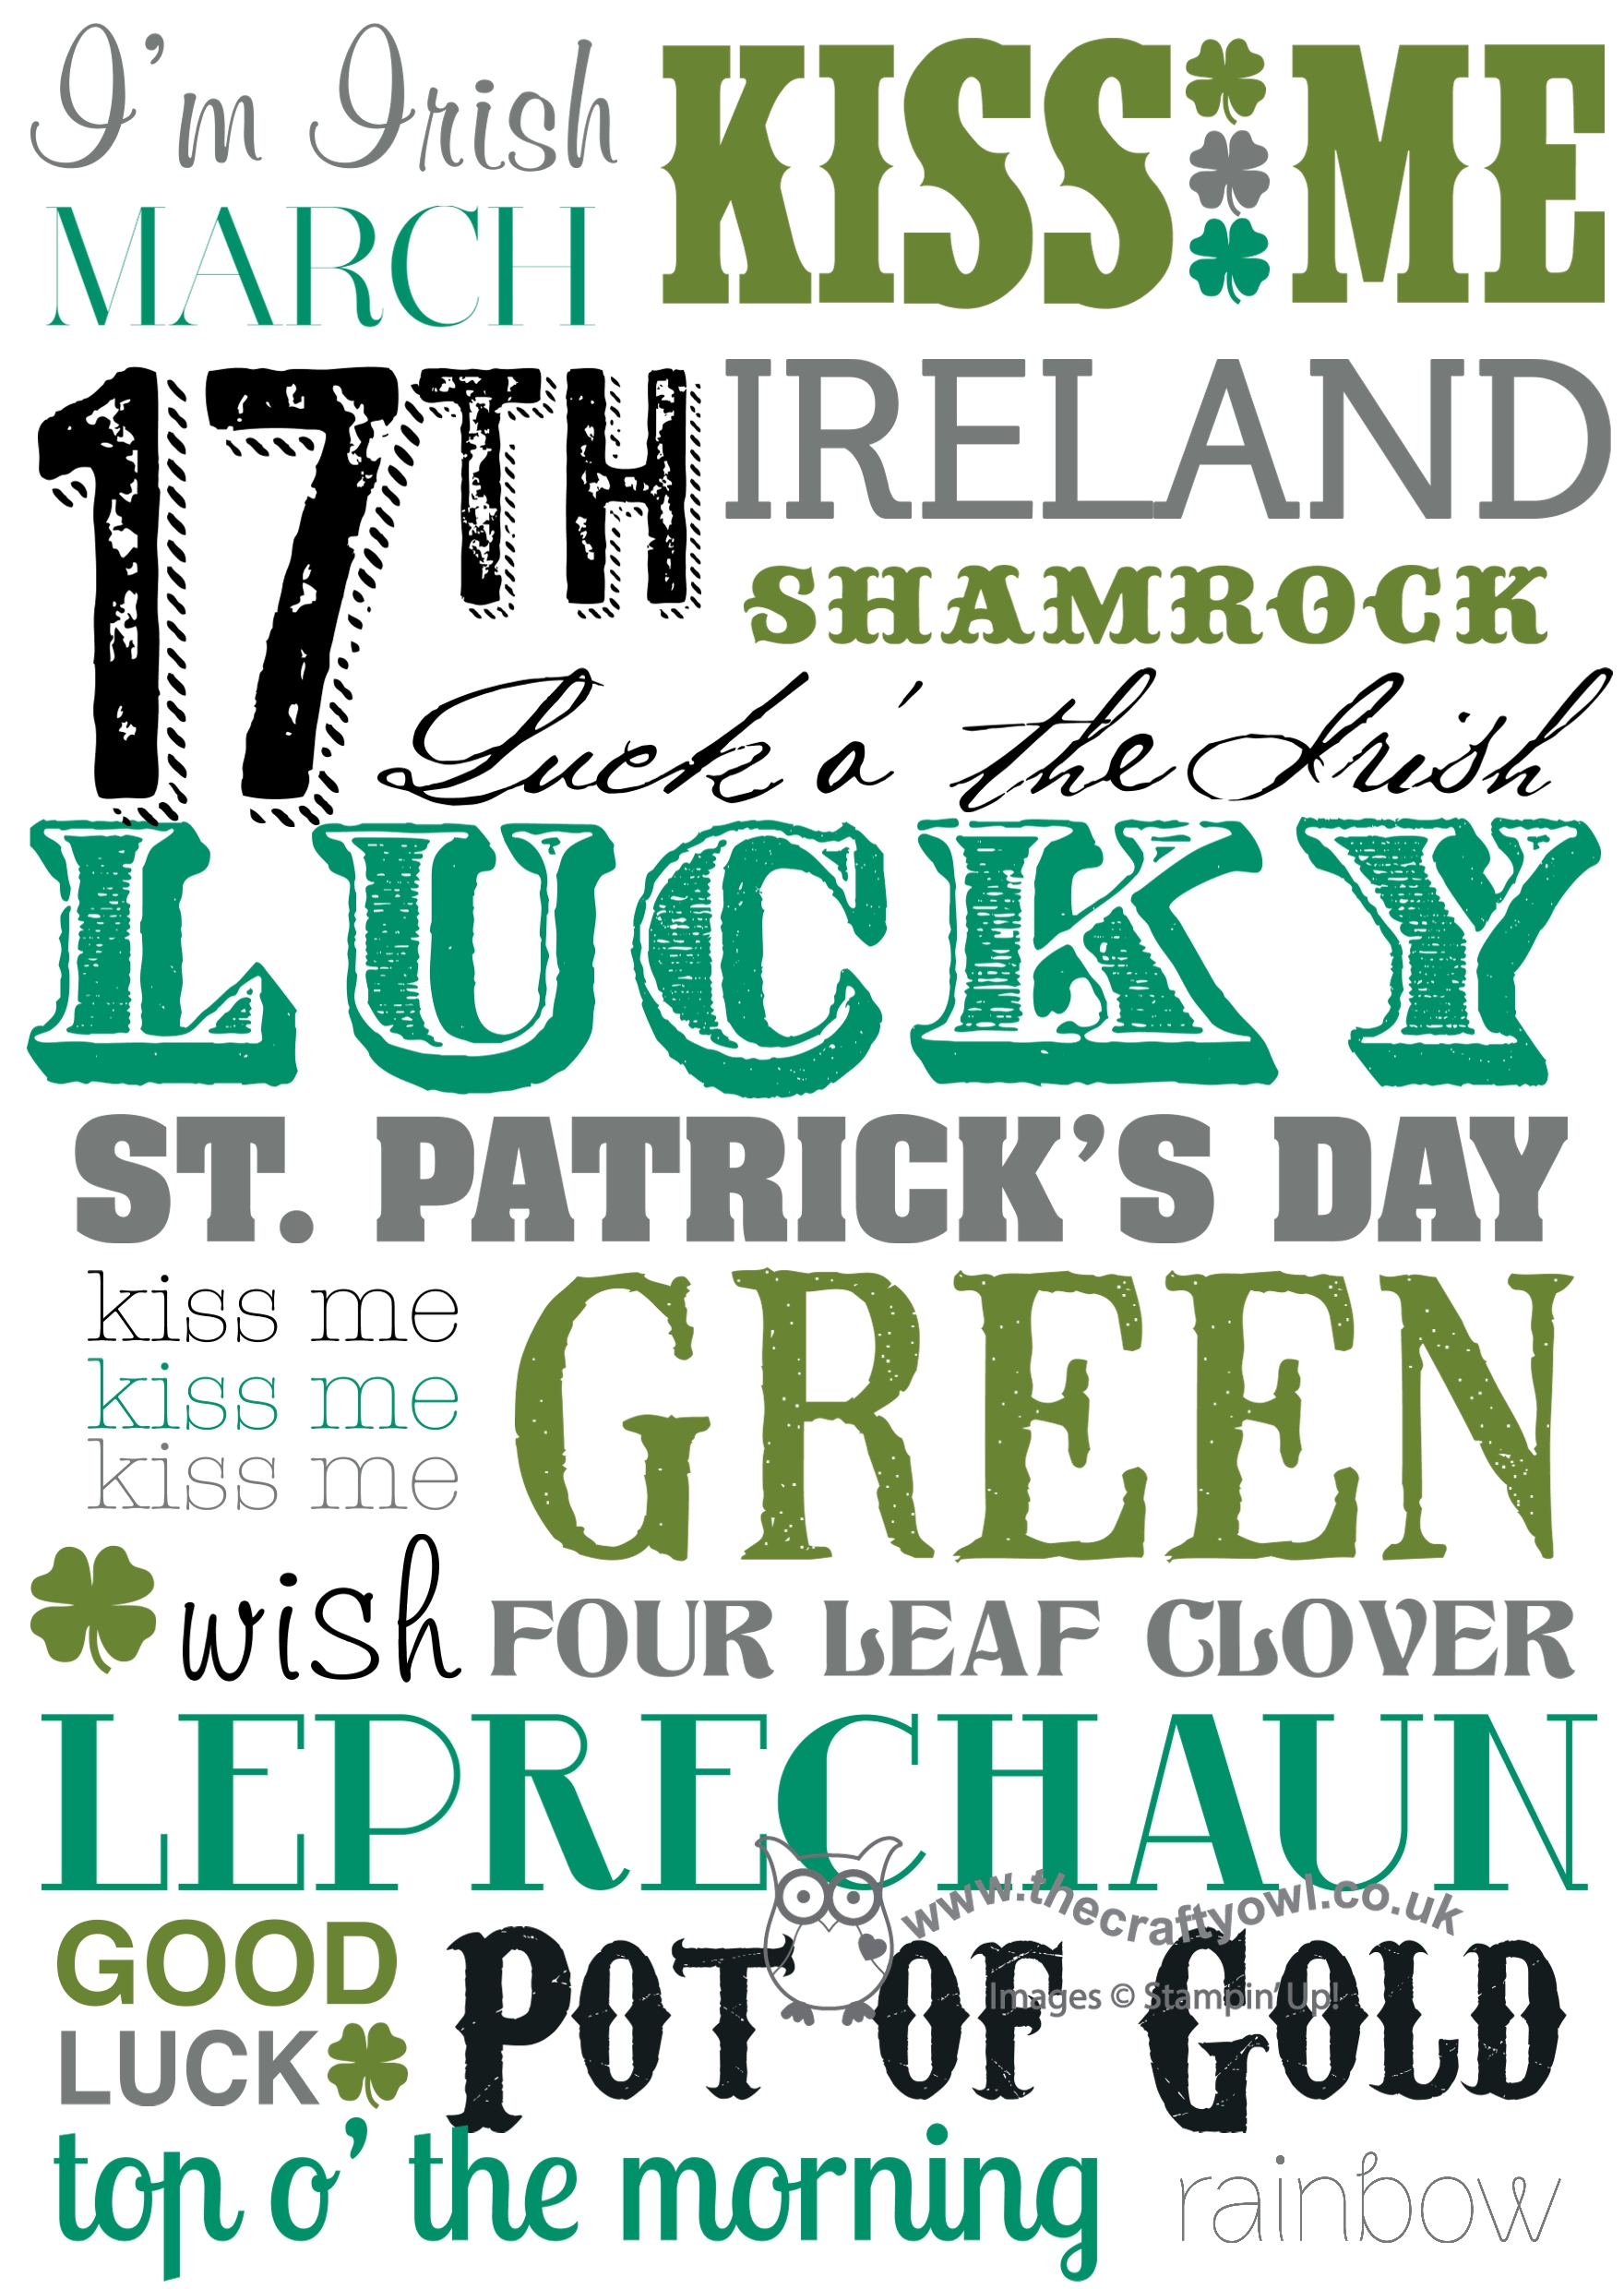
I love these graphic frameables (here's one I did for my New year cards this year) - you can play around with them until you get the look you're after. The other bonus with using MDS for today's project is that I could use all of the suggested colours, including the retired Glorious Green.
Back tomorrow with another project; until then, happy stampin'!
Stampin' Up! Supplies Used:
by Joanne James8. March 2014 20:54Today's card is one I designed for this week's Mojo Monday sketch challenge, where I was attracted by the layout and the 'frame' element that is central to the sketch:
Here is my take on the sketch:
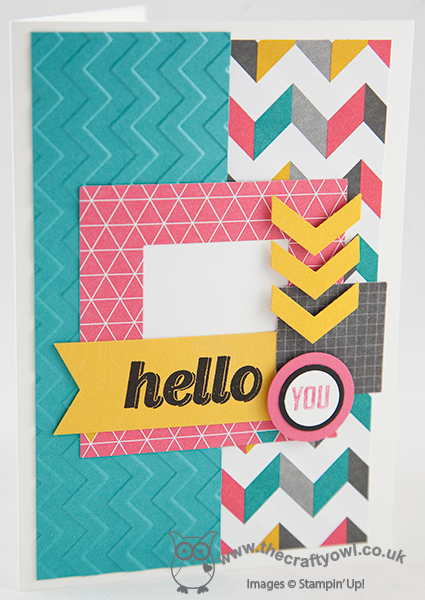
My card is a riot of graphic patterns and colour, using the Kaleidoscope Designer Series Paper as the inspiration for my colour scheme. I added a layer of texture with a Bermuda Bay panel that I dry-embossed with my Chevron Textured Impressions Embossing Folder, then layering the various elements in contrasting papers and finishing with a banner of Crushed Curry that I stamped with Versamark and heat embossed in black embossing powder to give it a lovely sheen. Cutting my frame was easy with the aid of my square framelits - this is one of those times when they are invaluable. I popped my chevron punched pieces on dimensionals, using them to draw the eye to my button 'You' (this is a partial stamp of the 'You & Me' stamp in the Perfect Pennants set).
I'm not one for mix-and-match of patterns as a rule, but sometimes it's ok to step outside of your comfort zone. I hope you're all enjoying your weekend; the weather has been much warmer and brighter here in the UK today - we managed to get some time outside in the garden today, which made a nice change.
Back tomorrow with another project; until then, happy stampin'!
Stampin' Up! Supplies Used:
e877f062-6a34-43c5-93b8-102c7a75c658|0|.0|96d5b379-7e1d-4dac-a6ba-1e50db561b04
Tags: Chevron Border Punch, Chevron Textured Embossing Folder, circle punch, Circles Framelits, Square Framelits, Stampin' Up, Stampin' Up Card, Stampin' Up Card ideas, Stampin' Up Supplies, Shop online, Perfect Pennants, Kaleidoscope, Simply Celebrate
Cards | Stamping
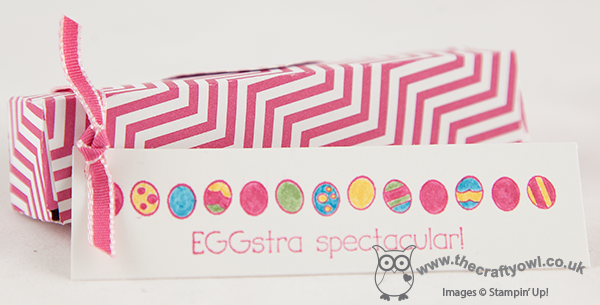
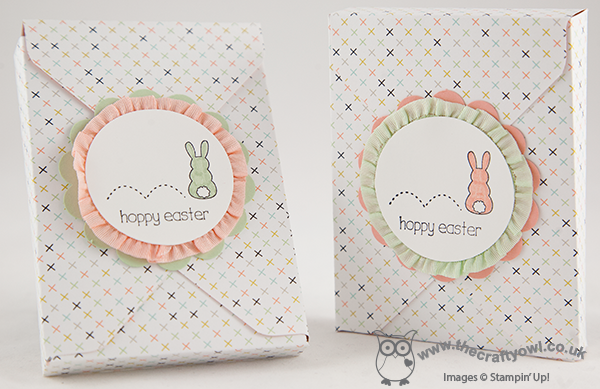
by Joanne James7. March 2014 19:25Hello everyone! From the home of 'cool time-saving tools' (if you're reading this and you're an SU! demonstrator you should also check out my Product Table Builder application) today I have the third of this week's video tutorials showing you how to make a super cute Easter mini-egg treat box using your Envelope Punch Board and my new Box Buster tool. You can use your Envelope Punch Board to make boxes of all shapes and sizes - including some rather dinky small ones. Check out this box that I made to hold 5 foil-wrapped mini eggs ready for Easter:
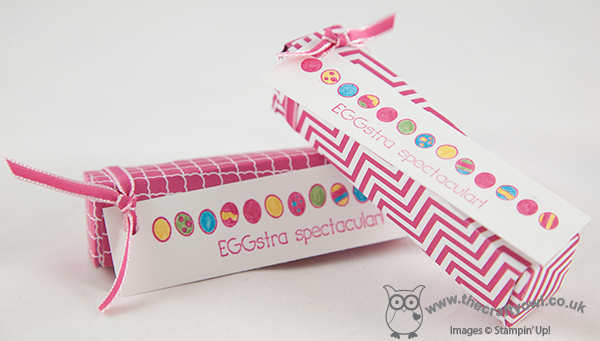
It measures just 20mm x 20mm x 85mm and it was so easy to work out the paper dimensions and punch points with the help of the Box Buster tool. Here's the video that shows you how I did it, along with a 'top tip' when creating narrow boxes like this:
This size box would also make a great wedding favour - it's the perfect size for sugared almonds if you're looking for something traditional. I hope you found today's video useful; why not use the Box Buster tool to create your own small or narrow boxes? You can use either millimetres or inches (to 1/8 of an inch) and create the box size of your choice?
Back tomorrow with another project; until then, happy stampin'!
Stampin' Up! Supplies Used:
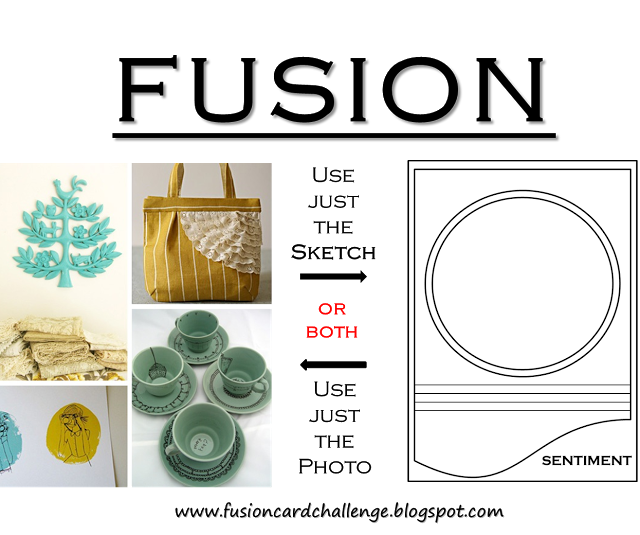
by Joanne James6. March 2014 22:41Firstly, I would like to say thank you to everyone who left comments on my blog and Facebook pages in the last couple of days about my new Box Buster from The Crafty Owl tool - I'm so glad that you are all finding this tool useful. Please feel free to share with anyone and everyone you know who likes box making and has an Envelope Punch Board; it takes all the guesswork out of box making! I have another Box Buster video tutorial for you tomorrow, but meanwhile I want to share my card for this week's challenge over at The Paper Players, where Ann's theme challenge this week is to make a 'Thankful for Spring' thank you card. I decided to combine the challenge with the one over at the Fusion Card Challenge, where I used the colours in the photo and the unusual sketch layout as the inspiration for my card:
I've invested in a few new sets of flower stamps lately, so was a little spoilt for choice, but decided that the lovely Sale-A-Bration Petal Parade stamp set would work perfectly with the sketch layout. Lots of my customers have chosen this item as their free Sale-A-Bration gift so I'm keen to share ideas with them on how to use it. Here's my card:
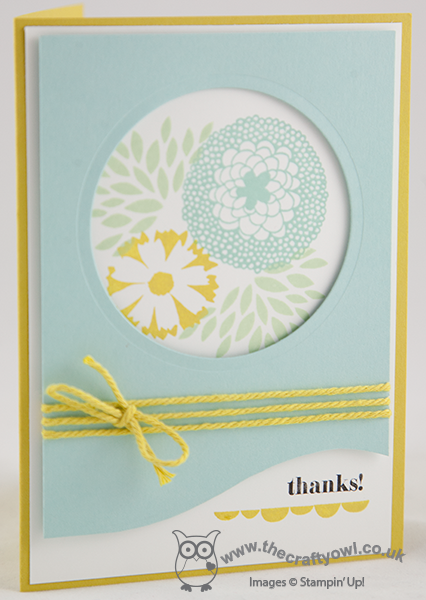
I chose a base od Summer Starfruit, then added a Whisper White layer that I had stamped with the Petal Parade flowers. I then added a top layer in Pool Party with a circle cut using my Circle Framelits to reveal the flowers beneath. I added my simple 'thanks' sentiment to the white layer beneath the curved edge of the top layer and added the Petal Parade border stamp for definition. To finish, I added some of the Summer Starfruit Sale-A-Bration baker's twine, first punching some little notches out of the Pool Party layer with the point of my mosaic punch to ensure the twine sits flat and evenly across the front of my card.
I hope you like my card; check out the links above to see what the respective design teams have created for these challenges for some great inspiration and ideas. Back tomorrow with another Box Buster video tutorial; until then, happy stampin'!
Stampin' Up! Supplies Used:
by Joanne James5. March 2014 09:52Good morning blog readers and crafters! Back nice and early this morning with the second of my video tutorial posts showing you how to make any size box using your Envelope Punch Board and my new Box Buster tool. I've started early on my Easter treat boxes, so today's box shows you how to make this cute box:
The finished dimensions of today's box are 100mm x 75mm x 15mm. It was designed to fit a specific Easter treat - but you'll have to watch the video below to find out what it was! My new Box Buster from The Crafty Owl tool is just great for that - you can easily create a box to fit your chosen contents, without any hassle or wasted paper - you just measure the thing you want to put in the box, input the dimensions into the Box Buster tool and it does all the hard work for you: it will tell you exactly what size paper you need and where to make your first and second punch markings.
Today's project was worked out in millimetres, but the Box Buster tool will let you construct your box in either millimetres or inches - you choose! Here's the link to today's video tutorial:
Wasn't that SOOO easy?! Keep following this week as there are more box tutorials to come, showcasing a variety of box types with handy hints and tips for making the most of your Envelope Punch Board and my new Box Buster tool.
Back soon with another project; until then, happy stampin' (and box making!)
Stampin' Up! Supplies Used:
184e6871-6a47-4103-a0a0-0c3eb90de4fd|0|.0|96d5b379-7e1d-4dac-a6ba-1e50db561b04
Tags: 3D Projects, boxes, circle punch, Eggstra Spectacular, Envelope Punch Board, Sale-a-bration, Sale-a-bration 2014, Stampin' Up Card, Stampin' Up, Shop online, scallop circle punch, Sweet Sorbet, video tutorial
3D Projects | Boxes | Envelope Punch Board | Sale-a-bration | Stamping | Video Tutorials
by Joanne James4. March 2014 22:24Good evening lovely readers! I have finished editing my next video tutorial but have bumped it to tomorrow so that I can fit in a quick card that I made for this week's Paper Craft Crew challenge. here is this week's sketch layout:
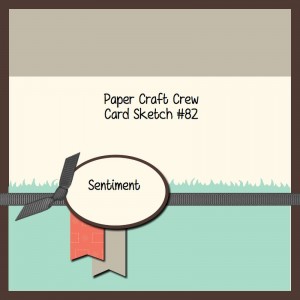
Here is the card I made using this layout:
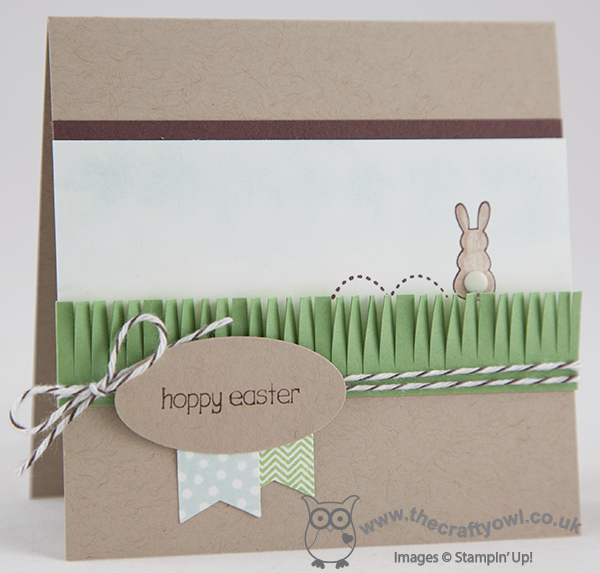
I went with a 4" square card for a change and a Crumb Cake base, then took a strip of Whisper White that I lightly sponged in Soft Sky across the top with Wild Wasabi across the bottom, then stamped the bunny minus the sentiment in Chocolate Chip and coloured him with Crumb Cake ink and a blender pen, before adding a candy dot for his tail. I matted this section on a strip of Chocolate Chip and then added a fringe of Wild Wasabi to the front of the card to make it look like the bunny was hiding in the grass. The new fringe scissors are great for creating grass in an instant and add a lovely texture. I then finished by wrapping some Early Espresso baker's twine around my card and tying in a bow. I stamped the sentiment onto an oval of Crumb Cake cardstock and finished with two co-ordinating banners, stamped using the Banner Blast stamp set and punched out with the matching punch. Both of these items are available free with a spend of £45 or more during Sale-A-Bration - contact me or visit my online store if you would like to place a £45 order and receive these gifts for free.
I've had a busy day today so am off to bed for a well-earned rest; back tomorrow with the second in my 'Any Size' box tutorial series. Until then, happy stampin'!
Stampin' Up! Supplies Used:
857a10ab-e2de-414a-a7f9-f2ec4120ed25|0|.0|96d5b379-7e1d-4dac-a6ba-1e50db561b04
Tags: Candy Dots, Easter, Earn Free Products, Sale-a-bration 2014, Sale-a-bration, Shop online, Stampin' Up, Stamp-a-ma-jig, Stampin' Up Card, Stampin' Up Supplies, Eggstra Spectacular, Fringe Scissors
Cards | Sale-a-bration | Stamping
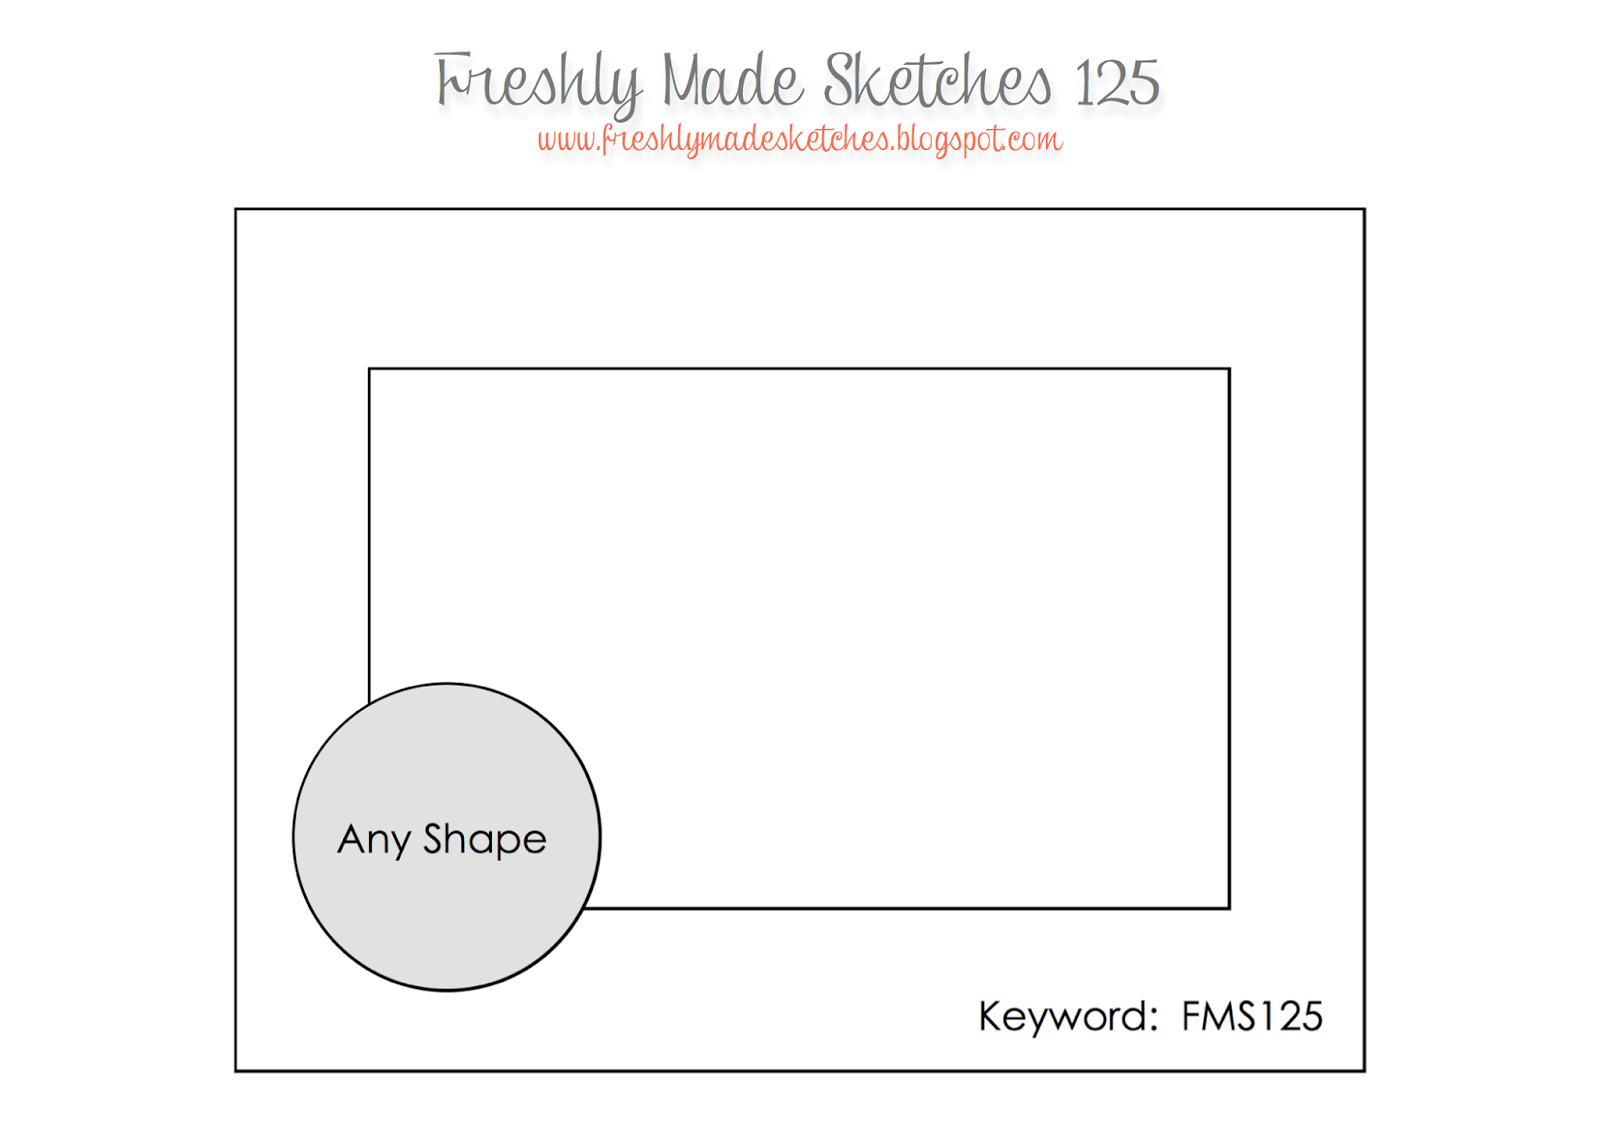
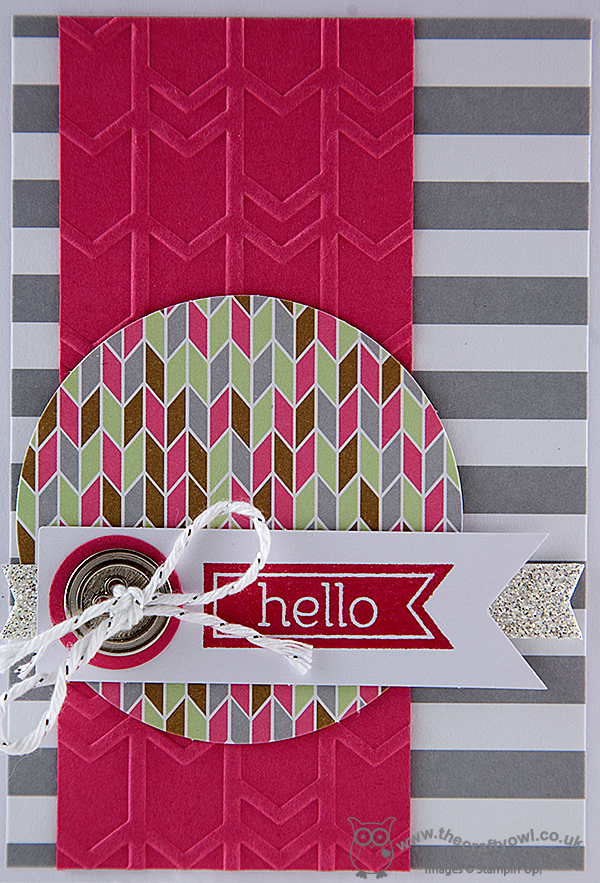
by Joanne James4. March 2014 16:28I'll be back later with another video tutorial showing you how to make another 'any size' box using your Stampin' Up! Envelope Punch Board and Box Buster from The Crafty Owl, but meanwhile I managed to grab a quick few minutes this morning to make a card for this week's Pals Paper Arts challenge. There is a great sketch from Nicole Watt this week that offers so many possibilities:
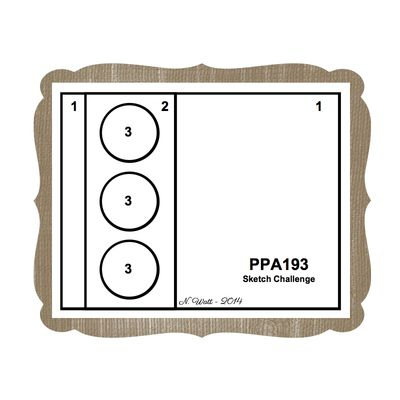
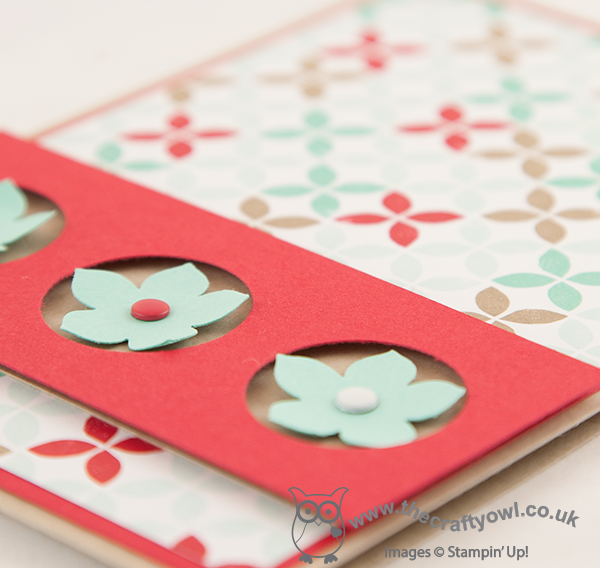
I've had my card in my head since I first saw the sketch, but only managed to get it translated into an actual card today. So here is my take on the sketch:
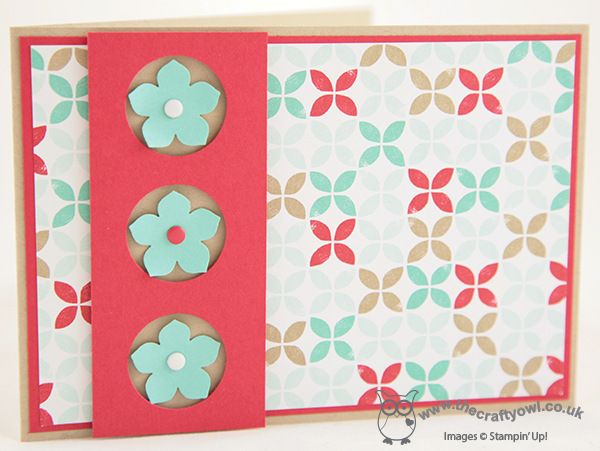
I went for a modern graphic card, using a sheet of the Fresh Prints Designer Series Paper Stack for my colour scheme. I punched the flowers using my Petite Petals punch without stamping them with the co-ordinating stamp set first, as I wanted to limit the pattern to the paper. I set the flowers in a section that has three holes punched with the 1" circle punch and raised this up on dimensionals to add some depth and give the flowers more of a 3D effect. I finished each of the flowers with a candy dot in either Real Red or Whisper White. having finished the card, I realised that it was one of life's rarities - no stamping! I really like this sketch layout and I'm sure will be using it again.
Back later with another video tutorial for you; until then, happy stampin'!
Stampin' Up! Supplies Used:
by Joanne James3. March 2014 22:26Good evening readers! Another busy day today with my first class of the month. The ladies in today's class made some great cards using their Happenings Simply Created Card Kits - pop by my Facebook page tomorrow if you would like to see what they created as I will be uploading some photos of their work.
Meanwhile, I promised you a special second blog post today that showed you how to make a box that can be used to hold four of the notelets created from part of the Happenings Simply Created Card Kit - so here it is! I've shot a few videos previously using the Envelope Punch Board, however this is the first box video. The reason I'm excited to share this particular video with you though is that I used a new tool of mine - Box Buster from The Crafty Owl - to work out the dimensions for my box and it was SO easy!!
For any of you that have made boxes using your Envelope Punch Board previously, you will know that the trickiest thing is working out where to make your first and second punches in order to create a box of the correct dimensions. It's easy for a square-based box, as the dimensions simply need to be divisible by 3, but what about when you want to create rectangular boxes of different heights, widths and depths? Following many templates and a considerable amount of test paper, I have developed a tool that means you can input your three chosen dimensions, in either millimetres or inches, and the Box Buster will calculate the size of the paper that you require and where you need to make both your first and second punches.
Watch the video to see just how easy it is to use (you will need to make a volume adjustment for sound during the middle section of the video; the section that shows the Box Buster in action uses different recording software to my usual video recordings and the sound volume settings are not only different but I've been unable to edit post-production - I do now know for next time though!):
You can find Box Buster from The Crafty Owl on my website here or via the permanent link on the right hand side of my blog page. Box Buster is a free tool and will be permanently available for anyone to use - why not visit the page now and add it to your 'favourites' so that you can access it quickly and easily the next time you need to make a box using your Stampin' Up! Envelope Punch Board? Whilst you're there, why not also check out the Product Table Builder from The Crafty Owl - a great tool if you are a Stampin' Up! demonstrator with an online store. And if you haven't already got an Envelope Punch Board, what are you waiting for? Click on the link at the bottom of today's post and purchase one from my online store today!
I'll be making more video tutorials this week showing you how easy it is to make boxes in a variety of different shapes and sizes, in both metric and imperial measurements, using Box Buster from The Crafty Owl and The Stampin' Up! Envelope Punch Board; do come back and check them out or subscribe to my YouTube channel.
Back tomorrow with another project; until then, happy stampin'!
Stampin' Up! Supplies Used:
by Joanne James2. March 2014 23:23Today it's the first Monday of the month, which means one thing - card class! I'm looking forward to a fun afternoon with the ladies in the first of my classes this week, but before I go I have the first of today's blog posts for you - my card for this week's challenge over at Freshly Made Sketches. This week Narelle has designed the following sketch layout:
Since Mothering Sunday falls at the end of March here in the UK (earlier than my readers from across the pond) I decided it's time to start card making with Mothers in mind, so here's what I did with today's sketch:
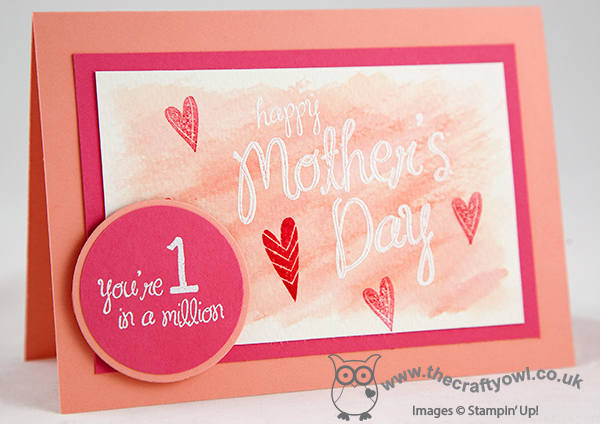
Using watercolour paper, I heat embossed my Happy Mother's Day sentiment in white and then using my Aquapainter and some Crisp Cantaloupe ink, I created a watercolour background. When the paper was dry, I stamped the hearts from the same set in Strawberry Slush ink over the top, stamping off some of them to create a variation in colour intensity. I stuck with the circle shape to highlight 'You're 1 in a Million' and also heat embossed this in white directly onto Strawberry Slush cardstock matted onto Crisp Cantaloupe, to echo the matting on the main section of my card. It almost looks like a badge doesn't it?
Back later with a very exciting video tutorial for you - how to make a box of any size using your envelope punch board - you're not going to want to miss it!
Until then, happy stampin'!
Stampin' Up! Supplies Used:
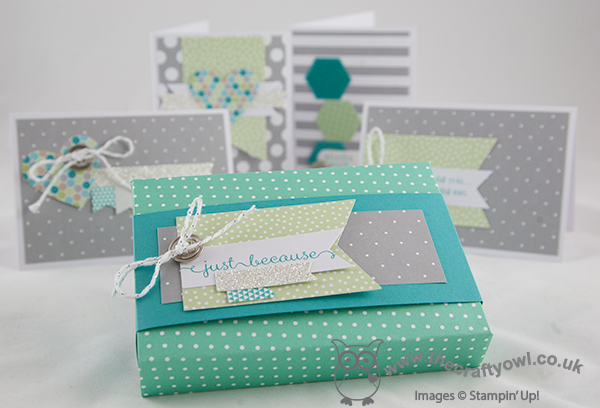
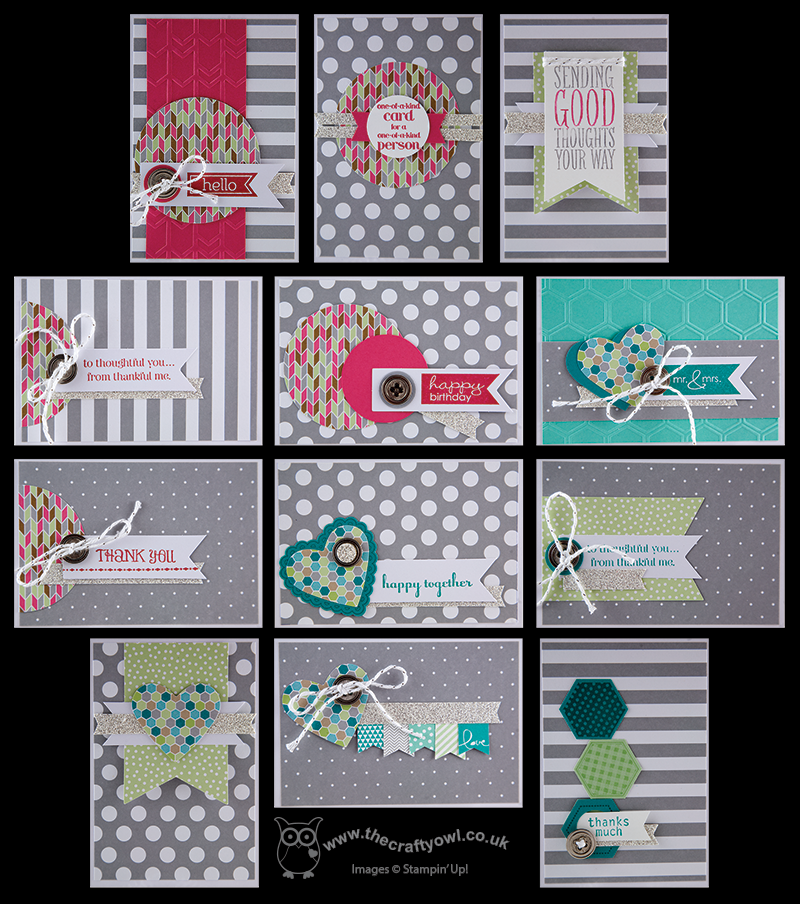
by Joanne James2. March 2014 20:59Today I'm sharing some of the cards I made using the Happenings Simply Created Card Kit that features in the Spring-Summer catalogue. The kit contains everything you need to make 15 cards, including envelopes and costs just £13.50 - that equates to 90p per card, which is great value for a hand-finished card. It doesn't include inks or stamps - you can use the 'Says it All' set suggested in the catalogue, or you can use whatever sentiment sets you already own. I used a selection of stamps on my cards, and added in a few additional items on a few of them too. So here's my first card, which is made up following the basic design that is included with the kit:
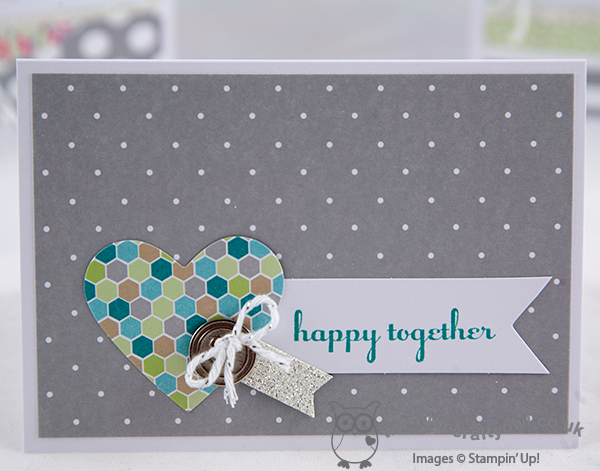
I then added in some co-ordinating accessories just to change things up a little on some of my cards - I created some embossed sections using the new Arrows embossing folder and the Hexagon embossing folder:
I also used some punches to create shapes that mirrored the patterns of the die-cut accents to add some interest:
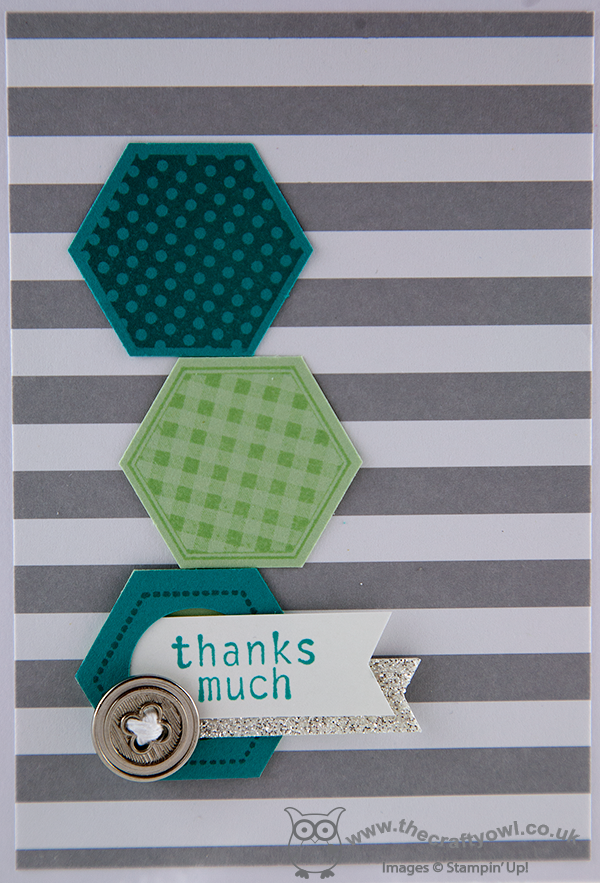
These kits would be great for a beginner or someone who hasn't stamped before, as a gift for someone or even just when time is short and you want to create a whole bunch of cards in one go, but that can be varied such that each is unique. If you would like to buy the Happenings Simply Created Kit or any of the other items I've used on my cards, just click on the links in the table below to go straight to my online store or give me a call if you're local to me and I can place the order for you. We are using these kits in my classes this week and I can't wait to see what my ladies will come up with. I managed to decorate all of cards and still have some embellishments left over to decorate a gift box to hold some of the cards I made - come back tomorrow to see a video tutorial showing how I made it using a new tool that I'm sure you will find useful!
Until then, happy stampin'!
Stampin' Up! Supplies Used:
55c42721-365a-4b1a-9ef6-8b270ecab48e|0|.0|96d5b379-7e1d-4dac-a6ba-1e50db561b04
Tags: Arrows TIEF, circle punch, Classes, Hexagon Embossing Folder, Hexagon Punch, Shop online, Stampin' Up, Stampin' Up Card, Stampin' Up Card ideas, Stampin' Up Supplies, Happenings Simply Created Card Kit, Honeycomb Embossing Folder
Cards | Classes | Stamping