by Joanne James18. September 2014 10:37Well we're on the back end of the week already - yay! Thank you to all the new visitors to my blog yesterday who came to see my guest stamper card for The Color Throwdown and to those of you who left lovely comments on my blog - it's always nice to hear from my readers! I look forward to you becoming regular visitors.
Today's card is for this week's challenge over at 'Less is More' where the theme this week is 'beverages' and it's a one layer challenge. I pulled out one of my favourite Christmas retired sets, Scentsational Season, to make today's card; I thought a winter-warming hot chocolate should be the order of the day for my card, even if not outdoors as we are still enjoying a mild September (and long may it continue!). Here's my card:
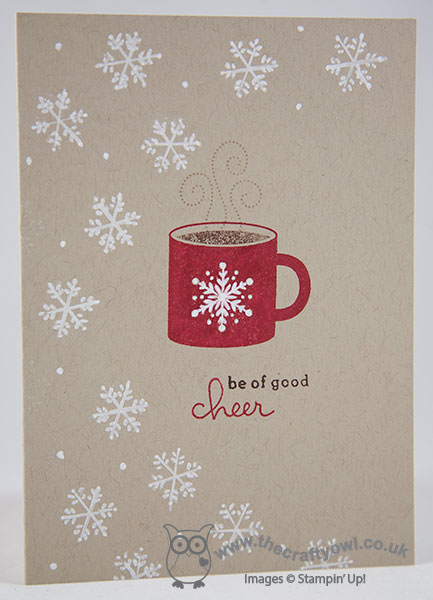
I used a Crumb Cake base and stamped my mug in Real Red, colouring the hot chocolate section of the mug separately with my Chocolate Chip Stampin' Write marker. I added my two-tone sentiment from the 'Endless Wishes' set, then using my Chalk Marker, I carefully coloured in the snowflake on the mug and randomly doodled a flurry of snowflakes around the edge of my card. I'm a tea drinker myself (in large quantities, usually about 10 cups a day!) but there's something really appealing about hot chocolate in the Winter time - I think it's the smell of cocoa and sugar which just cuts through cold air like nothing else!
Check out the gallery for more beverage inspiration - there are lots of fun cards there this week, and a whole range of beverages are featured including some altogether more alcoholic tipples too!
Back tomorrow with another project; until then, happy stampin'!
Stampin' Up! Supplies Used:
by Joanne James12. August 2014 08:00Today I'm sharing a card that I made for this week's challenge over at Less is More that is full of sneak peeks from the new seasonal Autumn-Winter catalogue that is launching at the end of the month. This week it's a one layer challenge with the focus on foliage; the minute I saw the theme, I knew exactly what I wanted to create. Here is my card:
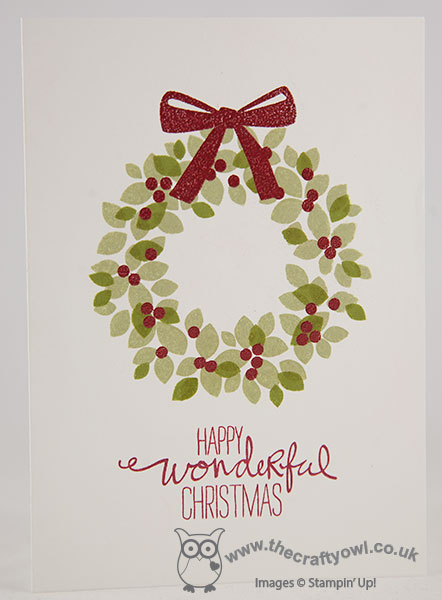
I have used the new Wondrous Wreath set for my card today. This set comprises layered elements to create a beautiful Christmas wreath and also comes with a set of co-ordinating framelits, that make light work or cutting out. It's a photopolymer set too, which makes for incredibly easy alignment of the images - no stamp-a-ma-jig required! For today's card though I used the stamps alone - they are also great for a one layer card. I stamped the base wreath in Pear Pizzazz, then stamped the second section in Old Olive. I then stamped the berries and bow in Versamark and heat embossed with Cherry Cobbler embossing powder to leave a lovely sheen. Lastly, I added the sentiment from the same set in Cherry Cobbler ink.
The seasonal catalogue is choc-full of amazing products, but I think this may turn out to be my favourite of the Christmas sets due to its sheer versatility. If you like the look of this set, you only have another 16 days to wait until the new catalogue launches.
Following yesterday's fun day of Lego building, a trip to the cinema and birthday cake, today I'm partying of a different kind - I'm demonstrating at a Stampin' Up! party this afternoon. Wish me luck! Back tomorrow with this week's Design Team card for the Colour Me...! card challenge. until then, happy stampin'!
Stampin' Up! Supplies Used:
*Wonderous Wreath - available 28th August
by Joanne James15. July 2014 22:24No blog post yesterday and a late one today - so much going on at the moment as the end of the school year draws ever closer! I've been busy finishing commissions for teacher cards and gifts today and popped by the Less is More blog to see what the current challenge is, as I haven't managed to fit in the last couple due to other commitments. This week it's One Layer Challenge combined with a theme - and when I saw what it was I just had to have a go! Yes - it's doodle fingerprints:
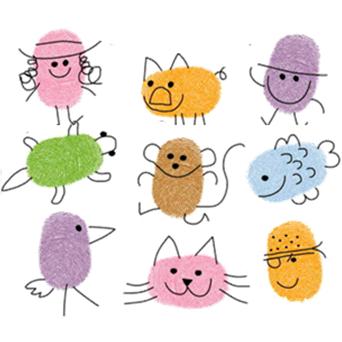
I've made these with my children many times and we have a Christmas tradition of painting a plate with a picture made out of hand or fingerprints each year, but never thought I'd be using my Stampin' Up! inks to create a challenge card no less! Given that I've had teacher thank yous on my mind all week, I knew exactly what I wanted to make - a fingerprint caterpillar:
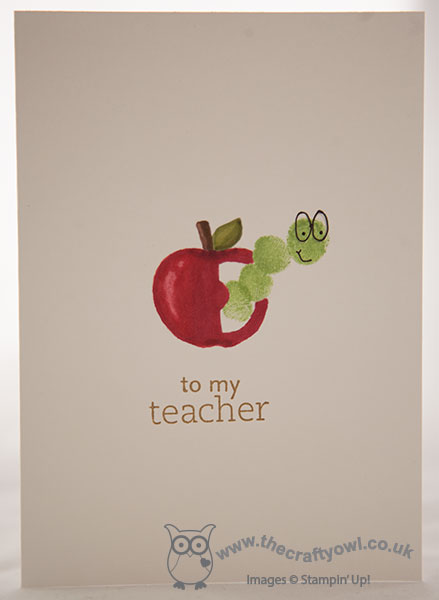
Isn't he cute?! I used one of the apple embellishments from the Project Life Playground kit as a stencil for my apple and had my first public attempt at colouring in with my Blendabilities (still more practice required!), then using Wild Wasabi ink fingerprinted my caterpillar book worm into place using Wild Wasabi ink. I doodled his face with my Project Life journaling pen and added a 'to my teacher' sentiment (from the retired set 'for my family').
Not the most time consuming of cards to be fair, but jolly good fun - I could have spent all afternoon doodling and fingerprinting, with so many ideas for more cards if only time allowed! This is also the kind of card you could easily create with little ones - great if they want to make their own teacher thank you cards.
That's me done for today; back tomorrow with my Design Team card for the Colour Me...! Challenge and the new Wednesday Weekly Deals. Until then, happy stampin'!
Stampin' Up! Supplies Used:
by Joanne James19. June 2014 11:00Today I'm having another of those 'something old, something new' days, which is quite fitting given that my card is being entered for this week's challenge over at The Paper Players where they are celebrating their 200th challenge. I really enjoy participating in this challenge and try to make a card for it each week. I didn't manage it last week (life and birthdays got in the way!) but a quick thank you to Nance for the pick the week before for my Golden Anniversary wedding card (you can see it here if you missed it). This week, each of the designers has chosen a favourite previous challenge and designed a new card around it. I was tempted to go with LeAnne's sketch as I've loved all of the cards she has made with this layout but eventually I decided to use an existing stamp, the large Swallowtail butterfly, (although it's new to me) and combine it with the new in-colours and using Ann's challenge create a one layer card.
So without further ado, here is my card:
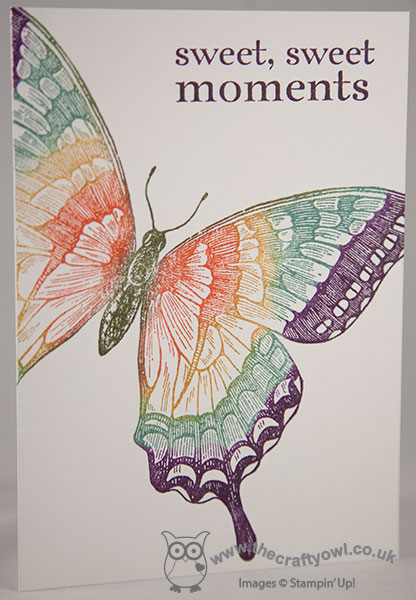
There isn't much you can do with this stamp that hasn't been done before, but I've seen so many lovely cards made with it I still wanted to add it to my collection. I used Shimmery White cardstock as my base layer for my card - it's thicker than Whisper White and whilst I didn't manage to get a photograph that captures the effect, it has a lovely subtle shimmer in real life that adds to the finished look. I inked my Swallowtail using the new 2014-15 in-colours, using sponge daubers to apply the ink to the stamp and working from the centre outwards. I started off with Mossy Meadow for the body and antenna, then in turn Tangelo Twist, Hello Honey, Lost Lagoon and lastly Blackberry Bliss. I stamped the butterfly off the page and finished with a simple sentiment from the 'Happy Day' set. Here's a close up of the detail of the stamp:
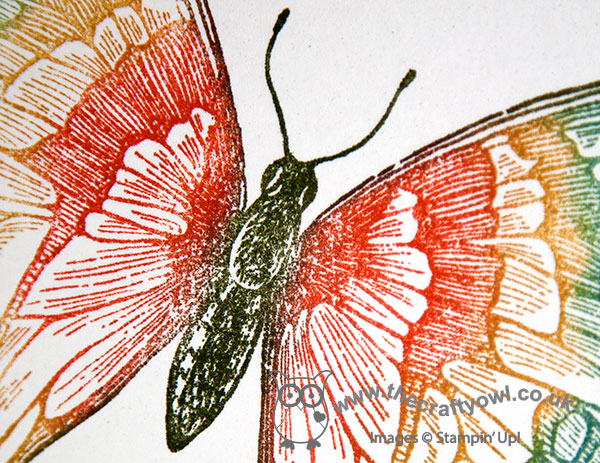
For a single stamp it has some great detail. There was a time I would have run a mile at a one layer card, but I've overcome my fear now and sometimes it's quite nice to have the challenge of making your stamps work hard for you, which I think they have to when you only have one layer to work with. For my European readers, who are eagerly awaiting the launch of the new catalogue on 1st July and have yet to get their hands on the new colours, what do you think - do you have a favourite yet? I think mine is going to be Blackberry Bliss - I love this deep, rich purple. Don't worry if you haven't made your mind up - you'll be seeing lots more of them in coming weeks I assure you! I'm also linking today's card up with the challenge over at Less is More where they are looking for 'off the edge one layer cards'. Congratulations to everyone over at the Paper Players this week; I haven't been around to participate in even close to all 200 challenges, but I'm looking forward to participating in the next 200!
Back tomorrow with another project; until then, happy stampin'!
Stampin' Up! Supplies Used:
*2014-16 In Colours available 1st July 2014
by Joanne James14. May 2014 21:40I've had a busy couple of days preparing swaps and finishing my preparations for the Stampin' Up! event at Telford on Saturday and I've still got more to do! Today I'm sharing my card for this week's challenge over at Less is More, where Chrissie and the team are looking for one layer thank you cards. I decided to try something something a little different, using my retired but never-to-be parted with Expressions Thinlits. Here is my card:
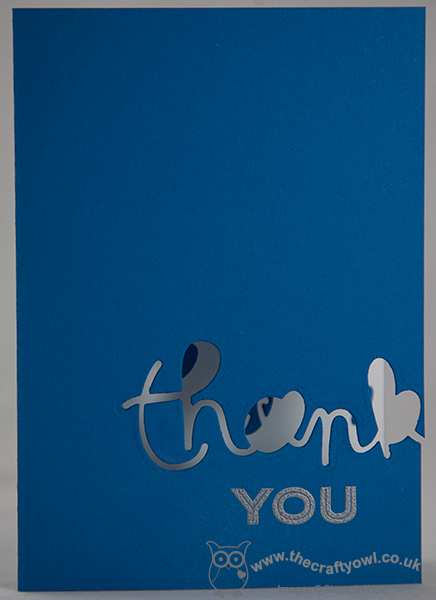
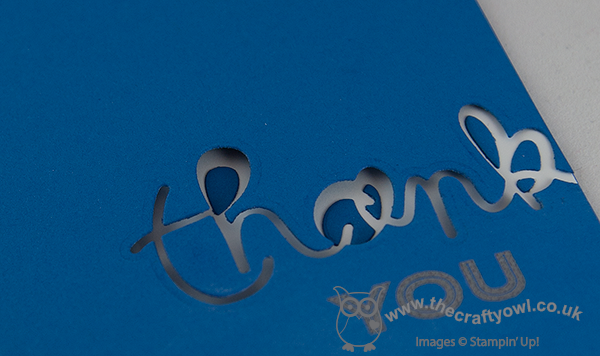
I decided to make a thank you card that would be suitable for a male, or at the very least gender neutral - so I went for a nice bright blue. Now I know the eagle-eyed amongst you are thinking - but the framelit says 'thankful', right? Well that's true - as I only wanted the 'thank' part, I positioned it over the edge of the card and cut it to the edge so that it looks as if the writing is going off the edge of the card. I adhered the cut-out pieces from the middle of the word to the inside of the card, to maintain the definition of the lettering - you can see it more clearly on the photo below:
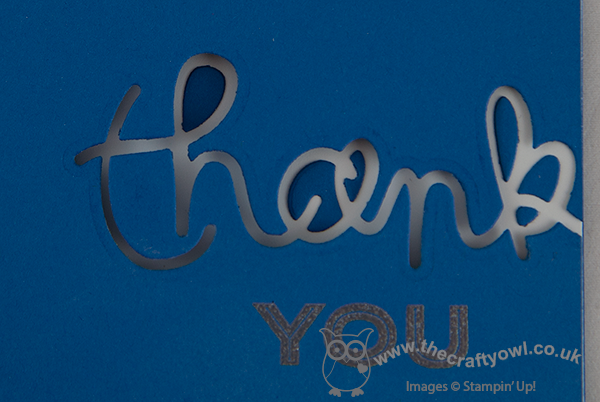
To finish my sentiment, I inked up the 'you' from the 'thank you' sentiment in the 'Simply Celebrate' set and heat embossed it with silver embossing powder. A clean and simple thank you card that's just a little bit different! I'm also linking my card up to 'Addicted to CAS', where the current challenge is appropriately 'off the edge'. Right, I'm off to get my nails done!
Back tomorrow with another project; until then, happy stampin'!
Stampin' Up! Supplies Used:
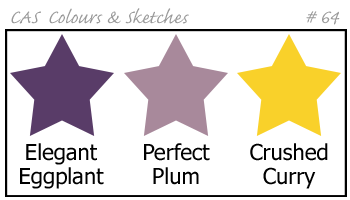
by Joanne James23. April 2014 08:00My James juniors are back at school today after a long Easter break, but I assure you that's not the reason behind the sentiment for today's card ;-) I started off with an idea in mind for this week's Less Is More challenge, where the theme is 'something that makes you smile'; unintentionally, I ended up combining this with the colour challenge this week over at CAS Colours and Sketches, where black and shades of grey are the order of the day:

I knew immediately that my 'something that makes me smile' would have to be that cute little mouse from the Life in the Forest stamp set that I used on this card last week; I decided to use him in conjunction with the word 'smile' from the Happy Day stamp set and position him as if he was standing just behind the word and peering around. I stamped 'smile' in Versamark and heat embossed in black embossing powder, as I wanted the sentiment to really stand out and look solid, then stamped the mouse using black stazon and coloured him with the greys and my blender pen. I sometimes struggle with the simplicity of 'less is more', but this card seems to tick all the boxes for clean and simple: lots of white space, few layers (none) and minimal embellishments (none). I think this may be my 'zen' of CAS cards!
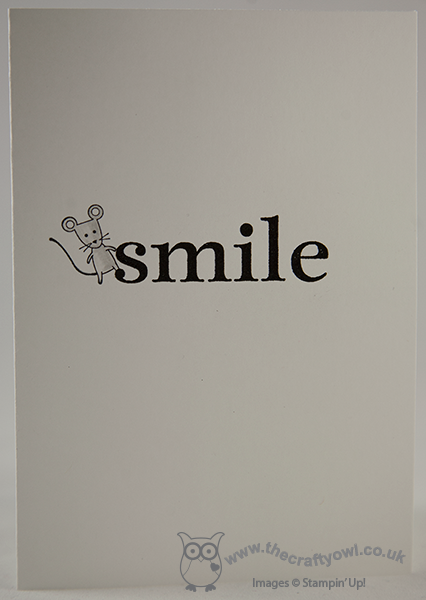
I love this card for all its black and white one-layered simplicity, but couldn't help play around with an initially discarded version where I sought to introduce some colour - this card is so far out of my comfort zone, I just couldn't help it. If you'd like to see a more colourful version, check out the post on my Facebook page today - I'd love to know which one you prefer. For me, the one above wins; as for the mouse, he makes me smile every time, with or without!
I'm off to my office for a nice early start: lots to do today, including amongst other things start preparing next week's classes. Back tomorrow with another project, until then happy stampin'!
Stampin' Up! Supplies Used:
by Joanne James12. March 2014 10:11I'm hoping for a super-efficient day today: the dinner is already prepared and in the slow cooker, I've managed a few admin tasks and I'm getting my blog post in nice and early before I crack on with more creating and ticking a few more things off my ever-growing 'to do' list - I love days like this! Today I'm sharing two versions of essentially the same card - you'll see why shortly!
I loved the colours over at CAS Colours and Sketches this week and had a specific card in mind that I thought would also work for the challenge over at Less is More, where the challenge is One Layer cards featuring Spring flowers. So here are the CAS colours this week:
These colours reminded my of iris, a spring flower that we are starting to see in bloom now; I decided to use the orchid stamp from the Happy Watercolour set for my card (an iris is a type of orchid, right?!) because I needed to be able to create something abstract without any green and the stamps in this set are perfect for this. So here is my one layer card:
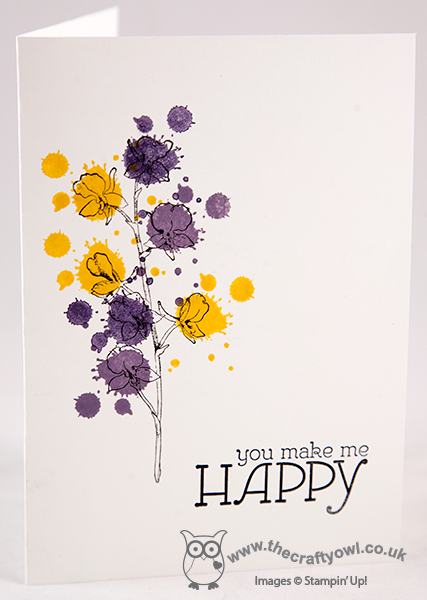
Instead of using one of the watercolour pieces to colour the flowers, I decided the bold colours needed something different so used one of the Gorgeous Grunge 'splodge' stamps instead; I saw something similar at a recent training event by Laura Mackie and decided this stamp would work nicely with the bold colour scheme. The splodges look random, but are perfectly placed: with the aid of my Stamp-a-ma-jig, it was easy to get the correct placement that I wanted. I then finished off with the 'happy' sentiment from the Happy Watercolour set - I love the font on this stamp. Having made this one layer card, I then decided to 'step it up' a little - here is my second card:
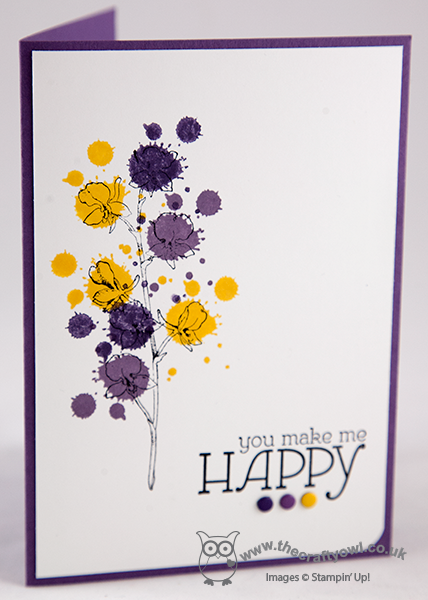
This time I layered on a base of Perfect Plum and finished the sentiment with some co-ordinating Candy Dots, rounding one corner of the white layer with my Envelope Punch Board. Some subtle additions, but they give the card quite a different look I think. I like both of these cards - which one do you prefer?
The 'Happy Watercolour' stamp set will feature in my classes on 28th and 30th April - if you live in Northampton and would like to join me to make some beautiful cards using this set, please get in touch for more information and to book your place. You can find my full class schedule here.
Right, I'm off to get inky! Back tomorrow with another project; until then, happy stampin'!
Stampin' Up! Supplies Used:
2dc518d3-fd24-4030-9b4f-d714327c5af4|0|.0|96d5b379-7e1d-4dac-a6ba-1e50db561b04
Tags: Candy Dots, Envelope Punch Board, Happy Watercolour, one layer cards, Gorgeous Grunge, Shop online, Stamp-a-ma-jig, Stampin' Up, Stampin' Up Card, Stampin' Up Card ideas, Stampin' Up Supplies
Cards | Classes | Stamping
by Joanne James12. February 2014 09:56So I didn't quite manage to squeeze in another 'make' for you yesterday, but I'm here bright and breezy (or should that be windswept, given the gales we've had here for the last day or so!) this morning with today's card. Given my recent dalliances with the colour black, I thought I would try something different using black cardstock and one of my most favourite stamps - yes, the Flowerfull Heart (still available to order until Friday if you'd like one - click on the link to my online shop below!) Here is my card:
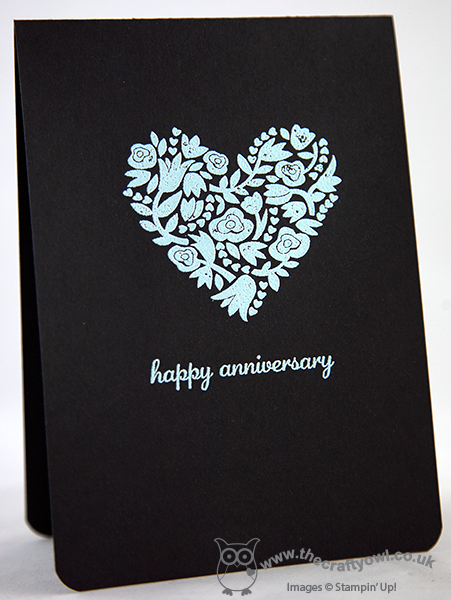
Now, I know you might be thinking "Anniversary card - on black??!" but hear me out! I wanted to use this stamp again with some heat embossing; I toyed with gold (well, it worked pretty well on this card I think) but eventually decided to use Pool Party embossing powder. My colour combination was inspired by one of the DSP patterns in the Sweet Sorbet pack that is available as one of the free Sale-A-Bration gifts currently when you spend £45 or more - the little blue Pool Party flowers with black centres. I would not necessarily have thought about using these colours together had it not been for this paper. A simple sentiment from the 'Express Yourself' hostess set (such a versatile set of greetings in a very usable font, it can be yours when you host a Stampin' Up! party - contact me to book yours) finishes this simple card.
So what do you think - a colour combination that works or one to be avoided, especially on a romantic card? I'd love to know what you think. I'm also linking this card up with the 'One Layer Card - Anything Goes' challenge over at Less is More this week (currently the only card using black for it's 'white space' - should I be worried?!) and CAS(E) This Sketch as my card uses their sketch again:
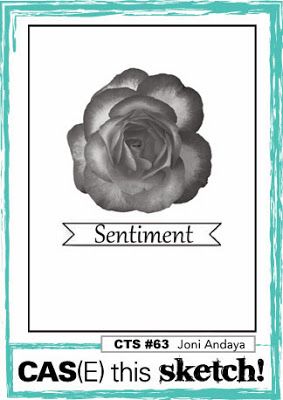
Funny how you can use the same two starting points, yet end up with two cards that couldn't be more different. Back tomorrow with another project; until then, happy stampin'!
Stampin' Up! Supplies Used:
9fe4b513-b28f-441e-b5cc-fe0fd6c2169c|0|.0|96d5b379-7e1d-4dac-a6ba-1e50db561b04
Tags: Embossing, Flowerfull Heart, Host a Party, Express Yourself, one layer cards, Sale-a-bration 2014, Shop online, Stamp-a-ma-jig, Stampin' Up, Stampin' Up Card, Stampin' Up Card ideas, Stampin' Up Supplies, Anniversary, Weddings
Cards | Host a Party | Promotions | Sale-a-bration | Stamping
by Joanne James12. February 2014 09:08Another early post from me today - makes me look organised, but if you'd witnessed the library book hunt that rampaged through the James household this morning before school, you could be forgiven for thinking otherwise! As promised, today's card uses the same stamp from the 'From This Day Forward' set that I used yesterday, but to give a completely different effect. Here is my card:
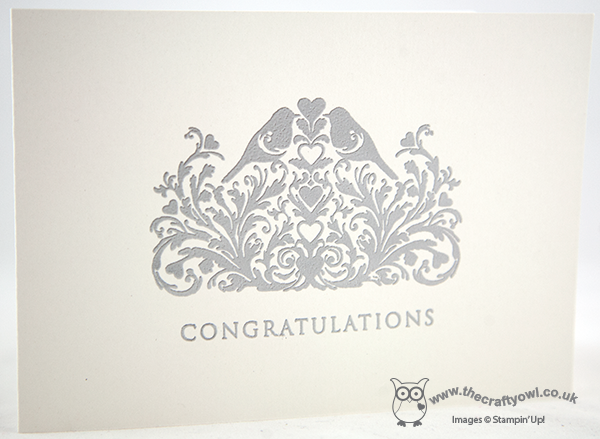
The photograph really doesn't do this card justice (not least because it is so difficult to get a great shot of an almost all-white card!) but up close, this card is really beautiful; I stamped the image and sentiment in Versamark onto Shimmery White cardstock - a lovely cardstock for this kind if project, it is flecked with minute specks of shimmer glitter and catches the light beautifully - and then heat embossed with silver embossing powder to add texture (important when your card is only one layer) and a lovely sheen).
It just goes to show that you don't always need lots of layers to create an impactful card - I'm getting quite into this one layer thing!
I'm going to link up today's card with this week's challenge over at 'Less is More' where the challenge is 'One layer - anything goes' and at CAS(E) this Sketch, as I used this sketch for my layout (turned through 90 degrees).
I'm off to get crafty - lots to do today! I might even pop back later and squeeze in another post.
Until then, happy stampin'!
P.S.: In case you're wondering we found the library book eventually - phew!
Stampin' Up! Supplies Used:
by Joanne James22. January 2014 09:43I'm sticking with the Valentine's theme today as today's card is also this week's entry for The Paper Players weekly challenge, where Sandy has asked us to create a one layer Valentine's card:
I decided to use the heart as per the challenge tile, but today's card is also showing you how to use one of my favourite Stampin' Up! products, the Expressions Thinlits dies, in a different way. You've seen me use the die cut word itself as in yesterday's card, and I've also used the negative space created by the die cut (you can see an example of that here). Today I thought I would show you how you can use them to create a mask, which gives yet another effect and one that is particularly suited to a one-layer card. Here is my card:
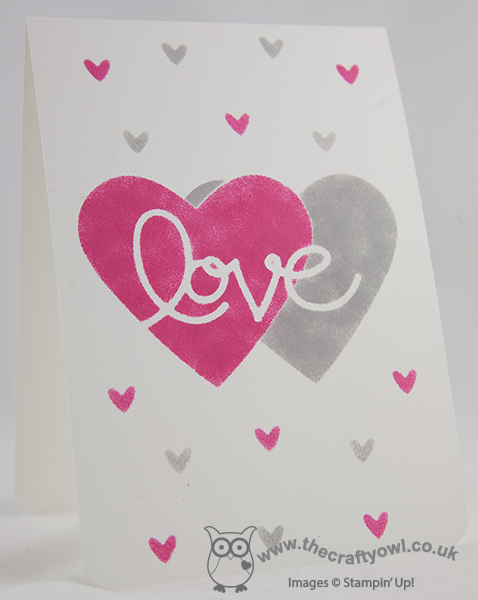
I cut out the die cut word 'love', along with two overlapping hearts cut with my Hearts Framelits and created a mask. Then using Melon Mambo and Smoky Slate ink and a couple of sponge daubers, I carefully sponged around the die cuts to give the illusion of two overlapping hearts, with love running through the centre. I created a second mask using the small heart from the Owl Builder Punch; I could have used a stamp, but I wanted to retain the soft sponged effect so created another stencil then simply sponged a few random hearts across some of the remaining white space. I rounded the bottom corners of the card, but otherwise left well alone; as the Paper Players point out this week, less is more!
I'm really pleased with how this card turned out and it shows yet another way you can use the thinlits to achieve an alternative effect. If you too are 'in love' with 'love' and the other words in the Expressions Thinlits set, don't forget these are only available until 1st February when the current seasonal Autumn-winter catalogue ends - click on the link below to my online store if you would like to purchase. I know I wouldn't be without mine - they can be used in so many ways.
Back tomorrow with another one layer card; until then, happy stampin'!
Stampin' Up! Supplies Used:
59edc7bc-b5db-4717-93b4-ad2ce2d82116|0|.0|96d5b379-7e1d-4dac-a6ba-1e50db561b04
Tags: Hearts Framelits, Expressions Thinlits Dies, Owl Punch, Sponging, Stampin' Up, Stampin' Up Card, Shop online, Stampin' Up Card ideas, Stampin' Up Supplies, Valentines, Valentine's, one layer cards
Cards | Stamping