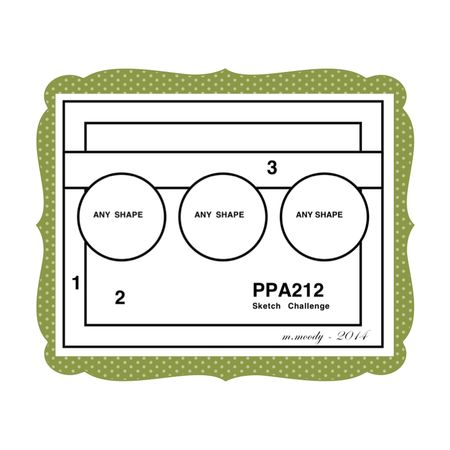
by Joanne James22. July 2014 10:00I haven't participated in the Pals Paper Arts challenge for a little while, but when I saw Margaret's sketch this week I knew it would be perfect for a special card that I wanted to make:
A friend of mine is moving to Australia - she is a native Australian, so for her it's just 'going home', but for her British husband and young children, it's emigrating to the other side of the world. So the move is a big deal and comes with mixed emotions on all sides. The great thing is though that they are taking the opportunity to spend a few months travelling the world on leaving Britain and before arriving in Australia, so rather than focus on the move I thought it would be fun to make a card to wish them all the very best for their travels. I knew I wanted to make a card using the 'Around the World' stamp set - here's what I came up with:
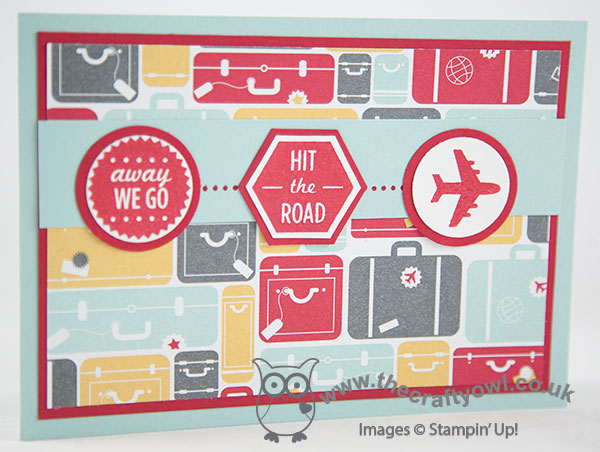
I used a Pool Party base and a mat of Real Red, along with a piece of the now retired 'I am Me' designer series paper (I am still awaiting the arrival of my new papers and besides, this one was perfect for my theme!) I added the cross-panel in Pool Party, then stamped three of the images from the Around the World stamp set in Real Red on Whisper White. I did take advantage of the 'any shape' instruction on the sketch and did a little 'mix and match', with two circles and a hexagon. The circles I cut out using my Circle Framelits and then mounted them onto some Real Red circles cut with my 1 1/4" circle punch; the hexagon I cut by hand so that I could mount it on a Real Red hexagon punched with my hexagon punch. I tied them all together by stamping the trail from the aeroplane stamp onto the Pool Party card behind them.
So a bright, fun card to wish my dear friend and her family the best of luck on their forthcoming travels.
Back tomorrow with this week's Wednesday Weekly Deals and my Colour Me...! card for this week. Until then, happy stampin'!
Stampin' Up! Supplies Used:
* I Am Me Designer Series Paper - retired
fac25a92-9dfa-4e6f-ba60-a4b558e2da25|0|.0|96d5b379-7e1d-4dac-a6ba-1e50db561b04
Tags: Around The World, I Am Me, Big Shot, circle punch, Circles Framelits, Hexagon Punch, Shop online, Stampin' Up, Stampin' Up Card, Stampin' Up Card ideas, Stampin' Up Supplies
Cards | Stamping
by Joanne James11. July 2014 21:54I've had another busy week and whilst it's great that it's Friday, boy do I have a busy weekend ahead of me! But before I get into my weekend, check out this card I made today for this week's Mojo Monday challenge; I haven't participated in this challenge for a while, but I really liked this week's sketch so thought I would use it for today's card. Here is the sketch:
And here's my card, featuring some of the scrummy new paper in the All Abloom Designer Series Paper Stack:
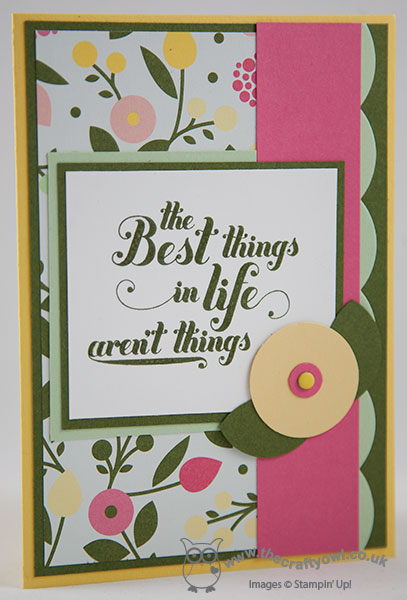
I followed the sketch but I have been a little liberal with the relative dimensions of the various elements, as I wanted to use this particular sentiment from the 'Feel Goods' set and show off as much of the bold paper pattern as possible. Taking the inspiration for my colour scheme from the DSP, I matted a piece of Mossy Meadow onto a Daffodil Delight card base, then positioned the DSP on the left and bordered the right hand side with a strip of Strawberry Slush edged in Pistachio Pudding, cut with the large scallop edgelit. I stamped my sentiment in Mossy Meadow and matted it on a piece of the same colour cardstock, with a small partial mat of Pistachio Pudding as I didn't want to obscure too much of the pattern. I finished with a simple circular flower, to echo those in the paper design, punched out with a couple of circle punches and finished with a candy dot.
I made this card with a friend of mine in mind and I'm really pleased with how it turned out. Above all, I'm loving this new paper stack - the patterns in it are lovely and I can guarantee you'll be seeing lots more of this!
So that's me for today. And so to the weekend: tomorrow Rebecca has an extra ballet lesson before her exam on Sunday, we are holding Ben's birthday party for his school classmates tomorrow afternoon (more on that tomorrow!) and we are also hoping to squeeze in a visit to our local fire station open day and drop in on a church fete that a friend of mine has been working very hard to prepare for to show our support. That is all in addition to the usual homework and swim squad sessions - wish me luck!
Back tomorrow with another project; until then, happy stampin'!
Stampin' Up! Supplies Used:
by Joanne James9. July 2014 08:00Happy Wednesday everyone! Double delights today: new weekly Wednesday Deals - I'll be back with the details on those later -and more importantly for me my second Colour Me...! Card Challenge Design Team post! This week we are using the striking colour combination of Elegant Eggplant and Soft Sky:
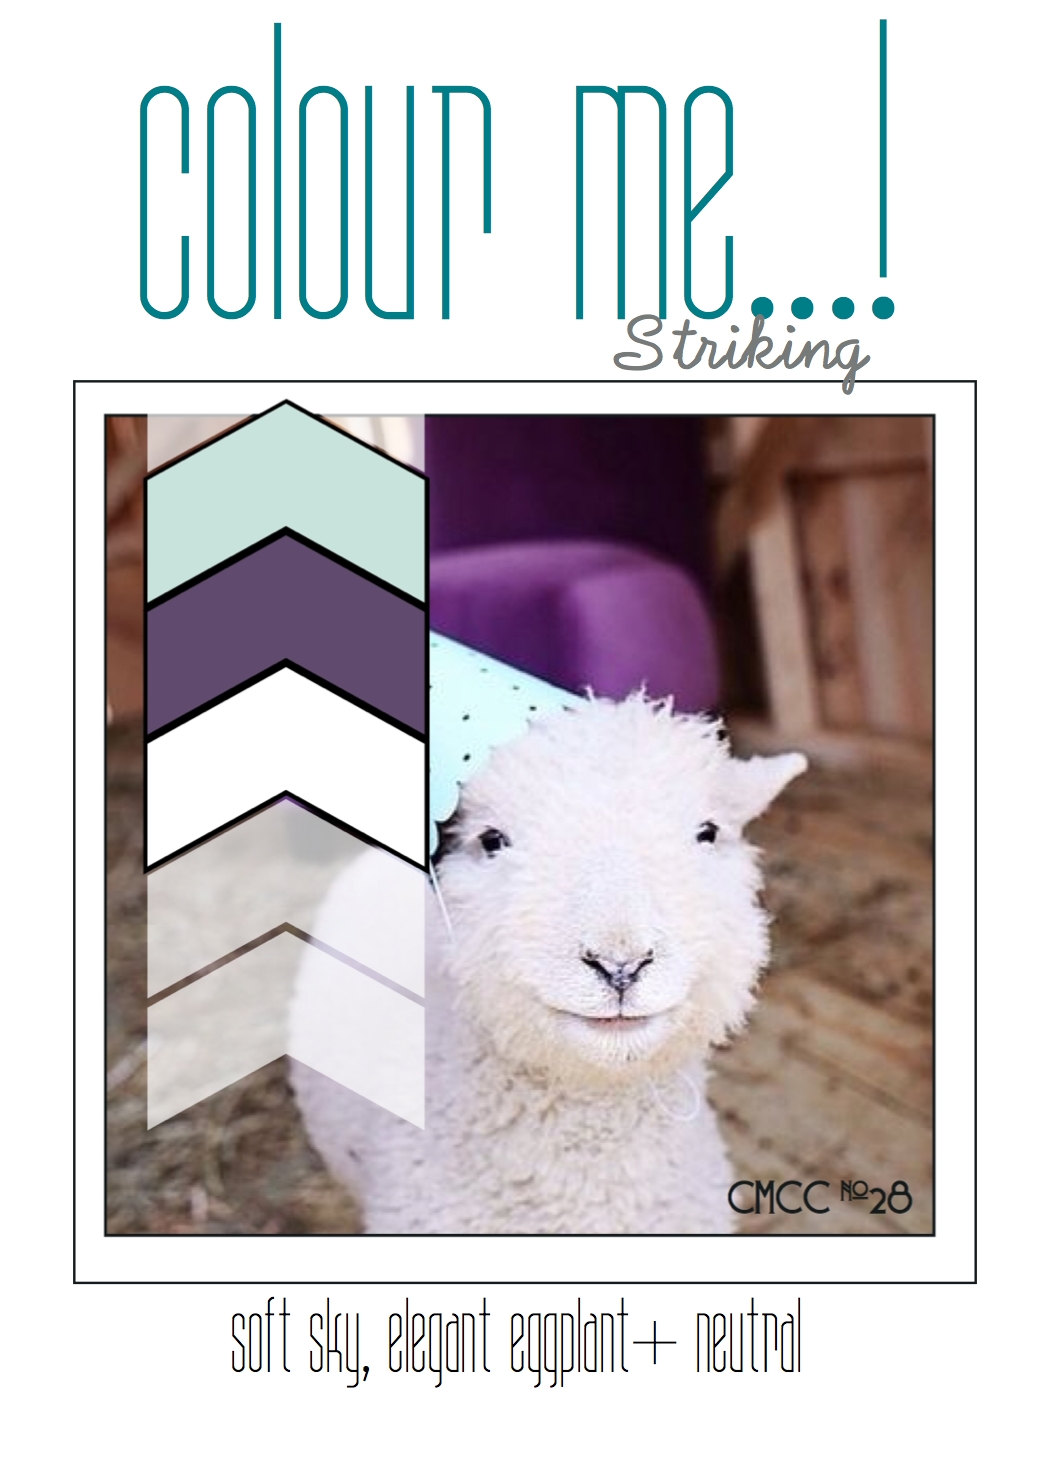
This is an unusual colour combination for me, but I had a clear idea of how I was going to use these contrasting colours - here's the card I came up with this week:
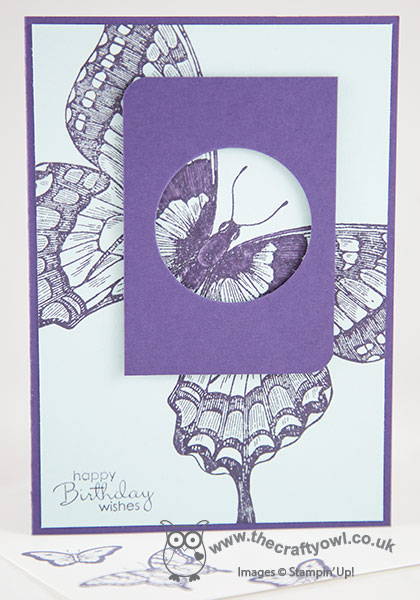
I decided to use Elegant Eggplant for my base card and then stamped the large Swallowtail stamp in Elegant Eggplant onto Soft Sky cardstock. I then took a rectangular piece of Elegant Eggplant cardstock and punched a circular hole out of the centre and rounded alternating corners with my Project Life corner rounder. I then strategically placed this over my butterfly to include its head and adhered it to my card using dimensionals, having first coloured the portion of the butterfly visible through the circular hole using Elegant Eggplant ink and a blender pen. The top layer is used to create a 'spotlight' onto the butterfly and almost magnify its detail. I finished with a small birthday sentiment from Petite Pairs as I didn't want anything that would overshadow my butterfly, and stamped the inside of the card and the envelope too with the smaller swallowtail from the coordinating Papillion Potpourri stamp set.
I hope you like today's card - please do pop along to the 'Colour Me...!' challenge page this week to check out the work from the other talented designers that I'm working with and to upload your own creations.
Back tomorrow with another project; until then, happy stampin'!
Stampin' Up! Supplies Used:
by Joanne James22. June 2014 16:31Happy Monday everyone - that sure did come around again quickly! I am now officially counting down - 9 days until the launch of the new 2014-15 Stampin' Up! Annual Catalogue and more importantly 8 days until my official launch party!! You can read all about it here and I hope to see as many of you there as possible. Meanwhile, lots of jobs to do this week, the first of which is to share today's card.
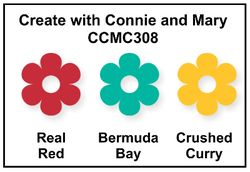
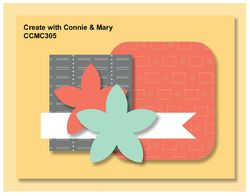
I used this week's sketch layout over at Pals Paper Arts today along with the colour palette over at Create with Connie and Mary:
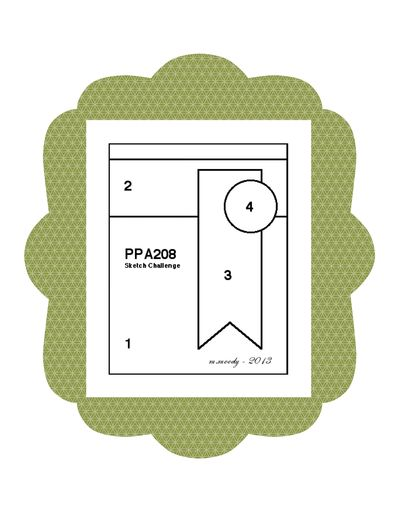
I've had the idea for today's card in my head for a while and the combination of the sketch and colour scheme were perfect for my card - take a look:
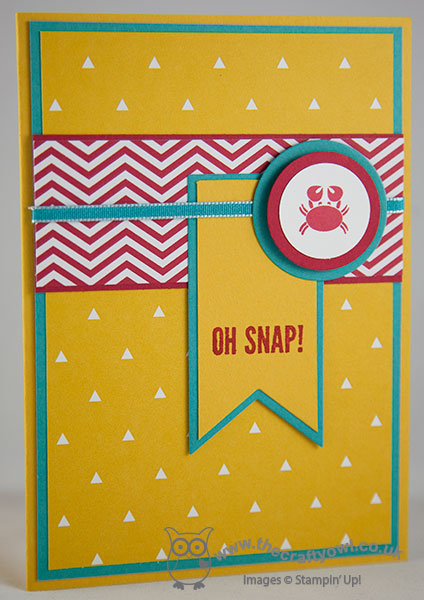
Having bought the Hip Notes stamp set because I thought it would come in useful with my Project Life memory keeping, I have also found a few other uses for it: the 'oh snap!' stamp seemed to tie in perfectly with the little crab from the Sea Street set to make a belated birthday card. I love these bright colours and decided to let the graphic red and yellow designer papers feature here with the Bermuda Bay as the supporting accent colour. My Banner Framelits made light work of the pennants and the same for the circles around the crab motif, which were made from a variety of framelits and punches. The card is quite simple with a very clean and layered look and I expanded on the sentiment inside the card:
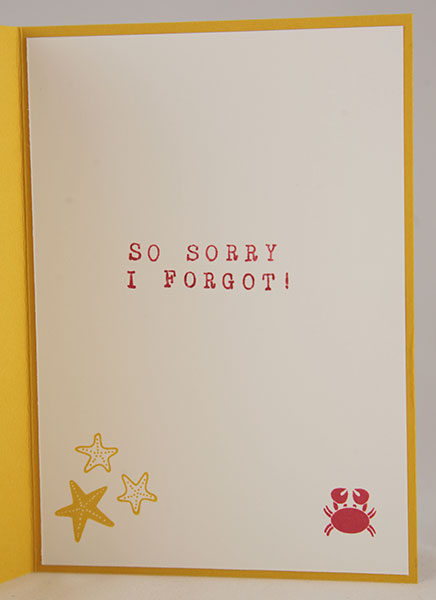
I stamped this sentiment with the new Alphabet Rotary Stamp that will debut in the forthcoming annual catalogue; I love how you can use it to make quick bespoke sentiments like this to add to a card. I'd like to say as a card maker that I never forget people's birthdays, but as a number of my closest friends will attest, that is sadly not the case! Maybe I should make a few of these cards to have on standby ready for the next time I have a moment of forgetfulness!
Back tomorrow with another project; until then, happy stampin'!
Stampin' Up! Supplies Used:
* Sea Street - available 1st July
* Alphabet Rotary Stamp - available 1st July
da9c126c-71f8-4115-a58d-81201bb75f49|0|.0|96d5b379-7e1d-4dac-a6ba-1e50db561b04
Tags: Sea Street, Kaleidoscope, Big Shot, Circles Framelits, circle punch, Banners Framelits, Belated Birthday, Shop online, Stampin' Up, Stampin' Up Card, Stampin' Up Card ideas, Stampin' Up Supplies
Cards | Stamping
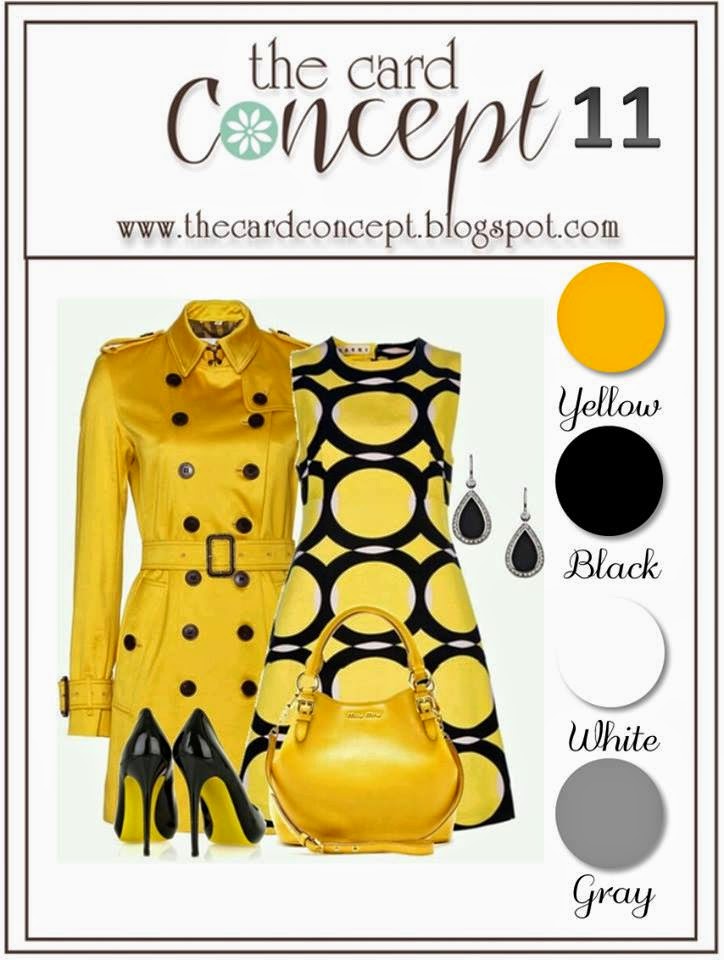
by Joanne James3. June 2014 21:42Today's card started out as my entry for this week's challenge over at Create with Connie and Mary; once I'd decided on my design, I also remembered the inspiration photo over at The Card Concept so used this as my colour scheme:
Here is my finished card:
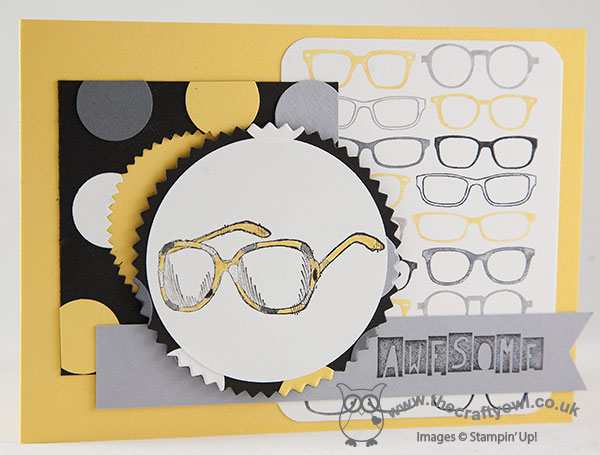
I decided to use the sunglasses (minus the sentiment) from the Spring catalogue hostess set 'To the Point' as the focal point for my card and stamped them onto a circle of Whisper White as I wanted to be able to create the cut out image on the layer behind. I created a patterned layer using punched 3/4" circles on a black square to echo the spot pattern on the sunglasses, and cut out the starburst shape and mat for the circle using my Starburst Framelits. I stamped the retired single stamp 'Spectacular' and my marker pens to create my own DSP background panel, using my stamp-a-ma-jig to enable easy alignment and pattern repeat, and rounded the corners with my Envelope Punch Board. Lastly, I stamped my sentiment onto a flag of Smoky Slate; the sentiment on the original stamp was too small to work here, so I substituted with 'Awesome' from the Cool kid stamp set in the current Spring catalogue (only available until the end of the month).
I had already made a card for the challenge over at The Card Concept, which is scheduled to post later in the week and couldn't be more different to this one, however having chosen my design I couldn't help but think that sunglasses were the only thing missing from the inspiration photo, so I decided to roll with it! My card definitely fits the 'clean and layered' style; the question is, does it really have specs appeal? I'd love to know what you think - feel free to leave me a comment below! I am also linking this card up over at SUO Challenges, where the theme is to create your own background DSP, as I've done here with my 'Spectacular' stamp.
That's all from me today; back tomorrow with another card and news of this week's Wednesday Weekly Deals; until then, happy stampin'!
Stampin' Up! Supplies Used:
by Joanne James31. May 2014 10:41A really quick post from me today as I have a very busy work day ahead, but a bonus project for you too today - read on! I made today's card a couple of weeks ago for one of Rebecca's friends who was celebrating her 9th birthday. It got me thinking - at 9 years old, suddenly some girls are less about cute and desperate to 'grow up', so I needed to make a card that was girly but not too 'cutesie' (I think that's a word!). Birthday Basics DSP is always my 'go to' paper for cards like this - here's my card:
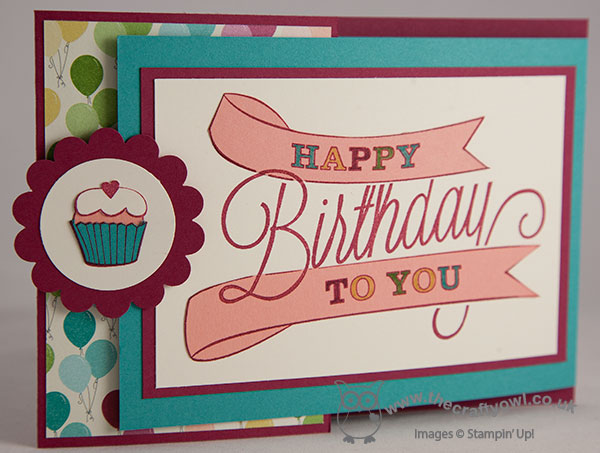
I went for a 'fun fold' card featuring the Another Great Year stamp set. I stamped the main stamp onto Very Vanilla then stamped it again onto a sheet of Crisp Cantaloupe and coloured the words with markers before adhering to the vanilla layer. I then created a fun scalloped circle closure to hold the card shut, with a co-ordinating paper-pieced cupcake taking centre stage, which I adhered with a dimensional onto the panel featuring colourful birthday balloons:

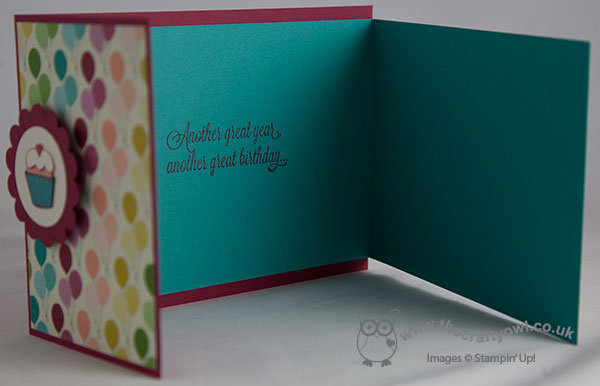
Doesn't that cupcake look delicious? Below you can see how I created the card base from two pieces of cardstock, along with my stamped sentiment inside:
Another reason for my paper choice was that the gift was a gift voucher to spend at a local cycling store for accessories for a new bicycle, and the Birthday Basics paper has the perfect design for a themed gift card holder, made using my Envelope Punch Board:
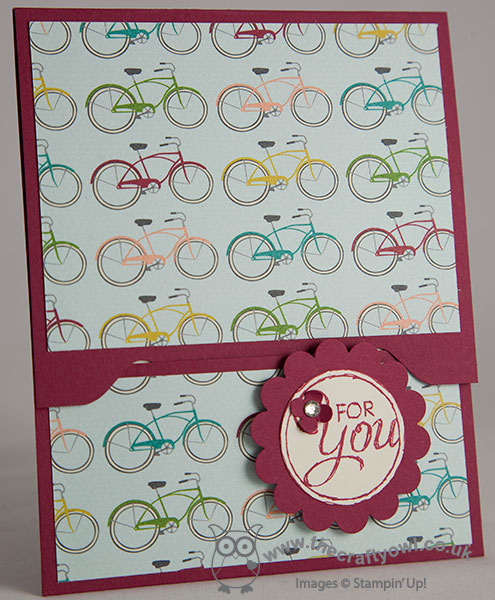
I've made these gift voucher holders before (you can find instructions on a previous post here) - the colours mean that both items look great together. Today's card uses lots of retiring colours and products, so if you need to stock up on any you should hop over to my online store by clicking on the links below - the Itty Bitty Punches that I used to create the little flower on the gift card holder above have already sold out!!
Right, must dash - I need to link today's post up with the current SUO Challenge of 'Something Yummy' - if I'm quick I might just make it! back tomorrow with another project, until then happy stampin'!
Stampin' Up Supplies Used:
by Joanne James19. May 2014 19:19I haven't had any time for crafting today, so I'm going to share with you a simple pop up card designed by Monica Gale that I made at our quarterly training session last month and that I made with my ladies at our recent Fresh Prints All Day Craft Event - here is the outside of the card:
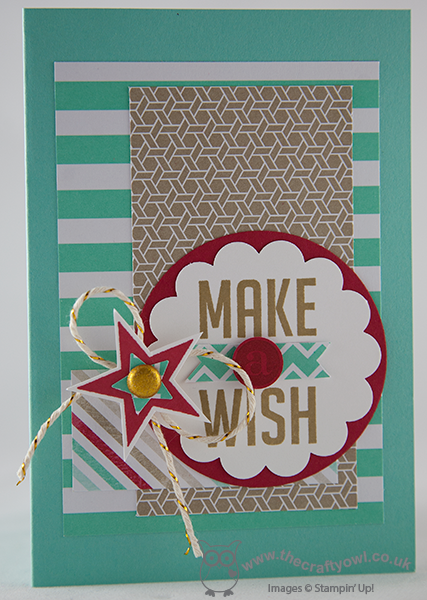
I added a few layers of Fresh Prints papers onto a Coastal Cabana card base, then stamped the 'Make a Wish' stamp from the Perfect Pennants set in Crumb Cake and punched out with a 2 3/8" Scalloped Circle punch layered onto a 2 1/2" circle out of Real Red cardstock, The banner was cut from a scrap of DSP and the 'a' stamped on red card and punched out and popped on a dimensional for added dimension. To decorate, I stamped a star from 'Simply Stars' in Real Red on Whisper White cardstock, added a DSP star using the Merry Minis star punch and secured with a gold glimmer brad with a twist of gold threaded baker's twine behind for a little added sparkle.
Inside the card there is a really simple little pop up made by cutting two short horizontal slits in the liner, which is made out of a notelet:
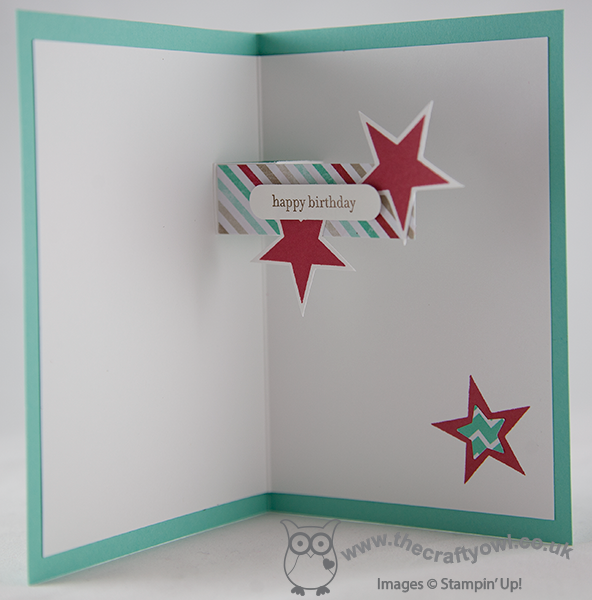
A few more stars and a simple birthday greeting and it's done - a fun little pop card suitable for either gender. I'm hoping to get into my craft room tomorrow and catch up on my crafting, although there is a big basket of ironing competing for my attention, so might need to get that out of the way first!
Either way, back tomorrow with another project; until then, happy stampin'!
Stampin' Up! Supplies Used:
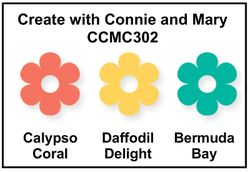
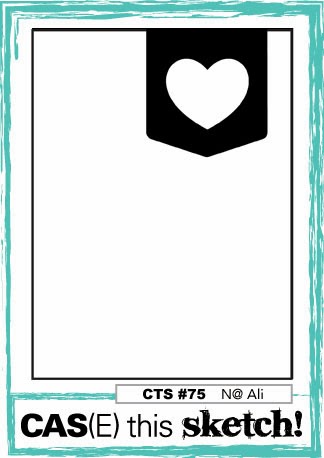
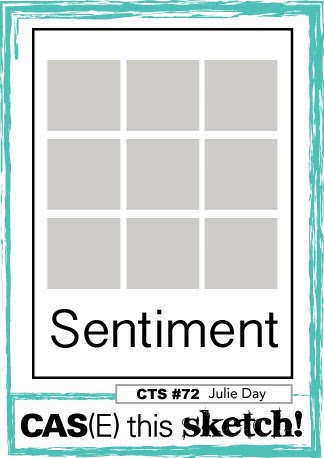
by Joanne James13. May 2014 21:06Today I'm sharing a card I made for this week's challenge over at Create with Connie and Mary, where they have a lovely vibrant colour palette to play with; I also used the layout over at CAS(E) This Sketch:
This card gave me the perfect opportunity to make a feature of a lovely piece of Watercolour Wonder paper that I've had in my box for a while and also to try something different with the tab panel. Here is my card:
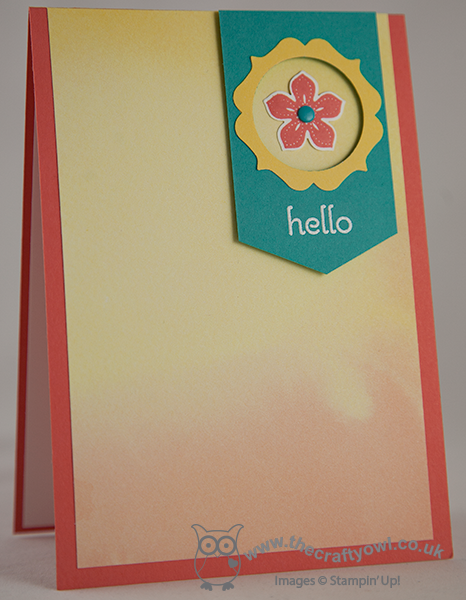
I used Calypso Coral for the base of my card, topped with a piece of Watercolour Wonder DSP. Now I know that, strictly speaking, the paper pack says that Daffodil Delight and Tangerine Tango are the feature colours in the Watercolour Wonder papers, however the watercolour effects mean that on some of the sheets the blending means that there are also opportunities to match with other colours, such as Calypso Coral for example - I just chose an area of paper that avoided the darkest orange tones so it fits perfectly with the rest of my card. I cut my inverted banner from a piece of Bermuda Bay cardstock and used a 1 1/4" circle and the Label Bracket punch to create the Daffodil Delight aperture to showcase my Petite Petals flower - I've been wanting to use this framing idea ever since I saw it on one of Connie Babbert's cards a while ago (you can see Connie's original card here). I also stamped my 'hello' sentiment in Versamark and heat embossed in Whisper White. Lastly, I stamped my flower in Calypso Coral on some Whisper White cardstock and finished it with a Bermuda Bay candy dot.
I really like how this card turned out; I almost stamped a sentiment onto the DSP instead of the banner, but in hindsight I'm really glad I didn't - I love that the watercoloured panel is on show and uninterrupted by any other stamping or design.
Back tomorrow with another project and this week's new Wednesday weekly deals; until then, happy stampin'!
Stampin' Up! Supplies Used:
by Joanne James17. April 2014 10:00As promised, today I have the second of the cards I made for this week's sketch over at CAS(E) This Sketch - I saw this layout and couldn't resist another interpretation. This time I also combined it with the colour challenge over at Dynamic Duos:

This card is altogether more fun than yesterday's - take a look and you'll see what I mean:
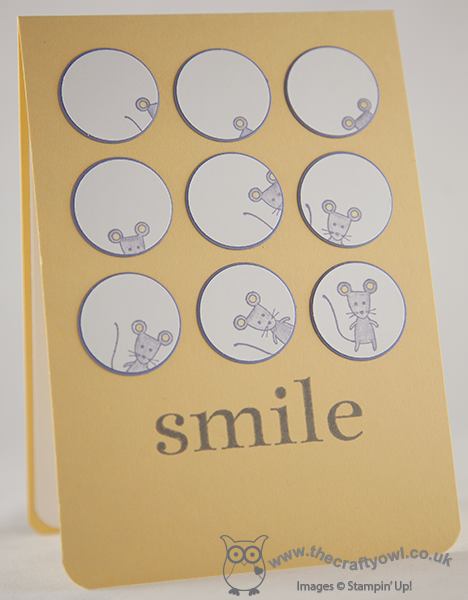
I had the idea that if the squares were circles, the little mouse from the 'Life in the Forest' stamp set could play 'peek a boo' as if he was in a block of Swiss cheese (something of a graphic interpretation, given that the circles are identically sized and placed, but hopefully you can see what I mean!) I stamped the mice onto Whisper White and simply punched out with my 1" circle punch so that only parts of them were showing, and I mounted these onto circles of Wisteria Wonder only slightly larger that I cut with my Circle Framelits. I coloured the mice with my Wisteria Wonder and So Saffron inks and a blender pen and finished the card with the sentiment 'smile' - well, I didn't have one that says 'chuckle', which is what I was doing as I coloured these little fellas so this was the next best thing :-)
I hope you like my fun take-two on the sketch; back tomorrow with my entry for this week's Paper Players challenge (and yes, it was a challenge indeed!) Until then, I'm off to the theatre with Ben this morning whilst Rebecca is on a swimming course and my dear husband is having to monitor the bathroom fitter who is replacing a floor tile that has been booked to do the job for some 14 months - hopefully today is (finally) the day!
Until then, happy stampin'!
Stampin' Up! Supplies Used:
by Joanne James19. March 2014 20:33Today I want to share with you another use for one of my new favourite punches - the scalloped tag top punch. This really is such a versatile punch that can be used in so many ways. There are lots of variations on how it can be used to make an unusual card closure - today's card is a fun, concertina style Mother's Day card, where the scalloped tag top punch is used to add detail to the closure. This is what the card looks like 'closed':
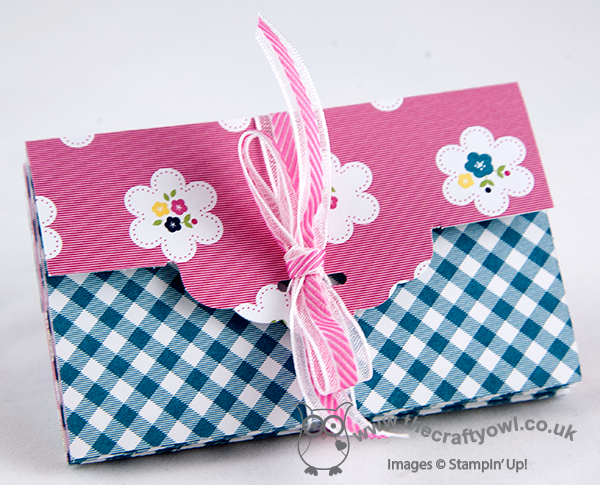
Ribbon is threaded through the punch out hole and around the card and tied in a bow to keep it shut, then when you undo the ribbon and open the card out, you see the message inside:
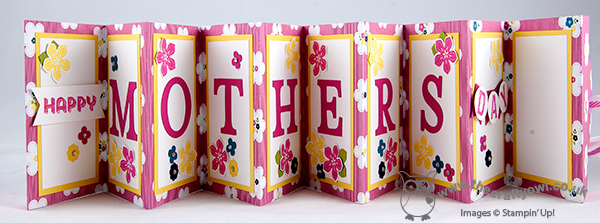
These cards are such fun to make and so easy. All you need is one sheet of 12" x 12" for the basic card. I used a sheet of the Gingham Garden DSP for my card, and layered the inside panels with Whisper White matted on Daffodil Delight. I cut the letters for 'Mothers' with my Typeset Alphabet die, but you could easily use an alphabet stamp set such as Morning Post or Notable Alphabet if you have one instead. I took the word 'Happy' from one of the 'See Ya Later' Sale-A-Bration stamp sets and the letters for 'Day' from my Sketched Alphabet individual stamps before punching out and layering on a mini banner. I then decorated with flowers stamped and punched from the Petite Petals bundle and the Itty Bitty Punches set in colours that co-ordinated with my chosen DSP. The last panel is left blank for you to write your personalised Mother's Day message.
I had intended to shoot a video tutorial on how to make one of these cards to accompany my series of Scalloped Tag Top Punch video tutorials, but time has not been on my side so I haven't managed it yet; I will look to complete one in the next week or so and when I do will update my blog with the link.
The best bits about this card: it's one of those projects where you don't have to deliberate over which side of your DSP to use, as you see both sides (dilemma avoided, for once) and also because of the closure, you don't need an envelope - this is a card and envelope in one! This style of card would work for lots of other occasions too - why not have a go and see what you come up with.
Back tomorrow with another project; until then, happy stampin'!
Stampin' Up! Supplies Used:
496e722e-02bc-47d9-8908-08b02d818f3c|0|.0|96d5b379-7e1d-4dac-a6ba-1e50db561b04
Tags: ABC-123 Sketch Alphabet & Numbers, Banner Punch, circle punch, See Ya Later, Shop online, Stampin' Up, Stampin' Up Card, Stampin' Up Card ideas, Stampin' Up Supplies, Typeset Alphabet, Scalloped Tag Topper Punch, Big Shot, Mother's Day, Gingham Garden
Cards | Stamping