by Joanne James26. August 2014 15:30As I'm writing my post today there is finally a break in the rain - hurrah! I hope that everyone here in the UK had a lovely Bank Holiday weekend, despite the dreadful weather across most of the country yesterday. I am now home, having spent a long weekend away in Somerset with my extended family, celebrating my Mother-in-law's forthcoming 70th birthday. We were fortunate to have had wonderful weather and spent a great weekend on the beach, fossil hunting, playing rounders and generally having a relaxing time.
Today I'm sharing a card I made a while ago as one of the samples for the UK Regional Training Day where I was asked to do a 'wow' technique presentation using the Traveler stamp set. This card is one of the ones that was actually inspired by the set, rather than featuring it directly, although the old fashioned brownie camera that inspired my card does feature on the inside. I decided to try my hand at a shaker card and created it to look like an old fashioned camera - here's the front of my card:
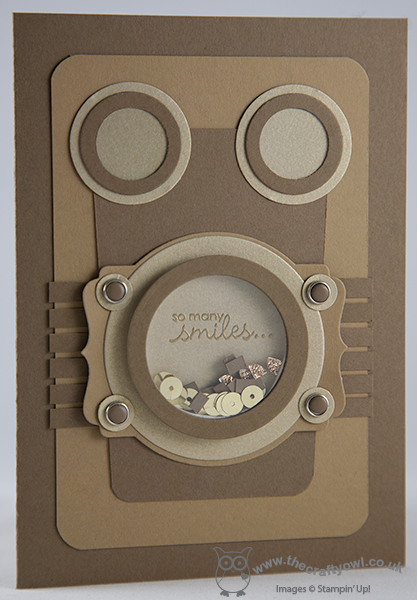
I used Soft Suede, Baked Brown Sugar and Brushed Gold cardstock and a variety of circle punches and both circle and deco label framelits to construct my shaker, and filled the window with gold sequins and some confetti squares cut using my fringe scissors from baked Brown Sugar cardstock and Champagne glimmer paper. I used the Petite Pairs sentiment set and heat embossed the first half of my sentiment in gold on the inside of my shaker frame. This was then continued on the inside of the card:
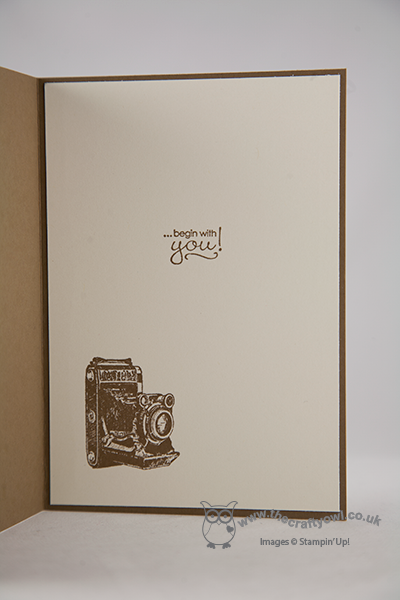
I also finished with the camera stamp. So what do you think - does my punch art camera shaker card bear any resemblance to the real thing? I thought this would make a fun masculine shaker card - proving even grown ups can be fun!
Back tomorrow with my Design Team card for this week's Colour Me...! challenge - and I have a fun 'sneak peek' Christmas card to share with you!
Until then, happy stampin'!
Stampin' Up! Supplies Used:
d8ff5816-b75b-4099-8492-98feab5b6931|0|.0|96d5b379-7e1d-4dac-a6ba-1e50db561b04
Tags: Traveler, Stampin' Up Supplies, Stampin' Up Card ideas, Stampin' Up Card, Stampin' Up, Shaker cards, Shop online, circle punch, Circles Framelits, Deco Labels Framelits, Petite Pairs, Candy Dots, Candy Dot Brads, corner punch
Cards | Punch Art | Stamping
by Joanne James24. August 2014 08:00Today I'm sharing my Design team card for this week's challenge over at The Paper Players. This week Jaydee is hosting and she has the following sketch layout for us:
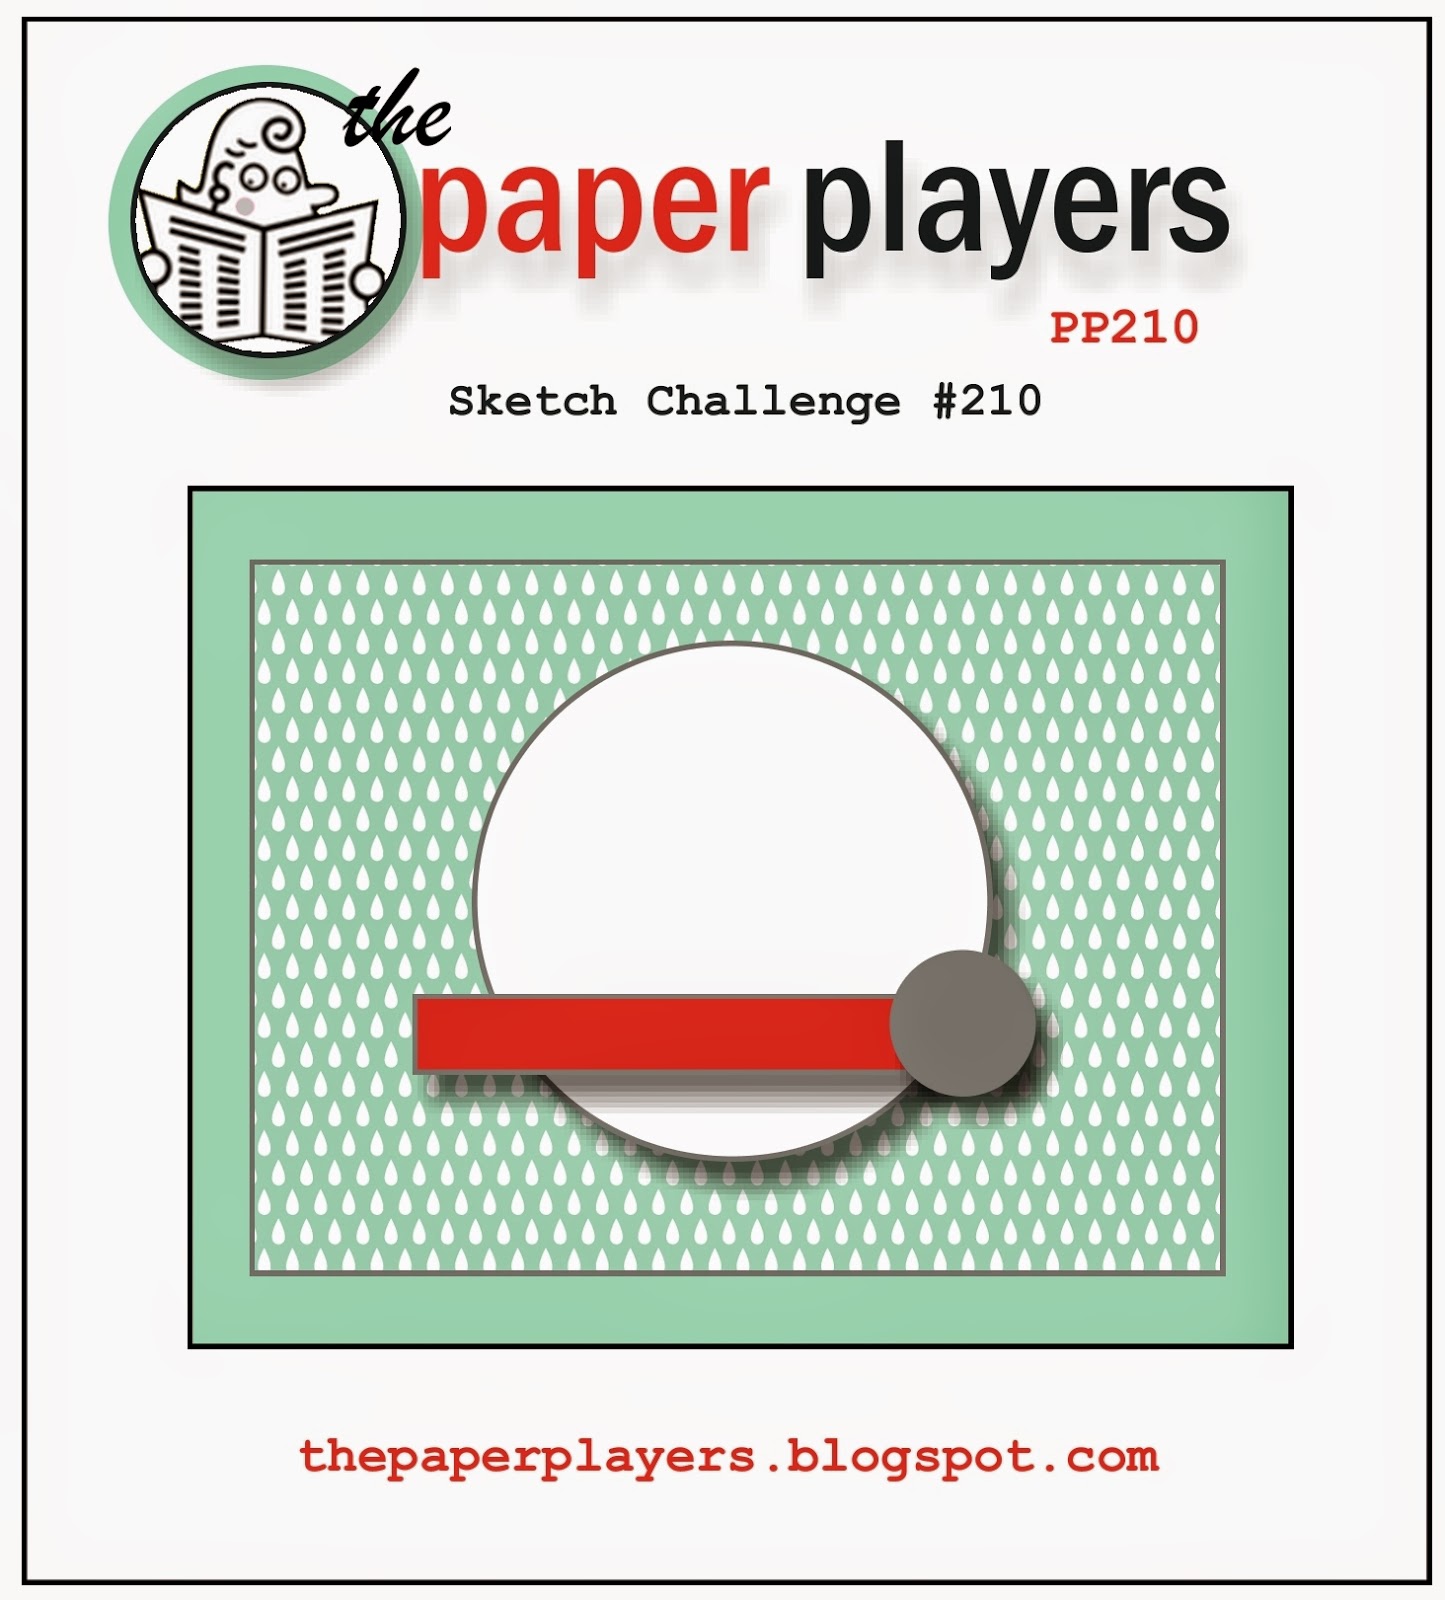
I love a good sketch layout and this one is no exception - I'd designed 3 cards with it within minutes of looking at it, so don't be surprised if you see this layout inspiring more of my creations in the coming weeks. For today though, I have another seasonal catalogue 'sneak peek' for you (I know, I'm such a tease!) - this time, with a Halloween theme:
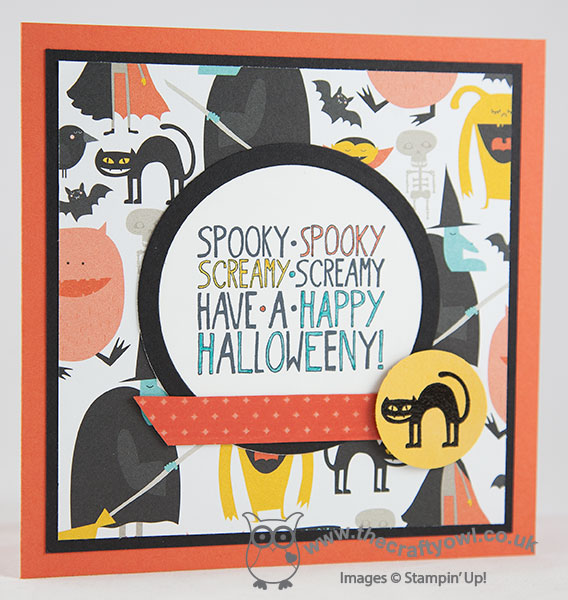
I don't normally purchase any Halloween items as I usually plough straight into Christmas, but this year I couldn't resist - there are some fantastic items to choose from! Today's card features the 'Motley Monsters' DSP and stamps from both the 'Freaky Friends' stamp set (the cat) and the 'Mingle All the Way' stamp set (sentiment). I heat embossed the cat in black so that he would be nice and shiny and coloured in the open letters of the sentiment with marker colours that co-ordinated with the DSP. The banner flag is made from a piece of Tangerine Tango cardstock covered with Retro Fresh washi tape in the same colour.
I hope this gets you in the mood for a spooky spooky halloweeny! Do pop over to The Paper Players to see what the other designers have come up with - there are some amazing takes on today's sketch.
Back tomorrow with a post for Bank Holiday Monday; until then, happy stampin'!
Stampin' Up! Supplies Used:
* Motley Monsters Designer Series Paper, Freaky Friends and Mingle All The Way - available 28th August
b2531e35-6a1f-4892-a0be-28e3bb28468b|1|5.0|96d5b379-7e1d-4dac-a6ba-1e50db561b04
Tags: Halloween, Motley Monsters, Freaky Friends, Mingle All The Way, Big Shot, Circles Framelits, Shop online, Stampin' Up, Stampin' Up Card, Stampin' Up Card ideas, Stampin' Up Supplies
Cards | Stamping
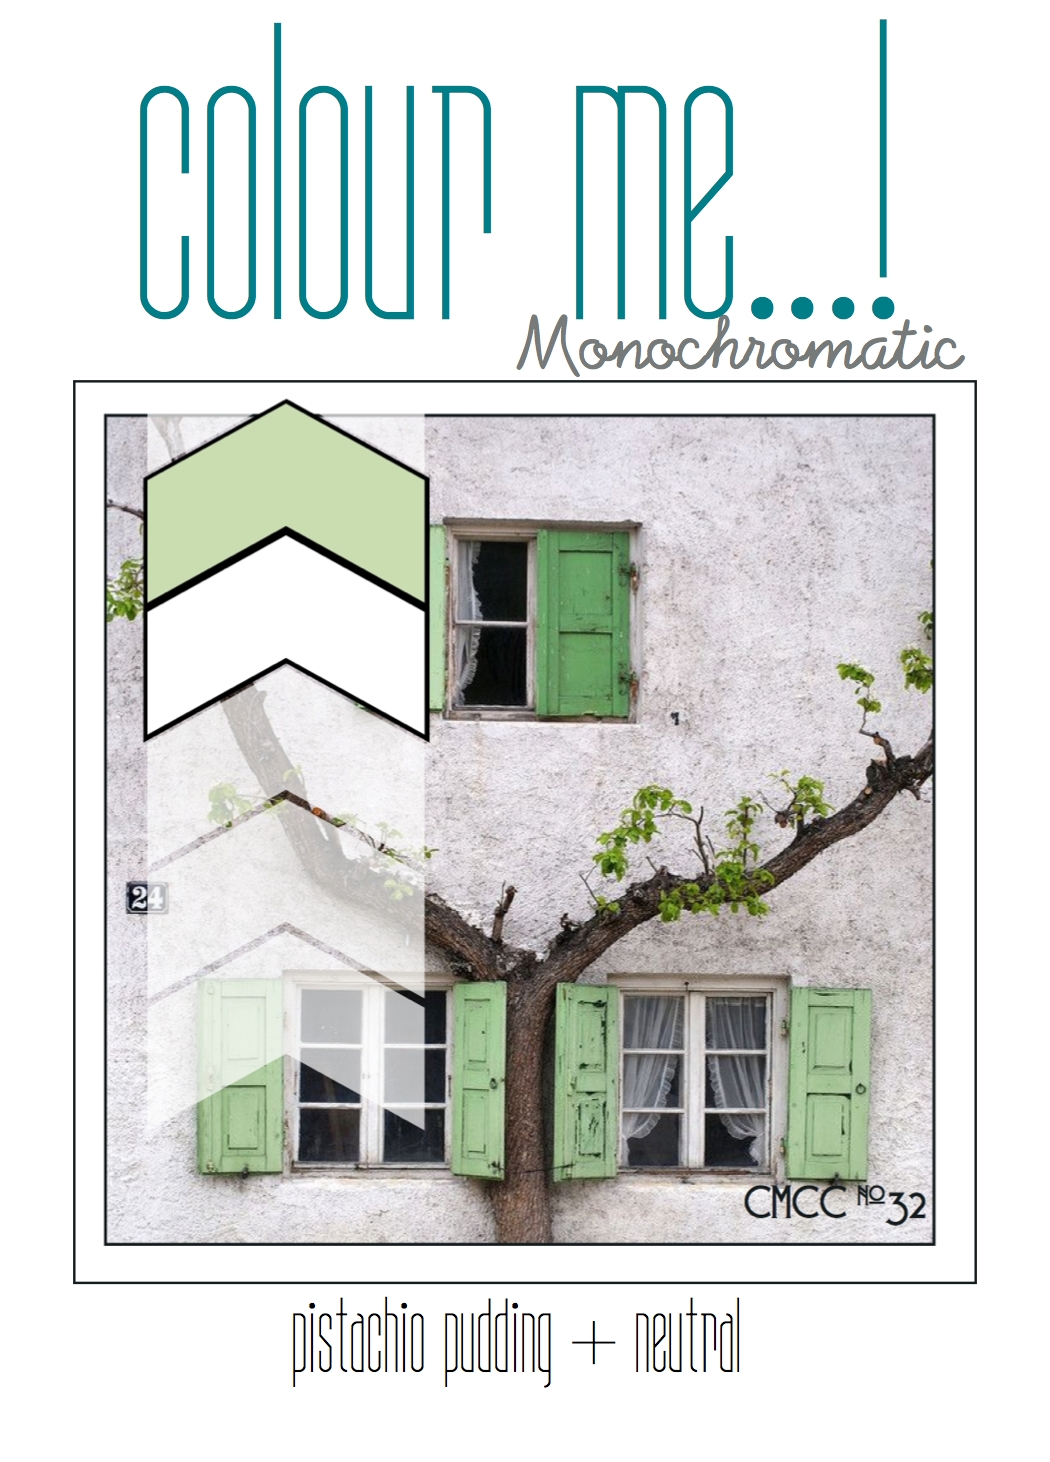
by Joanne James6. August 2014 11:00Happy Wednesday everybody! Today is a good day - the sun is shining again, my Autumn-Winter pre-order has arrived so I have lots of Halloween and Christmas goodies to play with, there's a new bunch of weekly deals (see earlier post here) and it's time for this week's Colour Me...! Challenge, where we have a monochromatic colour challenge this week using Pistachio Pudding and a neutral:
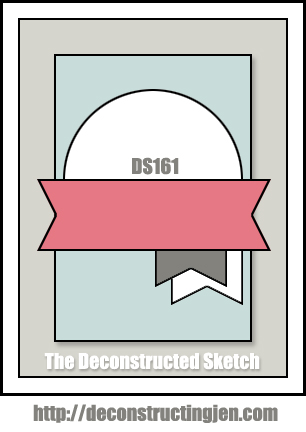
I thought this challenge would be trickier than it actually was. I used the latest sketch from the Deconstructed Sketch for my layout and inked up my new Kinda Eclectic stamp set which I have been keen to get working with - here's my card:
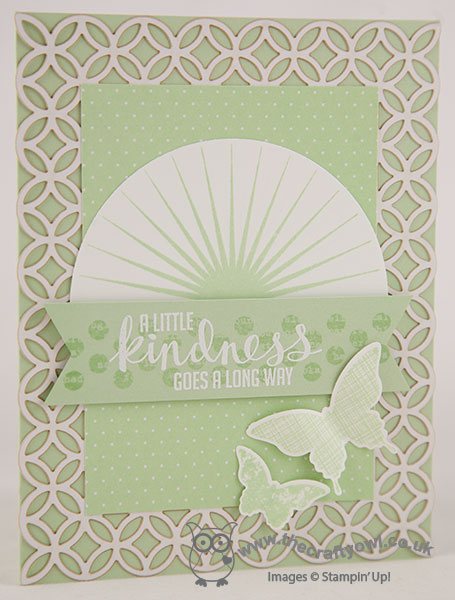
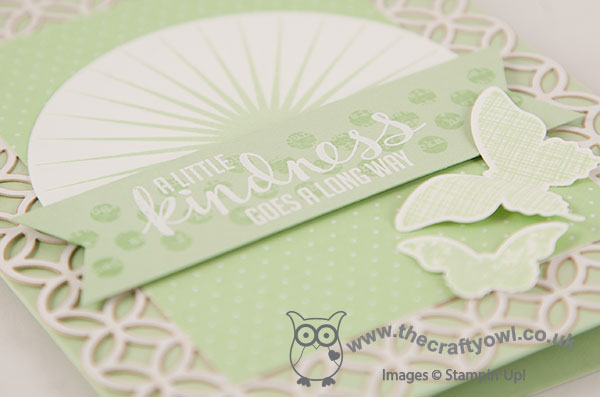
For my card I used a base of Pistachio Pudding, then layered one of the die-cut pieces from the now retired Simply Sent card kit in last year's annual catalogue. I added some Pistachio Pudding polka dot paper from the All Abloom DSP stack, then stamped the sunburst from Kinda Eclectic in Pistachio Pudding onto Whisper White and cut out using my Big Shot and Circles Framelits and cut the bottom third off the circle. For the central banner, I stamped the spots in Pistachio Pudding on the cardstock of the same colour, then stamped my sentiment in Versamark and heat embossed in White embossing powder over the top to add additional dimension. Lastly, I replaced the flags in the sketch with the butterflies from Kinda Eclectic, stamped in Pistachio Pudding onto Whisper White cardstock and punched out using the co-ordinating punches. I think the key to a single colour card where you are using one single colour plus a neutral, and don't have then benefit of tonal shades of the same colour, is to add layers, patterns and shapes for extra interest. If you're based in the UK and Europe, the Pistachio Pudding ink pad is on this week's Wednesday Weekly Deals List too and can be yours for just £3.71 instead of the usual £4.95 this week, so if you needed an incentive to have a go at this week's challenge, this is it!
I look forward to seeing what you come up with in the gallery this week - meanwhile, check out what the other designers have in store for you over at Colour Me and our new featured guest designer for the month of August.
Back tomorrow with another project for you; until then, happy stampin'!
Stampin' Up! Supplies Used:
1354179a-167f-4bc5-8a25-c568f87aa6cb|0|.0|96d5b379-7e1d-4dac-a6ba-1e50db561b04
Tags: Colour Me...!, Kinda Eclectic, Simply Fabulous Simply Sent, Butterflies, Big Shot, Circles Framelits, All Abloom, Shop online, Stampin' Up Card, Stampin' Up, Stampin' Up Card ideas, Stampin' Up Supplies
Cards | Stamping
by Joanne James3. August 2014 08:00It's time for this week's challenge over at The Paper Players and Sandy has a theme challenge for us this week that's all about buttons:
You can use any kind of buttons - real, embossed, paper - so for my card I decided to take Sandy's theme quite literally and create a 'Cute as a button' card suitable for a baby girl and featuring a clay button made with Simply Pressed Clay in one of Stampin' Up!'s silicone moulds - here is my card:
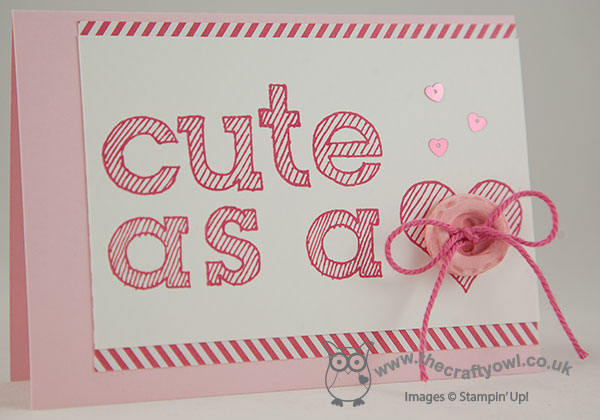
I used a Pink Pirouette card base and matted my Whisper White panel with a piece of Strawberry Slush DSP from the In-Colour stack in the chevron design, although with just enough showing so that it looks like a simple diagonal to echo the lines of the text. On my white panel, I stamped 'cute as a <3' using the new Epic Alphabet set. This set is photopolymer, which makes aligning the letters accurately so easy - with no stamp-a-ma-jig required! I moulded my clay button in the Simply Pressed Clay Mould and allowed it to dry before colouring it with my Pink Pirouette Stampin' Write marker - you can colour your clay before you mould it with reinker or afterwards with ink/markers, it's really up to you. The colour differs slightly depending on the method; personally I like to mould my buttons and embellishments in uncoloured clay a few at a time, then keep the dried pieces in a box to be coloured as required depending on the project. Here's a close up of my button:
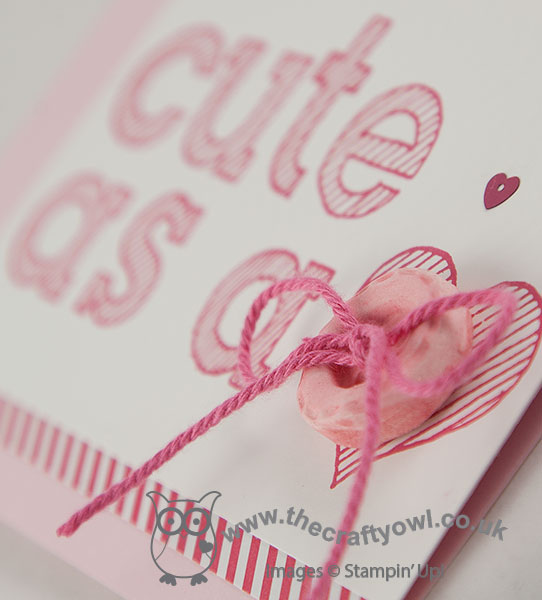
To finish, I pierced two holes in the button with my paper piercer and threaded some Strawberry Slush baker's twine through the holes and tied in a bow and added a scattering of In-Colour heart sequins.
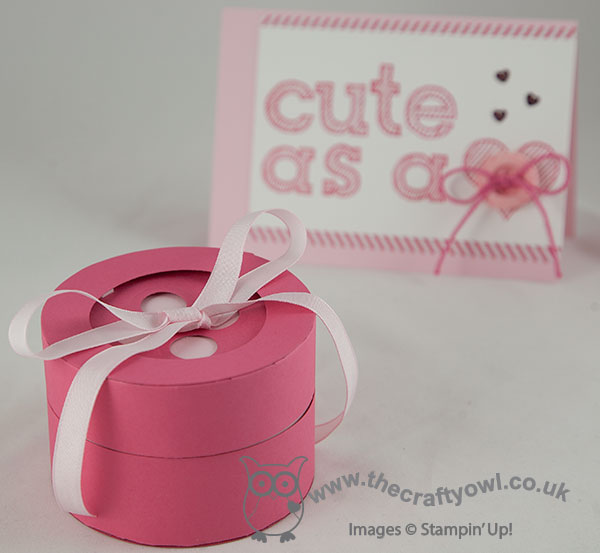
I really love how my card turned out - but I couldn't stop there! I thought it would be fun to create a button gift box to go with it, using my Big Shot and Circles Framelits - here it is:
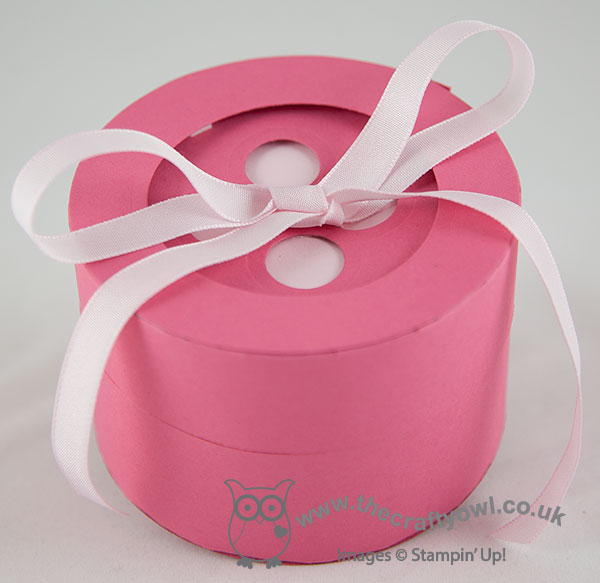
I used Strawberry Slush cardstock and the second largest of the circle framelits for my box, which measure 9.3cm in diameter and 7cm tall. I lined my box with Pink Pirouette cardstock for rigidity and to allow for an edge-to-edge closure. This box is just big enough to fit in a cute onesie, some bibs or a pair of booties - here's a photo of the inside:
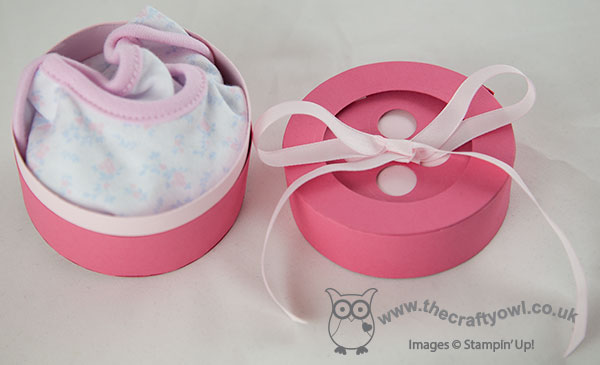
Lastly, I threaded some retired Pink Pirouette ribbon through the button holes and tied in a bow. So there you go - two cute as a button projects, I hope you'll agree! Do pop over to The Paper Players and see what the other talented designers have for you today and I very much hope you'll join us in creating something for this week's challenge.
Back tomorrow with another project; until then, happy stampin'!
Stampin' Up! Supplies Used:
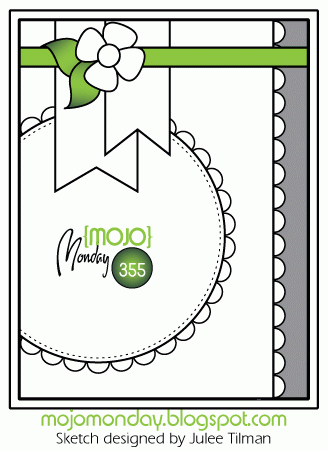
by Joanne James26. July 2014 23:24A late post from me today - I returned late yesterday evening from a family mini break and seem to have spent all day today washing and ironing, isn't that always the way?! That's not strictly true - I did manage to get some long overdue gardening done this afternoon and fit in a grocery shop; all in all a very productive day! I made this card earlier in the week for my brother-in-law's birthday; it's not until next week, but as he doesn't read my blog I know I'm safe to share! I used this week's Mojo Monday sketch challenge as the inspiration for my layout:
I've spent some time practising with my Blendabilities this week and thought today's card would be a great opportunity to show you just how great these fabulous markers are for achieiving a blended coloured image. Here is my card:
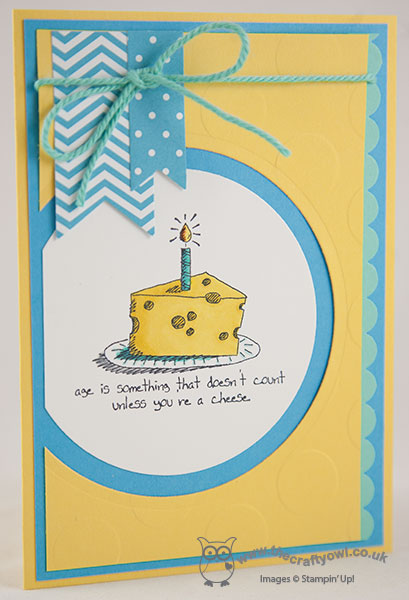
Since my Bro' is officially 'post 40' this year, this image and sentiment from the 'Giggle Greetings' set seemed rather appropriate. I coloured the candle and cheese with my Daffodil Delight and Coastal Cabana sets of markers and echoed these colours elsewhere in my card. I am loving these new pens - they allow for beautiful shading with seamless colour blending and are so easy to use - no previous expertise necessary, although if you're the type of person who liked to colour as a child, you may find them rather addictive! I also embossed the top layer of my card with the Large Polka Dot embossing folder - it kind of reminded me of the holes in the cheese, albeit a little too regular in design. Lastly, I went with thick baker's twine for my bow detail - as a true 'man's man', I'm not sure my brother-in-law would appreciate anything more fancy!
Back tomorrow with my design team card for the Paper Players this week when we have a great sketch challenge for you - and another card using my Blendabilities markers!
Until then, happy stampin'!
Stampin' Up! Supplies Used:
2fc9ef41-ffa4-4afe-b5b5-a732cb829a26|0|.0|96d5b379-7e1d-4dac-a6ba-1e50db561b04
Tags: Blendabilities, Giggle Greetings, Big Shot, Circles Framelits, Large Polka Dot TIEF, Stampin' Up Card, Stampin' Up Card ideas, Stampin' Up Supplies, Stampin' Up, Shop online, Scallop Trim Border Punch
Cards | Stamping
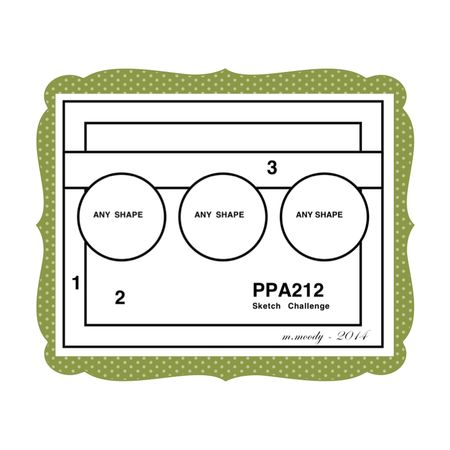
by Joanne James22. July 2014 10:00I haven't participated in the Pals Paper Arts challenge for a little while, but when I saw Margaret's sketch this week I knew it would be perfect for a special card that I wanted to make:
A friend of mine is moving to Australia - she is a native Australian, so for her it's just 'going home', but for her British husband and young children, it's emigrating to the other side of the world. So the move is a big deal and comes with mixed emotions on all sides. The great thing is though that they are taking the opportunity to spend a few months travelling the world on leaving Britain and before arriving in Australia, so rather than focus on the move I thought it would be fun to make a card to wish them all the very best for their travels. I knew I wanted to make a card using the 'Around the World' stamp set - here's what I came up with:
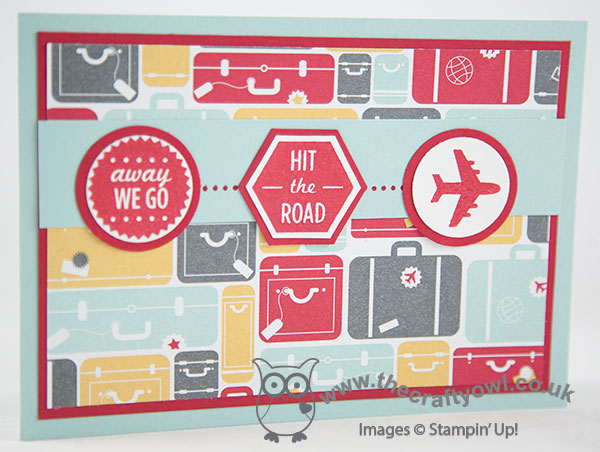
I used a Pool Party base and a mat of Real Red, along with a piece of the now retired 'I am Me' designer series paper (I am still awaiting the arrival of my new papers and besides, this one was perfect for my theme!) I added the cross-panel in Pool Party, then stamped three of the images from the Around the World stamp set in Real Red on Whisper White. I did take advantage of the 'any shape' instruction on the sketch and did a little 'mix and match', with two circles and a hexagon. The circles I cut out using my Circle Framelits and then mounted them onto some Real Red circles cut with my 1 1/4" circle punch; the hexagon I cut by hand so that I could mount it on a Real Red hexagon punched with my hexagon punch. I tied them all together by stamping the trail from the aeroplane stamp onto the Pool Party card behind them.
So a bright, fun card to wish my dear friend and her family the best of luck on their forthcoming travels.
Back tomorrow with this week's Wednesday Weekly Deals and my Colour Me...! card for this week. Until then, happy stampin'!
Stampin' Up! Supplies Used:
* I Am Me Designer Series Paper - retired
fac25a92-9dfa-4e6f-ba60-a4b558e2da25|0|.0|96d5b379-7e1d-4dac-a6ba-1e50db561b04
Tags: Around The World, I Am Me, Big Shot, circle punch, Circles Framelits, Hexagon Punch, Shop online, Stampin' Up, Stampin' Up Card, Stampin' Up Card ideas, Stampin' Up Supplies
Cards | Stamping
by Joanne James6. July 2014 08:00 
Today is a very exciting day - my first official post as a Guest Designer with The Paper Players! I am very pleased to be joining this talented group of ladies for the next three months, along with the other amazing guest designers: Claire Broadwater, Yapha Mason, Andrea Whisman and Mike Funke - I'm really looking forward to working with you all. So today's challenge is from Nance and requires projects with a beach theme:
When I think 'beach' I immediately am drawn to the bold and bright colours of the Caribbean, where, as a keen scuba diver I've spent some of my best beach holidays. However, for today's card I decided to opt for something that shows a more traditional British beach scene and took the opportunity to use one of the new in-colours, Lost Lagoon. I also used this week's Freshly Make Sketches layout (turned through 90 degrees) for my card - take a look:
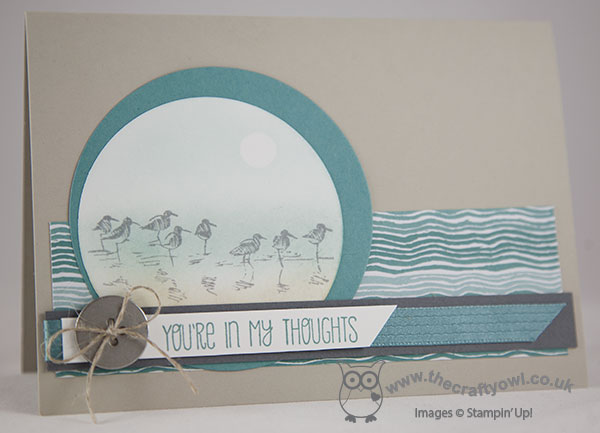
I took out the seagulls from my recently acquired 'Wetlands' set and with a Sahara Sand card base, stamped them in Basic Grey on a circle of Whisper White cut out with my Big Shot and circles framelits and sponged in the background using Soft Sky, Lost Lagoon, Sahara Sand and a little So Saffron masking the sun using a little punched circle of spare cardstock. I mounted this circle slightly offset onto a larger circle cut from Lost Lagoon and used a piece off paper from the new Moonlight Designer Series paper stack as a partial background - this paper so reminds me of waves! The pattern actually runs across the short side of the stack, so to make it extend along the whole of the long side of my card I simply matched the pattern and created a join, that is hidden behind the circular focal point - clever, eh? I then finished with a strip of Basic Grey cardstock wrapped with a piece of Lost Lagoon stitched satin ribbon, my sentiment stamped on a narrow flag and a basic metal button tied with linen thread to add to the natural feel.
I love the circular elements on this card and the muted colour scheme - it takes me back to my childhood when I lived quite near to some of the best of the British coastline and would often spend warm sunny days building sandcastles and paddling in the sea. I currently live right in the centre of 'middle England' and couldn't be further from any stretch of coastline than anywhere else in the country; I'll have to make do with watching the barges and moorhens on the local canals instead!
I hope you like my card today and that it inspires you to hop on over to the Paper Players challenge blog to join in and upload your challenge creations. The Paper Player challenge takes place weekly, opening on a Sunday at 8am (PST) and closes at noon on Friday (PST). Here's a quick recap of our challenge rules:
1. Create a new paper project
2. Upload your creation to your blog with a link back to us and provide a direct link to the post featuring your challenge submission.
3. Please link your card to no more than three challenges, TOTAL.
4. Have FUN!
We look forward to seeing your seaside-themed creations! We are having a restful family day today, having had a busy day yesterday with a theatre visit and swimming gala and the next two weeks choc full of things going on as the end of the school term draws near. Back tomorrow with another project; until then, happy stampin'!
Stampin' Up! Supplies Used:
5665b1b2-9516-4b05-819d-53b292f1af3e|0|.0|96d5b379-7e1d-4dac-a6ba-1e50db561b04
Tags: Big Shot, Circles Framelits, A Dozen Thoughts, Wetlands, Shop online, Stamp-a-ma-jig, Stampin' Up, Stampin' Up Card, Stampin' Up Card ideas, Stampin' Up Supplies, Midnight DSP Stack
Cards | Stamping
by Joanne James4. July 2014 21:54Today's card is my entry for this week's Summer Collection challenge over at Create with Connie and Mary where they have the following colour challenge:
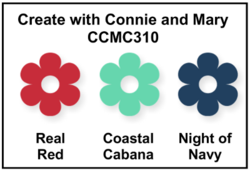
I love this colour combo and couldn't pass up the opportunity to make something with it. All of these colours can be found in the new Sea Street designer series paper, so I decided this would be my starting point. Here's my card:
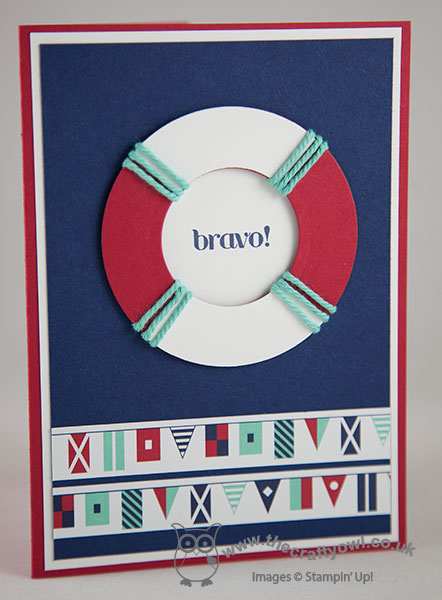
I've been wanting to make a life-buoy on a card with this paper that would enable me to use the new thick baker's twine too and this card provided the perfect opportunity. Using a Real Red base, I then used a mat of Whisper White and a further mat for the top layer in Night of Navy. I created my life buoy by cutting two rings using my circle framelits, one in red and one in white, then cutting the white one into quarters and overlaying two of the sections onto the red one. I wound Coastal Cabana baker's twine around this and adhered it to my card using dimensionals, having first stamped my sentiment onto a circle of Whisper White and adhered that directly to the card base. I then finished the front of my card with two strips of Sea Street DSP showing multi-coloured sailor's flags and stamped the co-ordinating stamp onto the inside card panel.
As my regular blog readers will know, both James juniors are keen swimmers and whilst only Rebecca currently races competitively, Ben is improving all the time as he grows older and stronger and is gaining on her all the time. He often undertakes distance swimming badges and skills-based certifications, so I made this card with him in mind - I think it will make a lovely congratulations card for my little swimmer the next time he achieves a milestone and I like that the card has a masculine feel that would suit both young and old alike.
I'll be back tomorrow with another project and I will be posting early as I will be watching the last swimming gala of the season tomorrow evening. Wish me luck - with the warmer weather we've been having the swimming baths will be roasting, so it will be all I can do to stop myself diving into the water too! Until then, happy stampin'!
Stampin' Up! Supplies Used:
by Joanne James22. June 2014 16:31Happy Monday everyone - that sure did come around again quickly! I am now officially counting down - 9 days until the launch of the new 2014-15 Stampin' Up! Annual Catalogue and more importantly 8 days until my official launch party!! You can read all about it here and I hope to see as many of you there as possible. Meanwhile, lots of jobs to do this week, the first of which is to share today's card.
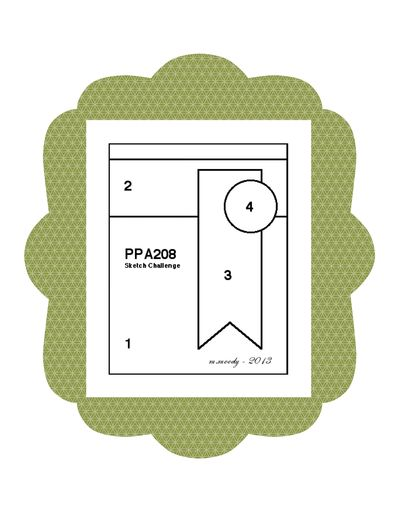
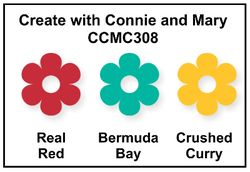
I used this week's sketch layout over at Pals Paper Arts today along with the colour palette over at Create with Connie and Mary:
I've had the idea for today's card in my head for a while and the combination of the sketch and colour scheme were perfect for my card - take a look:
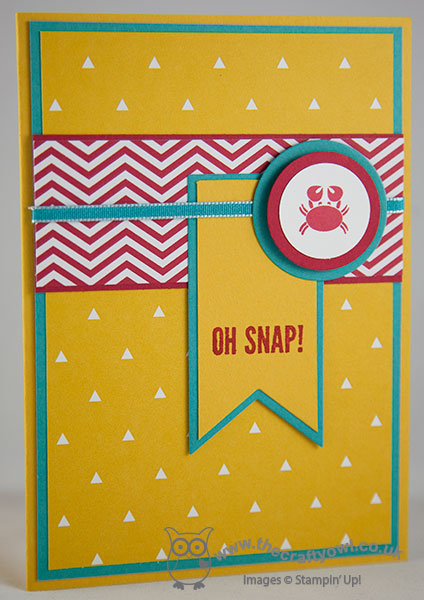
Having bought the Hip Notes stamp set because I thought it would come in useful with my Project Life memory keeping, I have also found a few other uses for it: the 'oh snap!' stamp seemed to tie in perfectly with the little crab from the Sea Street set to make a belated birthday card. I love these bright colours and decided to let the graphic red and yellow designer papers feature here with the Bermuda Bay as the supporting accent colour. My Banner Framelits made light work of the pennants and the same for the circles around the crab motif, which were made from a variety of framelits and punches. The card is quite simple with a very clean and layered look and I expanded on the sentiment inside the card:
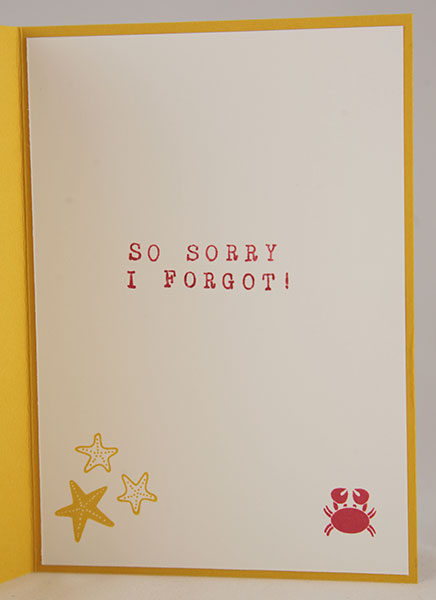
I stamped this sentiment with the new Alphabet Rotary Stamp that will debut in the forthcoming annual catalogue; I love how you can use it to make quick bespoke sentiments like this to add to a card. I'd like to say as a card maker that I never forget people's birthdays, but as a number of my closest friends will attest, that is sadly not the case! Maybe I should make a few of these cards to have on standby ready for the next time I have a moment of forgetfulness!
Back tomorrow with another project; until then, happy stampin'!
Stampin' Up! Supplies Used:
* Sea Street - available 1st July
* Alphabet Rotary Stamp - available 1st July
da9c126c-71f8-4115-a58d-81201bb75f49|0|.0|96d5b379-7e1d-4dac-a6ba-1e50db561b04
Tags: Sea Street, Kaleidoscope, Big Shot, Circles Framelits, circle punch, Banners Framelits, Belated Birthday, Shop online, Stampin' Up, Stampin' Up Card, Stampin' Up Card ideas, Stampin' Up Supplies
Cards | Stamping
by Joanne James23. May 2014 10:00Yay it's Friday - it may be stormy here in the UK, but it can't dampen that Friday feeling! Especially as this weekend we have a Bank Holiday too - an extra day makes all the difference. Today's card uses the sketch layout over at Retrosketches this week:
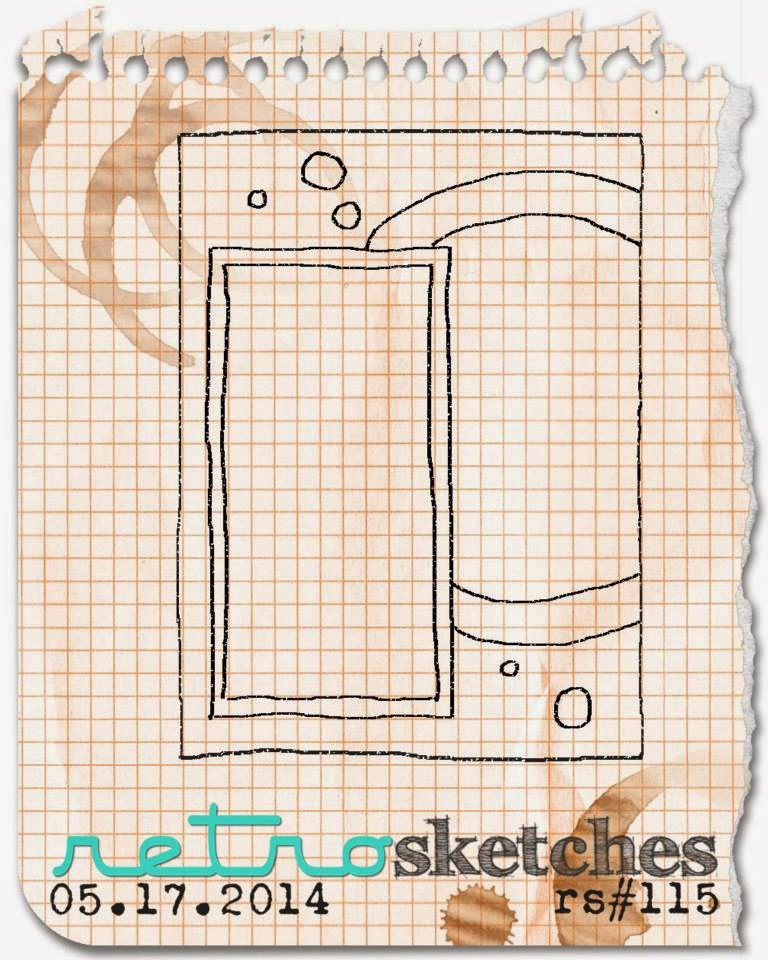
I recently had the need the need to send two sympathy cards within a week and realised that it isn't something I keep a stock of, even though it's the type of card you often need without warning. I decided to make one using this week's sketch - here's my card:
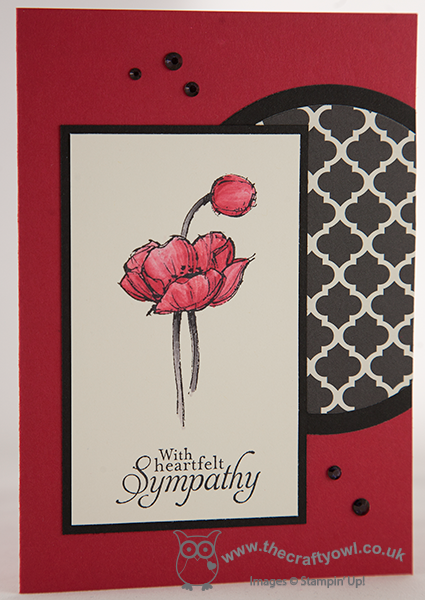
I decided to use Real Red ink and a blender pen to colour my Simply Sketched poppy, which is stamped in black Stazon on Very Vanilla. Whilst red is often associated with love and romance, the Flanders poppies were also red and they are a traditional symbol of remembrance. I matted my poppy with a layer of Basic Black, then did the same with the circle element behind, cutting the top layer from a piece of Modern Medley designer paper using my Big Shot and Circles Framelits. To finish, I coloured some rhinestones black with a Sharpie marker pen and adhered them to the card.
A nice early post from me today; no sports fixtures this afternoon, so time for a trip to the hairdressers instead - I hope the weather is kind!
Back tomorrow with another card; until then, happy stampin'!
Stampin' Up! Supplies Used: