Hot Glue Embossed Sunset Watercolour

by Joanne James12. February 2017 09:00

It's Sunday and time for this week's new challenge over at The Paper Players! It's the turn of the super-sweet and talented Nance to host this week and she has a fun colour challenge for us to work with:


I absolutely love Nance's colour combination this week - so unusual! I considered a variety of things to do with my card - mostly floral - but decided to be brave and try something different: hot glue embossing. I used this week's sketch over at CAS(E) This Sketch as it had a perfect vertical panel for my design - take a look:


Here's the low-down on today's card:

Hot glue embossing is a fun technique to combine with watercolouring. The idea is simply that you take your hot glue gun and 'draw' a pattern onto a piece of watercolour paper. Once set, you reheat the glue with your heat tool, sprinkle with embossing powder then reheat to set. I decided that I would draw a sunset with my glue gun, by creating the sun on the horizon and then some reflection and I heat embossed this with copper embossing powder.

I then used my aquapainter and Blushing Bride and Smoky Slate reinkers to colour my sky and water. I finished my card with a sentiment  from Flourishing Phrases, which I also heat embossed in copper. Finally I used a piece of copper foil to border my sentiment and watercoloured panel. 

This card is rather abstract for me, yet such fun to create and I think it makes a lovely sympathy card - I've been needing a few too many of these lately. So what do you think? Is this a technique you would like to try?

Here is the visual summary of the key products used on today's project for you to pin for easy reference:


You can see all of my Product and 'How To' summaries on my 'How To - Tips and Techniques' Pinterest board in case you've missed any. 

Before you reach for your ink and papers, check out what our amazing team has created to inspire you this week:

The Paper Players Design Team
 
 
Here's a quick recap of our challenge rules:
 
1.  Create a new paper project
2.  Upload your creation to your blog with a link back to us and provide a direct link to the post featuring your challenge submission.
3.  Please link your card to no more than four challenges, TOTAL.
4.  Have FUN! 


I look forward to seeing what you create with this week's colour palette. Enjoy the rest of your weekend as it will be over all too quickly; we are attending a basketball match this afternoon with Ben captaining his team (hopefully to victory!) I'll be back tomorrow with another project; until then, happy stampin'!


Stampin' Up! Supplies Used: 

Table built using Product Table Builder by The Crafty Owl - Independent Stampin' Up! Demonstrator.

Santa's Train Watercolour Christmas Card

by Joanne James24. September 2016 20:11

It's the weekend and I managed to squeeze in a little crafting time this afternoon to make a card for this week's challenge over at Freshly Made Sketches where Amy has given us a great sketch to work with:

So many possibilities! I decided on a little watercolouring and another Christmas card - here's my card:


Here's the low-down on today's card:

Santa's Train - I stamped the train from 'Christmas Magic' in archival black onto watercolour paper and got to work with my inks and an aquapainter to colour it in with a traditional predominantly red and green colour scheme. I also created a mask for the train and added in some trees behind to add some perspective to my winter scene.

A Wink And A Sparkle -  Difficult to see on my photograph, I added a touch of gold Wink of Stella to the bell and brass elements on my train, some clear Wink of Stella on the trees and snowy ground and some retired red Dazzling Details to my holly wreath for a little sparkle. It's very subtle but it looks very pretty in real life, I assure you!

Greetings From Santa - The 'Christmas Magic' stamp set has some lovely greetings, but none of them worked for the sentiment strip as per the sketch. Instead I chose to use this one from the 'Greetings From Santa' set which has a better fit.

Here is the visual summary of the key products used on today's project for you to pin for easy reference:


 You can see all of my 'How To' summaries on my 'How To - Tips and Techniques' Pinterest board in case you've missed any. 

I'll be back tomorrow with a card for our new challenge over at The Paper Players and I'm the hostess, so you won't want to miss it. Until then, happy stampin'!


Stampin' Up! Supplies Used:

Table built using Product Table Builder by The Crafty Owl - Independent Stampin' Up! Demonstrator.

Jar of Love Light-Up Fireflies Card

by Joanne James7. August 2016 10:00

It's Sunday and time for a new challenge over at The Paper Players! It's my turn to host this week and I have a fun theme for you to play along with:
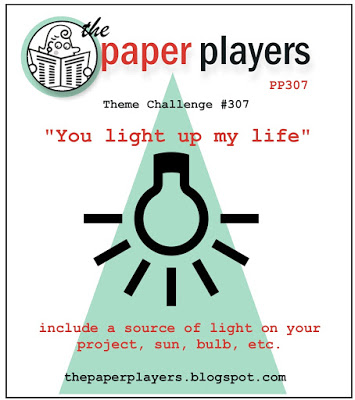
    

I decided to choose something really open-ended with my 'you light up my life' theme - from sunshine to light bulbs and everything in between, so long as your card includes a source of light, real or artificial, it will fit the bill for my challenge this week! I decided to try something that I've been wanting to have a go at for a while - an actual light-up card! Take a look:
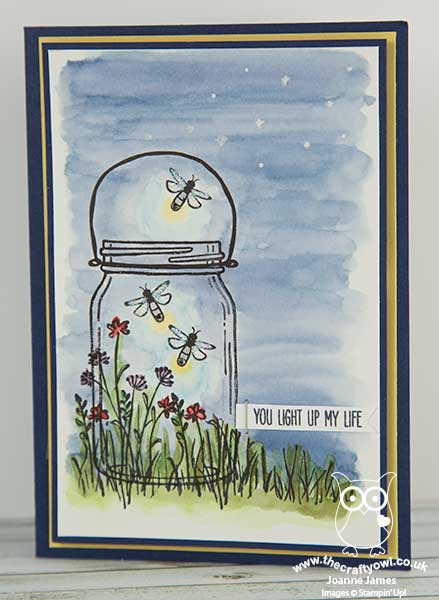
 

Here's the low-down on today's card:

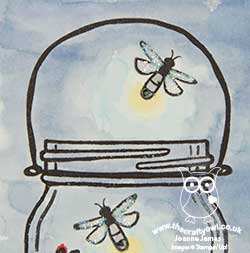
A Jar of Light and Love - I decided to watercolour a little scene for my card, stamping my large Jar of Love as the temporary home for my fireflies. I did all my stamping in Archival Black ink onto watercolour paper, then coloured my image using my inks and an aquapainter. I didn't worry about being too precise with my watercolouring as I wanted that fluid, loose feel. I also added a few tiny dots representing more fireflies in the distance with my white gel pen and some Dazzling Diamonds glitter to my firefly wings with my fine tip glue pen. 

A Fire Fly Glow - Mr James is passionate about electronics and the James Juniors are really into circuits and creating things and, amongst other things, they have made cute light-up houses with their circuit pens previously; I have been wanting to have a go at 'drawing' my own circuit and using it to incorporate lights into my card for a while so for today's card, I raided hubby's electronics supply of LEDs, circuit pens, copper tape and batteries to create my very own circuit and give my fireflies a bright glow. The circuit sits behind the image panel and when you press on the sentiment tab it completes the circuit and the fireflies light up like this:
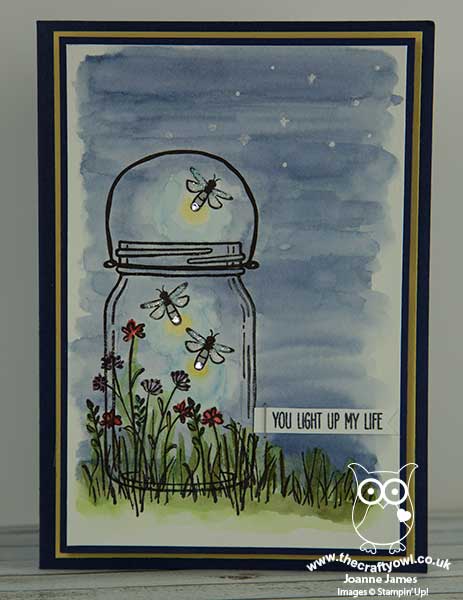
 

Isn't that just so much fun?! It really wasn't that tricky to do and does create a fun element to your card, although it can work out expensive if you need to purchase lots of electronics supplies, so this is definitely a card to send to someone special.

Meadow Grass - To create the grassy ground for my jar to sit on, I used the flower stems stamp and grass from the 'In the Meadow' stamp set. The loose, sketchy style of this set fitted perfectly with my jar and watercoloured scene. I stamped the flower stamp twice, masking the stamp the second time I stamped it so that my grasses would taper away across my card.

I'm linking today's card up with the team over at Just Add Ink where the theme is 'Just Add F' or things beginning with F - in my case, fireflies.

Here is the visual summary of the key products used on today's project for you to pin for easy reference:
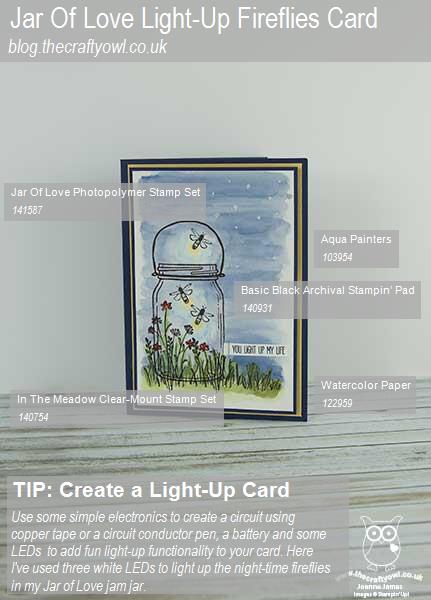
 

You can see all of my 'How To' summaries on my 'How To - Tips and Techniques' Pinterest board in case you've missed any. 

Before you reach for your ink and papers, check out what our amazing team has created to inspire you this week:

The Paper Players Design Team
 
 
Here's a quick recap of our challenge rules:
 
1.  Create a new paper project
2.  Upload your creation to your blog with a link back to us and provide a direct link to the post featuring your challenge submission.
3.  Please link your card to no more than four challenges, TOTAL.
4.  Have FUN! 


I look forward to seeing what you create with my theme this week. I am spending the day at home today, taking it easy; the James Juniors had a friend each over to camp in the garden last night so a late night and early morning will undoubtedly have been had by all! Daddy was on camp out too, so he will have fared the worst; I suspect much of today will be spent surviving until we can all have an early bedtime, but this kind of fun is most definitely what summer holidays should be about!

Back tomorrow with another project; until then, happy stampin'!


Stampin' Up! Supplies Used:

Table built using Product Table Builder by The Crafty Owl - Independent Stampin' Up! Demonstrator.

Simple Watercolouring With Bella And Friends

by Joanne James17. July 2016 09:00

It's Sunday and time for a new challenge over at The Paper Players! It's the turn of the lovely Jaydee to host this week and she has a clean and simple challenge for us to play along with:


As I was working through trying to get my cards done before my impending vacation, I was grateful for Jaydee's choice of clean and simple theme this week - watercolouring. For my card this week I decided to use my new 'Bella and Friends' stamp set and create a truly 'clean and simple card. Take a look: 


Here's the low-down on today's card:

Bella and Friends - Ok, so hands up who doesn't think this cute puppy dog set is adorable?! As my regular readers will know I am not really a pet person and so I don't have many of those kinds of stamps (read the trouble that got me into in this post earlier in the year!). With the retirement of my beloved 'Giggle Greetings', I needed an animal stamp - and the minute I saw this stamp set, I was in love! The cute puppy dog so reminds me of my brother-in-law's dog Ollie and he was the colour inspiration for my puppy today - a mix of Soft Suede and Delightful Dijon. This set is perfect for colouring, whether with an aquapainter or markers, and is also great for clean and simple cards. I like it so much, I may even be tempted to purchase the 'Pretty Kitty' cat equivalent too!

Have aquapainter, will watercolour - My favourite way to colour images like this is to use my aquapainters. I simply stamped the image in Stazon onto watercolour paper, and got right to it! I coloured the images then added a little Soft Sky and Wild Wasabi for the landscape and was done. This kind of card is good for the soul - whether it takes minutes or hours, I find colouring with my aquapainters wonderfully theraputic. How about you?

Clean and Simple - This card ticks all the boxes for a clean and simple card: minimal layers and embellishments, one simple focal image focused on one third of the card and easy to recreate - yay! 

Here is the visual summary of the key products used on today's project for you to pin for easy reference:


You can see all of my 'How To' summaries on my 'How To - Tips and Techniques' Pinterest board in case you've missed any. 

Before you reach for your ink and papers, check out what our amazing team has created to inspire you this week:

The Paper Players Design Team
 
 
Here's a quick recap of our challenge rules:
 
1.  Create a new paper project
2.  Upload your creation to your blog with a link back to us and provide a direct link to the post featuring your challenge submission.
3.  Please link your card to no more than four challenges, TOTAL.
4.  Have FUN! 


I look forward to seeing your clean and simple watercoloured creations this week. I'm off for another day of fun in the sun!

Back tomorrow with another project; until then, happy stampin'!


Stampin' Up! Supplies Used:

Table built using Product Table Builder by The Crafty Owl - Independent Stampin' Up! Demonstrator.

Grateful Bunch Spritzed Watercolour Butterfly Card

by Joanne James26. April 2016 19:00

Today I'm sharing the second of my technique class cards with you, featuring the Grateful Bunch stamp set:

This card features the butterfly and lace panel from the stamp set and was inspired by the sample in the seasonal catalogue. Here's the low-down on today's card:

Two of Three Curvy Corners - I created a layered bookmark-style panel on my card featuring the soon-to-be retired Curvy Corner Trio Punch. This versatile punch adds a beautiful decorative finish to the corners of my panel; in order to allow the top corners to be shown to full effect, I trimmed away the corners of the watercolour layer using my 1 1/4" circle punch.

Watercolour Butterflies - I stamped each of the butterflies in turn, spritzing the inked stamp with a fine mist of water before stamping onto the watercolour paper panel to create the washed watercolour look. The trick is to use a bright colour and not to over-spritz to get a good quality image.

Lovely Lace - I added a Pool Party tone-on-tone lace border to my base card along the edge of my raised panel, along with some metallic gold thread for just a hint of luxe.

Here is the visual summary of the key products used on today's project for you to pin for easy reference:


You can see all of my 'How To' summaries on my 'How To - Tips and Techniques' Pinterest board in case you've missed any. 

I designed this card with my class ladies in mind, all of whom love the versatility of the Curvy Corner Trio Punch. A couple of them are avid scrapbookers and love that they can 'pretty' their scrapbook pages with it, as well a create fancy inserts and mats and layers for cards. 

That's all from me today; I'll be back tomorrow with another project. until then, happy stampin'!


Stampin' Up! Supplies Used: 

Table built using Product Table Builder by The Crafty Owl - Independent Stampin' Up! Demonstrator.

Honeycomb Happiness Meets Birthday Bouquet Ice Creams!

by Joanne James23. March 2016 20:20

The middle of the week has arrived - and a short week at that! Today I have a card to share with you for this week's challenge over at TGIF Challenge that also uses the sketch layout at Fab Friday:


I got such lovely comments on my card for last week's TGIF Challenge, that when I saw the badge for this week I just knew it was the perfect opportunity to get out the ice cream patterned paper in the Birthday Blossoms DSP and play along. Here is my card:

My card is a mix of mouth-watering ice-cream in pastel colours, with a little texture and another go at no-line watercolouring. Today's highlights include:

A sweet treat stamp and paper combination - The Birthday Bouquet Designer Series Paper has some gorgeous florals, but also includes a number of great alternative patterns that are perfect for a sweet celebration. I love these soft, watercoloured ice creams and decided to stamp one using the ice-cream stamp in the 'Honeycomb Happiness' Sale-A-Bration stamp set onto watercolour paper and coloured it using inks and my aquapainter to mirror those on the paper. I needed a small sentiment that wouldn't overwhelm my cone, so I trimmed the top part away for a better fit.

A colour combination that's good enough to eat - I love the combination of pale pink and pale green, with the warm brown of soft suede - the ice-creams combine these colours perfectly and the pink and brown make the perfect base for my card. Here's this colour combination if you would like to save it to use on your projects:


Waffle-y Versatile Stylish Stripes - I used the pastels for the horizontal stripes on my card and decided to use Soft Suede to mat my watercoloured image. I don't often use texture and embossing on my cards but decided to create a little more interest with a textured layer that emulated the cone of my ice cream. The Tiny Triangles or Zig Zag Textured Embossing Folders would have been good choices, but since I don't own either of those I embossed my cardstock twice with my trusty Stylish Stripes Textured Impressions Embossing Folder, embossing once then rotating my cardstock through 90 degrees and embossing again to give a criss-cross look. It works for me!

Here is today's visual summary of the key products used for you to save for easy reference:

I hope you like today's card. As I mentioned yesterday, today is the first day of the school holidays and when I returned from my drop-in Coffee and Card session at Bell of Northampton this morning (I'll be back to share the card we made today later in the week), Rebecca decided that having played outside all morning, she wanted to do something creative this afternoon. So what do you do when two of your greatest passions in life are Lego and craft? Well, you use your Lego Mindstorms to build a robot that you can programme to decorate your Easter eggs! We made a short video to show the results and I thought I'd share here as I thought the results were rather impressive:

Who said school holidays were boring? Not when you're 10 years old and a member of the James family, for sure!

Back tomorrow with this week's card for the new challenge over at Create With Connie and Mary; until then, happy stampin'!


Stampin' Up! Supplies Used:

Table built using Product Table Builder by The Crafty Owl - Independent Stampin' Up! Demonstrator.


Honeycomb Happiness Chick Amongst The Flowers

by Joanne James20. March 2016 09:00

It's Sunday and time for a new challenge over at The Paper Players! It's the turn of our very own Birthday Girl, the lovely Jaydee, to host our challenge this week and she has a fun clean and simple theme for you to play along with:


So along with Jaydee's birthday - happy birthday wishes to you Jaydee! - we are also celebrating the arrival of Spring! For my card this week I was inspired to use the cute little chick from the Sale-A-Bration Honeycomb Happiness stamp set, this time in conjunction with the floral spray in the 'Number of Years' stamp set. I used this week's layout over at Freshly Made Sketches for my card - take a look:


Key points to note about today's card:

More than a number - The 'Number of Years' stamp set is big on numbers, but it also has this lovely floral spray which can be used in conjunction with the other stamps in the set or for something totally different, as I've done here. The watercolour-effect stamp was the perfect pairing for my no-line watercoloured chick today. I stamped it twice, masking my chick once so that some of the stems appeared behind for depth of field, then went over the top with my aquapainter to further enhance to watercoloured effect. 

No-line watercolouring - I've used this technique with this same little chick previously (you can see that card here). Today I wanted to use soft pastels and delicate colouring to have him peeking out of the spring flowers, so no-line watercolouring was the perfect solution. I stamped him in Sahara Sand and coloured him in So Saffron and Daffodil Delight with my aquapainter to give him a realistic finish.

Sketches are open to interpretation - Kim's sketch is great but I needed my chick to be grounded and not floating in mid-air, so I rotated the sketch through 180 degrees (this is allowed!) I used the floral spray to give the circular shape within the sketch without adding another layer to my card and keep it looking 'clean and simple'.

A bold Hello - With such delicate watercoloured pastels, I decided to stamp my sentiment in Versamark on Basic Black and heat emboss in white to give my sentiment some prominence. I then punched this out with my Word Window Punch. A nice contrast I think to the softness of the rest of my card.

I'm also linking up my card today with the challenge over at Addicted to CAS, where the current theme is 'delicate' and SUO Challenges where the theme is 'welcome Spring'.

Here's today's visual summary of the key products used on today's card for easy reference:


Before you reach for your ink and papers, check out what our amazing team has created to inspire you this week:

The Paper Players Design Team
 
 
Here's a quick recap of our challenge rules:
 
1.  Create a new paper project
2.  Upload your creation to your blog with a link back to us and provide a direct link to the post featuring your challenge submission.
3.  Please link your card to no more than four challenges, TOTAL.
4.  Have FUN! 

I look forward to seeing what you create with this week's clean and simple theme. We have a jam-packed day of sport today: hockey and basketball training, followed by a hockey tournament, lunch and then both James Juniors are playing in a basketball match. I'm thinking we need to start the day with at least two Weetabix each to get us through to dinner!!

Back tomorrow with another project; until then, happy stampin'!


Stampin' Up! Supplies Used:

Table built using Product Table Builder by The Crafty Owl - Independent Stampin' Up! Demonstrator.

Honeycomb Happiness Hello Chick

by Joanne James22. February 2016 07:30

Happy Monday everyone! I have a card made with a few challenges in mind today:


I was keen to try out an idea I had for this week's challenge over at CASology where the cue card is 'egg' and decided to use the open sketch over at Freshly Made Sketches for my layout. I've seen lots of cards on Pinterest featuring no-line watercolouring this week, so wanted to have a go using the little chick in the 'Honeycomb Happiness' stamp set, one of a number of Sale-A-Bration stamp sets that is free with a £45 spend before 31st March. I will also be linking up to SUO Challenges where the team are featuring Sale-A-Bration products in their challenge this week. Here's my card:

How cute is this little fella? I think he is adorable! I stamped my chick onto watercolour paper in Sahara Sand, then watercoloured him using my aquapainter and So Saffron, Daffodil Delight and Crushed Curry inks. The key to no-line watercolouring is to make sure that when you stamp your initial image you use a light-coloured ink that 'disappears' as you colour in. Having painted his whole self, I then proceeded to cover him up! I fussy cut an eggshell, also from watercolour paper, then coloured it with my Soft Sky ink and adhered it over my chick so that it looked like he was just breaking out of his shell. Some shadow and a sentiment finished this panel. I then added a thin strip of Everyday Chic designer series paper along the edge, having coloured in the pattern with my Daffodil Delight and Crushed Curry Stampin' Write markers, before adhering to my Daffodil Delight card base with dimensionals. I really enjoyed my first attempt at this style of watercolouring and I can see me using this chick in lot of other ways too. He will undoubtedly be useful as Easter approaches, but he would also make a cute addition to a baby card. The one thing I'm not sure about in hindsight is the strip of dsp - I think it's a little bold for the rest of my card. 

Here is today's visual summary for easy reference:


That's all from me today; I'll be back tomorrow with a super cute project for this week's challenge over at Pals Paper Arts. Until then, happy stampin'!


Stampin' Up! Supplies Used:

Table built using Product Table Builder by The Crafty Owl - Independent Stampin' Up! Demonstrator.

Wetlands Thinking Of You

by Joanne James18. June 2015 08:00

It's Thursday and time for this week's new challenge over at Create With Connie and Mary. This week we have a colour challenge for you:

I found this quite a difficult colour combo to work with (I think it was the brown and grey together that did it for me), although the brown and grey duo did remind me of Canadian geese, so in the end I went with a rather safe masculine card using my Wetlands set: 

I combined this trusted favourite, which I stamped in Chocolate Chip on watercolour paper and coloured in all three inks using my Aquapainter, with some of the new Chocolate Chip Neutrals DSP Stack with the polka dot pattern. My Island Indigo circle is also embossed with the Large Polka Dots embossing folder, although it is difficult to see in the photo. A little background Gorgeous Grunge, some threads of jute ribbon and a candy dot finish my card.

Do pop over and see what the other designers have come up with  - there are some great examples of how this trio can be combined on your cards! Don't forget to check out the challenge rules too before entering :-)

I'll be back tomorrow with a bright and colourful birthday card; until then, happy stampin'!


Stampin' Up! Supplies Used:

  • Big Shot
  • Magnetic Platform
  • Wetlands Clear Stamp Set
  • 2" Circle Punch
  • Watercolor Paper
  • Aqua Painters
  • White 1-1/4" (3.2 Cm) Jute Ribbon
  • Gorgeous Grunge Clear-Mount Stamp Set
  • Polka Dot Textured Impressions Embossing Folder
  • Island Indigo Classic Stampin' Pad
  • Island Indigo A4 Cardstock
  • Chocolate Chip Classic Stampin' Pad
  • Chocolate Chip A4 Cardstock
  • Smoky Slate Classic Stampin' Pad
  • Smoky Slate A4 Cardstock
  • Regals Candy Dots


Awesomely Artistic Watercolour Card

by Joanne James13. June 2015 21:54

Saturday already - I just don't know where this week has gone! I've spent most of today baking in readiness for a very special young lady who is about to turn 'double digits' in the birthday stakes (more on that later in the week!) so just have time for a quick post today to share the 'make and take' card that I made recently at the Stampin' Up! event held in Telford recently, using a beautiful new set called 'Awesomely Artistic':

The base of the card is one of the new in-colours, Mint Macaron, decorated with a piece of burlap. The main panel is watercolour paper, stamped with a blossom in Mint Macaron and some grunge splatters from the same set in Delightful Dijon. The dragonfly was stamped and spritzed with water so that the colour would bleed into the paper. The sentiment is from another new set, 'One Big Meaning' and was stamped in Tip Top Taupe, firstly directly onto the watercolour paper and then again onto Very Vanilla and the bottom part cut out and popped up on a couple of dimensionals. A vintage faceted button and a sprinkle of pearls complete the card - I even remembered to decorate the envelope too!

There are some gorgeous images in the 'Awesomely Artistic' stamp set and you can be sure that you will be seeing more of this set from me. 

Back tomorrow with a new challenge over at The Paper Players; until, then, happy stampin'!


Stampin' Up! Supplies Used:

Table built using Product Table Builder by The Crafty Owl - Independent Stampin' Up! Demonstrator.


Mini Catalogue

BROWSE THE CATALOGUE

The mini catalogue is now live! Read and download your copy here.

Shop Online

Access my online shop 24 x 7, 365 days of the year:

Current March hostess code:

S9F2XJJW

Shop Online

Join My Team

It's always a great time to join Stampin’ Up! New team members can get £130 worth of products for only £99 + free business supplies + free shipping + all the fun being a part of Stampin’ Up! Stampin' Up! has something for everyone: join my growing team and benefit from my support to enjoy Stampin' Up! however you choose.

If you're interested, call me for a chat to understand how I can help you realise your goals. Alternatively, if you have already decided to sign up and you just can't wait, please click here for the link to the online form where you can sign up and order your starter kit right away! 

Latest Kit!

Stampin Cut and Emboss

The Rock Legend Kit has all you need to make 8 cards with coordinating envelopes. Along with the new Panda Friends Kit, both are available from January 4th for just £14 each - get yours here!

2023-24 Annual Catalogue

BROWSE THE CATALOGUE

Click on the catalogue for a full list of current SU! supplies - if you would like to order any of the items featured, please drop me a line at [email protected] or give me a call on 07773 421446 - I'd be happy to help.

New Online Exclusives

There will be new products available exclusively in the online store from 5 March - check them out here.

About Me

Hi I'm Joanne and live in Northampton and when I'm not looking after my husband and two beautiful children, am an avid crafter with a passion for all things Stampin' Up!

I must confess that I have never been a big rubber stamper - until I discovered Stampin' Up! that is. I love the fact that I can get such great results with co-ordinating stamps, inks, papers and punches - the possibilities are endless! Join me on my stamping journey as I share the things I love and be inspired to create amazing things yourself!

Follow Me

Monthly Newsletter

Box Builder

Click the button above to use Box Buster to create your custom box design using the Envelope Punch Board!

Kits Collection Now Available!

Stampin Cut and Emboss

The new Kits Collection from Stampin' Up! is now available!

Click here to see the current kits available and order yours online today.

I Design For


Stampin' Up Stuff

This is my personal blog and is not endorsed by Stampin’ Up! I hope you find it a plentiful source of ideas and personal inspiration but please don't copy my designs for contest submission or use for classes, publication or sale without express permission.