Seasonal Chums Watercoloured Pumpkin CAS Card for The Paper Players PP362

by Joanne James17. September 2017 09:00

It's Sunday and time for this week's new challenge over at The Paper Players! It's the turn of my good friend, the awesome LeAnne, to host this week and she has a timely clean and simple challenge for us to work with:


I'm also playing along with the team over at Stamp Ink Paper today as I'm just in time to link up with their CAS Fall challenge and the lovely ladies over at SUO Challenges where the theme is Autumn colours.

When I think about harvest, I think about harvest loaves, vegetables from the garden ... and pumpkins! I love the photo inspiration that Nance found for this week's challenge and I decided I just had to have pumpkins on my card. I decided to go with something a little different - take a look:


Here's the low-down on today's card:

Pumpkins Are For Harvest, Not Just For Halloween - Most of the pumpkin stamps I have in my set are ones with carved faces, all ready for Halloween. This stamp from the new seasonal catalogue is one of the few that I own that isn't - do you recognise which set it comes from? It's actually from the 'Seasonal Chums' set on page 47, but it's not the front of the face on the Halloween tag - it's the back piece of the same tag. I've circled it below so that you can see which one I mean:


This part of the stamp makes for a perfect pre-carved pumpkin - all I needed to do was mask off the front portion of the stamp and stamp just the back image. I also created a mask out of a post-it note to enable me to stamp my trio of pumpkins overlapping each other, to create depth and dimension.

No Line Watercolouring -  I decided to use a little no-line watercolouring to give my pumpkins a natural look. I love this effect and it's so easy to achieve: simply stamp your chosen image in a pale colour such as Sahara Sand onto watercolour paper, then use your chosen inks and an aquapainter to colour your stamped images normally, making the lines 'disappear'. 

Colours of Fall - Warm yellows, oranges, reds, browns and olive greens are the colours I associate with autumn and I chose to focus on orange and brown on my card today. Here's my colour palette should you wish to save it as inspiration for your fall projects:


To finish my card I added a little lace and ribbon embellishment (retired bits and pieces); not something I usually do with a CAS card, but I felt my card needed a little something just to balance it visually. I love this card!

Here is the visual summary of the key products used on today's project for you to pin for easy reference:


You can see all of my Product and 'How To' summaries on my 'How To - Tips and Techniques' Pinterest board in case you've missed any. 

Before you reach for your ink and papers, check out what our amazing team has created to inspire you this week:

The Paper Players Design Team
 
 
Here's a quick recap of our challenge rules:
 
1.  Create a new paper project
2.  Upload your creation to your blog with a link back to us and provide a direct link to the post featuring your challenge submission.
3.  Please link your card to no more than four challenges, TOTAL.
4.  Have FUN! 


I look forward to seeing your clean and simple creations in the gallery this week. Enjoy the rest of your weekend as it will be over all too quickly; mine is sports-filled, with hockey, swimming and ice hockey yesterday and basketball and more hockey today! I'll be back tomorrow with another project; until then, happy stampin'!


Stampin' Up! Supplies Used: 

Table built using Product Table Builder by The Crafty Owl - Independent Stampin' Up! Demonstrator.

Card Front Builder Christmas Shaker Card PP361

by Joanne James10. September 2017 09:00

It's Sunday and time for this week's new challenge over at The Paper Players! It's the turn of my fellow Brit turned Yankee teamie, the lovely Jaydee, to host this week and she has a fun colour challenge for us to work with:


Before I get into my post today, you will notice that our esteemed team leader, the fabulous Nance Leedy, is off this week; she is currently battling with the effects of Hurricane Irma; we love you Nance and our thoughts and prayers are with you that you and your family are safe! The same goes for anyone else reading this who is impacted either directly or indirectly by the devastating effects of the hurricanes moving through the Caribbean and USA currently.

Back to my card. Whilst these colours made me think 'floral', I struggled to incorporate the silver into my floral design so decided instead to create an unconventionally-coloured Christmas card with my Card Front Builder Thinlits Dies - take a look:


Here's the low-down on today's card:

Card Front Builder Dies - With the exception of a one-word stamped sentiment, today's card focuses on the Card Front Thinlit Builder Dies. I used a trio of trees to edge my shaker window and the teeny tiny deer to create a simple wintry scene.

Softly Falling Snow - Today I've used another embossing folder - my all-time favourite, the Softly Falling Textured Impressions Embossing folder. It provides great texture for my top card layer and my winter scene.

Shake, Shake, Shake - I continued my softly falling snow by creating a shaker card window as a focal point for my winter scene and filled it with white mica flakes. These were in last year's seasonal catalogue however you can currently snap them up on the clearance rack; they make a great alternative to sequins for a softer look and feel.

Here is the visual summary of the key products used on today's project for you to pin for easy reference:


You can see all of my Product and 'How To' summaries on my 'How To - Tips and Techniques' Pinterest board in case you've missed any. 

These may be unusual colours for a Christmas card, but I think they work. What do you think? Are there any unusual colour combinations you like to try on your Christmas cards? Do leave me a comment below - I'd love to hear your thoughts. 

Before you reach for your ink and papers, check out what our amazing team has created to inspire you this week:

The Paper Players Design Team
 
 
Here's a quick recap of our challenge rules:
 
1.  Create a new paper project
2.  Upload your creation to your blog with a link back to us and provide a direct link to the post featuring your challenge submission.
3.  Please link your card to no more than four challenges, TOTAL.
4.  Have FUN! 


I look forward to seeing what you create with this week's colour palette. Enjoy the rest of your weekend as it will be over all too quickly; I'll be back tomorrow with another project; until then, happy stampin'!


Stampin' Up! Supplies Used: 

Table built using Product Table Builder by The Crafty Owl - Independent Stampin' Up! Demonstrator.

Window Box Thinlits Pencil Gift Box and Back To School Card For The Paper Players PP360

by Joanne James3. September 2017 09:00

It's Sunday and time for this week's new challenge over at The Paper Players! My dear friend Claire is the hostess this week and she has a fun and timely theme for us to work with:


I know some of my readers in other countries have already seen a return to school, but for us this week Wednesday is the day, so this week's challenge is a timely one. Is it me or do all Mums especially get just a little excited at the prospect of the start of a new academic year and a return to school after the long summer break? Don't get me wrong, I love having my two Juniors at home and am thankful for the break from the sometimes relentless activities that comprise the school routine, however all good things must come to an end and so it is that we are getting ready to begin a new school year, with the excitement, opportunities and challenges that this will undoubtedly bring.

I've double projects for you today as I needed some gift packaging for a teacher gift this week, so took the opportunity to create a fun gift box and co-ordinating card - take a look:


The gift box is rather large (approx. 18 inches long) so was something of a challenge to photograph but hopefully the detail below will enable you to see how I made it. Here's the low-down on today's projects:

A Window Turned Pencil Box - Having made an elongated box with my Window Box previously with the ladies in one of my technique classes earlier this year, I knew that I could use the same idea to create my pencil-shaped box. I cut one piece of the window box without cutting straight through and elongated this for the length of my sheet of A4 Crushed Curry cardstock. I then cut another piece that was the same length and the width of three sides, for the opposite 3 sides of my pencil, but without a bottom/lid. Instead I used some Maths to create a template for my pencil point in Crumb Cake, and adhered this inside the end of the tube to create my pencil point:


Here's a shot showing you how the main body of the pencil box opens to accommodate the main gift:


In addition to the main box, I also made a complete box using my Window Box Thinlits in Blushing Bride for my eraser and adhered this to the top of my pencil, which also opens separately - just big enough to add a little treat or two inside to accompany my main gift:


Finally I added a sleeve created from silver foil, to hold the pencil box closed securely - it just slides off to create access to the main box. A banner tag decorated with an apple - every teacher project has to have one, right? - finished my box. 

Pieces And Patterns For A Co-ordinating Card - I wanted a card to co-ordinate with my gift box, so decided to replicate the pencil design on a simple card using the pencil stamp from the Pieces and Patterns set. I masked a square and created my own repeating pattern - thank heavens for a stamp-a-ma-jig! - and then added a banner sentiment from the same set, again anchored with an apple (made using an old die I have in my stash):

Back To School Colours - My back-to-school pencil and apple colours fit perfectly with the colour palette and photo inspiration over at The Color Throwdown this week (I hope I'll be allowed my pink eraser and a few neutrals (the pencil really wouldn't be complete without it). I'm also linking my card up with the challenge over at Addicted to CAS where the code word is 'apples' and both of my projects fit the bill over at Paper Craft Crew where they have extended their 'back to school' challenge for another week:

      Play along with the Paper Craft Crew Theme Challenge 257! Visit www.papercraftcrew.com #theme #themechallenge #stampinup #sunnygirlscraps #playalong #cardmaking #papercrafting #papercraft #scrapbooking #handmade #rubberstamping #cards

Here is the visual summary of the key products used on today's project for you to pin for easy reference:


You can see all of my Product and 'How To' summaries on my 'How To - Tips and Techniques' Pinterest board in case you've missed any. 

Before you reach for your ink and papers, check out what our amazing team has created to inspire you this week:

The Paper Players Design Team
 
 
Here's a quick recap of our challenge rules:
 
1.  Create a new paper project
2.  Upload your creation to your blog with a link back to us and provide a direct link to the post featuring your challenge submission.
3.  Please link your card to no more than four challenges, TOTAL.
4.  Have FUN! 


I look forward to seeing what you create with this week's theme. Enjoy the rest of your weekend as it will be over all too quickly; I'll be back tomorrow with another project; until then, happy stampin'!


Stampin' Up! Supplies Used: 

Table built using Product Table Builder by The Crafty Owl - Independent Stampin' Up! Demonstrator.

Birthday Memories Big Birthday Card For The Paper Players

by Joanne James27. August 2017 10:00

I've been absent from my blog for a few days - once again precious time with my Juniors this week as we make the most of our school summer holidays hasn't left me time for blogging during the latter part of this week. Luckily for you today it's Sunday and time for this week's new challenge over at The Paper Players! The lovely Laurie is the hostess this week and she has a sketch for us to work with:


I tried a few different things for my card today, but kept wanting to put a sentiment in the circle! Since I was trying to be truly faithful to Laurie's sketch, I kept at it then it hit me - the answer was in a piece of paper I have been saving for just such an opportunity! Take a look:


Here's the low-down on today's card:

What Birthday Memories Are Made Of -  In the end this card makes me feel like a little bit of a cheat, since there is very little stamping and the gorgeous sheet of Birthday Memories Designer Series Paper does all the hard work! There are some gorgeous papers in this pack, all of which contain intricate and colourful birthday imagery reminiscent of days gone by. The sheet I've used today is a design that covers the whole of the 12" x12" sheet and is really one that is hard to cut into. It makes a beautiful gift box lid or gift bag where you can see the entire animal parade.

Big Is Beautiful - I happened to have a half-width of this sheet of designer paper left over from another project, so decided to upsize my card to the larger size of 14.9cm x 21cm in order to accommodate as much of the design as possible, including those fun floating balloons. To emphasise the shape of the sketch, which I represented with the little racoon, I decided to fussy-cut another identical racoon out of one of the other sheets of DSP and pop it up on dimensionals, allowing it to hang over the edge of my central panel. 

Don't Forget The Envelope - The only stamping on my card front was for my sentiment I couldn't resist embellishing with a gift that I also cut out of the DSP too), and on the inside. I also used the 'Birthday Delivery' stamp set to stamp and decorate my envelope front and back though - a special handmade card shouldn't stop at the card front, although I don't often photograph mine to share with you. For some great examples of this be sure to check out my teamie Nance's blog - her cards always look as fabulous on the inside as on the outside :-)

Here is the visual summary of the key products used on today's project for you to pin for easy reference:


You can see all of my Product and 'How To' summaries on my 'How To - Tips and Techniques' Pinterest board in case you've missed any. 

This paper is truly gorgeous and it's almost as if it was made for Laurie's sketch this week. I love this card - I just need to find a special little person to send it it to now! 

Before you reach for your ink and papers, check out what our amazing team has created to inspire you this week:

The Paper Players Design Team
 
 
Here's a quick recap of our challenge rules:
 
1.  Create a new paper project
2.  Upload your creation to your blog with a link back to us and provide a direct link to the post featuring your challenge submission.
3.  Please link your card to no more than four challenges, TOTAL.
4.  Have FUN! 


I look forward to seeing what you create with our sketch this week. Enjoy the rest of your weekend as it will be over all too quickly; we are lucky that we have a Bank Holiday here in the UK so it's a slightly longer one than usual - I'm hoping for some sunshine! I'll be back this week with some of the projects from my last class and maybe even another sneak peak or two of some great sets from the upcoming Autumn-Winter seasonal catalogue, so stay tuned. Until then, happy stampin'!


Stampin' Up! Supplies Used:

Table built using Product Table Builder by The Crafty Owl - Independent Stampin' Up! Demonstrator.

Just Add Color For The Paper Players

by Joanne James20. August 2017 10:00

It's Sunday and time for this week's new challenge over at The Paper Players! It's my turn to host this week and I have a clean and simple challenge for you to work with:


Time for some colouring fun! I love to colour, whether it's stamped images or pre-printed paper, with pencils, inks or marker pens, I find it so theraputic and a great stress-reliever. I took the opportunity to make a card using Jen's sketch over at Freshly Made Sketches this week and the colour palette at The Color Throwdown - take a look:


Here's the low-down on today's card:

Today's card has barely any stamping; I used a piece of the Just Add Color Speciality Designer Series Paper for the base of my card today. Open designs printed on heavyweight paper, these papers have everything from feathers to houses, a complete underwater scene and lots more in between. I used my Stampin' Write markers to colour in my pretty design of watering cans and florals. I finished my card with the angled panel and a stamped and die cut sentiment.  

Here is the visual summary of the key products used on today's project for you to pin for easy reference:


You can see all of my Product and 'How To' summaries on my 'How To - Tips and Techniques' Pinterest board in case you've missed any. I also have another coloured creation to share with you today - Rebecca decided that she wanted to get in on the colouring action too as I made my card for today's post and made her own card at the same time, which she was adamant I shared with you too! So here it is:


Pretty, right? And all her own work too! Colouring is definitely something for everyone from the ages of 2 to 102!

Before you reach for your ink and papers, check out what our amazing team has created to inspire you this week:

The Paper Players Design Team
 
 
Here's a quick recap of our challenge rules:
 
1.  Create a new paper project
2.  Upload your creation to your blog with a link back to us and provide a direct link to the post featuring your challenge submission.
3.  Please link your card to no more than four challenges, TOTAL.
4.  Have FUN! 

I look forward to seeing your clean and simple creations in the gallery this week. Enjoy the rest of your weekend as it will be over all too quickly; I'll be back tomorrow with another project; until then, happy stampin'!


Stampin' Up! Supplies Used: 

Table built using Product Table Builder by The Crafty Owl - Independent Stampin' Up! Demonstrator.

A Bermuda Bay Bike Ride For The Paper Players

by Joanne James13. August 2017 10:00

It's Sunday and time for this week's new challenge over at The Paper Players! Firstly, thanks to everyone who left such lovely comments on my High Tide square pop out swing card last week; I have a few more cards made using the same design and will be sharing a more detailed 'how to' for this fun fold, so stay tuned for more information on this one. Back to today: it's the turn of the awesomely-inspiring Sandy to host this week and she has a colour challenge for us to work with:


I must say I did find this colour palette rather challenging; the green got me thinking of flowers, but I was struggling to make the three colours work together. Instead I chose to focus on the blue and I took the opportunity to get out my Bike Ride stamp set and create a fun birthday card - take a look:


Here's the low-down on today's card:

Build A Bike Made Simple - This is the first time I've use my Bike Ride stamp set with the co-ordinating Build A Bike Framelits, as the cards I made with it previously were having returned from Onstage in Amsterdam where we received the stamp set only as an all-attendee giveaway but not the framelits. What a difference they make - I pieced together the pieces of my bicycle with ease and got to use the little wire basket too - love it!

Flip The Sketch And Chop The Bike - I used the sketch over at CAS Colours & Sketches for my layout today (I figured a bike is about as non-rectangular a shape as you can get!), rotating it through 180 degrees as I wanted my bike to be riding onto my card rather than off it. Patricia's sketch shows the shape appearing to hang off the edge of the card so there was nothing else for it - I chopped off the end of my bicycle! I think it works though - if anything, it adds to the sense of movement I think. 

Coffee Break Border - My card is predominantly blue, with the Pear Pizzazz and Calypso Coral featuring only in small quantities: the flowers in the basket, a heart enamel dot. I almost left it there, but I felt like I wanted to ground my bicycle and include a little more of one of the colours so added a strip of Coffee Break designer series paper with a subtle green and white stripe.


Here is the visual summary of the key products used on today's project for you to pin for easy reference:


You can see all of my Product and 'How To' summaries on my 'How To - Tips and Techniques' Pinterest board in case you've missed any. 

Before you reach for your ink and papers, check out what our amazing team has created to inspire you this week:

The Paper Players Design Team
 
 
Here's a quick recap of our challenge rules:
 
1.  Create a new paper project
2.  Upload your creation to your blog with a link back to us and provide a direct link to the post featuring your challenge submission.
3.  Please link your card to no more than four challenges, TOTAL.
4.  Have FUN! 

I look forward to seeing what you create with this week's colour palette. Enjoy the rest of your weekend - we are continuing with Ben's weekend of birthday celebrations, so lots of fun to be had here! I'll be back tomorrow with another project; until then, happy stampin'!


Stampin' Up! Supplies Used: 

Table built using Product Table Builder by The Crafty Owl - Independent Stampin' Up! Demonstrator.

High Tide Square Pop Out Swing Card For The Paper Players PP356

by Joanne James6. August 2017 10:00

It's Sunday and time for this week's new challenge over at The Paper Players! The wonderful Nance is the hostess this week and she has a fun theme for us to work with:


The great outdoors can be interpreted in so many ways: I needed some masculine birthday cards so decided to dig out my High Tide stamp set and take a trip to the coast for my card today - take a look:


Today's card is a fancy fold and I've closed it above so that you can see what it looks like flat with the overstamped birds; the photo below shows it at an angle in it's popped-out position:


Here's the low-down on today's card:

High Tide - High Tide is a stamp set that can be used to build seascapes quickly and with ease, with the photopolymer stamps making it easy to see how the pieces align in order to create a scene and for the two-step stamping of the lighthouse. The set contains some lovely sentiments too, one of which I used on the inside of my card. I needed something more birthday-related for the front of my card, so went to one of my 'go to' sets, Butterfly Basics, for this one. I also over-stamped the gulls and wader birds onto the main image and the surrounding frame for extra interest.

A Fancy Fold - I wanted to use a fancy fold to add a little extra interest to today's card, so I decided to make a square pop-out swing card. I often find masculine cards difficult to add a 'special touch' to as embellishments tend to make them look quite feminine, but a fancy fold can sometimes be a good way of making a card special without adding to much in the way of frills or requiring a vast quantity of supplies. My card front measures 5 3/4" square (a slightly odd measurement to be fair, but I couldn't find any 12" x 12" in Sahara Sand so had to use a sheet of A4). I was cutting a few bases at a time so for speed used the largest square in my retired Squares Framelits set to cut the aperture in the front, but you could just as easily cut this out using you trimmer and leaving a 1" frame on all sides. Here is another shot so that you can see what the card looks like when properly opened:


A Nautical Colour Combination - I used a combination of primary colours and neutrals for my calming beach scene, with the addition of the birds top and bottom stamped in Basic Grey. Here's my colour combination to save for future inspiration:


Here is the visual summary of the key products used on today's project for you to pin for easy reference:


You can see all of my Product and 'How To' summaries on my 'How To - Tips and Techniques' Pinterest board in case you've missed any. 

Whilst I had all my supplies out I also made a flat clean and simple card using this set which I will share some other time, but it was fun to make something a little different to share today and I love that this card is flat for posting too. 

Before you reach for your ink and papers, check out what our amazing team has created to inspire you this week:

The Paper Players Design Team
 
 
Here's a quick recap of our challenge rules:
 
1.  Create a new paper project
2.  Upload your creation to your blog with a link back to us and provide a direct link to the post featuring your challenge submission.
3.  Please link your card to no more than four challenges, TOTAL.
4.  Have FUN! 


I look forward to seeing what you create with this week's theme. Enjoy the rest of your weekend - we spent the day at a country show yesterday so are going to be taking it easy today. I'll be back tomorrow with another project; until then, happy stampin'!


Stampin' Up! Supplies Used: 

Table built using Product Table Builder by The Crafty Owl - Independent Stampin' Up! Demonstrator.

A Little Wild Baby Blue Elephant For Laurie's TicTacToe At The Paper Players

by Joanne James30. July 2017 10:00

It's Sunday, I'm back after my two week vacation and excited to be back with my lovely team over at The Paper Players! This week we are all about team here at The Paper Players: the lovely Laurie was due to host this week but has unfortunately had to deal with a family bereavement and needed some time out so I am lending a helping hand. Laurie has done all the hard work and has designed a fun tic-tac-toe board to challenge us all as it's the fifth week of the month; I am picking up with the comments and visits to your blogs and get the honour of choosing this week's top pick. So, without further ado, here is this week's challenge board:


When considering my make for today, I just knew I would have to include the option of 'diecut' since I consider Laurie to be the absolute queen when it comes to diecutting, her creativity knows no bounds. I decided to go down the first vertical column and took the opportunity to make a baby card using the current sketch over at Fab Friday - it turns out I also fulfilled the bottom horizontal row too - take a look:


Here's the low-down on today's card:

A Little Wild - So how adorable is that little elephant?! I know - he is off the cuteness scale, for sure! He comes from the stamp set 'A Little Wild' and is part of a trio that includes a sweet bear and a lion too that is perfect for baby makes. The best part though? He is actually double-sided; each animal comes with a front and back and the co-ordinating Little Loves Framelits Dies will cut both pieces out as one, enabling them to be used as a gift tag too. I actually cut my elephant away here as I just wanted to the front, but I couldn't resist adding the reverse to the inside of my card:


Blue For A Boy - I decided to use a piece of the Bundle of Love Specialty Designer Series Paper for the blue for my card; it was tough not to use the gorgeous gold embossed foil pattern on the reverse, however I did use the Soft Sky/Very Vanilla/Gold colour combination to bring the elements of my card together. I added some subtle Soft Sky shading to my elephant using ink and a blender pen just to give him a little more depth and dimension.

Touches Of Gold - I wanted to add a touch of luxury to my card, the birth of a baby is a special occasion after all, and inspired by the designer series paper, added in a few gold elements - a die cut, layered scalloped circle, gold natural trim ribbon, some gold heat embossing and metallic enamel dots - to finish. 

Here is the visual summary of the key products used on today's project for you to pin for easy reference:


You can see all of my Product and 'How To' summaries on my 'How To - Tips and Techniques' Pinterest board in case you've missed any. 

I just love this card and can't wait to make a pink one for a girl and some co-ordinating packaging adorned with little elephant tags too!

Before you reach for your ink and papers, check out what our amazing team has created to inspire you this week:

The Paper Players Design Team
 
 
Here's a quick recap of our challenge rules:
 
1.  Create a new paper project
2.  Upload your creation to your blog with a link back to us and provide a direct link to the post featuring your challenge submission.
3.  Please link your card to no more than four challenges, TOTAL.
4.  Have FUN! 


I look forward to seeing what you create with our board this week. All of the Design Team love it when your return our visits and leave a friendly blog comment or two, however this week more than most it would be great if you could pop by Laurie's blog at Stampin' Up North and leave her a little Paper Players love - I know she would appreciate it. 

Enjoy the rest of your weekend; I have some trampolining to attend to (watching not bouncing thankfully!) and some preparation for the first of this month's technique classes on Tuesday.

I'll be back tomorrow with another project; until then, happy stampin'!


Stampin' Up! Supplies Used:

Table built using Product Table Builder by The Crafty Owl - Independent Stampin' Up! Demonstrator.

Monochromatic Purple Beautiful Bouquet PP352

by Joanne James9. July 2017 09:00

It's Sunday and time for this week's new challenge over at The Paper Players! It's my wonderful friend LeAnne's turn to host this week and she has a fun colour challenge for us to work with:


Ok, time for confessions first! I saw the colours on the badge and had such a clear idea of what I wanted to make when I was preparing my card that I pulled the colours from my ink caddy and set to work. It wasn't until I started to write this post that whilst I had used monochromatic purples, I hadn't used the three on LeAnne's swatch! I actually used Sweet Sugarplum, Rich Razzleberry and Fresh Fig for my three colours and I didn't have time to remake. So I'm hoping for forgiveness from LeAnne for choosing Fresh Fig instead of Berry Burst and that you can all use your imagination!

I took the opportunity to create a big bunch of flowers using the Beautiful Bouquet bundle - take a look:


Here's the low-down on today's card:

Pick A Bunch - Like most of the team this week, I was drawn to use flowers with this monochromatic colour scheme and decide to ink up my Beautiful Bouquet stamp set and create a bunch of flowers. The thing I love most about this set is the co-ordinating framelits: the Bouquet Bunch Framelit Dies make cutting out the flower heads and stems really easy and enable you to create layered florals with ease. 

A Beautiful Bouquet - In addition to the flower pieces, the stamp set also contains a great selection of sentiments in a lovely combined block and scripted font. I chose one of my favourites for my card today - the perfect greeting for a friend who means a lot that lets them know how you feel. 

The Importance of White - I often talk about the importance of white on cards, usually in the context of 'white space' or clear and uncluttered space, a key feature of clean and simple cards. On today's card white plays an important role as a colour to break up the monochromatic colours and add definition to the flowers themselves. 

I really like this card, even if the colours are not quite what LeAnne had in mind when she set us the challenge!  

Here is the visual summary of the key products used on today's project for you to pin for easy reference:


You can see all of my Product and 'How To' summaries on my 'How To - Tips and Techniques' Pinterest board in case you've missed any. 

Before you reach for your ink and papers, check out what our amazing team has created to inspire you this week:

The Paper Players Design Team
 
 
Here's a quick recap of our challenge rules:
 
1.  Create a new paper project
2.  Upload your creation to your blog with a link back to us and provide a direct link to the post featuring your challenge submission.
3.  Please link your card to no more than four challenges, TOTAL.
4.  Have FUN! 

I look forward to seeing what you create with this week's colour palette. Enjoy the rest of your weekend as it will be over all too quickly; I'll be back tomorrow with another project; until then, happy stampin'!


Stampin' Up! Supplies Used: 

Table built using Product Table Builder by The Crafty Owl - Independent Stampin' Up! Demonstrator.

Text Ya Later Exam Congratulations Card

by Joanne James2. July 2017 09:00

It's Sunday and time for this week's new challenge over at The Paper Players! I am the hostess this week and I have a timely theme for you to work with:


We are almost at the end of the academic year here in the UK and so it's the perfect time for teacher thank you cards. It's also the start of exam results season: everything from Common Entrance Exams, to the 11 Plus, graduate degrees and next month GCSE and A Level results. Since our challenge is an international one and all countries have these things happening at different times, I thought I would broaden this week's theme to encapsulate all of these things. So whether it's a thank you for your favourite teacher or a message of congratulations, we would love to see them all in the gallery this week.

I've made my teacher thank yous already, however I know a number of children that sat GCSE exams this year and so will be requiring a few more congratulations cards than usual. I used today's challenge as an opportunity to get started! This week's sketch over at Freshly Made Sketches inspired my layout  - I turned it through 90 degrees - and created a few cards using the same design; take a look:
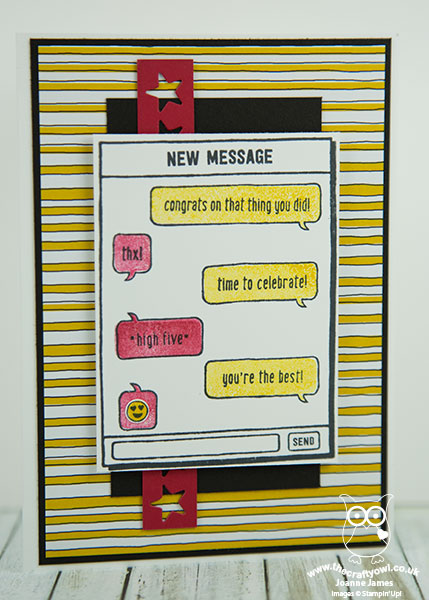
 

Here's the low-down on today's card:

Text Ya Later - This set was one of the first on my wish list; perfect for those tricky teenager cards, this on-trend stamp set, with it's text-speak and humorous emoticons works for children and adults alike. How many of us are in family message groups that span generations and often result in some hilarious texting faux-pas? There is so much fun to be had with these stamps, with the ability to tailor the messages to a number of different occasions. There are also some great background stamps that enable you to infill the speech bubbles with colour with ease.

Stars In Their Eyes - For the strip detail, I cut a row of stars out of coloured cardstock using one of the thinlits in the Mini Treat Bag Thinlits set, to add to the celebratory feel.

A Neat Little Trick - If you look really closely at my card, you will see that the smiley face emoticon has been punched out and added to my coloured speech bubbles. Want to know how I did it? I discovered that the single berry on the Holly Berry Builder Punch i just the right size to punch out these emoticons - handy, right?
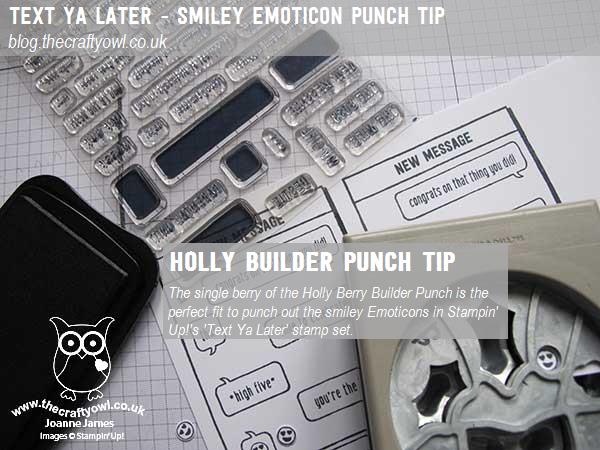
 

Here is the visual summary of the key products used on today's project for you to pin for easy reference:
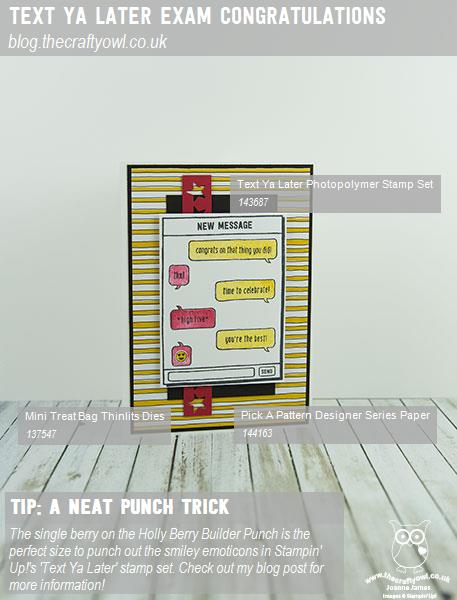
 

You can see all of my Product and 'How To' summaries on my 'How To - Tips and Techniques' Pinterest board in case you've missed any. 

Before you reach for your ink and papers, check out what our amazing team has created to inspire you this week:

The Paper Players Design Team
 
 
Here's a quick recap of our challenge rules:
 
1.  Create a new paper project
2.  Upload your creation to your blog with a link back to us and provide a direct link to the post featuring your challenge submission.
3.  Please link your card to no more than four challenges, TOTAL.
4.  Have FUN! 

Before I go, I also have another card that I made at the same time using the same sketch and stamp set whilst everything was out on my desk that uses this week's colours over at The Global Design Project:

Rebecca saw my congratulations cards and immediately requested a fun card for one of her friends whose birthday it is this week:
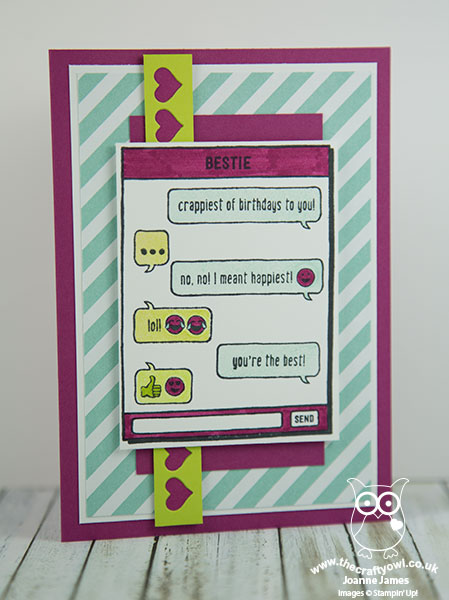
 

Those words just crack me up every time I read them - gotta love predictive text right? I just know this set is going to get a lot of use this year!

Here is the visual summary of the key products used on today's project for you to pin for easy reference:
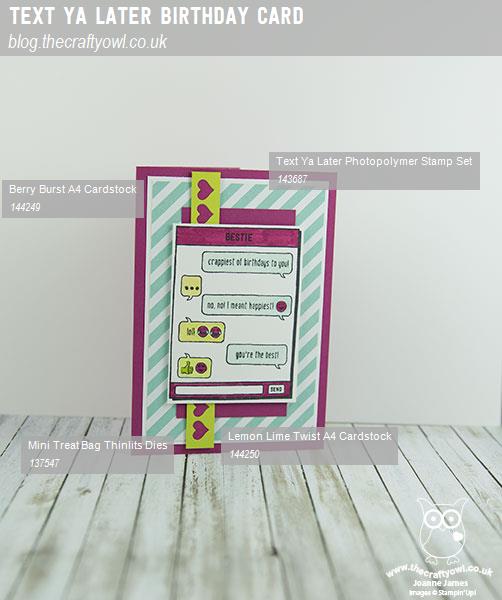
 

You can see all of my Product and 'How To' summaries on my 'How To - Tips and Techniques' Pinterest board in case you've missed any. 

I look forward to seeing what you create with this week's theme. Enjoy the rest of your weekend as it will be over all too quickly; we are having the a relatively quiet day today since having had a very busy week it's the first day in over a week that the entire family will be at home together - how crazy is that?!  

I'll be back tomorrow with another project; until then, happy stampin'!


Stampin' Up! Supplies Used: 
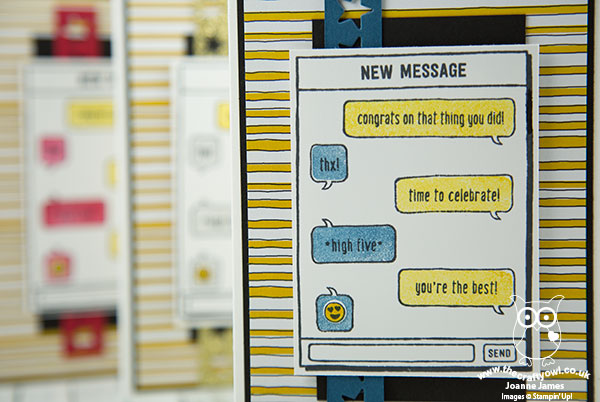
Table built using Product Table Builder by The Crafty Owl - Independent Stampin' Up! Demonstrator.


Shop Online

Access my online shop 24 x 7, 365 days of the year:

Current May hostess code:

VDKNV7BH

Shop Online

2024-25 Annual Catalogue

BROWSE THE CATALOGUE

Click on the image to download your copy of the 2024-25 annual catalogue. For a full list of current SU! supplies, go to my online store. If you would like any help or advice, please drop me a line at [email protected] or give me a call on 07773 421446 - I'd be happy to help.

Join My Team

It's always a great time to join Stampin’ Up but during May it's even better! New team members can get £78.25 of new In Color products for FREE! That's in addition to another £130 worth of products of your choice for only £99 + free business supplies + free shipping + all the fun being a part of Stampin’ Up! Stampin' Up! has something for everyone: join my growing team and benefit from my support to enjoy Stampin' Up! however you choose.

If you're interested, call me for a chat to understand how I can help you realise your goals. Alternatively, if you have already decided to sign up and you just can't wait, please click here for the link to the online form where you can sign up and order your starter kit right away! 

Latest Kits!

Stampin Cut and Emboss

The City Sights Kit has all you need to make 8 cards with coordinating envelopes for £20. Along with the new Happy Hollyhocks Kit, a no stamping kit including 9 cards for just £14, both are available from May 1st - get yours here!

New Online Exclusives

There are new products available exclusively in the online store from 5 March - check them out here.

About Me

Hi I'm Joanne and live in Northampton and when I'm not looking after my husband and two beautiful children, am an avid crafter with a passion for all things Stampin' Up!

I must confess that I have never been a big rubber stamper - until I discovered Stampin' Up! that is. I love the fact that I can get such great results with co-ordinating stamps, inks, papers and punches - the possibilities are endless! Join me on my stamping journey as I share the things I love and be inspired to create amazing things yourself!

Follow Me

Monthly Newsletter

Box Builder

Click the button above to use Box Buster to create your custom box design using the Envelope Punch Board!

Kits Collection Now Available!

Stampin Cut and Emboss

The new Kits Collection from Stampin' Up! is now available!

Click here to see the current kits available and order yours online today.

I Design For


Mini Catalogue


The next mini catalogue will be live in September! 

Stampin' Up Stuff

This is my personal blog and is not endorsed by Stampin’ Up! I hope you find it a plentiful source of ideas and personal inspiration but please don't copy my designs for contest submission or use for classes, publication or sale without express permission.