It's Sunday and time for this week's new challenge over at The Paper Players! The lovely LeAnne is hosting host this week and she has a fun theme for us to work with:

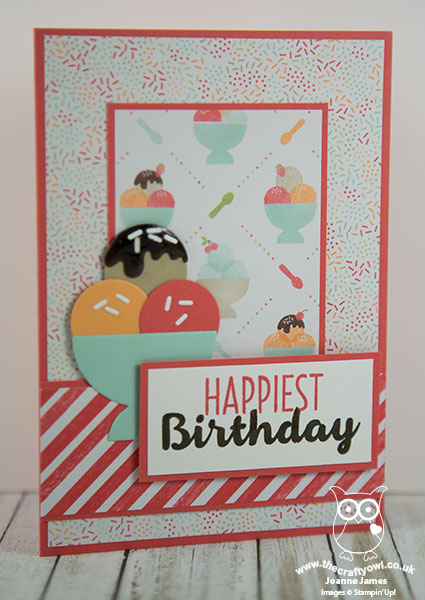
Sweet treats - yummy! So many delicious possibilities; I'm a real lover of ice-cream so decided to break out my Cool Treats Suite and using this week's sketch over at Mojo Monday created my very own ice-cream sundae - of the paper variety, of course! Take a look at what I came up with:
Here's the low-down on today's card:
Lots of Layers - I was attracted to this week's Mojo Monday sketch and all those lovely layers - I've used 10 in total on my card! I am often wary about mixing paper patterns however the Tasty Treats papers have some great co-ordinating patterns that make mixing and matching easy. I used three different ones on today's card sticking to one small pattern design, one larger design and a banner of stripes. Neither one overwhelms another so can be used together effectively to create a cohesive design.
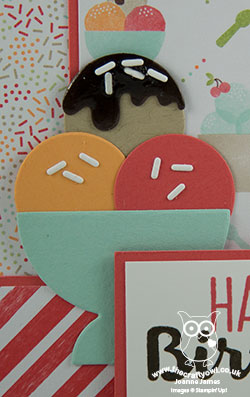
Tasty Treats - I took the colour scheme for my card directly from the Tasty Treats Specialty Designer Series Paper and instead of a square for one of the layers of the sketch I used my Frozen Treat Thinlits to create a three-scoop ice cream sundae, complete with sprinkles and glossy hot fudge sauce (courtesy of my fine tip glue pen). Such a shame we are soon to say goodbye to this paper, however I'm thrilled that the stamp set and thinlits are being carried over to the new annual catalogue.
Two-Tone Sentiment - I finished with a two-tone sentiment by masking and inking my stamp with Watermelon Wonder and Early Espresso respectively. I gave the same treatment to my sentiment on the inside and added a cherry, because, well every sundae needs one, even if it's on the inside:

This card is a great example of what I love about Stampin' Up! - effortless colour and product co-ordination. Inks that match stamps that match cardstock that match paper - there's nothing better!
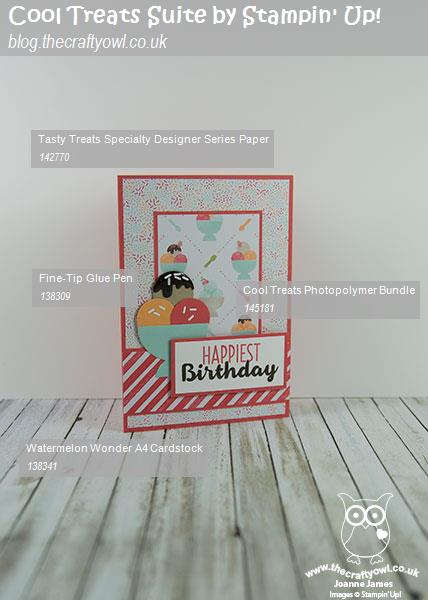
Here is the visual summary of the key products used on today's project for you to pin for easy reference:
You can see all of my Product and 'How To' summaries on my 'How To - Tips and Techniques' Pinterest board in case you've missed any.
Before you reach for your ink and papers, check out what our amazing team has created to inspire you this week:
The Paper Players Design Team
Here's a quick recap of our challenge rules:
1. Create a new paper project
2. Upload your creation to your blog with a link back to us and provide a direct link to the post featuring your challenge submission.
3. Please link your card to no more than four challenges, TOTAL.
4. Have FUN!
I look forward to seeing what you create with this week's theme. Enjoy the rest of your weekend as it will be over all too quickly; we are embarking on exam season here in the James household, so it will be revision and not a lot else here today. I'll be back tomorrow with another project; until then, happy stampin'!
Stampin' Up! Supplies Used: