Elongated Birthday Edgelit Rainbow Cupcake Card

by Joanne James12. March 2019 21:00

I've had two days of back-to-back classes so things have been fairly busy here!  A quick post from me today to share the card that I mentioned in my Paper Players post on Sunday. Our theme this week is 'colours of the rainbow' so I couldn't resist creating one with the cupcake die in the Detailed Birthday Edgelit Die set too - take a look:


Here's the low-down on today's card:

A Rainbow Of Cupcakes - Just like Sunday's card - you can see it here if you missed it - I wanted to utilise all of the colours of the rainbow on my card. I played around with the edgelits on this card too in order to accommodate this, cutting two sets of three cupcakes from one piece of Whisper White cardstock to give me a total of six cupcakes. I used my seventh and final rainbow colour, violet, or in this case Highland Heather, as the background for my card and to highlight the detail on the cupcake cases.

 A Little Paper Piecing - The pieces for the cupcake details are larger and easier to manipulate than for the presents die, so on today's card I used the edgelits to cut a set of cupcakes in each colour and used the pieces from the frosting to inlay them into my white die surround.

Go Long - As a result of using two diecuts joined at the centre, my cardfront is long and narrow as opposed to the standard A6 size that I usually make. This is a nice way to ring the changes with a card and with my BoxBuster tool and trusty Envelope Punch Board on hand to make a custom envelope, need not be an issue when it comes to needing to mail it.

There's very little stamping on today's card - just a heat-embossed sentiment on the front and a greeting with cupcake decoration inside:

Here is the visual summary of the key products used on today's project for you to pin for easy reference:


You can see all of my 'How To' summaries on my 'How To - Tips and Techniques' Pinterest board in case you've missed any. 

I'll be back tomorrow with another project. Until then, happy stampin'!


Stampin' Up! Supplies Used:

Table built using Product Table Builder by The Crafty Owl - Independent Stampin' Up! Demonstrator.

Lovely Lattice Kraft Birthday Card

by Joanne James11. March 2019 09:00

T

Happy Monday everyone! Today is the start of my class week, so it will b a busy one Chez James! Today's card is one I made that uses the current sketch layout over at Just Add Ink and the colour palette at Color Throwdown:


I thought these colours would be perfect for a birthday card featuring one of the Sale-A-Bration stamp sets, Lovely Lattice - take a look:


 Here's the low-down on today's card:

Lovely Lattice - There is lots you can do with this stamped image - many ways to colour it, and lots of options to cut it out and build layers and dimension with the flowers too - but I like it because the main image is one of those that can fill the card and there isn't much else required. I heat embossed my image in white onto Crumb Cake cardstock which really does show the detail of the lattice behind the flowers beautifully. For a free stamp set, this one really is rather pretty - and still available if you'd like to get your hands on it with a spend of £45 or more. Who doesn't love FREE product?!

Colour on Kraft - I decided to colour the image using my watercolour pencils, but dry with no added water for blending, as I wanted to see the pencil strokes; I used a combination of Gorgeous Grape, white and Basic Grey pencils, with a tiny spot of Crushed Curry for the flower stamens. 

Birthday Wishes - The 'Lovely Lattice' stamp set is sentiment-free, so I reached for one of my favourites from the current Spring-Summer catalogue that you haven't seen me use much here on my blog but rest assured they will be a keeper for me, regardless of whether or not they carry over to this year's new annual catalogue: the Well Said bundle. The' Well Said' stamp set combined with the Well Written Framelits dies really are the perfect pair and allow you to create endless sentiment combinations. I added a piece of Gorgeous Grape mini striped ribbon behind my layered sentiment and a sprinkling of pearls to complete my card. 

Here is the visual summary of the key products used on today's project for you to pin for easy reference:


You can see all of my 'How To' summaries on my 'How To - Tips and Techniques' Pinterest board in case you've missed any. 

Enjoy your day and I'll be back tomorrow with another project. Until then, happy stampin'!


Stampin' Up! Supplies Used:

Table built using Product Table Builder by The Crafty Owl - Independent Stampin' Up! Demonstrator.


Rainbow Presents Detailed Birthday Edgelit Card For PP432

by Joanne James10. March 2019 09:00

Today it's Sunday and time for this week's new challenge over at The Paper Players! It's the turn of the fabulous Claire to host this week and she has a fun theme challenge for you to work with:


Colours of the rainbow - I love it! I decided a rainbow collection of birthday presents were the order of the day - take a look:


Here's the low-down on today's card:

I Can Sing A Rainbow - However you remember it (my personal favourite mnemonic is 'Richard Of York Gave Battle In Vain'), the perfect rainbow has seven colours: red, orange, yellow, green, blue, indigo and violet and I was determined to feature them all on my card! In addition to using cardstock in each of the rainbow colours to back my presents die (a great way to use up your scraps), I also created a background consisting of a vertical strip of each to tie in with the rainbow theme.  

Seven Present Solution - The focal point of my card is definitely the rainbow presents, courtesy of the fabulous Detailed Birthday Edgelit Dies. The eagle-eyed amongst you will notice that the actual die has only five presents, not seven. To create my row of seven gifts, I placed the die and white cardstock in my Bigshot and rolled through once, without going to the very end of the die, then moved the die along and rolled it again, to create a longer length of presents that I then trimmed to fit. Job done!

Birthday Cheer Inside and Out - There's very little stamping on this card - just a greeting on the front and a little more on the inside, courtesy of the co-ordinating 'Birthday Cheer' stamp set:

Here is the visual summary of the key products used on today's project for you to pin for easy reference:


You can see all of my Product and 'How To' summaries on my 'How To - Tips and Techniques' Pinterest board in case you've missed any. 

I just love this set and card - the fun colours make it suitable for any person,  boy or girl, young or old - and this will definitely be a staple in my card box. Well, this one and the one that I will feature in another post later this week with a similar rainbow theme!

Before you reach for your ink and papers, check out what our amazing team has created to inspire you this week:

Here's a quick recap of our challenge rules:
 
1.  Create a new paper project
2.  Upload your creation to your blog with a link back to us and provide a direct link to the post featuring your challenge submission.
3.  Please link your card to no more than four challenges, TOTAL.
4.  Have FUN!

You can see all of my 'How To' summaries on my 'How To - Tips and Techniques' Pinterest board in case you've missed any. 

Enjoy your day; ours was a busy one yesterday at the swimming pool so I'm hoping today will be a little more relaxing. I'll be back tomorrow with another project. Until then, happy stampin'!


Stampin' Up! Supplies Used: 

Table built using Product Table Builder by The Crafty Owl - Independent Stampin' Up! Demonstrator.

How Sweet It Is Sweetie Shaker Card #GDP179

by Joanne James8. March 2019 11:30

Good morning lovely readers! An apology is in order for the lack of blog posts this week. I have been fairly tired following another successful Creative Escapes Weekend Craft Retreat last weekend and whilst I've spent my days catching up on household chores and preparing for next week's card classes, when it comes to the evenings I've been good for nothing; I've fallen asleep in the chair for three nights in a row way before bedtime, much to the amusement of the James Juniors! So today I thought I would make time to blog early so that you didn't miss out!

I'm sharing a card for a couple of challenges this week: The team over at Global Design Project are all about the candy and the folks at Stamps Ink Paper are asking for cards featuring gingham, plaid or stripes:


Not only does my card feature lots of sweet treats and some fetching candy pink stripes, it's a shaker too - take a look:


 Here's the low-down on today's card:

How Sweet It Is -  If you have a sweet tooth, the 'How Sweet It Is' Suite is for you! Bright and fun, with bold patterns of sweets and traditional sweet jars, it's great for cards and packaging alike. The papers, which feature bold stripes and spots in addition to candy-inspired patterns, really are good enough to eat. I used a pink stripe for the front of my shaker and a sweetie print for the inside at the back of my window, I also used the Jar of Sweets Framelits to cut out one of the sweet jars directly from the designer series paper to decorate the front of my card - I love it when dies and paper co-ordinate like this!

Jar Of Sweets - I used another of the Jar of Sweets Framelits to cut out the aperture for the window of my shaker, stamping the same image onto Whisper White and fussy cutting the jar lid to adhere to the top of my window section. I filled my shaker with a selection of sequins and some diecut sweets in bright, co-ordinating colours; you can see from the extras that I added to the front of my card these dies emboss a pattern onto the diecut sweet shape too which adds an interesting textural detail. There's very little stamping on today's card, save the sentiment and jar lid. A little extra stamping on the inside of my card courtesy of the 'Sweetest Thing' stamp set too:


Sweeter Than Candy - The 'How Suite It Is' Suite also includes some fun treat cups, that are perfect for dressing up to contain some sweet treats for your loved ones. I managed to snag these shots with my phone of some of the decorated sweet cups that filled with a selection of jelly beans and gummy bear for the lucky ladies on my retreat as one of their little gifts - I do love to spoil the whilst they are with me! 


I covered the cups with designer series paper and stamped a simple label for each of them decorated with a sweet jar cut from the DSP, and tied the tags to the cups with some of the very yummy Coastal Cabana/Granny Apple Green 3/8" reversible ribbon:


So cute and easy to decorate and I know from the feedback that my ladies loved them!

Here is the visual summary of the key products used on today's project for you to pin for easy reference:


You can see all of my 'How To' summaries on my 'How To - Tips and Techniques' Pinterest board in case you've missed any. 

Enjoy your day and I'll be back tomorrow with another project. Until then, happy stampin'!


Stampin' Up! Supplies Used:

Table built using Product Table Builder by The Crafty Owl - Independent Stampin' Up! Demonstrator.

Best Bunny Spring Easter Card For The Paper Players PP431

by Joanne James3. March 2019 09:00

Today it's Sunday and time for this week's new challenge over at The Paper Players! It's the turn of the fabulous Anne-Marie to host this week and she has a fun theme challenge for you to work with:


I was in part inspired by yet another fabulous badge created by the lovely Nance for us this week to create a pretty Spring day background for my Easter bunny - take a look:


Here's the low-down on today's card:

Best Bunny - The Best Bunny stamp set is super cute and just perfect for my Easter bunny. I stamped my bunny onto Soft Suede cardstock and paper-pieced his features then layered him on some ovals. I also used the carrot decoration to add a little detail to the inside:


Spring Is in The Air - I created my spring background with a touch of brayering using a sponge brayer and Balmy Blue ink. Then I stamped some grass and added a couple of tiny butterflies from the 'Enjoy Life' stamp set. My zingy Lemon-Lime Twist Gingham Gala paper and orange accents add a fresh vibrancy to this fun Easter card.

Easter Wishes From More Than Words - My larger-than-life sentiment comes from the new 'More Than Words' stamp set that is available exclusively during March as part of the Sale-A-Bration co-ordination product launch. A great set with lost of sentiments, that also compliments greetings in a number of first stage Sale-A-Bration release stamp sets.

Here is the visual summary of the key products used on today's project for you to pin for easy reference:


You can see all of my Product and 'How To' summaries on my 'How To - Tips and Techniques' Pinterest board in case you've missed any. 

Before you reach for your ink and papers, check out what our amazing team has created to inspire you this week:

Here's a quick recap of our challenge rules:
 
1.  Create a new paper project
2.  Upload your creation to your blog with a link back to us and provide a direct link to the post featuring your challenge submission.
3.  Please link your card to no more than four challenges, TOTAL.
4.  Have FUN!

You can see all of my 'How To' summaries on my 'How To - Tips and Techniques' Pinterest board in case you've missed any. 

Enjoy your day; I am on day 2 of my weekend Creative Escapes Craft Retreat so mine will be a busy one. Day one was a lot of fun so I'm expecting day 2 to be much the same! I'll be back tomorrow with another project. Until then, happy stampin'!


Stampin' Up! Supplies Used: 

Table built using Product Table Builder by The Crafty Owl - Independent Stampin' Up! Demonstrator.

Sale-A-Bration Co-ordination Is Here and New Sale-A-Bration Items Added!

by Joanne James1. March 2019 09:00


It's Friday 1st March - the end of the week and a Happy St David's Day to all my Welsh friends reading this! Lots of business news today - so get comfy! First up - Sale-A-Bration Co-ordination!

From today until the end of the month, you can choose from a selection of exclusive, limited-time products that have been designed specifically to co-ordinate with existing Sale-A-Bration items - take a look at the items on offer:


If you're not a fan of fussy cutting, there are some super-useful framelits in there! A great stamp set that you'll be seeing me using and an interesting shaped label punch. If these new items appeal to you, just click on the links to these products in my online store  below:

Table built using Product Table Builder by The Crafty Owl - Independent Stampin' Up! Demonstrator.

Here's a sneak peek of a card we made in my last Sale-A-Bration class that is a CASE of one of the catalogue samples that shows just what a difference the Hop Around Framelits make - such a crisp, even border:


Next up: you all know that this year's Sale-A-Bration promotion will end on 31st March and in addition to hosting and joining benefits (you can read about those here) you also earn a free product for every £45/90 spend - you can see the existing items here and here.

Good news: from now until the 31st March, you will also be able to choose from a number of other items (you must use the special code as detailed as opposed to the usual item code to get one of these items free with a £45/90 spend):

As you can see, this new selection also includes the gorgeous Painted Seasons Designer Series Paper that is now available minus the stamp set that it comes with in the £90 spend bundle and can be yours free with a spend of £45 or more. 

To make things easier for you, I've created a table linking each of the products directly to the promotional item in my online store - just click on the links below:

Table built using Product Table Builder by The Crafty Owl - Independent Stampin' Up! Demonstrator.

Remember, if you aren't placing your order via the above links, you need to use the special Sale-A-Bration item code for each product - these are different to the standard product codes for these items, which are still available to purchase in the annual catalogue.

If you would like more information or to place an order, either go here to purchase from my online store (don't forget to add this month's hostess code G44UFKHH) or you can email me or telephone me if you would prefer. I'm off to finish packing for the first of my Creative Escapes Craft Retreat which takes place this weekend - so exciting!

Back shortly with a new creative project; until then, happy shopping!


Sorry For The Loss of Your Furry Friend - One Layer Pet Sympathy Cards

by Joanne James25. February 2019 08:00

The James Juniors are back to school today following the half term break and I am here with a nice early post for you! Today I'm sharing a card that combines a few challenges: the current challenge over at Less Is More where it is one layer with the focus on sentiment and the current CASology challenge. My card also fits the photo inspiration at Fusion:


It's something of a happy accident that I am combining each of these in today's card - it just so happened that I had an idea that works for all three - and I have two cards for you! I decided to create a couple of pet sympathy cards; first up, a dog one:


I also created one for a cat lover too that is exactly the same design, just mirrored:


Here's the low-down on today's cards:

Sorry For Your Loss - I recently spotted this card on Pinterest and loved the clean lines created by the fun punch art idea and monochromatic colour scheme. It inspired me to think about using a similar idea to create a one-layer card using the same 'Sorry For Everything' stamp set - such a great set where you need a sentiment to take centre stage and useful for lots of different circumstances, including the loss of a furry friend. 

Cats And Dogs - I used a retired Sweet and Sassy Framelit heart, along with a punched cat and dog respectively, to create a mask through which I could sponge my heart. By using a different colour to the sentiment, which I stamped in black, it gives the illusion of another layer and whilst I didn't use the punches directly on my card, the silhouette created by the negative space makes my furbabies easily identifiable. 

Crossing The Rainbow Bridge - My colourful heart whilst perfect for the Fusion rainbow photo was actually inspired by a blog post a couple of week's ago by my Paper Players teamie and committed dog lover Ann Schach. As any of you who follow my blog will know, I am relatively new to the idea of pets having never had one as a child. Ann made this card for a friend of hers that was going through a tough time and she mentioned one of the things her friend was having to deal with was the loss of a pet, which she described as having 'crossed over the Rainbow Bridge'. I thought this was a lovely idea and so tried to incorporate the idea of a rainbow by sponging one into my masked heart, with a little purple heart to accent each pet. I really love the effect - what do you think? I also carried the rainbow theme onto the inside of my card with a set of rainbow footprints around my sentiment, that is courtesy of the new 'Happy Tails' stamp set:


A fitting sentiment for this kind of card I think and the rainbow colours are really uplifting. So two cards inspired by others in lots of ways, yet unique to me. Do check out the respective challenges for lots more inspiration.

Here is the visual summary of the key products used on today's project for you to pin for easy reference:


You can see all of my 'How To' summaries on my 'How To - Tips and Techniques' Pinterest board in case you've missed any. 

Enjoy your day and I'll be back tomorrow with another project. Until then, happy stampin'!


Stampin' Up! Supplies Used:

Table built using Product Table Builder by The Crafty Owl - Independent Stampin' Up! Demonstrator.


You're A Classic Garage Card PP430

by Joanne James24. February 2019 09:00

Today it's Sunday and time for this week's new challenge over at The Paper Players! It's the turn of the fabulous Ann to host this week and she has my favourite, a sketch challenge, for you to work with:


I could think of so many ways to use this sketch! I decided to challenge my self to retain the 'any shape' oval element, since I don't often use ovals on my projects and work with a new-to-me stamp set too - take a look:


Here's the low-down on today's card:

Masculine Classic Garage - The Classic Garage Suite in the Spring-Summer catalogue is perfect for projects to celebrate the men in your life: cars, keys, tools, perfect for those who love motors or anyone with aspirations to be a petrol-head. The designer series papers include some fabulous bright colours too and I used them to influence the colour scheme of my card, both in the papers that I used for my layers and the bold blocks of colour that feature my sentiment and focal point image.

Geared Up - I chose the classic car from the 'Geared Up Garage' stamp set as my focal image, stamped in black onto Tranquil Tide cardstock. I stamped it again onto vellum and fussy cut the windows before gluing to my car and covering them with a layer of fine tip glue for added shine. I'm not big into cars and I'm not sure what car type this is, however it does remind me of old-fashioned cars in the 1970s and I remember my Dad driving a car that was turquoise green in colour at the time and since this will be his Father's Day card I think he will appreciate the similarity and it is sure to evoke a few memories. I used another of the stamps from the set for the sentiment on the inside too:

Keys To The Car - Or key, to be precise! The silver metal keys and spanners that make up the Classic Garage Metal Elements are perfect for tooling up cards and packages and I couldn't resist adding one with a little bow of black twine to finish off my card.

Here is the visual summary of the key products used on today's project for you to pin for easy reference:


You can see all of my Product and 'How To' summaries on my 'How To - Tips and Techniques' Pinterest board in case you've missed any. 

Before you reach for your ink and papers, check out what our amazing team has created to inspire you this week:

Here's a quick recap of our challenge rules:
 
1.  Create a new paper project
2.  Upload your creation to your blog with a link back to us and provide a direct link to the post featuring your challenge submission.
3.  Please link your card to no more than four challenges, TOTAL.
4.  Have FUN!

You can see all of my 'How To' summaries on my 'How To - Tips and Techniques' Pinterest board in case you've missed any. 

Enjoy your day; we have a family sport-free day today so will be making the most of it before the Juniors return to school tomorrow. I'll be back tomorrow with another project. Until then, happy stampin'!


Stampin' Up! Supplies Used: 

Table built using Product Table Builder by The Crafty Owl - Independent Stampin' Up! Demonstrator.

Wonderful Floral Faux Layered Diecut Monochromatic CAS Card

by Joanne James22. February 2019 20:15

It's Friday and almost time for the weekend! My week has been a fun one with the children home for a change and a slightly less frantic pace than usual, which is nice. I haven't had much time to get in my craft room but did manage to create a couple of quick cards yesterday whilst simultaneously coaching Rebecca through her Music Theory in readiness for her Grade 4 exam in a couple of week's time. Today I'm sharing one of those cards with a technique I've been wanting to have a go at that is perfect for the current challenge over at StampsInkPaper who, like us over at The Paper Players for our clean and simple challenge, also chose to have 'monochromatic' as their theme this week:

Having watched this video by the uber-talented Jennifer McGuire a few weeks ago, I was keen to have a go at a card using the same technique and the border die from the Wonderful Floral Framelit Dies set. This is what I came up with:


I simply layered three of the Wonderful Floral border diecut pieces, one each in Granny Apple Green, Call Me Clover and Shaded Spruce front the back to the front, along the left hand vertical edge of my card, overlapping each one a fraction to the left of its predecessor. This die is often used with the leaf pattern along the outer edge, but here I laid the pieces with the leaf shape to the centre of my card so that the layered leaves would really stand out against my white card base. You can really see the effect of the overlaying of the diecuts in this photo here:


It also allowed me to position my gold heat-embossed sentiment along the straight edge. This actually looks shinier in real life, although looking at the photograph I think that heat embossing in white might have been a better idea. Next time, perhaps!

And that's all there is to it! Here is the visual summary of the key products used on today's project for you to pin for easy reference:


You can see all of my 'How To' summaries on my 'How To - Tips and Techniques' Pinterest board in case you've missed any. 

I really like this effect and am definitely going to revisit my collection of dies to see what other cards I can create using this technique. Enjoy your day and I'll be back tomorrow with another project. Until then, happy stampin'!


Stampin' Up! Supplies Used:

Table built using Product Table Builder by The Crafty Owl - Independent Stampin' Up! Demonstrator.

Notes of Kindness Card Kit - Everything You Need To Craft Like A Pro Made Simple

by Joanne James21. February 2019 21:00

Today I have a card for the current challenge over at As you See It, where the team are asking us to complete the sentence 'When I think simple, I think of...':

Now today's post feels a little bit of a cheat as far as the challenge is concerned, however hear me out. My regular readers will know what a fan I am of Stampin' Up!'s kits and for me, 'When I think of SIMPLE, I think of KITS' every time! Especially all-inclusive kits, with everything in the box ready to go, including instructions and layouts - no thinking required! So today I'm sharing with you one of the latest all-inclusive kit offering from the annual catalogue - the Notes of Kindness Card Kit and one of my current 'go to' kits.

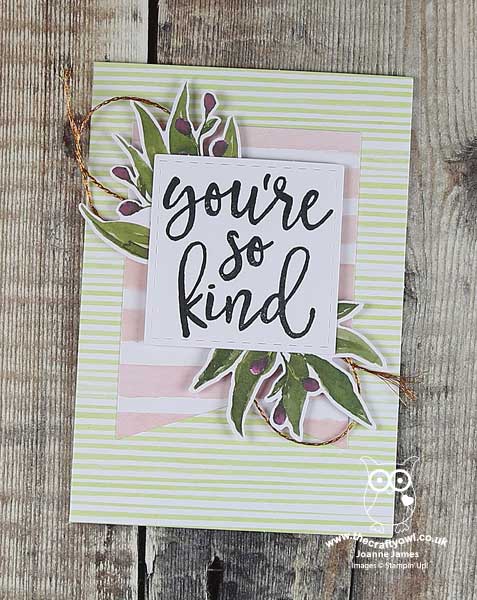
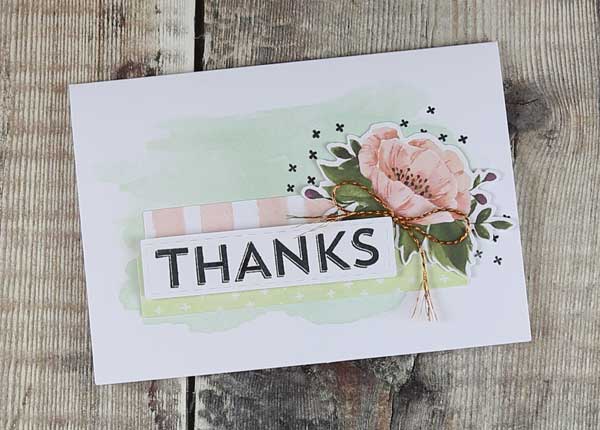
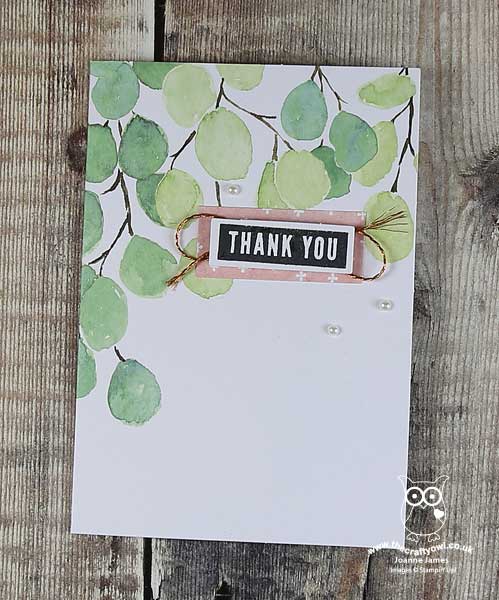
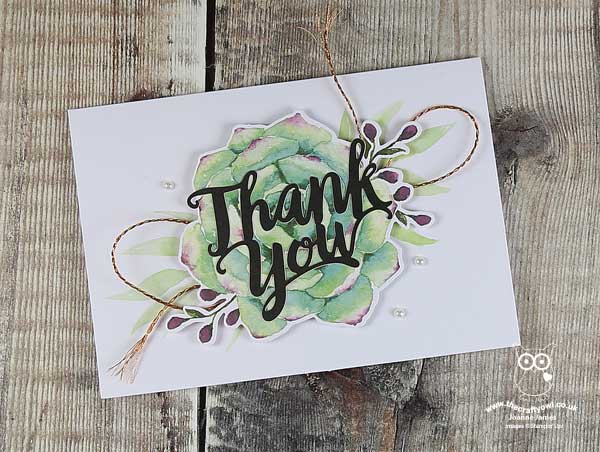
Here is an example of one of each the finished cards from the set:


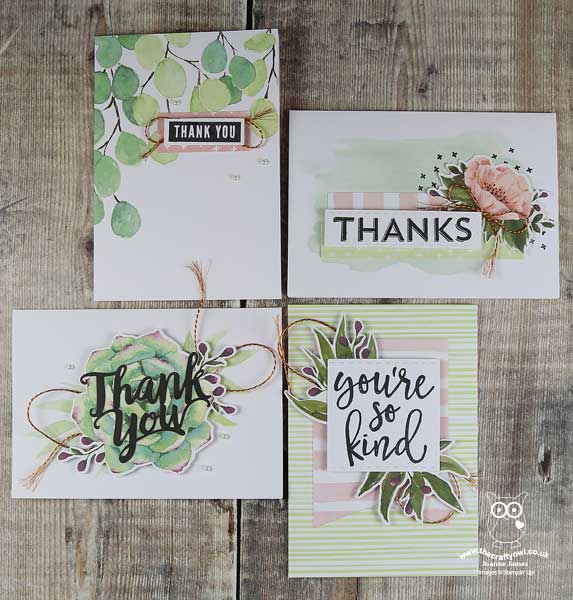
And here's an image that shows all of the cards that can be made with this kit:


Here's the low-down on the Notes of Kindness Card Kit and why I think they are perfect for just about anyone and everyone:

All Inclusive - The Notes of Kindness Card Kit kit is one that contains everything you need to create 20 cards, 5 each of 4 designs: card bases, co-ordinating envelopes, die cut images and shapes, a Stampin' Spot ink pad, set of 6 photopolymer stamps and an acrylic block, along with a range of accessories and embellishments. Simply add your choice of adhesive and you are good to go. 

Great Value For Money - At £33.00, this kit offers exceptional value for money - where else could you buy 20 handcrafted greetings cards at £1.65 each and have a stamp set, ink spot, block and a range of embellishments left over to create even more things with too? Not to mention the creative fun you will have putting them together along the way! And if you like it, refill kits of the consumable elements are available so you can make even more for less too.

The Perfect Gift -  Whether young or old, experienced crafter or new to crafting, this kit is perfect for you. Follow the instructions included or unleash your own creativity and do your own thing - and if you're trying to buy for 'the person who has everything' - I bet they don't have one if these! The kit comes in a lovely recyclable gift box too, so all you need is some ribbon and a tag and you are done.

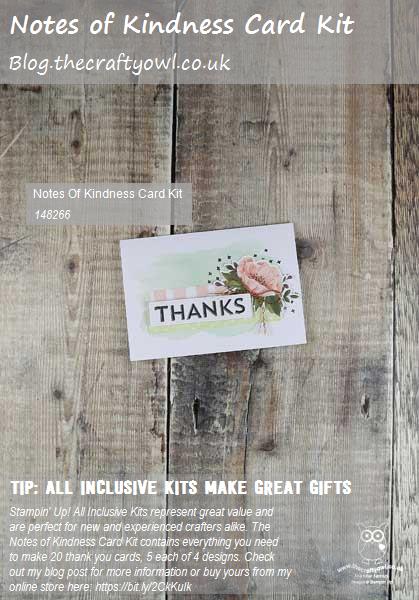
Here is a reminder of this fantastic kit if you are getting organised and want to pin it for easy reference:

You can see all of my 'How To' summaries on my 'How To - Tips and Techniques' Pinterest board in case you've missed any. 

Like all of the kits in the Stampin' Up! catalogue, the Notes of Kindness Card Kit is the perfect way to bring your creativity to life like a pro MADE SIMPLE - with everything except glue included. So I hope the ladies over at AYSI will forgive me this indulgence of creating a kit card for this week's challenge - for me a kit is escapism in a box!

Enjoy your day and I'll be back tomorrow with another project; until then, happy stampin'!


Stampin' Up! Supplies Used:

Table built using Product Table Builder by The Crafty Owl - Independent Stampin' Up! Demonstrator.

Shop Online

Access my online shop 24 x 7, 365 days of the year:

Current May hostess code:

VDKNV7BH

Shop Online

2024-25 Annual Catalogue

BROWSE THE CATALOGUE

Click on the image to download your copy of the 2024-25 annual catalogue. For a full list of current SU! supplies, go to my online store. If you would like any help or advice, please drop me a line at [email protected] or give me a call on 07773 421446 - I'd be happy to help.

Join My Team

It's always a great time to join Stampin’ Up but during May it's even better! New team members can get £78.25 of new In Color products for FREE! That's in addition to another £130 worth of products of your choice for only £99 + free business supplies + free shipping + all the fun being a part of Stampin’ Up! Stampin' Up! has something for everyone: join my growing team and benefit from my support to enjoy Stampin' Up! however you choose.

If you're interested, call me for a chat to understand how I can help you realise your goals. Alternatively, if you have already decided to sign up and you just can't wait, please click here for the link to the online form where you can sign up and order your starter kit right away! 

Latest Kits!

Stampin Cut and Emboss

The City Sights Kit has all you need to make 8 cards with coordinating envelopes for £20. Along with the new Happy Hollyhocks Kit, a no stamping kit including 9 cards for just £14, both are available from May 1st - get yours here!

New Online Exclusives

There are new products available exclusively in the online store from 5 March - check them out here.

About Me

Hi I'm Joanne and live in Northampton and when I'm not looking after my husband and two beautiful children, am an avid crafter with a passion for all things Stampin' Up!

I must confess that I have never been a big rubber stamper - until I discovered Stampin' Up! that is. I love the fact that I can get such great results with co-ordinating stamps, inks, papers and punches - the possibilities are endless! Join me on my stamping journey as I share the things I love and be inspired to create amazing things yourself!

Follow Me

Monthly Newsletter

Box Builder

Click the button above to use Box Buster to create your custom box design using the Envelope Punch Board!

Kits Collection Now Available!

Stampin Cut and Emboss

The new Kits Collection from Stampin' Up! is now available!

Click here to see the current kits available and order yours online today.

I Design For


Mini Catalogue


The next mini catalogue will be live in September! 

Stampin' Up Stuff

This is my personal blog and is not endorsed by Stampin’ Up! I hope you find it a plentiful source of ideas and personal inspiration but please don't copy my designs for contest submission or use for classes, publication or sale without express permission.