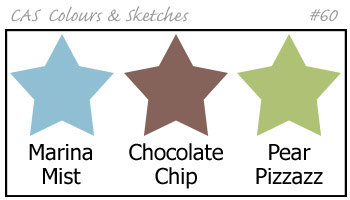
by Joanne James10. February 2014 12:28Today I'm sharing the card that was originally scheduled for yesterday! This card also uses the sketch layout at Freshly Made Sketches this week and I combined it with the colour challenge over at CAS Colours and Sketches this week:
I decided to go with an adult masculine card (it's always good to have a few of these on standby!) and inked up my Simply Sketched hostess set for the focal point of my card:
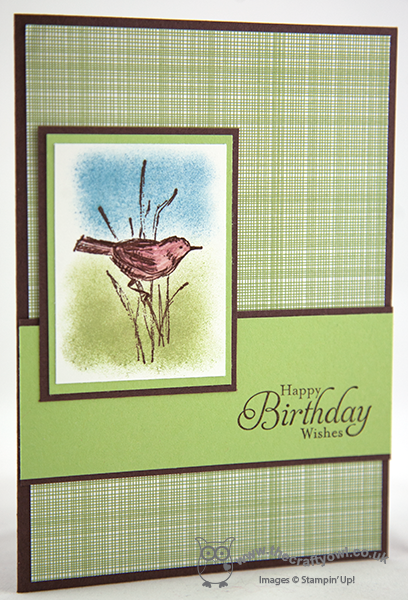
I stamped the little bird in Chocolate Chip ink and coloured him with a Chocolate Chip marker and blender pen, then used the blue and green to create a simple sponged background. I stamped my sentiment from the same stamp set on the front of the layered banner and used some of the Gingham Garden DSP to add interest without making the card too busy. This piece of Pear Pizzazz DSP seemed to be just right for this card, although you could be forgiven for not even knowing it's there as it isn't typical of the bright pink, indigo and yellow designs that are a key feature of this DSP pack.
I really like the understated finish of this card - and the little bird is perfect for a male card. This is the first time I've used the Simply Sketched stamp set and will definitely be making more with it. It has some lovely sketch stamps and three useful sentiments in a font that works with all kinds of cards. As I mentioned above, this set is an exclusive hostess set that can be yours only when you host a Stampin' Up! party. The current Sale-A-Bration promotion is a great time to host a party - not only will you and your party attendees get a free gift for every £45 you spend, but as the hostess you can earn an additional £25 in hostess benefits for qualifying party sales (£250 or more). If you would like to host a Stampin' Up! party, do give me a call or contact me to book a date.
I hope you like today's card; if you would like to see more ideas for using either today's sketch or the colour scheme, do pop by the Freshly Made Sketches and CAS Colours and Sketches blogs to see what the design teams and participants have created.
Back tomorrow with another project; until then, happy stampin'!
Stampin' Up! Supplies Used:
by Joanne James9. February 2014 20:01Today's post has been somewhat hijacked! I know I told you yesterday that this was an ordinary weekend and whilst that still holds true, something special happened today that I want to share with you. So, Rebecca went for her swim squad training this morning as usual but, unbeknown to me, she was given the option post warm-up to attempt her final distance badge - 1 mile (1.6km). Her previous distance badge achieved was for 1000m some 18 months ago, so I was confident she could do it, but 1 mile - it's still a long way, right? Well, she achieved it and was clearly so pleased with herself she phoned me from the car to tell me. As I turned to share with Ben the good, news, he promptly announced "Right Mum, let's go and make a card quickly before she gets home!" So with about 15 minutes to go, we set to work and this is what we came up with:
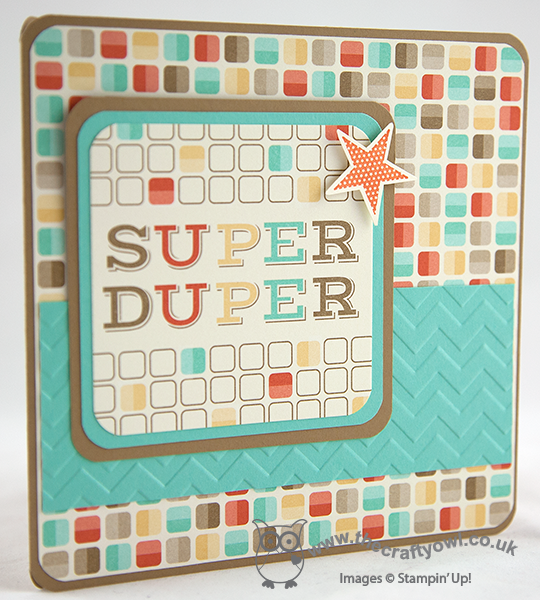
I followed this week's sketch layout at Freshly Made Sketches for my card and made a larger than usual 5 1/2" x 5 1/2" square card to accommodate my journaling tag. I rounded the corners of all my layers using my Envelope Punch Board (love that you can do this!) to echo the shape of the squares on the tag and co-ordinating Retro Fresh DSP. Ben was keen to incorporate swimming into the card (a challenge at short notice!) so we compromised at embossing the Coastal Cabana band with the Chevron Embossing Folder to give the illusion of waves and movement (in an abstract kind of way!) Lastly, I stamped and fussy cut a star and adhered to the corner of the tag with a dimensional because, well, Rebecca is my star! Ben insisted on finishing off by writing a message of congratulations inside in his best joined-up handwriting and we were just finishing up as Rebecca came through the front door.
She loved her card, which seems perfect recognition for such an achievement; I'm not sure I could swim a mile now, let alone when I was 8 years old!
Back tomorrow with the card that would have been posted today, but was deservedly 'bumped'; until then, happy stampin'!
Stampin' Up! Supplies Used:
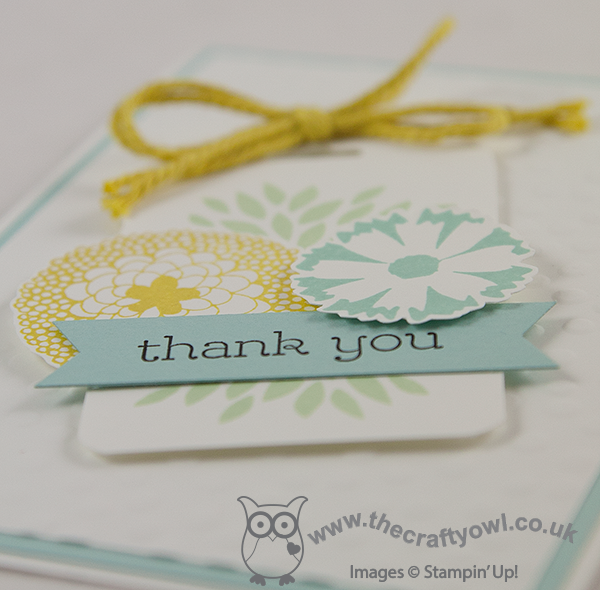
by Joanne James8. February 2014 19:56Yay - it's the weekend! We don't have any special plans this weekend, but sometimes that's a nice way to be. Homework, swimming lessons enough of a dry spell to get outside and shoot some hoops this afternoon and some time spent doing jigsaw puzzles - what could be nicer? Today I'm sharing another of the cards we made at this week's card class, featuring the items that can be yours free with a £45 spend. This card uses my favourite of the Sale-A-Bration stamp sets, Petal Parade - here is my card:
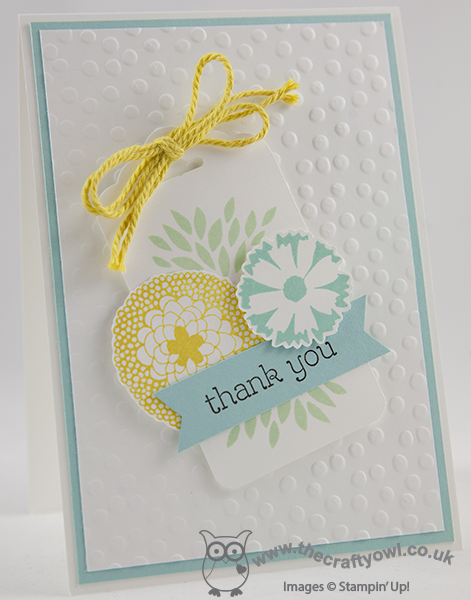
This card is a CASE of this one made by the talented Mary Brown; I loved this card when I saw it - the layering and the fussy-cut flowers really make it something special. In addition to which, it features three great Sale-A-Bration items (Petal Parade, Decorative Dots TIEF and some of the lovely baker's twine from the Sweet Sorbet accessory set) and one of my new favourites from the Spring-Summer catalogue - the Scalloped Tag Topper Punch. For my version of this card I wanted to use different colours and a pop of colour on my sentiment banner and offset my tag at a more jaunty angle. I hope you like it!
Back tomorrow with another card; until then, happy stampin'!
Stampin' Up! Supplies Used:
12b1e757-ed9a-4fad-a80d-7451139c1b34|1|4.0|96d5b379-7e1d-4dac-a6ba-1e50db561b04
Tags: Big Shot, Scalloped Tag Topper Punch, Decorative Dots Textured Impressions Embossing Folder, Happy Watercolour, Sale-a-bration 2014, Petal Parade, Sweet Sorbet, Shop online, Stampin' Up, Stampin' Up Card, Stampin' Up Card ideas, Stampin' Up Supplies, Classes
Cards | Classes | Stamping
by Joanne James7. February 2014 21:05Well, that was a week! One of my busiest and I sure am glad it's the weekend. Tonight I thought I would share with you one of the cards we made at my classes this week. All the cards we made featured Sale-A-Bration products that could be yours free with an order of £45 or more. Today's card is another featuring the 'You Make Me Happy' stamp from the 'See Ya Later' stamp set:
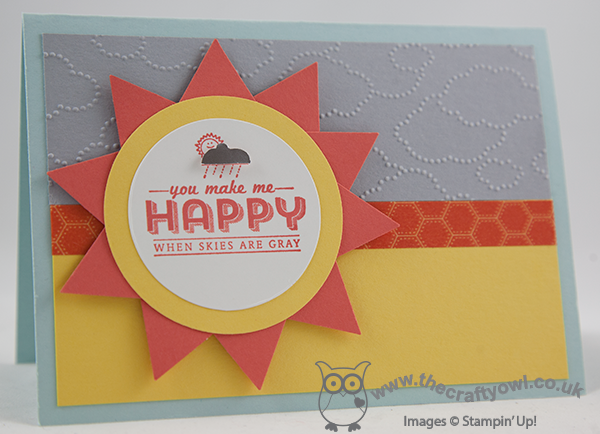
We stamped the sentiment onto the centre of our 'sun', which we constructed from layered circles and either triangles created with the new triangle punch or banner pieces using the banner punch (my sample shows triangles). I cut a tiny cloud out of an offcut of silver foil and added it to the front on a dimensional to add interest, and added a strip of This and That washi tape below the embossed panel just to bring a little colour and create definition.
If you would like to be the proud owner of this stamp set, then pop on over to my online store via the product links below to place your order. If you live local to me in Northampton and the surrounding area, why not come to one of my monthly card classes or my weekend project classes? My full class schedule can be found here; you don't need to have any previous knowledge or experience, we are a friendly bunch and all are welcome. Do give me a call if you'd like to know more.
Back tomorrow with another project; unitl then, happy stampin'!
Stampin' Up! Products Used:
e757c8b5-74f3-41aa-9cf8-037a09026f5b|0|.0|96d5b379-7e1d-4dac-a6ba-1e50db561b04
Tags: circle punch, Big Shot, Classes, Cloudy Day Textured Impressions Embossing Folder, Triangle Punch, This and That, Washi Tape, Shop online, Stampin' Up, Stampin' Up Card, Stampin' Up Card ideas, Stampin' Up Supplies, Sale-a-bration 2014
Cards | Classes | Stamping
by Joanne James6. February 2014 12:18A bright and cheery post for you today! The weather here in the UK has been less than favourable in recent weeks, with torrential rain, winds and severe flooding in some areas. Whilst I'm not a fan of this time of year myself, I feel thankful that we haven't been impacted by the weather as much as some people. Whilst I know today's card won't fix the country's weather problems, if you're in a part of the country that's struggling I hope at least it raises a smile. The theme over at 'Less is More' this week is 'rainbows' and that's where I took the inspiration from for today's card:
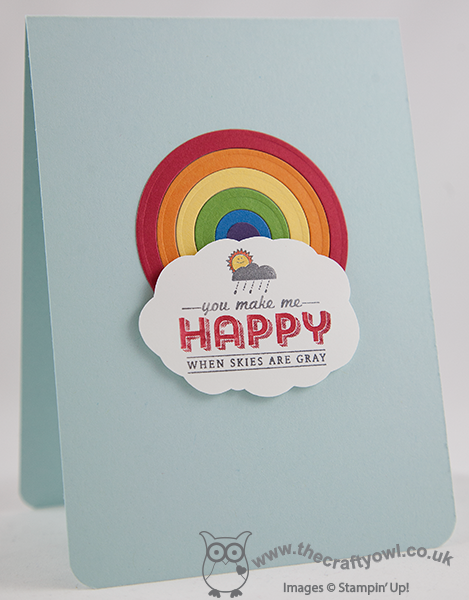
This is certainly a 'less is more' card for me; I created a rainbow using a selection of Brights cardstock using my circles framelits, and stamped my 'See ya later' sale-a-bration stamp onto a cloud that I actually cut out freehand using my Word Bubble framelits as a guide (I needed my cloud to be larger than the framelit size to accommodate the sentiment). I wanted my rainbow to 'disappear' into the cloud so made my rainbow extend beyond a semi-circle.
I think this card has a real feel-good factor about it - rainbows have that effect on you, don't you think? If you'd like more multi-coloured inspiration, pop on over to Less is More and take a look at the other entries - it's also their 3rd birthday this week, so happy birthday wishes to Chrissie, Jen and Mandi and congratulations on such an inspiring blog.
I'm off on a Thai cookery course tonight - I've done a couple of these themed cookery evenings before and they're such fun. Lots of cooking in the kitchen, then you get to sit down and eat the delicious output, without having to do the washing up!!
Back tomorrow with another project; until then, happy stampin'!
Stampin' Up! Supplies Used:
by Joanne James5. February 2014 18:33A quick early post from me today as I'm out for my second class of the week this evening. Today's card is for this week's challenge over at The Paper Players, where the lovely Ann-Marie has chosen a 'sweet treat' theme:

When I saw the theme of the challenge, I knew immediately what I was going to create - don't you just love it when that happens?! Here's my card:
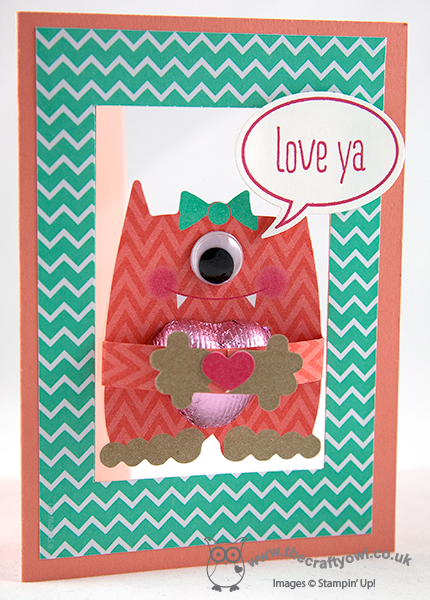
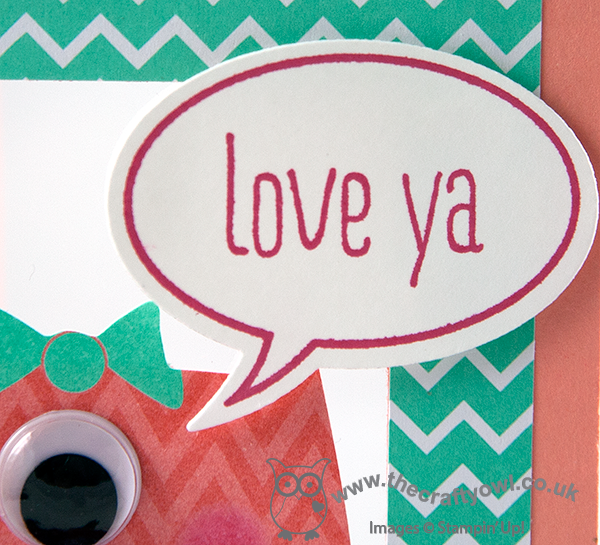
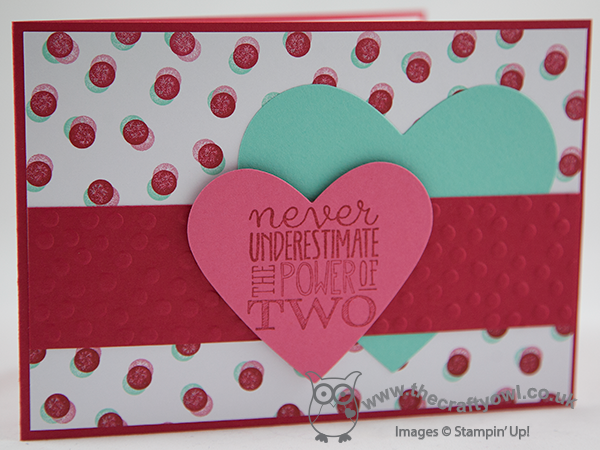
Quite a simple exterior with a border cut from the Fresh prints paper stack, the addition of a nice fat chocolate heart and one of those lovely Just Sayin' speech bubbles - here's a close up:
But the real fun element to this card is that she is mounted on a window sheet. Why? Well, because this way you get to see her behind (literally!!) - this is the inside reverse of the first image above:
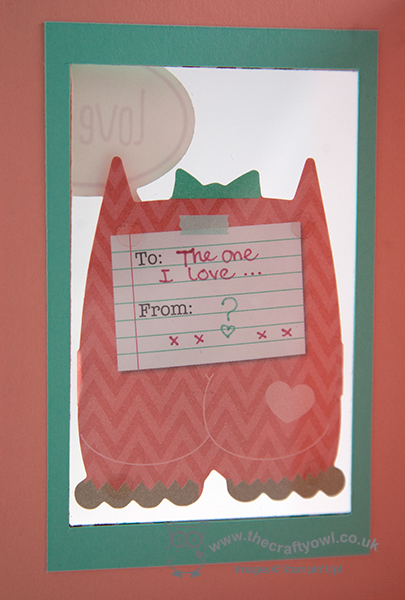
How cute is that?!!! It seemed such a shame to lose the reverse by sticking it straight onto cardstock - these are such fun kits and it's so great that the 'Whole Lot of Love' promotion has now been extended right through to Valentine's Day, so these cute little gals (and guys!) are still available to purchase.
Hop on over to The Paper Players to see what everyone else has created this week - there are some great cards and 3D projects to see. I've also linked up to the monthly challenge over at Catherine and Cathy Create, where the theme is 'hearts a flutter' and love.
Right, I'm off to class! Back tomorrow with another project; until then, happy stampin'!
Stampin' Up! Supplies Used:
404f1a76-76e7-4bfa-911d-ff0979f532eb|0|.0|96d5b379-7e1d-4dac-a6ba-1e50db561b04
Tags: Just Sayin', Word Bubbles Framelits, Big Shot, Monster Hugs, Magnetic Platform, Fresh Prints DSP Stack, Valentine's, Shop online, Stampin' Up, Stampin' Up Card, Stampin' Up Card ideas, Stampin' Up Supplies
Cards | Promotions | Stamping
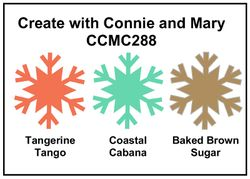
by Joanne James4. February 2014 20:29Good evening blog readers! Today I'm sharing another card that I made to link up to the colour challenge this week over at Create with Connie and Mary. Why, you ask? Well, this is this week's colour challenge:
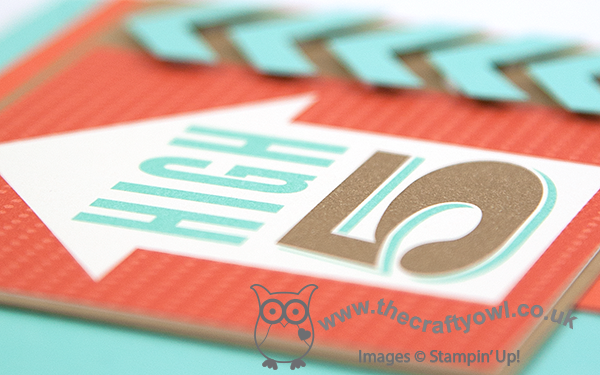
Now I already linked up this card that I had made for the Spring Sketch Challenge over at CCMC, because it just so happened to be in the right colours. Since that was more by accident than design, I decided to challenge myself to have another go at creating something specifically using these colours. To make it doubly challenging, I decided to try and not use any of the Retro Fresh DSP on my card - not because I don't love it, but because I wanted to create a card that looked different to the last one. So, here's the card I came up with:
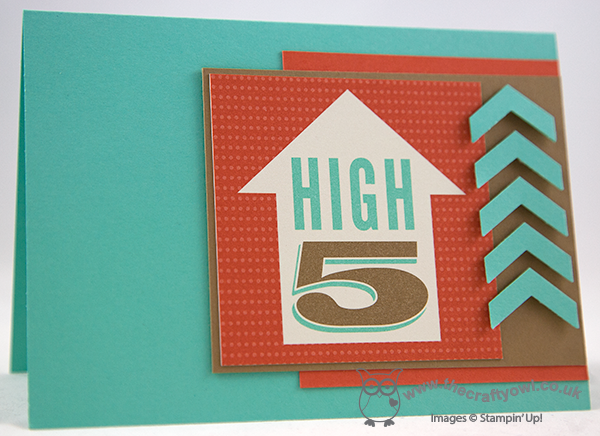
This card is very 'CAS' for me; I love 'clean and layered', but find 'clean and simple' more of a challenge (I think the large amount of 'white space' scares me!) I used one of the Retro Fresh Journalling Tags as the focal point for my card; as I'm not a big scrapbooker, I don't generally invest in journaling tags, but having seen some made into great cards on other people's blogs last season, I decided I would invest in a set of the new tags expressly to see if I could use them in card making. I have to say, I really like some of the cute tags and sayings included in the Retro Fresh tag kit and they are great for creating a quick focal point on a card. There are a few different sizes included and I think they're a bargain too, so if you've never bought a pack you might like to try them - like me, you might be pleasantly surprised! I finished this card before I realised I hadn't actually inked up a stamp either - this really is a card of so many 'firsts'!
I'm saving this card for when my son earns his next times tables badge at school; this will be a great 'hi 5' moment and this card will be the perfect way to celebrate.
Back tomorrow with another card; until then, happy stampin'!
Stampin' Up! Supplies Used:
by Joanne James3. February 2014 21:18This week is a busy week for me, with a couple of classes and lots more going on. I held my first class of the week today and we had a lot of fun making cards using all of the items that can be yours free with a £45 spend during Sale-A-Bration. I'll share some of these cards with you later in the week (I don't want to spoil things for those ladies that haven't made them yet!) but today I wanted to share a short video tutorial for the first of the projects I've made using the Scalloped Tag Topper Punch. The Scalloped Tag Topper Punch is new in the Spring-Summer seasonal catalogue and, along with its neighbour the Angled Tag Topper Punch, can be used to make easy gift tags and bookmarks in one simple step, as the top is shaped and the hole punched for you in one easy movement. It is an incredibly versatile punch and can be used to create lots more besides.
I have filmed a series of tutorials that show the versatility of these punches and the first of these shows you how to make a basic treat holder. Here are some of the ones I created:
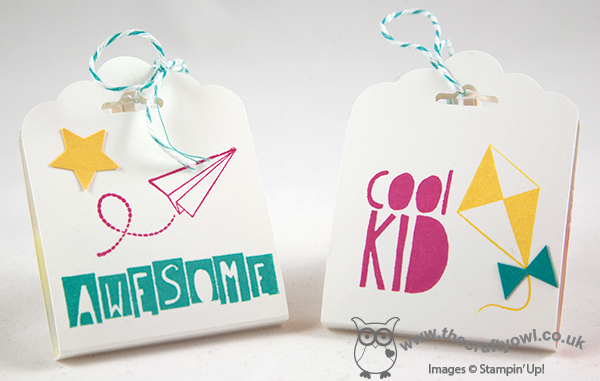
These were for my children as an after-school treat (they always complain I never greet them with sweets at the school gate, so this made a nice change!) and then I also created this more grown-up version:

I think these would make such lovely wedding favours and are so easy to make you could easily put together large quantities with minimal effort. I was inspired by these treat holders made by Mary Fish and adapted mine to suit the chocolate supplies on hand! Also, I have included both metric and imperial measurements in my tutorial, so you can create this treat holder with ease, whichever method you prefer.
So here's the first in my series of Scalloped Tag Topper Punch video tutorials - enjoy!
I hope you found my video useful; if you would like to purchase any of the items featured, please click on the links below and hop on over to my online store or give me a call if you're local to me and would like to save on postage costs. Back soon with news of some product shares that I've put together for those of you who have now had time to browse the new Spring-Summer catalogue and would like a little bit of everything! Until then, happy stampin'!
Stampin' Up! Supplies Used:
by Joanne James2. February 2014 20:33Good evening lovely blog readers! A super weekend has been had by all in the James household: lots of swimming and crafting in preparation for this week's classes featuring the lovely Sale-A-Bration goodies. Today's card is one I made earlier in the week using the sketch challenge at Pals Paper Arts this week - here's the sketch:
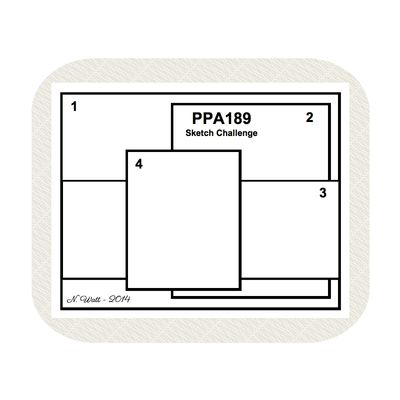
Whilst I followed the layout of the sketch, I changed out blocks 2 and 4 for heart shapes which I cut with my hearts Framelits - take a look at my card and you'll see what I mean:
I kept my card quite simple and took my colour inspiration from the sheet of paper I used from the new Fresh Prints DSP stack in the Spring-Summer seasonal catalogue. This is a lovely paper stack which predominantly features Real Red, Whisper White, Coastal Cabana and Crumb Cake, but there are a few patterns that include pink too, such as the one I've used here. The sentiment is from the 'Yippee-Skippee!' stamp set and could have several uses: I've used it in the context of a loved one for a Valentine's/anniversary card, but I think it would be great on a baby card to welcome the arrival of twins too. I can also see me using it on a scrapbook page featuring my Junior James' - they are a formidable pair when they get together! Lastly, I embossed the central panel with the SAB decorative dots folder to echo the pattern of the background paper.
I hope you like today's card - if the above sketch layout appeals to you, do pop over to the Pals Paper Arts blog to see what the design team did with the sketch. I have the first of this week's classes tomorrow, but do pop back here for another project - all being well I might even have another video edited for you!
Until then, happy stamping!
Stampin' Up! Supplies Used:
b9241dec-2a1a-4934-b00d-4fcb976d7ef2|0|.0|96d5b379-7e1d-4dac-a6ba-1e50db561b04
Tags: Big Shot, Decorative Dots Textured Impressions Embossing Folder, Hearts Framelits, Fresh Prints DSP Stack, Shop online, Stampin' Up, Stamp-a-ma-jig, Stampin' Up Card, Stampin' Up Card ideas, Stampin' Up Supplies, Yippee Skippee
Cards | Sale-a-bration | Stamping
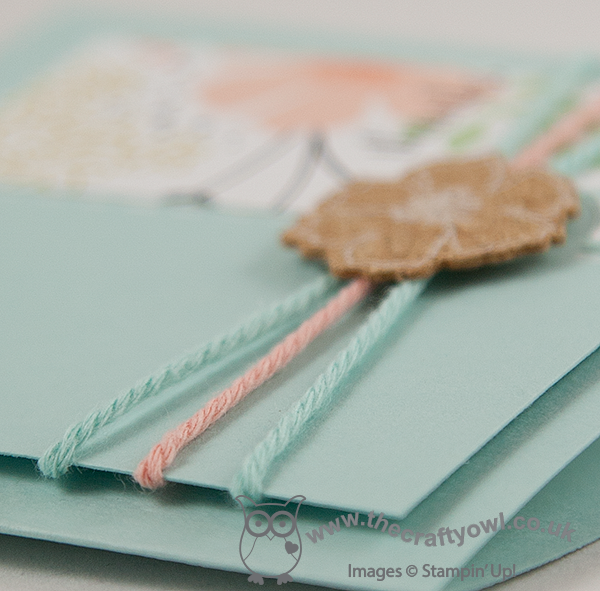
by Joanne James31. January 2014 23:00A quick post from me today using more of the Sale-A-Bration goodies that you can receive with each £45 spend. Today I've made a couple of cards featuring the Sweet Sorbet paper and highlighting some of the lovely items in the Sweet Sorbet accessory pack. The pack contains some handy self-adhesive cork embellishments and some super-chunky baker's twine - here's the first of my cards:
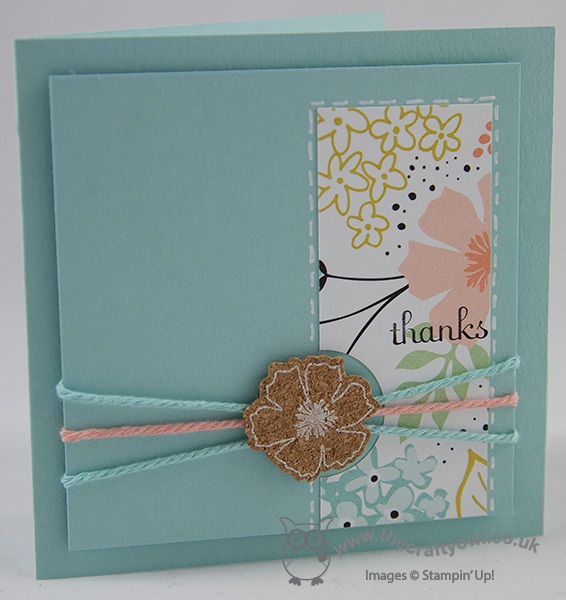
I used a simple panel of DSP on a square layered Pool Party base, with a semi-circle cut out around a cork flower, attached above three pieces of co-ordinating chunky baker's twine. I then simply stamped 'thanks' and outlined my DSP with my white gel pen. For my second card I used the same colourway on a rectangular base and cut a larger semi-circle out of the DSP to accommodate a larger flower which is actually pre-painted white, but as you can see from the photo can be coloured - I coloured mine in Crisp Cantaloupe and Calypso Coral using Stampin' Write markers and added a Pool Party Candy Dot:
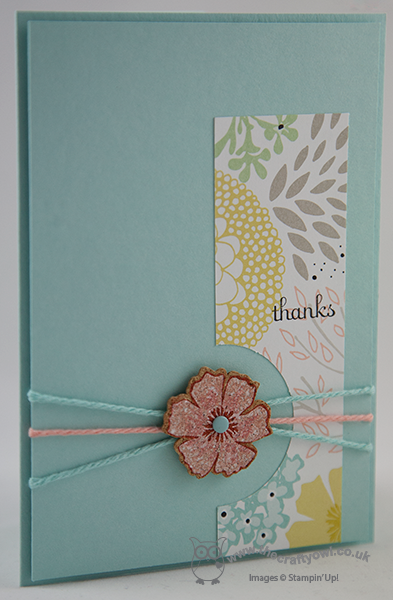
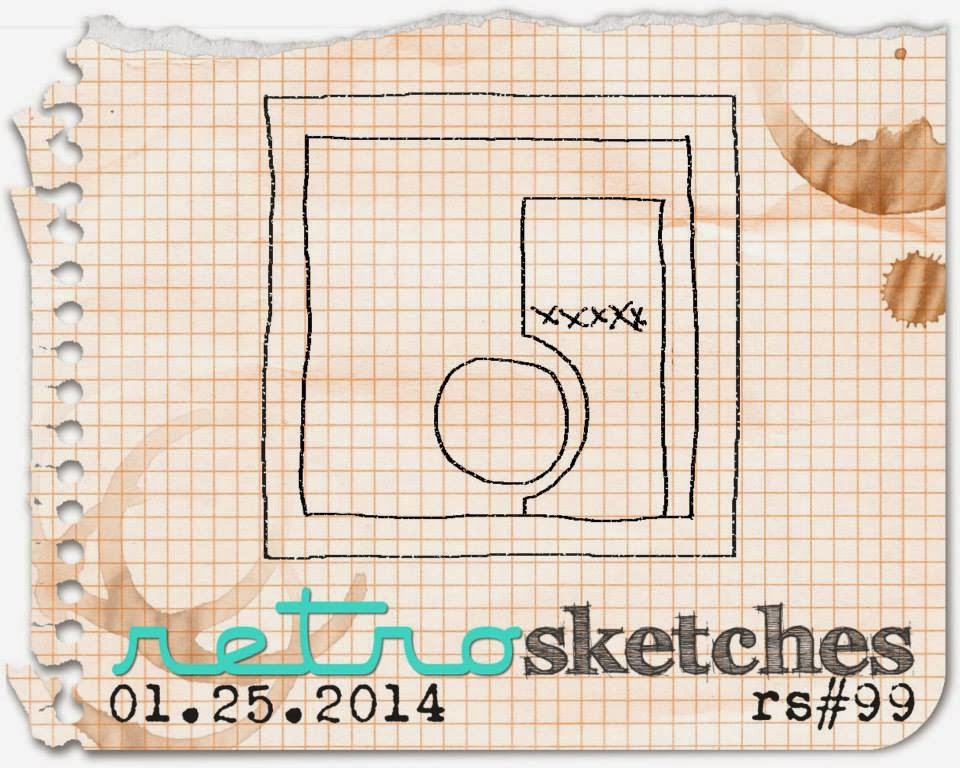
These cork flowers are a fun embellishment for something a little different, with lots of creative possibilities especially if you colour them. I'm linking the first of today's cards up to this week's Retrosketches card challenge - I used this sketch as the inspiration for both of my cards.
Back tomorrow with another fun project; until then, happy stampin'!

Stampin' Up! Supplies Used: