A Picture Perfect Party Birthday Celebration PP386

by Joanne James25. March 2018 09:00

It's Sunday and time for this week's new challenge over at The Paper Players! It's the turn of my amazing friend Claire to host this week and she has my favourite, a sketch challenge, for you to work with:


I could have gone so many ways with this sketch! I have not one, but two cards, to share with you today - both with a fun party theme. Here's the first one - take a look:


Here's the low-down on today's card:

Picture Perfect Party - Both of my cards today feature papers with the bold, photographic images featured in the Picture Perfect Party DSP Stack. In bright, celebratory colours, these papers are perfect for a large expanse of background and work really well as the background for my fun, party-themed cards. I used the offcut from my card panel to continue the decoration through to my envelope to with a colourful envelope liner.

Picture Perfect Birthday - I used the co-ordinating Picture Perfect Birthday stamp set to decorate the sentiment circles on the front of my card. I was lucky to receive this set free when I attended Onstage last November, which really was fortunate for me as I think this is a set I might otherwise have overlooked. It contains some great, scripted fonts that work for birthdays and more general celebrations and has some fun confetti, candle, tooter and ribbon bow images too. In addition to using it to decorate the outside of my card, I added a little colour to the inside too:


Finishing Touches - To finish my cards, I added some gold tinsel trim and a strip of fringed cardstock to the one above and some silver baker's twine and mini silver sequin trim with a strip of fringed cardstock to the card below:


And here's the inside of this card too:

Two cards using the same layout and supplies, each with a different pattern and sentiment. The Picture Perfect Party Suite is perfect for creating batches of birthday cards with a minimum of supplies. Here is the visual summary of the key products used on today's project for you to pin for easy reference:


You can see all of my Product and 'How To' summaries on my 'How To - Tips and Techniques' Pinterest board in case you've missed any. 

Before you reach for your ink and papers, check out what our amazing team has created to inspire you this week:

Here's a quick recap of our challenge rules:
 
1.  Create a new paper project
2.  Upload your creation to your blog with a link back to us and provide a direct link to the post featuring your challenge submission.
3.  Please link your card to no more than four challenges, TOTAL.
4.  Have FUN!

I can't wait to see what you create with this week's sketch and look forward to visiting your blogs this week! Enjoy the rest of your weekend as it will be over all too quickly. We are minus one James Junior who is away on a short hockey tour for a few days, so will be spending the day researching hurricanes with James Junior number 2 for a geography project in between a little crafting too I hope!

I'll be back tomorrow with another project that also uses this same sketch but has a totally different feel, so do come back and take a look at that card; until then, happy stampin'!


Stampin' Up! Supplies Used: 

Table built using Product Table Builder by The Crafty Owl - Independent Stampin' Up! Demonstrator.

Flying Home Welcome To Your New Home Card PP378

by Joanne James28. January 2018 09:00

It's Sunday and time for this week's new challenge over at The Paper Players! It's the turn of our wonderful team leader Nance to host this week and she has my favourite, a sketch challenge, for you to work with:


Whether you stay with the circle or use an alternative shape, this is a sketch with many possibilities. I decided to keep with the circle as it was perfect to showcase a new stamp I haven't used yet and have fun with a little colouring - take a look:


I've had a few friends that have either recently moved or are in the process of moving, so I needed to replenish my stock of 'new home' cards and the 'Flying Home' stamp set had the perfect image. Here's the low-down on today's card:

Flying Home - I was lucky enough to receive the 'Flying Home' stamp set at Onstage in November, but had yet to ink it up. This set is perfect for a new home card, or even a new baby card; in fact the whimsical line drawings work for lots of card types. The other great thing about this set is that it is made for colouring. I used my Stampin' Blends to colour in my main image and I stamped the little bird twice so that I could fussy cut one and pop him up on a tiny piece of a dimensional for added lift.

A Petal Garden Colour Combo - I pulled the colours for my stamped image directly from the Petal Garden designer series paper that I used for my background panel and added a co-ordinating ribbon trim too. I love these fresh colours, perfect for spring - here's the colour palette for you to save if you'd like to use it for your future projects:


New Home Congratulations - The 'Flying Home' stamp set is sentiment-free, so I decided to go on the hunt through my other sets for a small sentiment that I could add to my horizontal Pool Party strip. I found the perfect stamp in 'At Home With You'  - and followed up inside my card with 'congratulations'.

Here is the visual summary of the key products used on today's project for you to pin for easy reference:


You can see all of my Product and 'How To' summaries on my 'How To - Tips and Techniques' Pinterest board in case you've missed any. 

Before you reach for your ink and papers, check out what our amazing team has created to inspire you this week:

Here's a quick recap of our challenge rules:
 
1.  Create a new paper project
2.  Upload your creation to your blog with a link back to us and provide a direct link to the post featuring your challenge submission.
3.  Please link your card to no more than four challenges, TOTAL.
4.  Have FUN!

I can't wait to see what you create with this week's sketch and look forward to visiting your blogs this week! Enjoy the rest of your weekend as it will be over all too quickly. I'm hoping to fit in a little more crafty time today along with some precious family time. I'll be back tomorrow with another project; until then, happy stampin'!


Stampin' Up! Supplies Used: 

Table built using Product Table Builder by The Crafty Owl - Independent Stampin' Up! Demonstrator.

A Beautiful Peacock For The Paper Players PP376

by Joanne James14. January 2018 09:00

It's Sunday and time for this week's new challenge over at The Paper Players This week it's the turn of the awesome Jaydee to host and she has a great colour challenge for us to work with:


Now as you know I sometimes find colour challenges perplexing, however Jaydee's palette this week got me all excited - so many creative possibilities! And what fourth colour to choose? I eventually settled on Tempting Turquoise, creating the perfect colour combination to ink up my Beautiful Peacock stamp with for the first time - take a look:


Here's the low-down on today's project:

Eastern Palace Inspired - The first thing I do when I get a colour challenge is to look at what papers or accessories I have in my collection in those colours that I can work with. All three of Jaydee's chosen colours feature within the Eastern Palace Specialty Designer Series Paper so this was a natural starting point for me. 

A Beautiful Peacock - I knew I wanted to feature the denim and lime pattern that is on the right hand panel of my background; this pattern has always reminded me of peacock feathers - does it you? This led me straight to another of my free Sale-A-Bration stamp sets, Beautiful Peacock - such a gorgeous set and a perfect pairing. I decided to add in Tempting Turquoise as my fourth colour and use all four colours on my bird, with a Dapper Denim body and the remaining colours to create a graduation of colours across the tail feathers, punctuated with some retired Dapper Denim enamel dots.  You can see a close up of the detail on the photo below:


I then added some additional swirls and flowers to my panel behind. I really love this stamp - and even more so since it didn't cost me anything at all! 

A Touch Of Gold - I couldn't resist adding in a little sparkle to my project; I brushed some clear Wink of Stella onto the body of my peacock and added a trio of gold enamel shapes amongst the swirls to tie in with the gold stripes of my side strip of designer paper. 

Here is the visual summary of the key products used on today's project for you to pin for easy reference:


You can see all of my Product and 'How To' summaries on my 'How To - Tips and Techniques' Pinterest board in case you've missed any. 

Before you reach for your ink and papers, check out what our amazing team has created to inspire you this week:

The Paper Players Design Team
 
 
Here's a quick recap of our challenge rules:
 
1.  Create a new paper project
2.  Upload your creation to your blog with a link back to us and provide a direct link to the post featuring your challenge submission.
3.  Please link your card to no more than four challenges, TOTAL.
4.  Have FUN! 


I look forward to seeing what you create with this week's colour palette. 

Enjoy the rest of your weekend as it will be over all too quickly; we are having a relatively quiet day, having spent yesterday out in the cold for both netball and football fixtures. One of the James Juniors has been out on a sleepover, so once he's been collected, I'm hoping for a nice lunch and maybe even an afternoon movie - that would be nice! I'll be back tomorrow with another project; until then, happy stampin'!


Stampin' Up! Supplies Used: 

Table built using Product Table Builder by The Crafty Owl - Independent Stampin' Up! Demonstrator.

Painted Harvest Triple Fold Card

by Joanne James15. November 2017 22:00

Today I'm just popping by with a quick blog post to share a quick card with you - the last of my cards from my technique class featuring the Painted Harvest bundle earlier this month. Our final card is a real showcase of the fabulous Painted Autumn designer series papers in the form of a triple fold card - take a look:


Continuing with our 'thankful' theme, the triple fold design of this card showcases the gorgeous Painted Autumn papers, with five different panels of paper on the main Very Vanilla folded section and a sixth on the belly band that holds it closed. There is a hidden circle on the inside of the back panel on which to write your greeting and the belly band is decorated with another of those lovely sunflowers and another of the sentiments in the Painted Harvest set. I can't find my photo of the card when open, showing the inside - if I manage to track it down in my backed up projects I'll come back and update this post. In the meantime, I'm sure you get the idea!

Here is the visual summary of the key products used on today's project for you to pin for easy reference:


You can see all of my 'How To' summaries on my 'How To - Tips and Techniques' Pinterest board in case you've missed any. 

If you've enjoyed the outputs of this class, I have a similar one featuring the Delightful Daisy Suite on Monday 4th December with a couple of spaces left - you can see the full details here. Contact me for more information or to book your place - I would love you to join us!

Don't forget 9PM tomorrow is the first opportunity you will have to go online and reserve the new Stamparatus stamp positioning tool - you can read all about it here. I'll be back tomorrow with another reminder and hopefully a creative project too. Until then, happy stampin'!


Stampin' Up! Supplies Used:

Table built using Product Table Builder by The Crafty Owl - Independent Stampin' Up! Demonstrator.

Beautiful Bouquet One Sheet Wonder

by Joanne James11. August 2017 20:00

Friday already - where did the week go?! I've been having fun with my not-so-little ones - and today my youngest James Junior turned 10 years old so now I have two children in double digits - I really don't know where the time goes! We have had a fun day of games, football, dinner out and a trip to the cinema so all in all a lovely end to the week. Following a few absent days, I thought it was time for a quick post to share more of my makes with the Beautiful Bouquet stamp set. I actually used the set to create a one sheet wonder, that I turned into eight cards that I then duplicated for my thank you cards to go out with my customer orders this month. Here's one of the cards in the set:


Here's the low-down on today's card:

Bright Colour Combo - I chose a bright colour combination of hot pink, orange and red with a contrasting touch of blue for my set of cards - the Marina Mist blue is definitely the wild card here, however I think it breaks up the other colours in a good way. Here's the colour combination if you'd like to save it for future use:


Step It Up - I could have simply added my one sheet wonder panels to my card bases, along with a sentiment stamped on a basic square or punched circle, to complete my cards in record time. I decided to step them up slightly with the aid of my Stitched Shape Framelits, Layered Squares and Circles Framelits and some additional stamped flowers that I then diecut with the co-ordinating Bouquet Bunch Framelits. Completion took a little more time for sure, however I think it was worth it - sometimes it's the details that count and really make the difference.

The Wonder Of One Sheet - A one sheet wonder is a fun way to create your own patterned paper and can be a quick solution if you want to create a bunch of cards. I made up my own cut template for this one, with a set of easy cuts to make the most out of my single sheet of A4 cardstock. Here's a shot showing all the cards I made just to give you a flavour off the set:


I used a variety of base and mat colours - the tiny flowers make Beautiful Bouquet a great set to use for a one sheet wonder. Why not give it a try with some of your favourite colour combinations?

Here is the visual summary of the key products used on today's project for you to pin for easy reference:


You can see all of my 'How To' summaries on my 'How To - Tips and Techniques' Pinterest board in case you've missed any. 

I'll be back on Sunday with another project. Until then, happy stampin'!


Stampin' Up! Supplies Used:

Table built using Product Table Builder by The Crafty Owl - Independent Stampin' Up! Demonstrator.

Wood Words In-Colour Heat Embossed Thankyou

by Joanne James18. May 2017 20:00

I'm late posting today as I've been on the go and just haven't stopped to write until this evening. I'm sharing a card that I designed as a make and take for my team training that I held last Saturday - take a look:


Here's the low-down on today's card:

Wood Words - I used the large floral stamp from the forthcoming 'Wood Words' stamp set for my background today and stamped it in Versamark then heat embossed it in white onto Shimmery White cardstock, ready for my watercolouring. Wood Words is part of the Wood Textures suite that includes the Wood Crate framelit and some great wood textured papers, yet on today's card there's not a piece of wood in sight. My sentiment is from the same set too and is embossed in white on the new in-colour Berry Burst - I think this is actually my favourite of the new in-colours, a wonderful purple-pink shade that really pops with the copper foil behind too. I also added a coupe of flowers cut with the Seasonal Layers thinlits, one each in Powder Pink and Fresh Fig for added decoration.

In-Colour Watercolour - I used a trio of the new in-colours - Powder Pink, Berry Burst and Fresh Fig to create the watercoloured background for my white embossed flowers, working from one side to the other and fading out. Don't they look pretty together? I'm also linking today's card up with the team over at SUO Challenges this week where their challenge is all about watercolouring.

CASE The Kit - The design of my card was inspired by one of the cards in the forthcoming new 'Hello Friend' heat embossing product kit on page 16 of the new annual catalogue. One of the business topics we discussed at team training was how Stampin' Up!'s kits can benefit your business and our make and takes all included opportunities to practice the techniques and skills required to demonstrate with this kit effectively. There's nothing like being prepared and I'm sure my team would agree that team training is great for this kind of thing. As for me, I love getting together with my team - check out my Facebook page here if you'd like to see some of the other things we got up to last Saturday - we had the best ice-breaker activity I think I've ever participated in!

Here is the visual summary of the key products used on today's project for you to pin for easy reference:


You can see all of my 'How To' summaries on my 'How To - Tips and Techniques' Pinterest board in case you've missed any. 

I'll be back tomorrow with another project. Until then, happy stampin'!


Stampin' Up! Supplies Used:

Table built using Product Table Builder by The Crafty Owl - Independent Stampin' Up! Demonstrator.

Baking Makes Life Sweeter - Perfect Mix Card

by Joanne James26. February 2017 09:00

It's Sunday and time for this week's new challenge over at The Paper Players! My good friend LeAnne is the hostess this week and she has a sketch for us to work with:
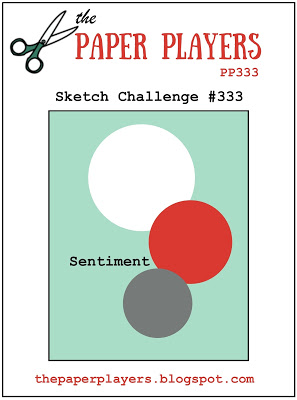
 

Now you know me - I love a good sketch and this one is a keeper! I had a couple of ideas for this sketch and made two quite different cards. The one I'm sharing today is very much in keeping with my style (maybe that's why it won the James family vote 2 to 1 when I conducted a quick poll!) I went with my signature 'clean and layered' style and took the opportunity to make another card using my 'Perfect Mix' stamp set - take a look:
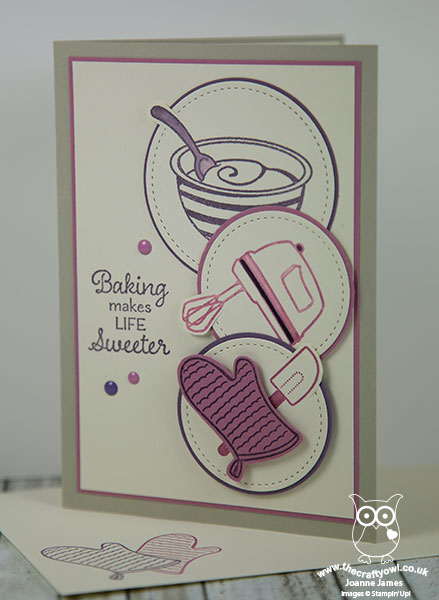
 

Here's the low-down on today's card:

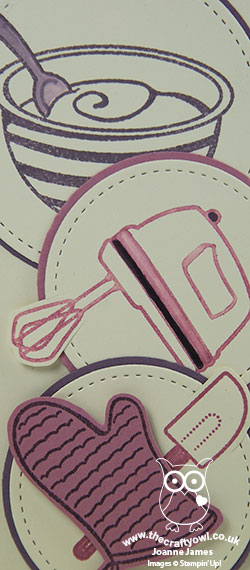
It's In The Detail - My card today is my usual clean and layered style. I toyed with adding some additional background pattern or even designer series paper, however the size of my circle elements would have made this too busy. Instead I opted to create detail in other ways: I used my circle Stitched Shape Framelits to cut out my stamped images and layered these onto some punched circles to add a thin border of colour. I also used the partial die cutting technique to add interest by allowing part of the image to overhang the circle. The mixer I inked using my Stampin' Write marker so that I could omit the sentiment that goes with it. I also stamped my oven glove onto coloured cardstock and fussy cut it before popping up on a dimensional for added colour and impact.

Rule of Threes - It is a known principle that things that come in threes are somehow more satisfying or more effective than other numbers. LeAnne's sketch uses three circular elements; I also added a trio of enamel shapes to echo my layered circles and continue the harmony of my card.

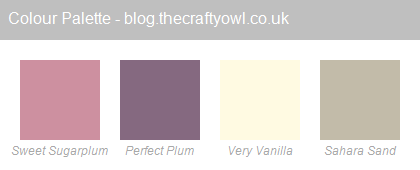
A Perfectly Purple Colour Combination - I love purple but it's not a colour I use often on a card, so I chose to use a combination of purples and neutrals today for a change - here it is if you'd like to try it too:
 

This is such a great stamp set! I love the punny sentiments but if you, like me, are a baker then you will find so many uses for these images.

Here is the visual summary of the key products used on today's project for you to pin for easy reference:

 **To be updated - Stampin' Up! Website currently unavailable due to overrunning maintenance work. Online ordering currently offline.**

You can see all of my Product and 'How To' summaries on my 'How To - Tips and Techniques' Pinterest board in case you've missed any. 

Before you reach for your ink and papers, check out what our amazing team has created to inspire you this week:

The Paper Players Design Team
 
 
Here's a quick recap of our challenge rules:
 
1.  Create a new paper project
2.  Upload your creation to your blog with a link back to us and provide a direct link to the post featuring your challenge submission.
3.  Please link your card to no more than four challenges, TOTAL.
4.  Have FUN! 


I look forward to seeing what you create with our sketch this week. Enjoy the rest of your weekend as it will be over all too quickly; I'm off to spend the day at the swimming pool as Rebecca is racing in her rescheduled Counties Competition. I don't know which I'd rather - the gale-force icy winds I experienced as I stood outside watching her play in her netball match yesterday morning or the sauna-like temperatures of the swimming pool today! The things us mothers do for love!. I'll be back tomorrow with another project; until then, happy stampin'!


Stampin' Up! Supplies Used:

To be updated - Stampin' Up! Website currently unavailable due to overrunning maintenance work.

Cozy Critters Pastel Owl Christmas Card - Last Day of 25% Off Stamp Sets

by Joanne James30. November 2016 08:00

Wednesday already?! Where does the time go! Firstly today I have a reminder for you: today is the last day you can take advantage of 25% off selected stamp sets as part of the Stitched From the Heart promotion - you can read full details, including the sets that are on offer, in my previous post here. For today I have another card that uses Sandy's sketch over at The Paper Players this week, but one that is quite different to my Design Team card from Sunday and that includes one of the stamps from the current offer sets:


Here's the low-down on today's card:

Book A Party, Earn An Owl -  One of the hostess sets in the current seasonal catalogue is 'Cozy Critters', which includes a sweet fox along with this adorable owl, which co-ordinates with the Owl Builder Punch for easy assembly. This stamp set is exclusively available to customers who either host their own party or place a single order of £150 or more and has been incredibly popular. This set will only be available until the 3rd January and will not be available on the retired list or clearance rack; I don't have any slots left for pre-Christmas parties now, but if this set is on your wishlist you still have time to place a qualifying order and grab yours with your Stampin' Rewards. 

Woodland Trees - I used that panel for an embossed piece again - this time the Woodland Textured Impressions Embossing Folder. Difficult to see in the photograph, but I brushed the debossed areas in between the trees with my clear Wink of Stella, along with the owl's oversized hat and co-ordinating scarf - this card is so, so sparkly!

Not Just For Tags - The sentiment and background snowflake are from the versatile Tin Of Tags stamp set. This stamp set co-ordinates with the Tin of Tags kit in the seasonal catalogue, however can be used for so much more besides and are perfect in a layered stitched circle on a card. This set is available for today only at a discounted 25% - £14.25 instead of £19. Why not buy one with a Tin of Tags kit (£20) and give someone a pre-Christmas gift that will not only provide some creative respite in the run up to the big day, but result in a set of beautiful handcrafted tags to add the finishing touch to their gift packaging:


I know I would appreciate a gift like this at this time of year!

Here is the visual summary of the key products used on today's project for you to pin for easy reference:


You can see all of my 'How To' summaries on my 'How To - Tips and Techniques' Pinterest board in case you've missed any. 

I'm also linking my card up with one of the other teams that the lovely Sandy designs for - Stamps, Ink, Paper - where the challenge is embossing, dry or heat. 

sip-any-challenge-76-800

I'll be back tomorrow with news of another great set of pre-Christmas offers from Stampin' Up! which you won't want to miss; until then, happy stampin'!


Stampin' Up! Supplies Used:

Table built using Product Table Builder by The Crafty Owl - Independent Stampin' Up! Demonstrator.

Silver Glimmer Christmas Reindeer

by Joanne James13. October 2016 08:05

I've been poorly this week hence my lack of blog posts but today it's time for a new challenge over at Create With Connie and Maryand this week we have a colour combination for you so I'm back with a short post for you:


I decided to go with an unusually coloured Christmas card today and equally uncharacteristically I had a design in mind as soon as I say this week's colour combination - that almost never happens! Here's my card:


Here's the low-down on today's card:

Santa's Sparkly Reindeer - The only stamping on today's card is the greeting (from the Star of Light stamp set) - this card is all about the dies, Santa's Sleigh Thinlits Dies to be exact. A silver glimmer reindeer, wearing a festive wreath and bow.

Die Impression Background - Inspired by the gorgeous cards that Jennifer McGuire made using die impression backgrounds recently (you can see her cards and a useful video tutorial here), I got out my Layered Circle Thinlits and created my own circle impressions to add texture and interest to my background. Unfortunately I did not manage to get a good photograph that showed this detail - this close up does show some of the circles, but I'm afraid that my photography skills on white are not as good as Jennifer's!

A Sprinkling of Fancy Frost - I finished my card with a sprinkling of Fancy Frost sequins - they feature two out of this week's colours, so it had to be done and they carried through the circle theme of the die impressions. 

Do visit the other Design Team members to see what they did with this week's colours; there's lots of inspiration over on their blogs too!

Enjoy your day and I'll be back tomorrow with another project. Until then, happy stampin'!


Stampin' Up! Supplies Used:

Table built using Product Table Builder by The Crafty Owl - Independent Stampin' Up! Demonstrator.

Mini Catalogue

BROWSE THE CATALOGUE

The mini catalogue is now live! Read and download your copy here.

Shop Online

Access my online shop 24 x 7, 365 days of the year:

Current April hostess code:

VDKNV7BH

Shop Online

Join My Team

It's always a great time to join Stampin’ Up! New team members can get £130 worth of products for only £99 + free business supplies + free shipping + all the fun being a part of Stampin’ Up! Stampin' Up! has something for everyone: join my growing team and benefit from my support to enjoy Stampin' Up! however you choose.

If you're interested, call me for a chat to understand how I can help you realise your goals. Alternatively, if you have already decided to sign up and you just can't wait, please click here for the link to the online form where you can sign up and order your starter kit right away! 

Latest Kit!

Stampin Cut and Emboss

The Rock Legend Kit has all you need to make 8 cards with coordinating envelopes. Along with the new Panda Friends Kit, both are available from January 4th for just £14 each - get yours here!

2023-24 Annual Catalogue

BROWSE THE CATALOGUE

Click on the catalogue for a full list of current SU! supplies - if you would like to order any of the items featured, please drop me a line at [email protected] or give me a call on 07773 421446 - I'd be happy to help.

New Online Exclusives

There are new products available exclusively in the online store from 5 March - check them out here.

About Me

Hi I'm Joanne and live in Northampton and when I'm not looking after my husband and two beautiful children, am an avid crafter with a passion for all things Stampin' Up!

I must confess that I have never been a big rubber stamper - until I discovered Stampin' Up! that is. I love the fact that I can get such great results with co-ordinating stamps, inks, papers and punches - the possibilities are endless! Join me on my stamping journey as I share the things I love and be inspired to create amazing things yourself!

Follow Me

Monthly Newsletter

Box Builder

Click the button above to use Box Buster to create your custom box design using the Envelope Punch Board!

Kits Collection Now Available!

Stampin Cut and Emboss

The new Kits Collection from Stampin' Up! is now available!

Click here to see the current kits available and order yours online today.

I Design For


Stampin' Up Stuff

This is my personal blog and is not endorsed by Stampin’ Up! I hope you find it a plentiful source of ideas and personal inspiration but please don't copy my designs for contest submission or use for classes, publication or sale without express permission.