Seasonal Swirls Autumn Leaf Wreath Thankful Card TTT138

by Joanne James4. November 2021 18:00

It's Thursday and time for a new challenge over at TicTacToe! It's the turn of Team X to host this week and the lovely Felicita is our featured designer this week. This is the fun board that we are playing along with: 
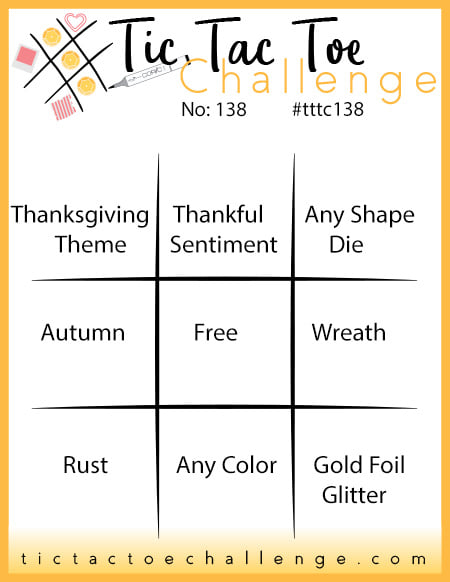
          

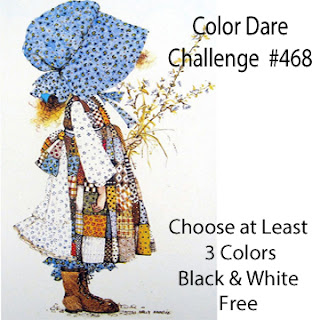
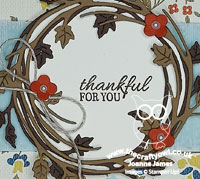
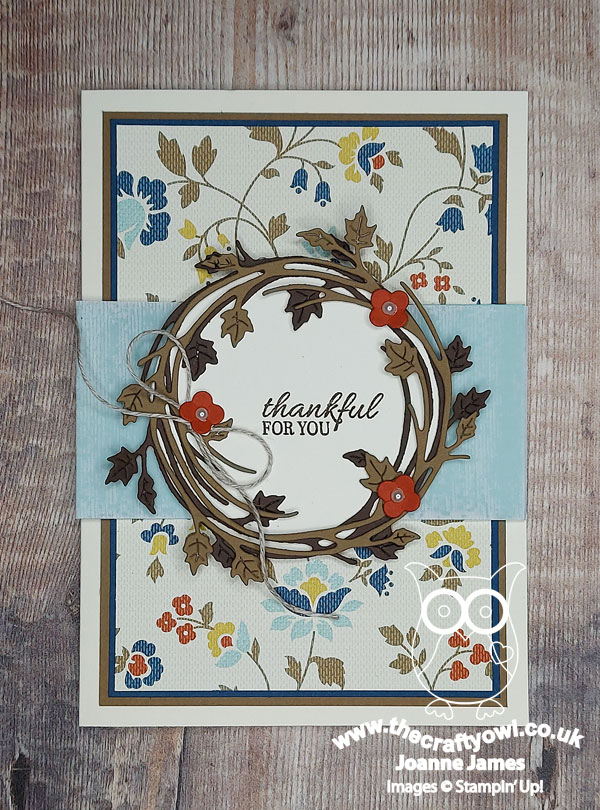
I also used Jen M's great sketch over at Freshly Made Sketches this week for my layout, the colours over at Color Dare and my final entry over at Just Us Girls this week where Bobby's wild card is 'leaves'. I went across the middle of this week's Tic Tac Toe board with Autumn/Free/Wreath for my card today, but it also works for the middle column of thankful sentiment/free/any colour too. when I saw the Color Dare inspo photo of Holly Hobby this week I was taken right back to my childhood - and more recently, to my retired designer series paper pile! I had some old Comfort Cafe paper that I thought would be perfect for the challenge as it featured bluesm yellows and browns and would also provide a suitable background for my wooden, leafy wreath - take a look:
 

Here's the low-down on today's card:

Seasonal Swirls - I went for a simple layered wreath of twigs and leaves today, as I didn't want to do too much to detract from the pretty background paper. I added a trio of Cajun Craze flowers, cut using my Floral Squares dies, that echo the detail on the paper, and centred each with a pearl, along with a linen thread bow and backed it with a very vanilla circle stamped with a simple sentiment from the 'Sparkle of the Season' set.

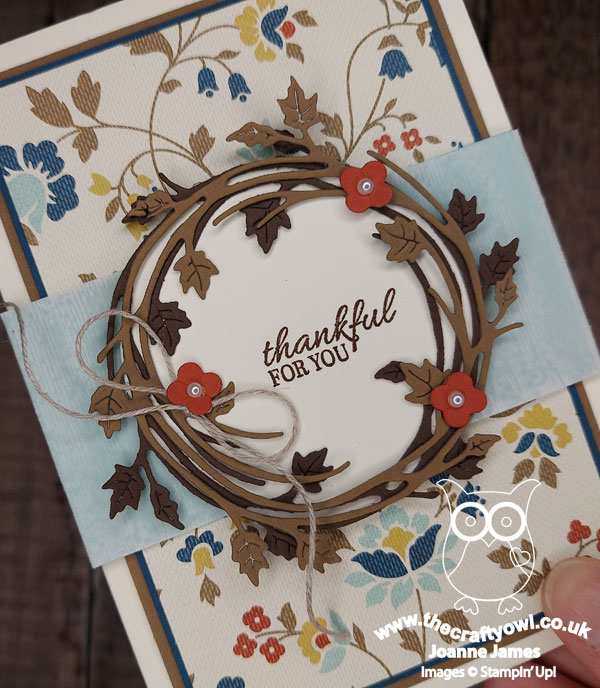
Added Texture - I love how the patterned paper has a faux-texture for added detail and interest. Having decided to add a Pool Party band to the front of my card, it looked a little too stark, so in a further nod to the paper, I added a layer of vellum over the top that I had embossed with my (retired) Subtles embossing folder. This was just enough to take the vibrancy out of the colour whilst also adding another level of detail; you can see the detail of it more closely below:
 

I really like this card - the paper is great for autumn and it's good to be using up more of my paper stash. If you're not a paper hoarder like me, you could easily recreate this card using the current Harvest Meadow papers, for example. A shoutout to Jen too for the perfect sketch to showcase a wreath - I think I might have to use it again this week!!

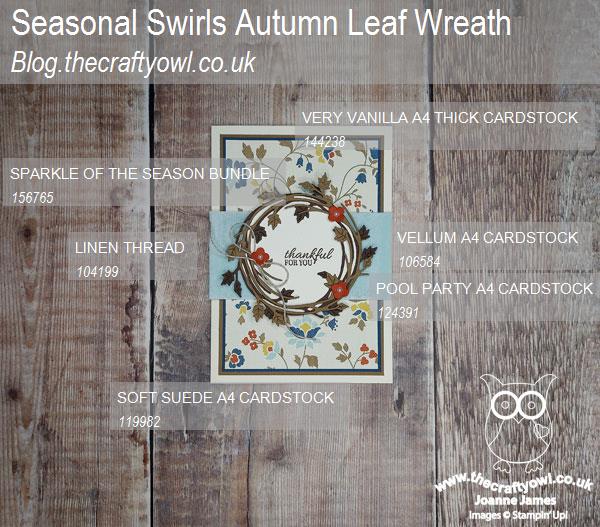
Here is the visual summary of the key products used on today's project for you to pin for easy reference:
 

You can see all of my Product and 'How To' summaries on my 'How To - Tips and Techniques' Pinterest board in case you've missed any. 

A tictactoe board offers so many creative possibilities - how does this week's board inspire you? Why not have a go? We would love to see you in the gallery and who knows - you might be selected for Designer's Choice and be eligible to be a guest designer on a future challenge. 

Enjoy the rest of your evening; I'll be back tomorrow with another project. Until then, happy stampin'!


Stampin' Up! Supplies Used: 

Table built using Product Table Builder by The Crafty Owl - Independent Stampin' Up! Demonstrator.

Sweet Strawberry Thank You Card FMS490

by Joanne James19. June 2021 20:37

Happy Saturday - it's the weekend! Today I'm sharing a card inspired by Jen B's layout over at Freshly Made Sketches:

I had the Sweet Strawberry bundle out on my desk, so thought I'd combine a little something old with something new for today's card - take a look:


Here's the low-down on today's card:

Sweet Strawberries - I used the Sweet Strawberry stamp set and Strawberry Builder Punch as the focus for my card today, retaining Jen's circle and using it as a base for a couple of punched strawberries and leaves.  I also added a little additional decoration inside my card:

Something Old - My 'something old' is the Berry Blessings DSP that I used, that was one of the free gifts with Sale-A-Bration earlier this year. I used if for my card base and stitched rectangle, and also punched my strawberries from the paper. Don't you just love this bold red and green combo?

Something New - My 'something new' is the checked embossing folder I used on my white panel. This check reminds me of picnic baskets so I thought would work well with the summery strawberries! Not that there's much chance of a picnic here at the moment - our beautiful sunny weather has been replaced with torrential rain all day yesterday!

Here is the visual summary of the key products used on today's project for you to pin for easy reference:


You can see all of my 'How To' summaries on my 'How To - Tips and Techniques' Pinterest board in case you've missed any. 

Enjoy your evening and I'll be back tomorrow with another project. Until then, happy stampin'! 

Stampin' Up! Supplies Used:

Table built using Product Table Builder by The Crafty Owl - Independent Stampin' Up! Demonstrator.

Sweet Symmetry Hey Friend Card

by Joanne James27. May 2021 10:33

Today I'm sharing a card that uses more of my new product stash so is perfect for the challenge over at TGIF Challenges this week where they are all about the new:

I could have linked up any of my 'Expressions In Ink' cards this week (and heads up - I have another one of those for you tomorrow!) but instead took a break to play with some of the new stamps and paper from the Sweet Symmetry Suite that you can find on page 112 of the new annual catalogue - take a look:


Here's the low-down on today's card:

Sweet Symmetry - The starting point for today's card is the gorgeous Sweet Symmetry designer series paper. Bright colours and bold, graphic designs make this a set of papers that won't appeal to everyone, but I have to say I love the retro fee of the patterns in this set and bright colours always tick my creative box! I chose one of my favourite repeating patterns and used that for the panel that covers two-thirds of my card front. 

In Symmetry - I decided to create a focal point flower that I stamped using the co-ordinating 'In Symmetry' stamp set and as I wanted the design to echo the papers, I stamped the flower several times in a variety of colours then fussy cut the sections and pieced them together. There are no framelits for this set - a very useful symmetrical stems punch instead that I didn't use today - but the uniform shape of the various floral elements meant this was easy to accomplish. You can see the detail of my layered flower more closely below:


Same Layout, Different Card - You may be wondering if there is something familiar about today's card; whilst the product I'm using I am sharing for the first time, the layout is the same as the one I used for my Paper Players card on Sunday (if you missed it you can see that card here). I liked Jaydee's sketch so much I thought I'd change things up and use it with a different set. Both cards look completely different, yet the sketch does give them a synergy that would otherwise be missing. Same layout, different card - I love that!

Here is the visual summary of the key products used on today's project for you to pin for easy reference:


You can see all of my 'How To' summaries on my 'How To - Tips and Techniques' Pinterest board in case you've missed any. 

That's all from me today; I have jobs to do and need to crack on! Enjoy your day and I'll be back tomorrow with another project and yes - it features Expressions in Ink! Until then, happy stampin'!


Stampin' Up! Supplies Used:

Table built using Product Table Builder by The Crafty Owl - Independent Stampin' Up! Demonstrator.

Well Written In Colour Circles Birthday Wishes CCS 415

by Joanne James13. April 2021 13:00

It's Tuesday and time for a new challenge over at CAS Colours & Sketches. This week's challenge is a sketch challenge and Wei has asked that we create something with the following layout:


 Feel free to flip or rotate the sketch when making your card. For my card today I wanted to showcase one of my most favourite retiring circles of all time, one of the circles from the Stitched Shapes Dies (unfortunately already out of stock and discontinued by the time you read this):


Here's the low-down on today's card:

I chose to feature Magenta Madness as the colour with my black and white colour combo today for the current challenge over at Color Dare, but this card would work paired with any colour. I cut a partial circle from the front of my card and infilled it with a piece of window sheet, and added a stitched circle to the acetate panel. I added a sheet of In-Colour DSP with a circle pattern to the inside of my card so that a small portion of it could be seen through my cardfront. Whilst the outside of my card has plenty of white space, inside there's not so much! Wondering what I did with the piece of cardstock I removed to accommodate my window sheet? I flipped it and adhered it to the inside of my card to write my greeting:


 Waste not, want not and all that! I added a stacked birthday diecut from the retiring Well Written dies along with a stamped greeting from 'A Wish For Everything' to complete the front of my card:


Super simple but I really like it! What do you think? Do leave me a comment below - I would love to hear your thoughts!

Here is the visual summary of the key products used on today's project for you to pin for easy reference:


You can see all of my 'How To' summaries on my 'How To - Tips and Techniques' Pinterest board in case you've missed any. 

Enjoy your day and I'll be back tomorrow with another project. Until then, happy stampin'!


Stampin' Up! Supplies Used:

Table built using Product Table Builder by The Crafty Owl - Independent Stampin' Up! Demonstrator.

Feels Like Frost Snowfall Thinlits CAS Christmas Card

by Joanne James19. October 2020 20:35

Happy Monday everyone! I've had a busy day with a great class this morning and physio and some chores this afternoon, so a quick post from me today with a Christmas card I made using the sketch over at CAS Colours and Sketches this week:

I had a few ideas for this sketch but ended up deciding to pair a returning favourite, the Feels Like Frost speciality paper with a cutaway circle, a diecut from the retired Snowfall Thinlits set and a heat embossed sentiment from the new Snowflake Wishes stamp set:


I added a few rhinestones to the foil diecut too for a little extra sparkle:


Here is the visual summary of the key products used on today's project for you to pin for easy reference:


You can see all of my 'How To' summaries on my 'How To - Tips and Techniques' Pinterest board in case you've missed any. 

Enjoy your evening and I'll be back tomorrow with another project. Until then, happy stampin'!


Stampin' Up! Supplies Used:

Table built using Product Table Builder by The Crafty Owl - Independent Stampin' Up! Demonstrator.

Have A Hoot Punny Owl I Want For Christmas Card

by Joanne James25. August 2020 08:00

Today I'm sharing a card for this week's Inspired By challenge where it's all about the punny sentiment:


I love a good punny sentiment and a quick perusal of current stamp sets and I knew exactly where I was headed. I used the sketch layout this week too - take a look:


Here's the low-down on today's card:

Have A Hoot - Yes, this adorable pair of loved-up owls and that festive punny sentiment 'owl I want for Christmas is you!' were a perfect fit for the challenge! I coloured my little scene with Blends and diecut my feathered friends and popped them up on dimensionals for a little lift, within their framed circle. I also added a little simple stamped detail inside my card:

Plaid Tidings - The colour scheme for my card was inspired by one of the many lovely patterns in the Plaid Tidings set, with a combination of Crumb Cake, Shaded Spruce, Cherry Cobbler and Whisper White. I used each of the colours in my layers, finishing with the Cherry Cobbler top panel for a festive touch. 

It's All In The Details - I added a sprig of mistletoe, complete with pearl berries and tied with some retired baker's twine, to the top of my window, perfectly positioned above my owls, and I also added some small rhinestones to the snowflakes for a little festive sparkle:


I'm also sharing today's card over at Christmas Kickstart where the challenge is 'Christmas Birds' - in truth, I'm not sure whether an owl constitutes a Christmas bird but these two are definitely set for Christmas so hopefully the ladies over there will appreciate it!

Here is the visual summary of the key products used on today's project for you to pin for easy reference:


You can see all of my 'How To' summaries on my 'How To - Tips and Techniques' Pinterest board in case you've missed any. 

Enjoy your day and I'll be back tomorrow with another project. Until then, happy stampin'!


Stampin' Up! Supplies Used:

Table built using Product Table Builder by The Crafty Owl - Independent Stampin' Up! Demonstrator.

Cute Fruit with Oranges, Lemons and Limes

by Joanne James24. July 2020 20:56

I had some new goodies arrive yesterday and finally got some time to play this afternoon so I'm just popping by to share a quick card that I made for this week's Freshly Made Sketches challenge with the current colour palette over at Color Throwdown:


I was intrigued by those circles on Jen's sketch and I had an idea that I thought might work with one of my new stamp sets - take a look:


Here's the low-down on today's card:

Cute Fruit - The 'Cute Fruit' stamp set is so fun! The set includes lots of different fruit and in addition to the fruit and some great punny sentiments, there are also a selection of cute faces - I mean, what's better than a banana? Well, a banana with a face of course!! I haven't used the faces on today's card, but rest assured they will make an appearance at some point.  

Let's Talk Sketch - I was musing over how to represent those little circles when it occurred to me they could be slices of oranges, lemons and limes. I decided to try out my idea, but this necessitated me altering my card base to a horizontal rather than vertical one, to allow me to scale my fruit accordingly and still keep the elements of the sketch in proportion. You can still see the sketch layout though and how it inspired my card. I would never have thought about using this set in this way so the sketch was a great way to stretch my creative thinking. 

Citrus Sparkle - I stamped each of my small citrus slices in Granny Apple Green and retired Pineapple Punch and Grapefruit Grove and punched them out with my retired 1" punch. I decided to create a large orange slice for the larger circle in the sketch and did this by layering some circles of cardstock and adding some segments cut from retired glimmer paper that I coloured orange with some ink and a sponge dauber for some extra sparkle which you can see better on the photo below:

I added some clear Wink of Stella to my stamped citrus slices too for some added lustre and my card was complete. So what do you think of today's citrus-y card? Does it work for you? Do leave me a comment - I'd love to hear your thoughts.

Here is the visual summary of the key products used on today's project for you to pin for easy reference:


You can see all of my 'How To' summaries on my 'How To - Tips and Techniques' Pinterest board in case you've missed any. 

Enjoy your evening and I'll be back tomorrow with another project. Until then, happy stampin'!


Stampin' Up! Supplies Used:

Table built using Product Table Builder by The Crafty Owl - Independent Stampin' Up! Demonstrator.

Wish For It All Doily Wishes Brights Birthday Card

by Joanne James13. April 2020 11:58

Today I'm sharing something bright and colourful using this week's Colour Throwdown colours and the sketch over at Fusion:


Whilst I don't have any gnomes in my collection (I think I might have to remedy this sometime soon!) I did also take some inspiration from the spots in the Fusion photo for my background and created a colourful birthday card - take a look:


Here's the low-down on today's card:

Today's card is all about the brights! I used some retired Brights DSP in Melon Mambo (link to current version below - this would look nice in the gingham too) and then a white circle to showcase my trio of diecut candles from the Doily Wishes Dies - these candles are so pretty I think they make the card! I used the banner from the same set and heat embossed my sentiment from the co-ordinating Wish For It All stamp set for the horizontal element; I finished off with another sentiment from the same set inside my card: 


A trio of those gorgeous shimmery enamel dots in Melon Mambo finishes my card. The Doily Wishes Dies and the Wish For It All stamp set comprise one of the many bundles that can be found in the annual catalogue which when both items are bought together benefit from a 10% discount. With the launch of a new annual catalogue around the corner, it's worth bearing in mind that even if these stamps and dies carry over, the discount bundled price won't, so it's worth taking advantage of this whilst you still can.

Here is the visual summary of the key products used on today's project for you to pin for easy reference:


You can see all of my 'How To' summaries on my 'How To - Tips and Techniques' Pinterest board in case you've missed any. 

This is another of those great standby birthday cards - so much so that I think I'm going to use a little of this enforced stay-at-home time to make up a batch in a variety of different colours and use up more sheets of that spotty DSP too! 

What do you have planned on this fine Monday? It's gloriously sunny here in the UK, but a good 15 degrees cooler than the scorching Easter Sunday we experienced yesterday. Fine for a nice long walk this afternoon, perhaps with a little craft time first. Enjoy your day and I'll be back tomorrow with another project. Until then, happy stampin'!


Stampin' Up! Supplies Used:

Table built using Product Table Builder by The Crafty Owl - Independent Stampin' Up! Demonstrator.

On To Adventure Holidaymaker for PP481

by Joanne James8. March 2020 10:00

Today it's Sunday and time for this week's new challenge over at The Paper Players! It's the turn of the fabulous Laurie to host this week and she has a vibrant colour challenge for you to work with:


I spent much of this week undertaking last-minute preparations for my weekend craft retreat, so was short on time to create and lacking my creative mojo. Anyway, I had to keep it quick and this is what I came up with - take a look:


I stamped my lady from the 'On to Adventure' stamp set and coloured her with my Stampin' Blends, then mounted her on a layered circle and stamped my sentiment onto a Coastal Cabana scalloped rectangle. A sprinkling of champagne rhinestones finish my card.

Super simple this week!

Here is the visual summary of the key products used on today's project for you to pin for easy reference:


You can see all of my Product and 'How To' summaries on my 'How To - Tips and Techniques' Pinterest board in case you've missed any. 

Before you reach for your ink and papers, check out what our amazing team has created to inspire you this week:

Here's a quick recap of our challenge rules:
 
1.  Create a new paper project
2.  Upload your creation to your blog with a link back to us and provide a direct link to the post featuring your challenge submission.
3.  Please link your card to no more than four challenges, TOTAL.
4.  Have FUN!

Enjoy your day; I will be on day two of my weekend craft retreat. Yesterday we had a ball, so I'm sure today will be just as much fun! More about that later in the week. I'll be back in a couple of days with another project. Until then, happy stampin'!


Stampin' Up! Supplies Used: 

Table built using Product Table Builder by The Crafty Owl - Independent Stampin' Up! Demonstrator.

Welcome Bunny Pastel New Baby Card

by Joanne James2. March 2020 20:30

Happy Monday everyone! I need to have a productive week this week - my to-do list is long! - this week's post maybe a little short and sweet - so let's go!


I still had the 'Welcome Easter' stamp set out on my desk having made this card last week, so decided to use the colours over at Just Add Ink where I haven't managed to play along in a while (hello lovely JAI ladies!) and this week's CAS(E) This Sketch layout from the lovely Brian King and an altogether different look to create a sweet baby card - take a look:


Here's the low-down on today's card:

I grabbed a piece of Pleased As Punch DSP for the pink check layer and added a horizontal piece with a stitched diecut border detail before anchoring with my bunny. I stamped him on Shimmery White cardstock in Smoky Slate, then used my aquapainter to colour him in, keeping the colours soft and muted and layered on a scalloped circle.

Now whilst I used the CAS(E) This Sketch layout, I may well get thrown out with this card as I broke my own clean and simple rule here - not only did I add a sprinkle of adhesive-backed sequins, but I also tied the Soft Sea Foam panel with a piece of Whisper White crinkle seam binding ribbon! In my defence, this ribbon is so soft and lightweight, it squishes to nothing (good for cards that need to be mailed!) and I kind of figured since it was a new baby card, a little embellishment makes it special. Not much of a defence to Brian and the CTS design team - if it helps, I used this sketch for another card that I'm going to share later in the week that is perfectly CAS in everyway, as Mary Poppins would say. 

So what do you think - is that little guy sweet or what?! He reminds me of Thumper from the Disney classic 'Bambi', (another Disney reference - not that I'm counting down to a special vacation to the happiest place on earth or anything...) but I digress...! 

Here is the visual summary of the key products used on today's project for you to pin for easy reference:


You can see all of my 'How To' summaries on my 'How To - Tips and Techniques' Pinterest board in case you've missed any. 

Enjoy your evening and I'll be back tomorrow with some exciting Sale-A-Bration news so do come back to find out more. Until then, happy stampin'!


Stampin' Up! Supplies Used:

Table built using Product Table Builder by The Crafty Owl - Independent Stampin' Up! Demonstrator.


Mini Catalogue

BROWSE THE CATALOGUE

The mini catalogue is now live! Read and download your copy here.

Shop Online

Access my online shop 24 x 7, 365 days of the year:

Current March hostess code:

S9F2XJJW

Shop Online

Join My Team

It's always a great time to join Stampin’ Up! New team members can get £130 worth of products for only £99 + free business supplies + free shipping + all the fun being a part of Stampin’ Up! Stampin' Up! has something for everyone: join my growing team and benefit from my support to enjoy Stampin' Up! however you choose.

If you're interested, call me for a chat to understand how I can help you realise your goals. Alternatively, if you have already decided to sign up and you just can't wait, please click here for the link to the online form where you can sign up and order your starter kit right away! 

Latest Kit!

Stampin Cut and Emboss

The Rock Legend Kit has all you need to make 8 cards with coordinating envelopes. Along with the new Panda Friends Kit, both are available from January 4th for just £14 each - get yours here!

2023-24 Annual Catalogue

BROWSE THE CATALOGUE

Click on the catalogue for a full list of current SU! supplies - if you would like to order any of the items featured, please drop me a line at [email protected] or give me a call on 07773 421446 - I'd be happy to help.

New Online Exclusives

There will be new products available exclusively in the online store from 5 March - check them out here.

About Me

Hi I'm Joanne and live in Northampton and when I'm not looking after my husband and two beautiful children, am an avid crafter with a passion for all things Stampin' Up!

I must confess that I have never been a big rubber stamper - until I discovered Stampin' Up! that is. I love the fact that I can get such great results with co-ordinating stamps, inks, papers and punches - the possibilities are endless! Join me on my stamping journey as I share the things I love and be inspired to create amazing things yourself!

Follow Me

Monthly Newsletter

Box Builder

Click the button above to use Box Buster to create your custom box design using the Envelope Punch Board!

Kits Collection Now Available!

Stampin Cut and Emboss

The new Kits Collection from Stampin' Up! is now available!

Click here to see the current kits available and order yours online today.

I Design For


Stampin' Up Stuff

This is my personal blog and is not endorsed by Stampin’ Up! I hope you find it a plentiful source of ideas and personal inspiration but please don't copy my designs for contest submission or use for classes, publication or sale without express permission.