by Joanne James3. December 2014 10:00Today's second creative post is for this week's Colour Me...! card challenge where we are working with a monochromatic colour scheme of Smoky Slate:
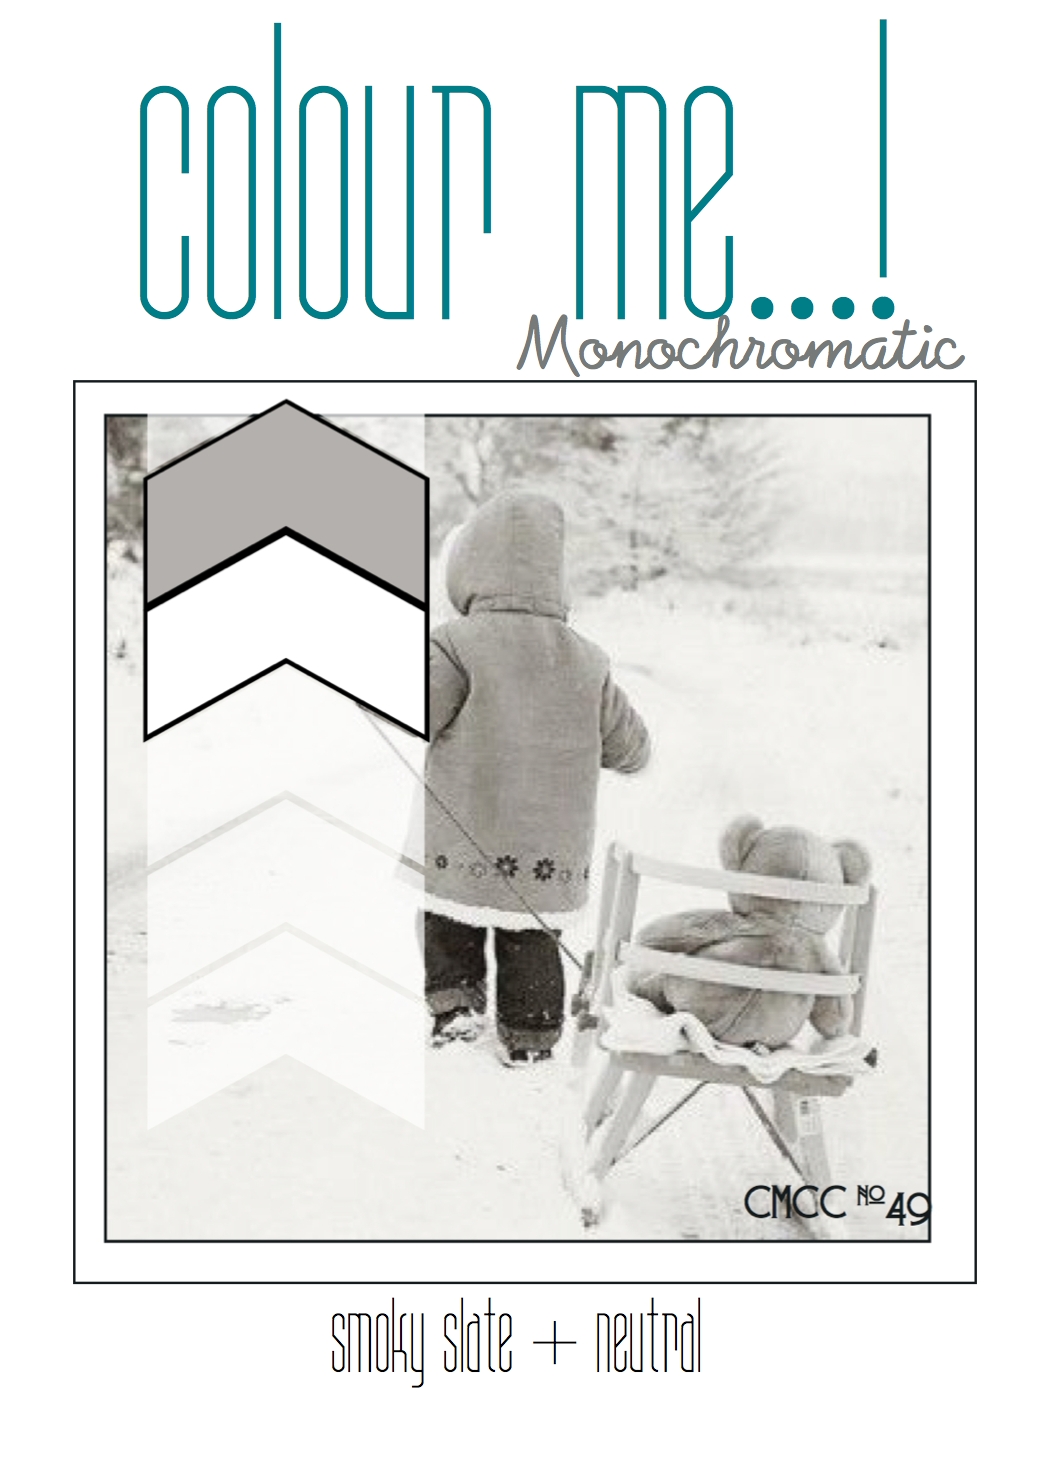
I love this week's inspiration photo - so cute! I went with a Christmas card today, although not a snowflake or sleigh in sight:
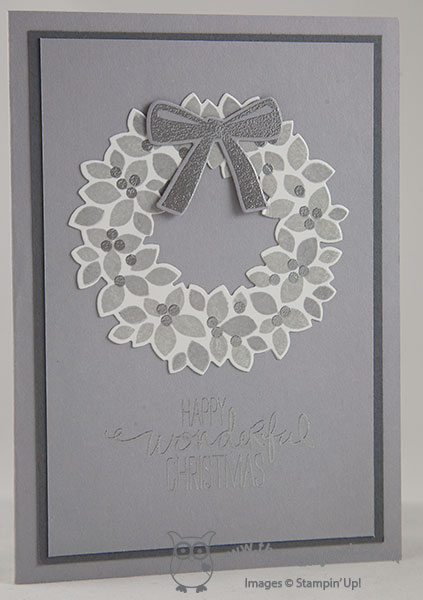
Today's card proved difficult to photograph, but I can attest that the silver embossed berries, bow and sentiment add a lovely touch of sparkle to this monochromatic card.
Feel free to leave a comment on today's card, before hopping over to check out the amazing cards by the rest of the Colour Me...! team:
And our talented guest designer for December
I have another card tomorrow using this colour scheme too, so pop back and take a look! We look forward to seeing your monochromatic creations - what does this palette inspire you to create?
Back tomorrow with another project; until then, happy stampin'!
Stampin' Up! Supplies Used:
af763dc7-57e6-4734-a6e8-1847c41ce796|0|.0|96d5b379-7e1d-4dac-a6ba-1e50db561b04
Tags: Big Shot, Embossing, Magnetic Platform, Shop online, Stampin' Up Supplies, Stampin' Up Card ideas, Stampin' Up Card, Stampin' Up, Colour Me...!, Wondrous Wreath, Wonderful Wreath Framelits
Cards | Stamping
by Joanne James3. December 2014 07:00 
Welcome to my first creative post of the day! Following my selection as Featured Stamper for this card using the above challenge colours over at Color Throwdown a couple of weeks ago, the lovely ladies over there have invited me to be a guest designer for this week's challenge - yay! As if that wasn't enough, just look at the lovely colours and inspiration photo we had to work with:
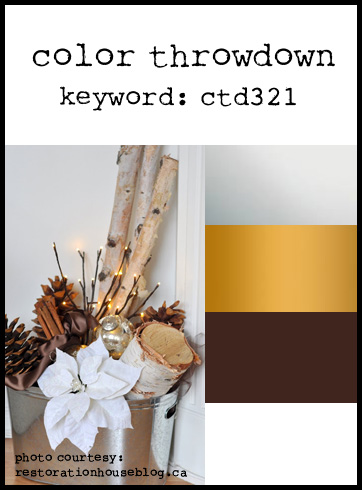
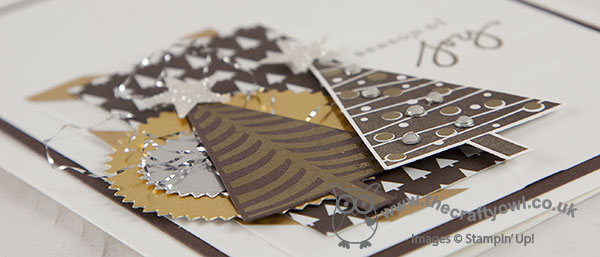
I had to go with something Christmassy and I found the mix of textures in the inspiration photo provided me with the starting point for my card. So this is what I came up with:
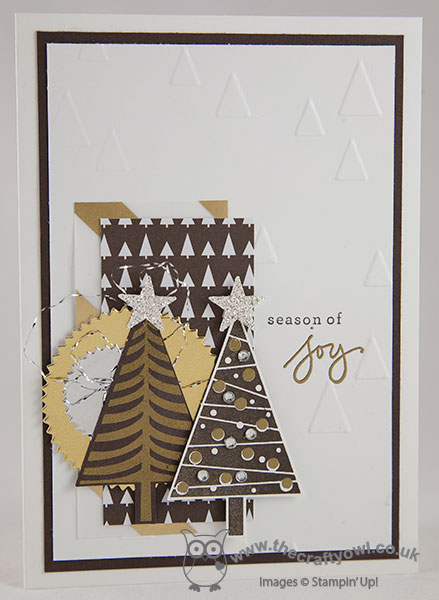
I used Whisper White for my base and layered this with a mat of Early Espresso, then another piece of Whisper White, having first embossed this piece with my On Point embossing folder. I then created a little 'corner collage', comprising some gold striped vellum, a piece of tree-patterned DSP from the 'Trim The Tree' stack, a gold and snaller silver foil starburst circle, and then two Christmas trees - one stamped in Versamark and heat embossed in gold on Early Espresso cardstock and the other stamped in Early Espresso on Whisper White, with the baubles heat embossed in gold and a few silver rhinestones added for extra sparkle. A couple of silver glimmer paper stars top the trees and I looped some silver thread removed from some silver baker's twine behind them. To finish, I stamped my sentiment in between the embossed area in Early Espresso and Versamark heat embossed in gold. Collage-style cards are not my usual thing, but I must confess I enjoyed getting slightly carried away with this card and am really pleased with the result.
Do pop over to the Color Throwdown blog to see what the other designers have created using this colour palette; these ladies do a great job each week and would I'm sure appreciate your visit. I for one will be stalking the gallery with interest!
Back shortly with today's third post! Until the, happy stampin'!
Stampin' Up! Supplies Used:
df70faee-acae-439b-bd50-2ff22182b1d7|0|.0|96d5b379-7e1d-4dac-a6ba-1e50db561b04
Tags: Christmas, Festival of Trees, Endless Wishes, On Point TIEF, Trim The Tree, Embossing, Shop online, Stampin' Up Supplies, Stampin' Up Card ideas, Stampin' Up Card, Stampin' Up, Starburst Framelits, Big Shot
Cards | Stamping
by Joanne James1. December 2014 22:25REMINDER: You have until 11am GMT this morning to take advantage of the £75 sign up offer to become a member of my Stampin' Up! team - click here if this is for you!
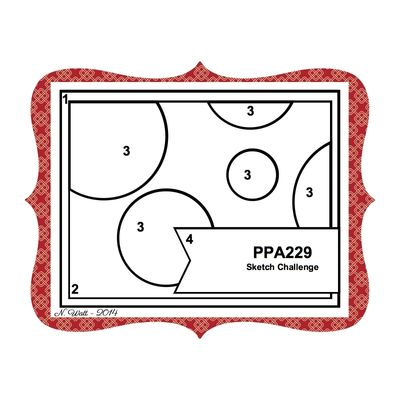
Today I'm sharing a card for this week's challenge over at Pals Paper Arts, where they have this fun sketch to work with:
I'm also linking my card up with the lovely ladies over at Less Is More, where they are celebrating their 200th blog post - woohoo! - and congratulations are most certainly the order of the day. Here is my card:
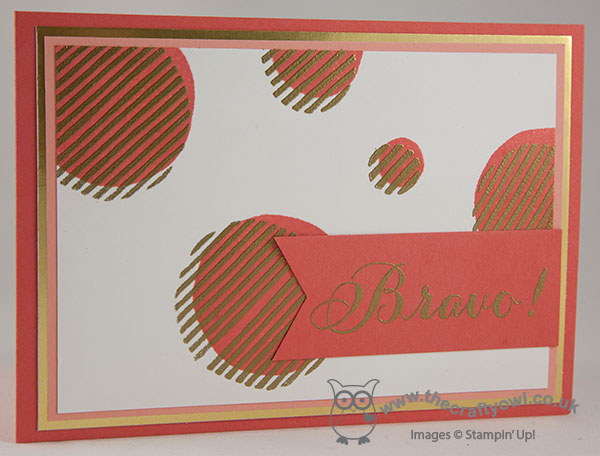
I used Calypso Coral for my card base and added a couple of mats of gold foil and Crisp Cantaloupe, beneath my main stamped panel. I then stamped various sized solid circles from the 'What's Your Type?' stamp set in Calypso Coral on a piece of Whisper White. I then used the striped stamp from the same set, and stamped it in Versamark over the solid circle, slightly offset (and in case, like my daughter, you are reading this thinking 'those circles don't line up', as I shared with her, this was intentional - they're not meant to!) and then heat embossed them in gold. To finish, I added a flagged sentiment banner in Calypso Coral to stand out from the background and heat embossed the 'Bravo!' sentiment in gold too. I love the swirly script of this stamp from the set of the same name and heat embossing adds a lovely luxurious feel I think.
That's all from me today: I have a rather musical day in store, with a class strings recital from the youngest James junior (he's been learning to play the violin for the last 10 weeks as part of an 'access to strings' project), piano lessons for everyone and a spot of Christmas shopping in between. Wish me luck!
Back tomorrow with a triple post; until then, happy stampin'!
Stampin' Up! Supplies Used:
0854be05-f1a4-4346-9b31-8db8f37b8d2a|0|.0|96d5b379-7e1d-4dac-a6ba-1e50db561b04
Tags: What's Your Type?, Bravo, Embossing, join Stampin' Up, join my team, Promotions, Shop online, Stampin' Up, Stampin' Up Card, Stampin' Up Card ideas, Stampin' Up Supplies
Cards | Stamping
by Joanne James29. November 2014 07:00A nice early post from me today as I have a busy day ahead. I'm just in time to squeeze in a link up with the lovely designers over at SUO Challenges, where the latest challenge is to make a project using any kind of Stampin' Up! markers. I use my Stampin' Write markers frequently, but wanted to showcase a card using one of my most favourite new(ish) Stampin' Up! products - Blendabilities. I made a version of this card in my September card class, but didn't blog it so wanted to share today as it not only uses Blendabilities but a really fun technique too. Here is my card:
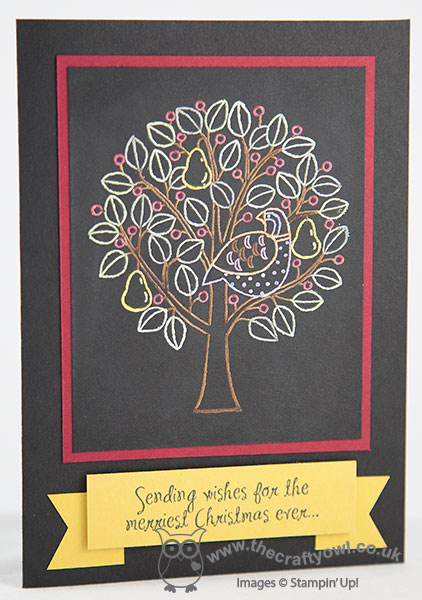
My card features the 'Partridges & Pears' stamp set. I stamped the main image in Versamark on Basic Black cardstock and heat embossed in white embossing powder, then used my Old Olive, Pumpkin Pie, Skin tone, Smoky Slate, Daffodil Delight and Cherry Cobbler Blendabilities to colour the heat-enbossed image. I kept the layout of my card quite simple, matting the central panel on a piece of Cherry Cobbler cardstock before adhering to my black card base and finishing with a wide flagged piece of Daffodil Delight cardstock, with the sentiment stamped across it in Memento Black ink. This card was difficult to photograph and does look more vibrant in real life - the image really stands out against the black. This is another great way to use your Blendabilities markers, in addition to straightforward blended colouring.
That's all from me today; we have homework to do, a spot of housework, school Christmas Fayre, swimming lessons and dinner with friends to fit in today - wish me luck! Back tomorrow with this week's design team card for The Paper Players; until then, happy stampin'!
Stampin' Up! Supplies Used:
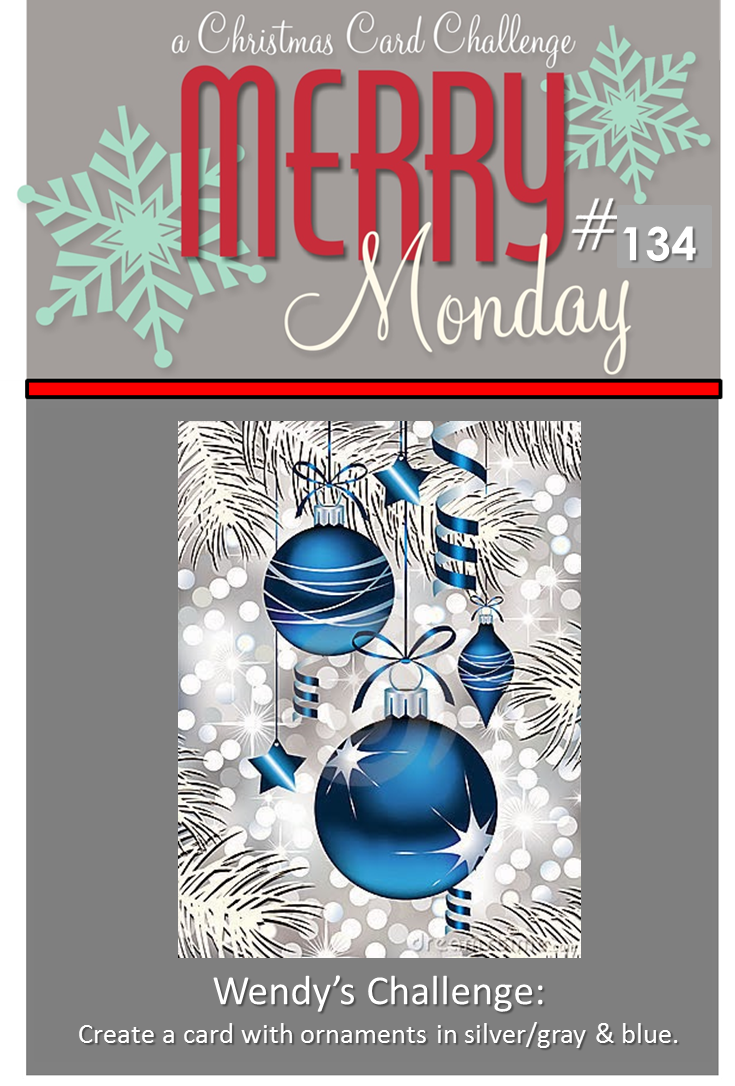
by Joanne James15. November 2014 20:47Today I'm sharing my card for this week's Merry Monday Christmas Card Challenge, where this week the challenge is to create a Christmas card with ornaments that are sliver/grey and blue:
I went for a little 'something old, something new' for today's card: I had a piece of last year's Winter Frost DSP on my desk, so decided to combine it with a couple of ornaments from this year's Cheerful Christmas set for today's card:
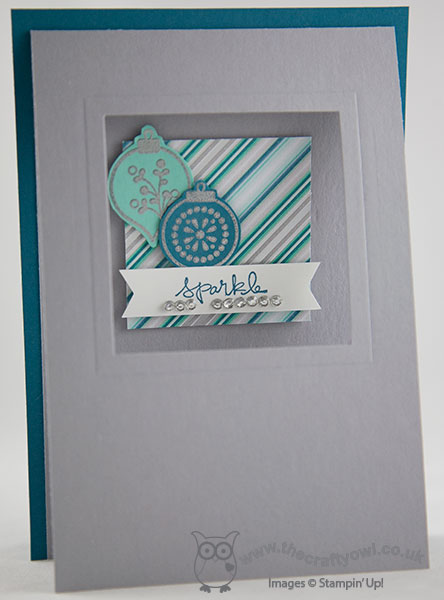
I used a single piece of Island Indigo to back my folded base of Smoky Slate and cut a square out of the front using my Big Shot and Square framelits, using the next size up to create an embossed frame. I used a square of Winter Frost DSP inside the framed area, and added a couple of baubles, one in Coastal Cabana and one in Island Indigo, both of which I stamped in Versamark and heat embossed in silver then fussy cut out with my paper snips. I popped one of on with a glue dot and the other with a dimensional and finished with my sentiment banner, which I finished with a row of tiny rhinestones for a little extra sparkle.
That's all from me for today; back tomorrow with my Design Team card for The Paper Players, where Ann has a new themed challenge for us. until then, happy stampin'!
Stampin' Up! Supplies Used:
81865de4-19fa-4615-bc4d-1a2c8ee31db5|0|.0|96d5b379-7e1d-4dac-a6ba-1e50db561b04
Tags: Big Shot, Cheerful Christmas, Christmas, Good Greetings, Winter Frost, Shop online, Stampin' Up, Stampin' Up Card, Stampin' Up Card ideas, Stampin' Up Supplies, Embossing
Cards | Stamping
by Joanne James26. October 2014 07:00Sunday means it's time for a new challenge over at The Paper Players where this week Nance has a great sketch for us to play along with:

I love a good sketch challenge so decided to use this one to make a Christmas card using The Newborn King, a set I haven't inked up in a while. Here's my card:
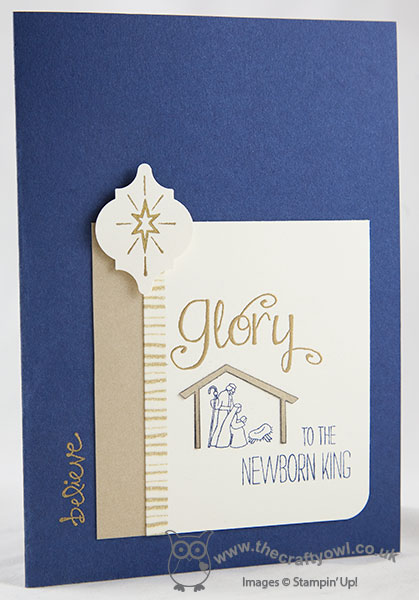
I stamped just the stable image on a piece of Very Vanilla cardstock in Night of Navy, and stamped it again on Brushed Gold cardstock and fussy cut out the stable itself and adhered this to my stamped image. I stamped my sentiment in two halves: the first half, the 'glory' in Versamark and heat embossed in gold, and the second part in Night of Navy, masking off the respective elements in turn. I toyed with whether or not I should stamp a sentiment on this section at all, given the sketch, then having decided that the sentiment here was as much a part of my image as the nativity, I then wondered whether I should dispense with the vertical sentiment element as per the sketch. In fact, I decided to use the word 'believe' from the Good Greetings set here, as it seemed to fit with my main focal panel. I edged my vanilla cardstock with a piece of gold washi tape and matted this section onto a piece of Brushed Gold, which overhangs the many section to show a border. Lastly, I stamped the star from the Newborn King stamp set in Versamark and heat embosses in gold, the filled in the outline with my gold marker for added definition and punched it out using my mosaic punch and attached it with a dimensional. I used Night of Navy for my cardbase, which I think is the perfect pairing for the gold and vanilla elements. I liked this card so much, I managed to make two (always good for my growing pile of cards!) - at this rate, I might just be ready for Christmas in time!!
Do check out the amazing cards produced by the rest of the design team for this week's challenge; as always, the standard is incredibly high and there's lots of inspiration to choose from.
Right - I'm off to hockey and then lunch with the extended James family, which will be nice for a change. Back tomorrow with another project; until then, happy stampin'!
Stampin' Up! Supplies Used:
by Joanne James9. October 2014 08:00I have another Christmas card to share with you today - the card I promised yesterday is actually scheduled tomorrow (my mistake!) so if you wanted to see that one, you've another day to wait! Back to today's card - this was inspired by the sketch over at CAS(E) This Sketch this week:
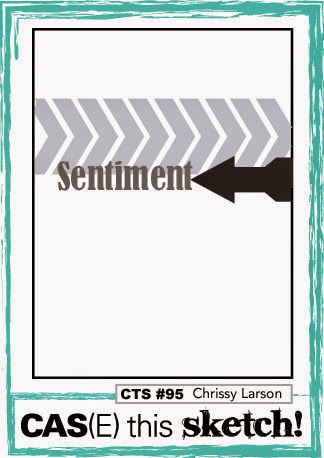
I went for a simple one layer card to add to my Christmas pile - here it is:
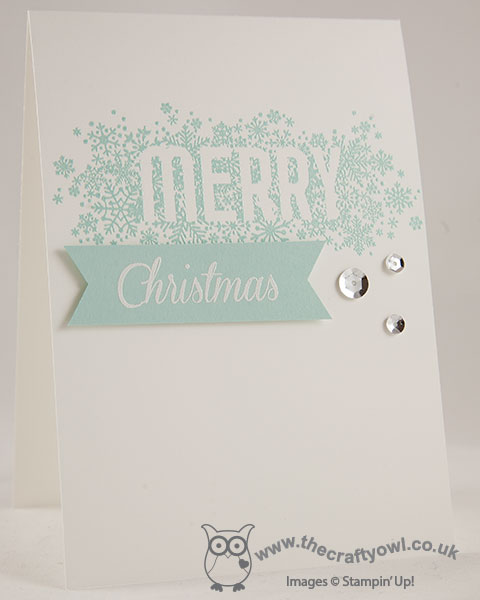
I stamped the 'Merry' from Seasonally Scattered in Versamark onto a base of Whisper White and heat embossed it in Pool Party embossing powder, which gives it a lovely shine. I then stamped the 'Christmas' from Watercolour Winter Too in Versamark onto a piece of Pool Party cardstock and heat embossed in white, flagged then ends then popped this onto dimensionals and positioned beneath my stamped base. Lastly, I added a few silver sequins to finish.
A super simple card but one that packs a real punch. A quick post from me today, as I have a fun day planned crafting with friends making advent calendars.
Back tomorrow with another card; until then, happy stampin'!
Stampin' Up! Supplies Used:
by Joanne James7. October 2014 08:00Today I'm back with a Christmas card (haven't had one of those for a few days!!) I saw this week's sketch over at Create With Connie and Mary this week and immediately had an idea - always great when that happens! Here is the sketch that inspired my card:
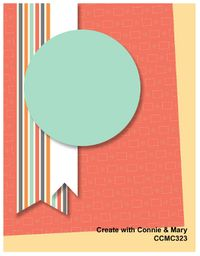
This is a great sketch with many possibilities; I wanted to use the 'Mingle All The Way' stamp from the stamp set of the same name and this is the card I came up with:
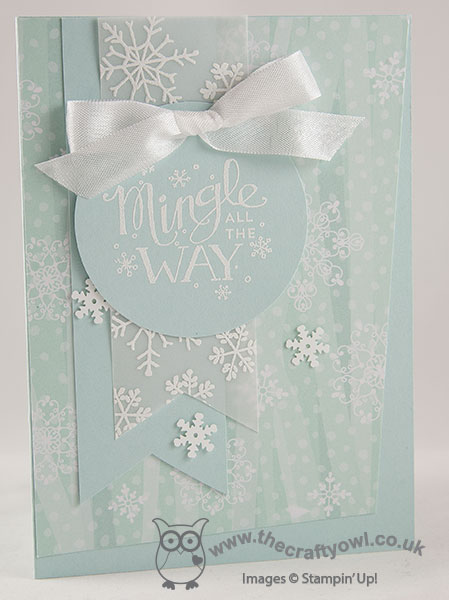
I used Soft Sky for my card base and a piece of the swirly snowflake paper from the 'All is Calm' speciality DSP pack for my offset layer. I then used a plain piece of Soft Sky for my bottom banner flag and overlaid this with a vellum banner that I stamped in Versamark with snowflakes from the Endless Wishes stamp set and then heat embossed in White. For the circle, I stamped the sentiment again in Versamark and heat embossed in white, then punched it out using my 2 1/2" circle punch. To finish, I added a few snowflake sequins and a bow in white seam binding ribbon.
Without trying, I made a monochromatic card, something I usually find quite tricky. I love the calm, serene feeling of this card.
Back tomorrow with this week's Design Team card for Colour Me...! and a new set of Wednesday Weekly Deals. Until then, happy stampin'!
Stampin' Up! Supplies Used:
by Joanne James4. September 2014 22:14Apologies for my late post today lovely blog readers - I have had a very busy 'making' day trying desperately to get ahead of myself for once, but as a result I'm late posting; I guess I just cant do it all!! So I'll keep today's post short and sweet - literally! - and share today's card that I made for this week's challenge over at Less Is More where there is a song theme again, using this week's colour scheme over at Pal Paper Arts:
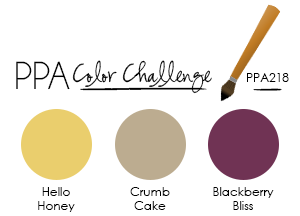
The song theme over at Less is More is 'Oh I do like to be beside the seaside'. I almost didn't make a card this week (I wasn't sure you wanted to see another Sea Street crab or lobster card!) when I was musing about what the seaside means to me and I found myself thinking about ice cream; I mean, a cornet is an intrinsic part of any trip to the seaside, right? When I was at the seaside in Minehead a couple of weeks ago, I had the most delicious forest fruits ice cream in an Italian waffle cone, so with this in mind I thought I would use the above colours to create my ice cream. So, here is my card:

I had some Stampin' Up! notelets out on my desk for another project and decided to use one as the base for my card, as they are more sturdy than Whisper White so perfect for a CAS card like this. I simply added a strip of Hello honey striped DSP from the Moonlight DSP paper stack and made a punch art ice cream cone, first scoring a piece of Crumb Cake with my Simply Scored Scoring Tool and cutting out by hand. For the ice cream itself, I stamped the cream swirl from the Cupcake party stamp set in Versamark, once on Hello Honey and once on Blackberry Bliss, then heat embossed with white embossing powder and punched out with my Cupcake Builder Punch. I also punched out a little Blackberry Bliss cherry using the punch, and covered it in crystal effects to add shine and dimension - this looks so cool in real life! I finished my card with the 'Sweet!' sentiment from the 'Bravo' stamp set, which somehow seemed appropriate for something so delicious!
Hope you like today's card; back tomorrow with another project. until then, happy stampin'!
Stampin' Up! Supplies Used:
359062a8-43cd-414e-bc29-4015f9592374|0|.0|96d5b379-7e1d-4dac-a6ba-1e50db561b04
Tags: Cupcake Builder Punch, Cupcake Party, Bravo, Moonlight, Shop online, Simply Scored, Embossing, Crystal Effects, Stampin' Up, Stampin' Up Card, Stampin' Up Card ideas, Stampin' Up SuppliesPunch Art
Cards | Punch Art | Stamping
by Joanne James31. August 2014 08:00No blog post yesterday I'm afraid, as I was busy with family activities and just couldn't find the time. Today though it's Sunday and time for my Design Team card for The Paper Players, where this week Nance has a fun tic-tac-toe challenge for us:
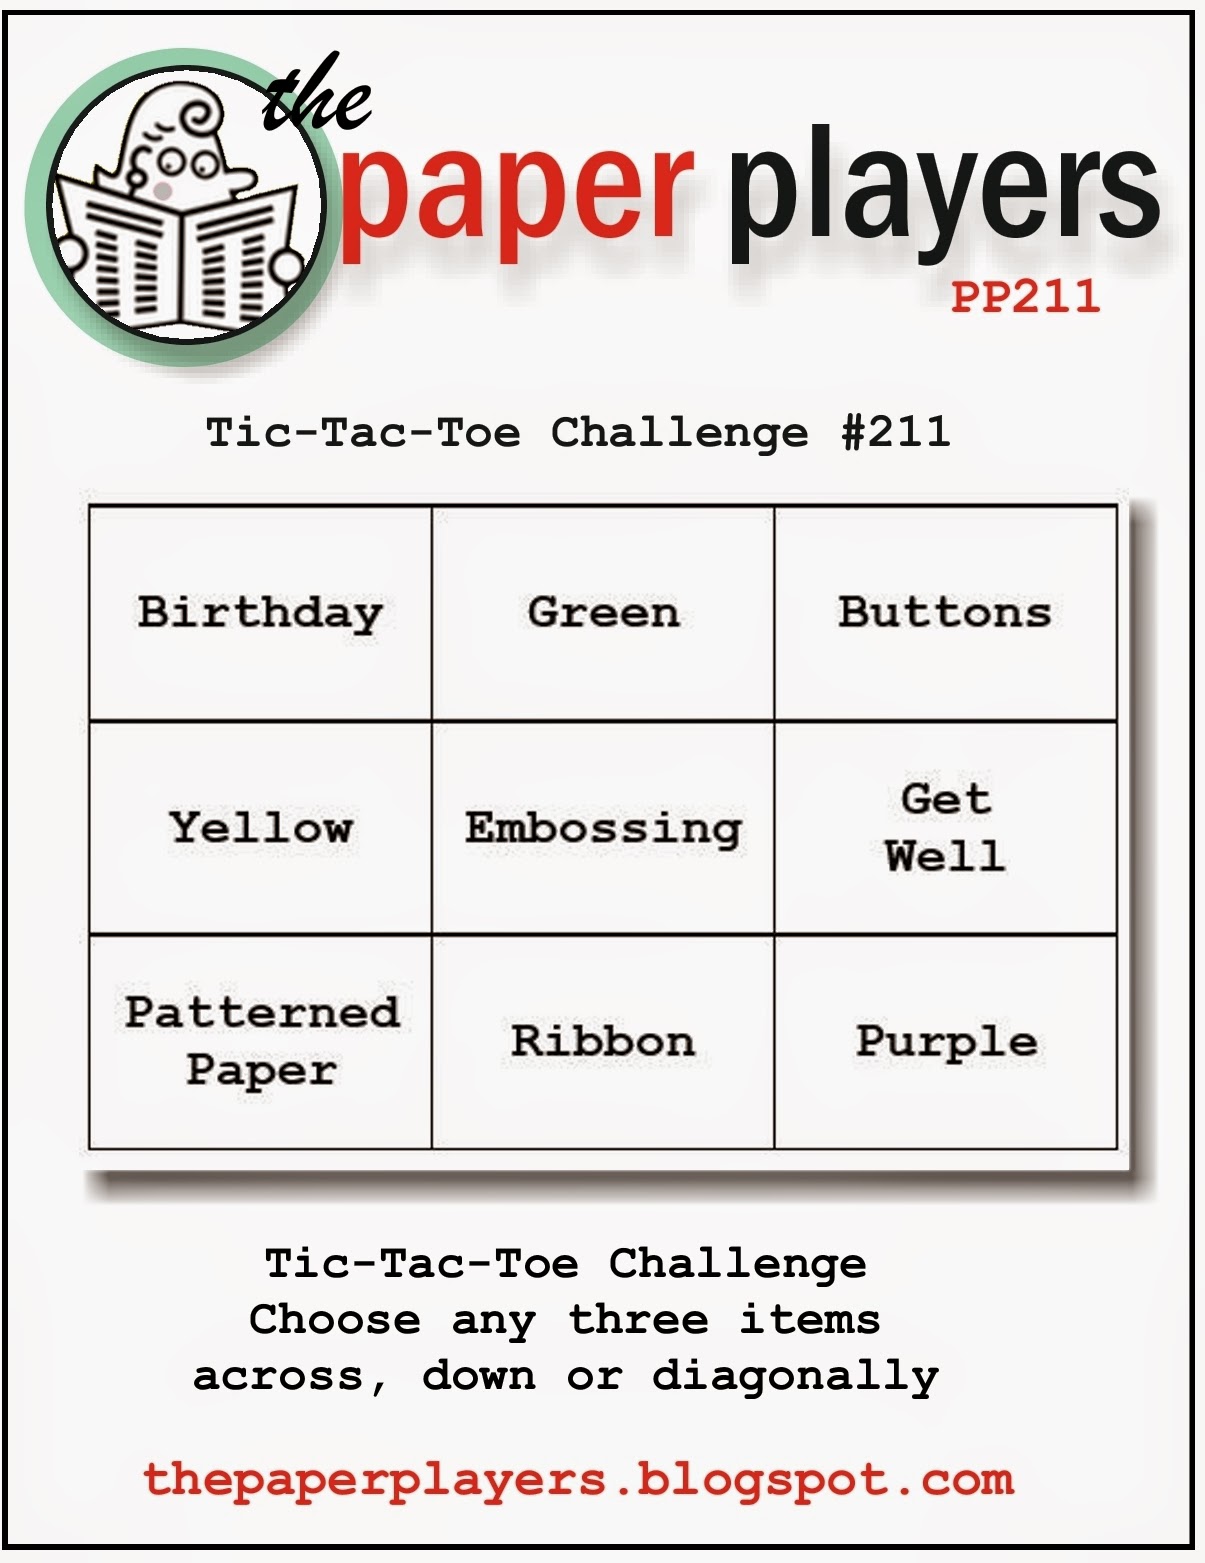
I had such fun trying to decide which boxes of the grid to use - in the end I went for the diagonal of 'patterned paper, embossing, buttons' and made my first Christmas card using the 'Cheerful Christmas' stamp set - I took the inspiration for my layout from this week's sketch over at Fab Friday:
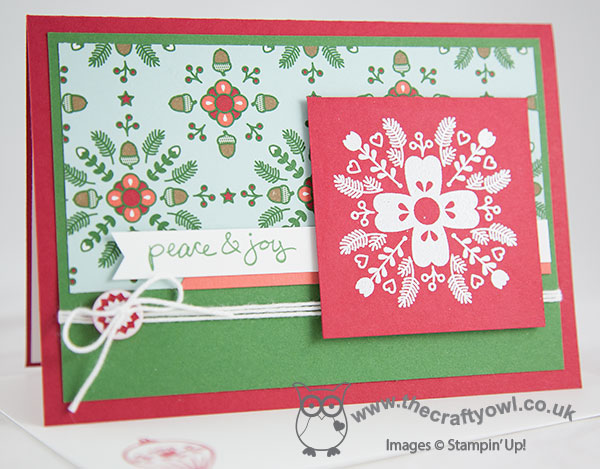
This stamp set appealed to me the moment I saw it - I love the Scandanavian-inspired patterns that look so great in traditional Christmas reds and greens, along with white and kraft. For this card, I matted my Real Red base with Garden Green, then adhered a piece of Nordic Noel Designer Series Paper to the top of the card; this DSP carries on the Nordic theme and lots of the papers in this set co-ordinate with these stamps - I love it! I stamped the main flower stamp in the set in Versamark on Real Red and heat embossed in white, then adhered this to my card using dimensionals. Lastly, I added a flag of Calypso Coral and stamped my sentiment, from the new hostess set 'Good Greetings' in Garden Green, onto a flag of Whisper White and tucked it beneath my flower square. Lastly, I finished by wrapping around some white baker's twine and adhering one of the red and white Nordic Designer Buttons to finish.
I even took the time to decorate the inside of my card and the envelope - I thought I'd make the most of it now, as by the time I get to the last minute rush these little acts of prettiness will be all but out the window! Pop over to the rest of the team to see what they did with this week's challenge - there's a huge variety in there this week and as always some great designs.
In the James household, swimming lessons resume today before the new term starts and then I will be doing the final preparations for my first monthly card class featuring Christmas cards tomorrow - yippee! Hope you enjoy your Sunday, however you are spending it.
Lastly, in case you needed a reminder - today is the last day of the Big Shot offer - see here for details.
Back tomorrow with another project; until then, happy stampin'!
Stampin' Up! Supplies Used:
ccbcb1fc-5623-4ffe-a863-11e868153c45|0|.0|96d5b379-7e1d-4dac-a6ba-1e50db561b04
Tags: Christmas, Cheerful Christmas, Nordic Noel, Embossing, Good Greetings, Seasonal Autumn Winter Catalogue 2014, Shop online, Stampin' Up, Stampin' Up Card, Stampin' Up Card ideas, Stampin' Up Supplies, The Paper Players
Cards | Stamping