Easter Promise Spring Crocus Two Ways

by Joanne James26. March 2024 21:21

Today I'm sharing a couple of extra Easter cards that I made for a few current challenges, using one of my favourite retired Easter sets, Easter Promise, using two different colouring techniques. The first one is for the current TicTacToe Challenge (I went across the middle row with pastel colours/CAS/flowers) and is my second entry over at Addicted to CAS where the code word is 'Bloom:


My first card is coloured with my Stampin' Blends - take a look:


 I coloured my crocus with my Stampin' Blends, sticking to pale purples with a tiny pop of orange for the stamen. I stamped and fussy cut the sentiment and added a trio of irridescent gems - don't you just love how they pick up the colour of whatever they're next to?  

My second card uses the colours over at Sunday Stamps and since it's another card featuring spring flowers, I'm sharing over at AAA Cards:


For this card I stamped the crocus image onto watercolour paper and used my inks and aqua painter, along with my watercolour pencils for highlights, to colour:


I used all of the colours on the Sunday Stamps palette (if you look closely there is the faintest wash of pink around my blooms which add a hint of Spring warmth) and diecut my finished image and added to a Lemon Lolly card base, with some coordinating enamel dots for a pop of added colour:


On this card I stamped my sentiment in brown and I think it suits the yellow tones much better. Both the insides and envelopes were stamped for a finishing touch of co-ordination. Both of these cards are off in the post already - the Easter weekend is almost upon us!

I hope you like my trip back down memory lane with one of my favourite retired Easter sets.

Enjoy your evening and I'll be back tomorrow with another project. Until then, happy stampin'!


Perennial Lavender Birthday Card PP671

by Joanne James7. January 2024 08:00

Today it's Sunday and time for this week's new challenge over at The Paper Players! It's our first challenge of 2024 and the fabulous Ann is hosting this week. A new year is a time for celebration and to kick off 2024 Ann has a challenge with celebration of a different kind in mind:


We are celebrating birthdays this week! So many new goodies to play with and so much new product to choose from; I decided to use the sketch layout over at Global Design Project #GDP426 for my card this week as the large central panel is perfect to showcase some lovely new paper - take a look:


Here's the low-down on today's card:

Perennial Lavender - As a lover of all things purple, the Perennial Lavender papers quickly caught my eye. The beautiful watercolour designs in a mix of purples and white on Crumb Cake don't disappoint! I cut one of the sheets into 6 pieces each that fit a cardfront, and trimmed one of them slightly to fit the panel on today's card.

Perennial Postage - My sentiment is from one of the two stamp set bundles in the Perennial Lavender Suite, called 'Perennial Postage'. There isn't a specific happy birthday sentiment, but I think this one works quite well, for birthdays and other occasions. I stamped it onto a banner cut with my favourite Stylish Details Dies and decorated with some diecut lavender stems that I cut from Crumb Cake cardstock and watercoloured with my aquapainter to tie in with the look and feel of the paper - you can see both in more detail below:

A few sparkly shimmer gems in various shades of purple and some linen thread complete the front of my card.

Inside Detail - I added another sentiment from the same stamp set to the inside of my card to continue the birthday theme and stamped a couple of lavender stems for a little extra decoration:

These papers do have a slightly 'vintage' feel to them which is not my normal 'go to', but they really are so beautiful it would be a shame not to embrace them! I love how this card turned out and I am looking forward to making more projects with them soon.

Here is the visual summary of the key products used on today's project for you to pin for easy reference:


You can see all of my Product and 'How To' summaries on my 'How To - Tips and Techniques' Pinterest board in case you've missed any. 

Before you reach for your ink and papers, check out what our amazing team has created to inspire you this week:

  
We have our two new guest designers for 2024, Cynthia and Jolanda, on board (waves enthusiastically!) - do pop by and visit their blogs and welcome them to the team. 
 
Here's a quick recap of our challenge rules:
 
1.  Create a new paper project
2.  Upload your creation to your blog with a link back to us and provide a direct link to the post featuring your challenge submission.
3.  Please link your card to no more than four challenges, TOTAL.
4.  Have FUN!

Enjoy your day; I will be making the most of the last couple of days before the youngest of the James Juniors returns to school and I am back to my daily school run commute. Hoping to find a little crafty time so fingers crossed I'll be back tomorrow with another project. Until then, happy stampin'!


Stampin' Up! Supplies Used: 

Table built using Product Table Builder by The Crafty Owl - Independent Stampin' Up! Demonstrator.

Happiness Abounds Birthday Card AYSI281

by Joanne James12. August 2022 12:00

Today I'm sharing my design team card for our new challenge over at As you See It where it's time for a recipe challenge:


There were lots of things on this week's board that I loved - DSP, bright colours, dies and even florals - but I was slightly unnerved by the addition of watercolouring into the mix! I find watercolouring a little hit and miss (sometimes my attempts are a hot mess!) so I decided to play safe and watercolour my stamped florals and take it from there. Take a look at where I ended up:


 Here's the low-down on today's card:

I decided to use some of the brightly coloured Hues of Happiness DSP for my background and use this as the starting point for my card. I resisted the urge to use some of my florals diecut from another sheet in this pack and instead I stamped a whole bunch of flowers from the 'Happiness Abounds' stamp set onto Shimmery White cardstock and heat embossed them in black. Shimmery White cardstock is great for watercolouring as it's not too absorbent and so is very forgiving. I watercoloured my flowers in the same colours that featured on my background paper, and positioned them around a central diecut piece, also from the co-ordinating Blossoming Happiness Dies:

I heat embossed my sentiment onto a Stylish Shapes diecut banner, added a twine bow and my card is complete - all elements of the recipe included, phew!

Here is the visual summary of the key products used on today's project for you to pin for easy reference:


You can see all of my 'How To' summaries on my 'How To - Tips and Techniques' Pinterest board in case you've missed any. 

Here's a summary of our challenge rules:

  • Create any card, scrapbooking page, 3D project or packaging project that fits the challenge.
  • Please include the challenge graphic and link back to the challenge in your blog post. Turn off word verification so we can leave you lots of lovely comments. Make sure you link the post not the whole blog to the Linky. Use #AYSIXXX when uploading to a public gallery.
  • If you’re unsure about ‘the rules’, check the details under the Challenge Guidelines tab on the As You See It Challenge homepage.
We look forward to seeing your creations in the AYSI gallery.

Enjoy your day and I'll be back on Sunday with my project for The Paper Players. Until then, happy stampin'!


Stampin' Up! Supplies Used:

Table built using Product Table Builder by The Crafty Owl - Independent Stampin' Up! Demonstrator.

Artfully Layered Abstract Watercolours PP588

by Joanne James24. April 2022 07:00

Today it's Sunday and time for this week's new challenge over at The Paper Players! It's my turn to host this week and I have my favourite, a sketch challenge for you to work with:
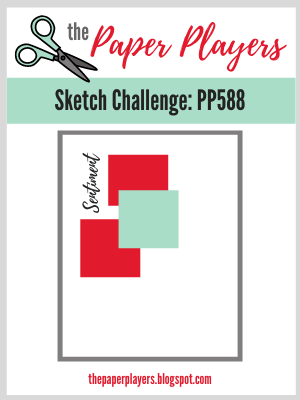
       

I designed a sketch with three elements - they can be any shape - and a vertical sentiment tucked alongside. My sketch was inspired by a card I made previously using squares of designer paper, however for today's card I went in a completely different direction - take a look:
 

Here's the low-down on today's card:

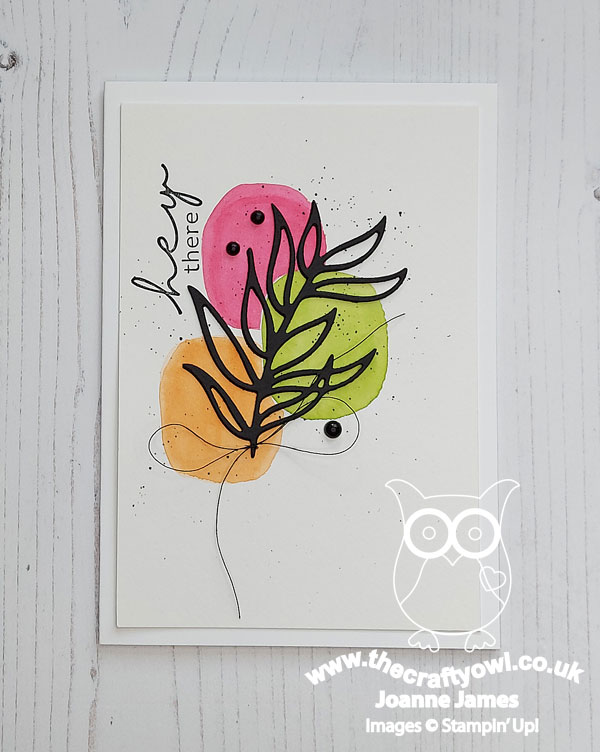
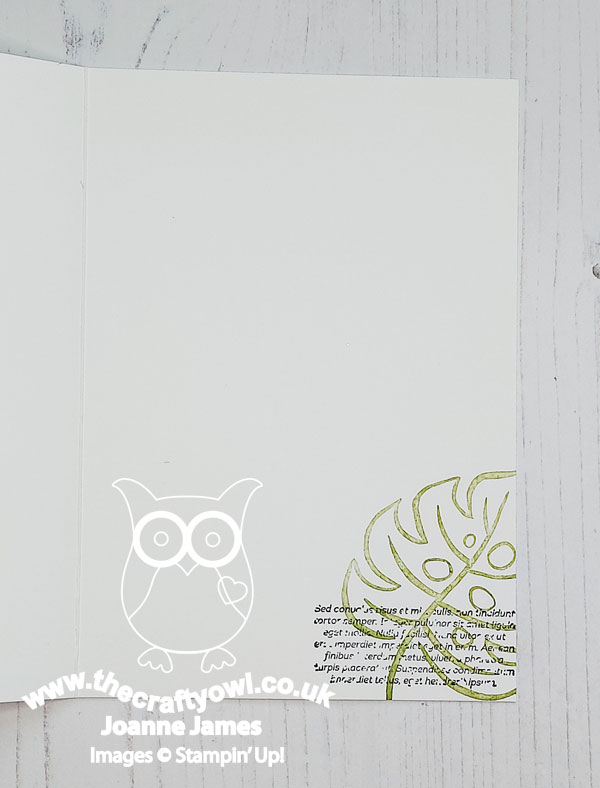
Artfully Layered - Today's card features the 'Artfully Layered' bundle - I just love these leaves! Today's card really is about the Tropical Leaves Dies and my card makes a dramatic feature of one of the leaves, diecut in black. There is just a little stamping, with the sentiment on the front and a little extra to decorate the inside:
 

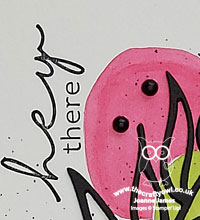
Inspired Abstract Watercolouring - I decided to brave it and use my aquapainter to watercolour three rounded squares for my three elements and use these as a backdrop to my leaf. I used the trio of bright colours over at Color Throwdown as I thought they would pair well with the black and painted each shape carefully, deciding not to overlap them and building colour gradually. I'm not the best when it comes to watercolouring but was totally inspired by my CAS Colours & Sketches teammate, Cecile Ribon, who creates the most amazing CAS cards using simple watercoloured shapes and outline stamped images and/or delicate diecuts - if you're not familiar with it I would urge you to take a look at her blog here, she is so artistic! Having added my watercoloured shapes, I added some black ink splatters using my Black Blends marker before adhering my diecut. I used anothe Cecile trademark of a stitch of twine at the base of my leaf, along with a trio of enamel dots, to complete my card:
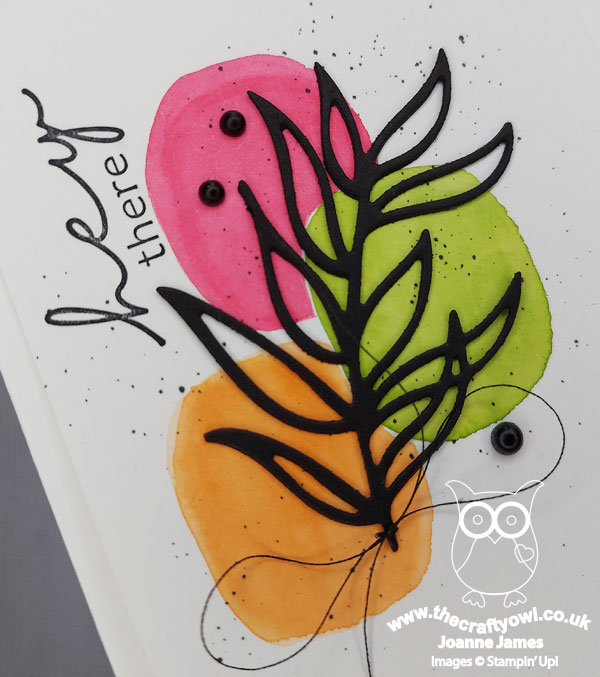
What do you think? I'm really quite please with the end output so I'm going to link up over at Inkspirational too, where they are also challenging us to watercolour this week. 

An Alternative Colourway - I liked my card so much, I decided I would have another go using the inspiration photo over at Just Add Ink too. I considered going in a different direction, given the distinctly autumnal feel of their photo, but I just couldn't bring myself to dig out my autumn leaves as we are just heading into summer on this side of the world! So I changed out my sentiment and chose a different diecut leaf and used the same layout for a second version. Here is the Just Add Ink inspo photo:

And here's my second card that was inspired by those warm, autumnal colours:
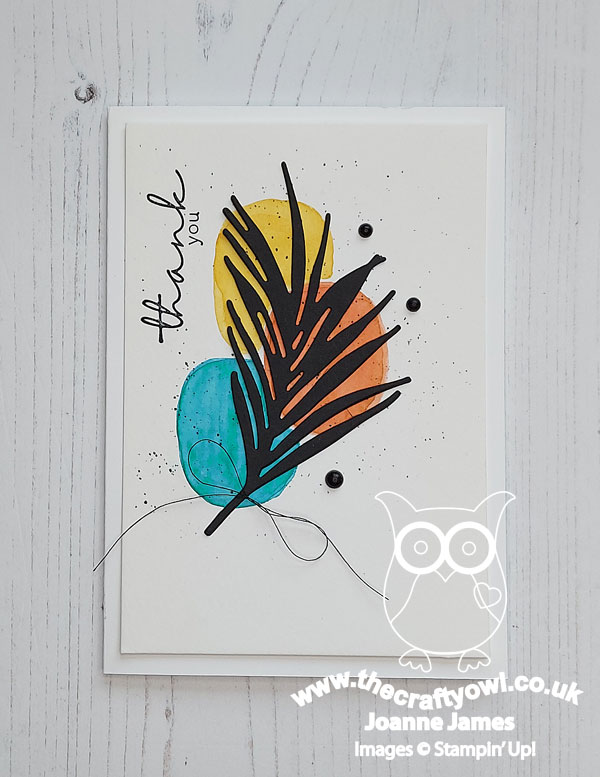
 

So what do you think of today's cards? Do you have a favourite? Do leave me a comment below - I'd love to hear your thoughts.

Here is the visual summary of the key products used on today's project for you to pin for easy reference:
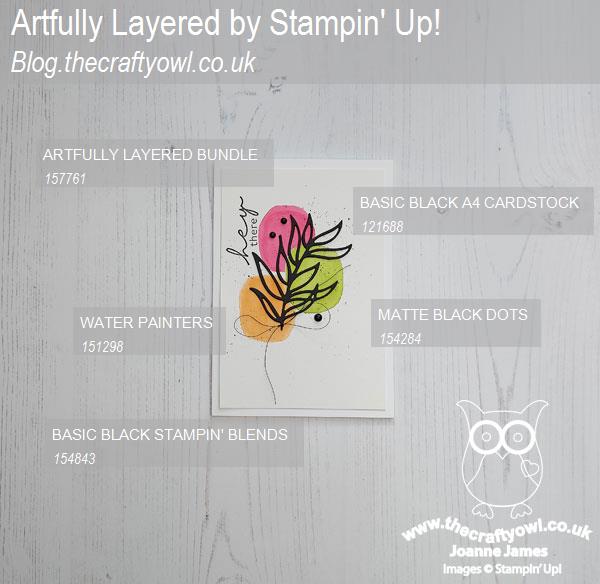
 

You can see all of my Product and 'How To' summaries on my 'How To - Tips and Techniques' Pinterest board in case you've missed any. 

Before you reach for your ink and papers, check out what our amazing team has created to inspire you this week:

Here's a quick recap of our challenge rules:
 
1.  Create a new paper project
2.  Upload your creation to your blog with a link back to us and provide a direct link to the post featuring your challenge submission.
3.  Please link your card to no more than four challenges, TOTAL.
4.  Have FUN!

Enjoy your day; we are having a quiet day at home today before the James Juniors are back to school this week. I'll be back tomorrow with another project. Until then, happy stampin'!


Stampin' Up! Supplies Used: 
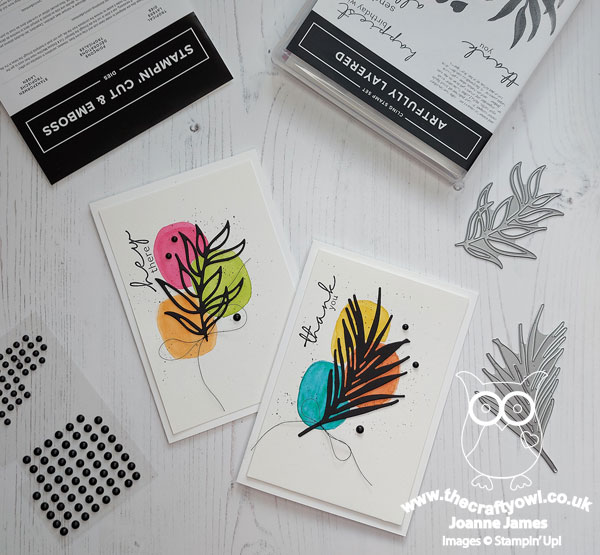
Table built using Product Table Builder by The Crafty Owl - Independent Stampin' Up! Demonstrator.

A Walk In The Woods For AYSI 243

by Joanne James5. February 2021 13:00

Happy Friday everyone! Today I'm sharing my design team card for our new challenge over at As you See It where we have a colour challenge for you this week:


I don't mind admitting these colours threw me for a loop initially - all I could see were elephants, donkeys and apples! Anyway, having seen the card that my teamie Jane made this week, I decided I just needed to have a trawl through my stamp collection and see what I could come up with. I found my 'Walk In The Woods' stamp set and decided the palette would work perfectly for some toadstools - take a look at what I came up with:


Here's the low-down on today's card:

This week's card is definitely 'less is more': I stamped the cluster of toadstools initially in Sahara Sand and coloured the image with my water painters for a little no-line watercolouring. Once dry, I decided that the simple image looked a little flat, so overstamped the outline again in Basic Grey, which added in some much needed detail:


A heat-embossed sentiment in white on Basic Grey and some (retired) Poppy Parade chunky twine bow ties the image in with my mat and card base and completes my card.

Here is the visual summary of the key products used on today's project for you to pin for easy reference:


You can see all of my 'How To' summaries on my 'How To - Tips and Techniques' Pinterest board in case you've missed any. 

Here's a summary of our challenge rules:

  • Create any card, scrapbooking page, 3D project or packaging project that fits the challenge.
  • Please include the challenge graphic and link back to the challenge in your blog post. Turn off word verification so we can leave you lots of lovely comments. Make sure you link the post not the whole blog to the Linky. Use #AYSIXXX when uploading to a public gallery.
  • If you’re unsure about ‘the rules’, check the details under the Challenge Guidelines tab on the As You See It Challenge homepage.
  • In a colour challenge, black or other neutral can be used in outlines and sentiments but no other colours should be included. Stampin’ Up colours are used for reference but colours that are a close match are welcome.

Enjoy your day and I'll be back tomorrow with another project. Until then, happy stampin'!


Stampin' Up! Supplies Used:

Table built using Product Table Builder by The Crafty Owl - Independent Stampin' Up! Demonstrator.

Strong and Beautiful Delightfully Detailed Watercolour

by Joanne James21. May 2020 08:00


Today I'm sharing a card that was inspired by the current Fusion Challenge that also meets the watercolour brief over at TGIF Challenges this week:


I went all-in with the Fusion sketch and photo inspiration and even created a watercolour background for my piece of Delightfully Detailed laser-cut paper -  take a look:


I generally avoid watercolour backgrounds like this as they always seem to end up a sludgy mess, but I was quite pleased to have created this one on my second attempt. I paired it with a sentiment from the 'Strong and Beautiful' stamp set which works for the Fusion theme of 'You are Enough' and split the sentiment into two parts, heat embossing the first part in white on the front of my card. This is the only thing I wish I'd done differently, as it's quite difficult to see on the photo against the pale pink background. This photo shows it a little clearer: 


I added a sprinkling of sequins and then finished my sentiment inside my card, adding another offcut of lasercut paper:


Here is the visual summary of the key products used on today's project for you to pin for easy reference:


You can see all of my 'How To' summaries on my 'How To - Tips and Techniques' Pinterest board in case you've missed any. 

We have the last of CE exams part one today with History first thing, followed by an online unboxing of my pre-order with my online class ladies late morning - I'm not sure who is looking forward to that more, them or me! I then have a rather boring afternoon of housework lined up - I can put it off no more! Enjoy your day and I'll be back tomorrow with another project. Until then, happy stampin'!


Stampin' Up! Supplies Used:

Table built using Product Table Builder by The Crafty Owl - Independent Stampin' Up! Demonstrator.

Welcome Bunny Pastel New Baby Card

by Joanne James2. March 2020 20:30

Happy Monday everyone! I need to have a productive week this week - my to-do list is long! - this week's post maybe a little short and sweet - so let's go!


I still had the 'Welcome Easter' stamp set out on my desk having made this card last week, so decided to use the colours over at Just Add Ink where I haven't managed to play along in a while (hello lovely JAI ladies!) and this week's CAS(E) This Sketch layout from the lovely Brian King and an altogether different look to create a sweet baby card - take a look:


Here's the low-down on today's card:

I grabbed a piece of Pleased As Punch DSP for the pink check layer and added a horizontal piece with a stitched diecut border detail before anchoring with my bunny. I stamped him on Shimmery White cardstock in Smoky Slate, then used my aquapainter to colour him in, keeping the colours soft and muted and layered on a scalloped circle.

Now whilst I used the CAS(E) This Sketch layout, I may well get thrown out with this card as I broke my own clean and simple rule here - not only did I add a sprinkle of adhesive-backed sequins, but I also tied the Soft Sea Foam panel with a piece of Whisper White crinkle seam binding ribbon! In my defence, this ribbon is so soft and lightweight, it squishes to nothing (good for cards that need to be mailed!) and I kind of figured since it was a new baby card, a little embellishment makes it special. Not much of a defence to Brian and the CTS design team - if it helps, I used this sketch for another card that I'm going to share later in the week that is perfectly CAS in everyway, as Mary Poppins would say. 

So what do you think - is that little guy sweet or what?! He reminds me of Thumper from the Disney classic 'Bambi', (another Disney reference - not that I'm counting down to a special vacation to the happiest place on earth or anything...) but I digress...! 

Here is the visual summary of the key products used on today's project for you to pin for easy reference:


You can see all of my 'How To' summaries on my 'How To - Tips and Techniques' Pinterest board in case you've missed any. 

Enjoy your evening and I'll be back tomorrow with some exciting Sale-A-Bration news so do come back to find out more. Until then, happy stampin'!


Stampin' Up! Supplies Used:

Table built using Product Table Builder by The Crafty Owl - Independent Stampin' Up! Demonstrator.


Baby We've Grown New Parent Congratulations Card

by Joanne James20. July 2019 22:00

Today I'm sharing a card that I made because it is perfect for the current challenge over at Festive Friday and uses the current Color Throwdown colours:

#festivefridaychallenge, #FF0038, Parent's Day, Watercolor cards   

Using both watercolouring and with Parent's Day in mind (or at least two new parents in particular) and this soft and sweet colour palette, I created this card for some new parents:

Not much to say about my card today! I stamped my image on watercolour paper and then heat embossed it in silver, watercoloured it and added a stitched frame to finish. No product table for this card because it uses a whole bunch of retired bits and pieces: one of my favourite baby-themed retired stamp sets, Baby We've Grown, a retired colour in Pink Pirouette (a perfect baby pink) and some retired co-ordinating ribbon and foil doily. All of these were chosen deliberately though, as they are just perfect for the recipients: a Stampin' Up! demonstrator friend of mine and her husband have finally this week received their much longed-for adopted child, a baby girl, so their family of two has (almost overnight) grown to become three. This stamped image of three owls seemed just so appropriate to celebrate the arrival of Little Miss Wilson as she is affectionately known, and the oh-so girly pink complimented with the pale grey seemed like the perfect palette.

Enjoy your evening; I am typing this having spent the evening at the swimming pool watching the youngest of the James Juniors race with some great race times and a couple of wins, so it's nice to be sat in the cool again. I'll be back tomorrow with another project and this week's post over at The Paper Players. Until then, happy stampin'!


Tags: , , , , , ,

Cards | Shop Online | Shop Stampin' Up! Online | Stamping

Tea Together Mother's Day Card for PP426

by Joanne James27. January 2019 09:00

Today it's Sunday and time for this week's new challenge over at The Paper Players! It's the turn of the talented Jaydee to host this week and she has my favourite, a sketch challenge, for you to work with:


Today's card is something of a departure from my usual 'clean' style and is choc-full of detail, so I hope you like it! I've gone pastel with this week's Global Design Project colours and whilst not for Valentine's my card is definitely all about love so is perfect for the Stamp Ink Paper challenge too - take a look:


Here's the low-down on today's card:

Time For Tea - The moment I laid eyes on the 'Tea Together' stamp set in the Spring-Summer catalogue, I knew it would have to find it's way into my shopping basket: as a self-confessed 'teapot' who often drinks between 6 and 8 cups of tea a day, it was bound to appeal, but the clincher was that it was paired with some wonderful Mother's Day sentiments too and the only person I know who drinks more tea each day than me is my Mum, so it seemed a perfect choice. Add to this the fact that the co-ordinating Tea Together Framelits Dies that cut out each of the elements, including the flowers, are available free during Sale-A-Bration with a £90 purchase and that was it - decision made! I decided to continue with my watercolouring phase and for today's teacup and flowers, as it suited the subtle, pastel colours and coloured, cut and layered until I was happy with the result.

Flourishes and Lace - I added additional detail to my background with a combination of an embossed panel - check out that fabulous lace effect detail - and some Petal Pink flourishes, carefully snipped from the new Beautifully Detailed Laser-Cut Paper, which is helpfully already coloured Petal Pink on one side (and white on the other side). Along with a few punched flowers and pearls, I'm really going for the vintage look and feel today. 

A Mother's Love - I've been liberal with my interpretation of Jaydee's sketch, but you can still see the basic circular shape represented by my tea cup full of flowers and my horizontal overlaid sentiment, accentuated by stamping only part of the sentiment on the teacup and substituting the masked word 'love' with a stacked diecut, courtesy of the Well Written Framelits. Whilst I would definitely agree with the sentiment on the front of this card, the sentiment from the 'Tea Together' set really is one of the most wonderful we have had in a stamp set for a long time:


The perfect finishing touch for my Mother's Day card. Here is the visual summary of the key products used on today's project for you to pin for easy reference:


You can see all of my Product and 'How To' summaries on my 'How To - Tips and Techniques' Pinterest board in case you've missed any. 

Before you reach for your ink and papers, check out what our amazing team has created to inspire you this week:

Here's a quick recap of our challenge rules:
 
1.  Create a new paper project
2.  Upload your creation to your blog with a link back to us and provide a direct link to the post featuring your challenge submission.
3.  Please link your card to no more than four challenges, TOTAL.
4.  Have FUN!

You can see all of my 'How To' summaries on my 'How To - Tips and Techniques' Pinterest board in case you've missed any. 

Enjoy your day; we are finishing up on our homework today along with the dreaded tax returns (each year I tell myself I will make time to process them well in advance of the deadline, yet it never happens!) Hopefully I will finish in time to sneak into my craft room for a quick make or two. Either way, I'll be back tomorrow with another project. Until then, happy stampin'!


Stampin' Up! Supplies Used: 

Table built using Product Table Builder by The Crafty Owl - Independent Stampin' Up! Demonstrator.

By The Bay Clean and Simple Inlaid Frame Card

by Joanne James18. January 2019 09:00

Yay - it's Friday, bring on the weekend! Today I'm sharing a card for the current challenge over at Less is More where I haven't played for a while:

I had a short window for a spot of crafting yesterday and thought I'd whip up another clean and simple card using a couple of new products that fits perfectly with their theme this week - take a look:


Here's the low-down on today's card:

By The Bay - The seagulls paddling on the shoreline that feature on today's card are reminiscent of the ones that featured in the much loved and now retired Wetlands set (anyone else remember that set?) albeit with a little more definition, and they are one of three line-drawn images that feature with three sentiments in 'By The Bay', one of the stamp sets that can be yours free with a purchase of £45 or more during Sale-A-Bration. Perfect for colouring the images are large enough to stand alone but also not so big that they take a long time to colour. I really like this set and you can be sure I will be using it more before the promotion is over. 

Another Way To Frame - To frame my image, I used a new favourite of mine, the Rectangle Stitched Framelits Dies, but this time to cute an aperture frame into my cardfront. I then adhered my watercoloured image behind this. I like the subtle added detail that this gives to a clean and simple card, without adding overt layers. 

Ways With Watercolour - I feel like I've been watercolouring a lot on my cards lately; I don't consider myself to be by any means an expert at watercolouring, but I think that's why I'm enjoying it so much; on watercolour paper, it's easy to build up colour without needing to be too precise in terms of the overall effect. It would take ages if I was to attempt to properly draw and paint the image to achieve omething like this, so I'm grateful that stamps, ink and an aquapainter enable me to produce something this good in a fraction of the time! I used a combination of blues, greys and sandy neutrals to colour my image.

If you like today's clean and simple card, by purchasing the key items used below, you can earn the By The Bay stamp set for free - perfect for creating your own watercoloured masterpieces.

Here is the visual summary of the key products used on today's project for you to pin for easy reference:

You can see all of my 'How To' summaries on my 'How To - Tips and Techniques' Pinterest board in case you've missed any. 

Enjoy your day - I have a monster basket of ironing to wade through but I'm hoping if I focus I might squeeze in a little stamping time before my afternoon school run, so I'm on a mission! I'll be back tomorrow with another project. Until then, happy stampin'!


Stampin' Up! Supplies Used:

Table built using Product Table Builder by The Crafty Owl - Independent Stampin' Up! Demonstrator.

New Online Exclusives

There are new products available exclusively in the online store from 5 November - check them out here.

Latest Kits!

Stampin Cut and Emboss

The Layered Landscapes Kit and Nature's Paintings Kit are the latest kits in the online store - get yours here!

Shop Online

Access my online shop 24 x 7, 365 days of the year:

Current November hostess code:

9NKXDTTR

Shop Online

Mini Catalogue

BROWSE THE CATALOGUE

'Tis The Season - the new Stampin' Up! Mini Catalogue is here! For more details and to download your copy click here

Scrapbooking

Stampin' Up! has introduced a new range of 12x12" scrapbooking product and kit - the full range is now available to purchase online. To download a copy of the new digital Scrapbooking Catalogue click here.

2024-25 Annual Catalogue

BROWSE THE CATALOGUE

Click on the image to download your copy of the 2024-25 annual catalogue. For a full list of current SU! supplies, go to my online store. If you would like any help or advice, please drop me a line at joanne@thecraftyowl.co.uk or give me a call on 07773 421446 - I'd be happy to help.

Join My Team

It's always a great time to join Stampin’ Up! New team members can get £130 worth of products for only £99 + free business supplies + free shipping + all the fun being a part of Stampin’ Up! Stampin' Up! has something for everyone: join my growing team and benefit from my support to enjoy Stampin' Up! however you choose.

If you're interested, call me for a chat to understand how I can help you realise your goals. Alternatively, if you have already decided to sign up and you just can't wait, please click here for the link to the online form where you can sign up and order your starter kit right away! 

About Me

Hi I'm Joanne and live in Northampton and when I'm not looking after my husband and two beautiful children, am an avid crafter with a passion for all things Stampin' Up!

I must confess that I have never been a big rubber stamper - until I discovered Stampin' Up! that is. I love the fact that I can get such great results with co-ordinating stamps, inks, papers and punches - the possibilities are endless! Join me on my stamping journey as I share the things I love and be inspired to create amazing things yourself!

Follow Me

Monthly Newsletter

Box Builder

Click the button above to use Box Buster to create your custom box design using the Envelope Punch Board!

Kits Collection Now Available!

Stampin Cut and Emboss

The new Kits Collection from Stampin' Up! is now available!

Click here to see the current kits available and order yours online today.

I Design For


Stampin' Up Stuff

This is my personal blog and is not endorsed by Stampin’ Up! I hope you find it a plentiful source of ideas and personal inspiration but please don't copy my designs for contest submission or use for classes, publication or sale without express permission.