Easter Bunnies Are Not Just For Easter PP634

by Joanne James2. April 2023 08:00

Today it's Sunday and time for this week's new challenge over at The Paper Players! It's the turn of the fabulous Jaydee to host this week and she has a theme challenge for us to work with:


The animals came in two by two - feature two animals on your card, how fun! I actually have two cards to share with you today: I made my Paper Players card after I made the first one, so I'll share that one first so that the second one makes a bit more sense! My first card is an Easter card using Jen T's layout over at Freshly Made Sketches and the current Colour Inkspiration colour palette:

    May be an image of text

I thought the oval layout would be perfect for two bunnies and the colour palette would be just the ticket for a dark chocolate brown bunny and some floral decoration courtesy of the Dainty Delight Dies - take a look:


Whilst the layout worked beautifully for one bunny, two were definitely a squeeze, so having added some soft clouds and grass to surround my single bunny, I decided to add an Easter sentiment from the retired set 'Crazy About You'. This is such a pretty colour combo and I love the embossed detail on the Dainty Delight flowers and leaves too:


I then moved on to card two. I punched another bunny so that I had another pair and also had the country gingham oval left over from my first card that I still wanted to use up, so this time I switched to the current Sketch Saturday layout and decided to play along with the challenge over at TGIF Challenges and look at what other scraps and offcuts I had that would co-ordinate with my gingham oval.


I actually had quite a few! A strip of Country Floral designer paper leftover from a previous project, an offcut of Mint Macaron and some offcut strips of Wisper White that were just wide enough to cut a couple of borders with my Penned Flowers Dies and a scrap of Poppy Parade. This is what I came up with:


I used a Petal Pink card base and this time positioned my bunnies mirroring each other, with a punched heart between them. I really wanted a 'Some bunny loves you' sentiment but alas, I don't have one in my collection so went with this one from the retired Sale-A-Bration set 'Thanks A Bunch' instead:


I think this would make a sweet anniversary card;. It actually came together quite quickly by collecting up a bunch of leftover bits and pieces and more importantly - I managed to accommodate my two bunnies this time!

Here is the visual summary of the key products used on today's projects for you to pin for easy reference:


You can see all of my Product and 'How To' summaries on my 'How To - Tips and Techniques' Pinterest board in case you've missed any. 

Before you reach for your ink and papers, check out what our amazing team has created to inspire you this week:

Here's a quick recap of our challenge rules:
 
1.  Create a new paper project
2.  Upload your creation to your blog with a link back to us and provide a direct link to the post featuring your challenge submission.
3.  Please link your card to no more than four challenges, TOTAL.
4.  Have FUN!

Enjoy your day; I am off to an extra hockey game today and then we have the start of the Easter holidays, which for us means the start of serious revision season in the James household - not much in the way of excitement here! I'll be back tomorrow with another project. Until then, happy stampin'!


Stampin' Up! Supplies Used: 

Table built using Product Table Builder by The Crafty Owl - Independent Stampin' Up! Demonstrator.


Epic Celebration - You Rock for The Paper Players PP387

by Joanne James1. April 2018 09:00

Happy Easter Sunday wishes everyone! It's time for this week's new challenge over at The Paper Players! It's the turn of the amazingly talented Laurie to host this week and she has a fun theme challenge for you to work with:


I don't have much in the way of music-themed supplies in my collection and usually end up resorting to my e-cutter to create music-themed cards and gifts (you can see some of my previous examples here and here), so I was thrilled to see the Epic Celebrations set in this year's Sale-A-Bration promotion. As the wife of a guitarist and the other mother of two almost-teens, one of whom is in a band and both of whom are into either listening to or playing music in a big way, this set was a must-have for me. So whilst Sale-A-Bration has now ended, this set is a keeper and I just had to use it on today's card. I also used this week's sketch at Freshly Made Sketches for my layout - take a look:
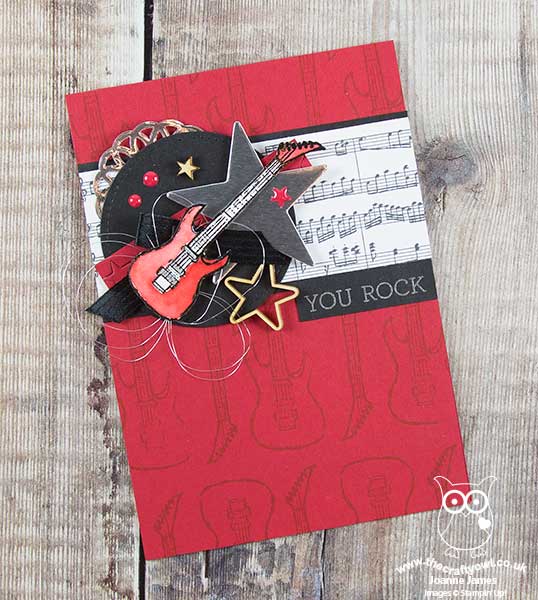
 

Here's the low-down on today's card:

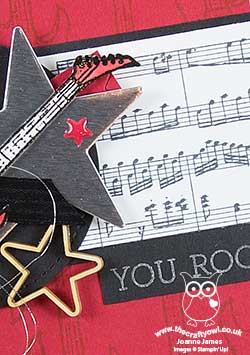
Epic Tone on Tone - I decided to use a simple tone-on-tone stamped background in Real Red using the guitar stamp to create some detail and to highlight my main focal image, which I stamped and heat embossed in black on watercolour paper, then coloured with my aqua painter. I added this to a collection of stars and bits and pieces to add a touch of 'glam rock' to my card. 

A LittleSheet Music - The border panel is a section of the background stamp 'Sheet Music', which I simply stamped onto Whisper White and cut out a section for added interest in keeping with the theme.

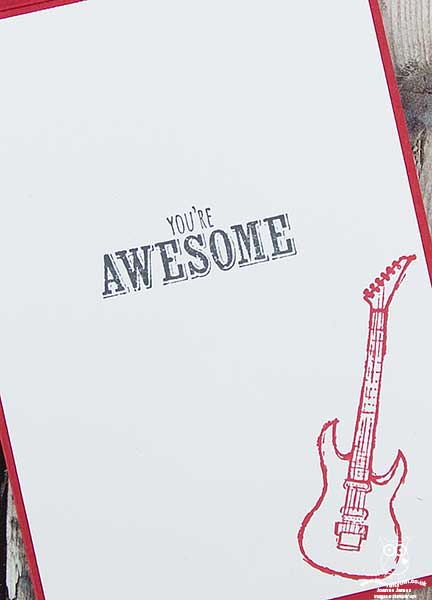
A Punny Sentiment - My punny sentiment is courtesy of the now-retired 'Crazy About You' set, which was perfect for this card. I also used the 'You're Awesome' sentiment from the Epic Celebrations set on the inside of my card:
 

Here is the visual summary of the key products used on today's project for you to pin for easy reference:
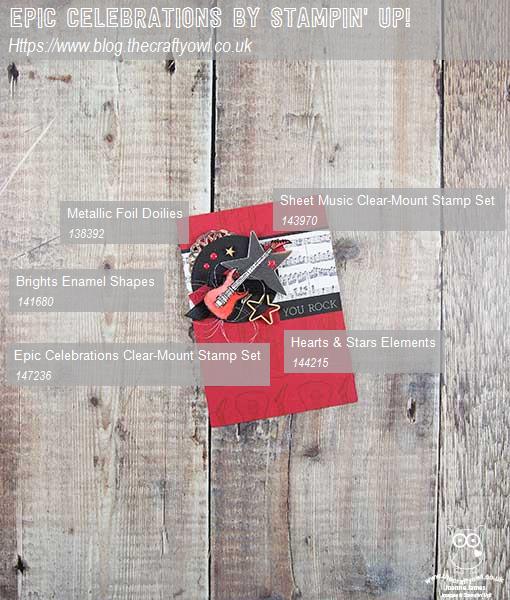
 

You can see all of my Product and 'How To' summaries on my 'How To - Tips and Techniques' Pinterest board in case you've missed any. 

This card is headed to my pile as a thank you for one of Rebecca's teachers; she will be performing the role of Brigitte in her whole school production of Rogers & Hammerstein's 'The Sound of Music' next term and there are an army of staff involved in making this happen, including her Maths teacher, who also plays electric guitar. The girls at school think he is super cool, so this card will be perfect for him!

Before you reach for your ink and papers, check out what our amazing team has created to inspire you this week:

Here's a quick recap of our challenge rules:
 
1.  Create a new paper project
2.  Upload your creation to your blog with a link back to us and provide a direct link to the post featuring your challenge submission.
3.  Please link your card to no more than four challenges, TOTAL.
4.  Have FUN!

I can't wait to see how you interpret this week's theme and look forward to visiting your blogs this week! Enjoy the rest of your weekend - enjoy your Easter egg hunts and eat as much chocolate as you can safely consume! I'll be back tomorrow with another project; until then, happy stampin'!


Stampin' Up! Supplies Used: 

Table built using Product Table Builder by The Crafty Owl - Independent Stampin' Up! Demonstrator.

A Playful Palette Happy Birthday

by Joanne James16. June 2016 08:05

I'm back from a special day yesterday: Rebecca celebrated her 11th birthday - wherever did that time go?! She was slightly disappointed that it was a school day, although genuinely touched by the number of children that came up to her to wish her a happy birthday yesterday, and two little juniors who even came and sang to her - how sweet! It seems when you're Head Girl everyone knows when it's your birthday!

Anyway - today it's time for a new challenge over at Create With Connie and Mary and this week we have a sketch for you:


For my card today I decided on a showcase of in-colours and one of the new designer series paper stacks - take a look:

Here's the low-down on today's card:

A Playful Palette of Colour - The designer series papers featured on my card today feature four of the five new in-colours (only Dapper Denim is absent) and are one of the products featured in the Playful Palette suite - modern and colourful designs, inspired by brushstrokes and artwork. Here's a photo showing other items in this creative suite:


Layering Squares - I cut each of my four squares with my new Layering Squares framelits and chose to highlight one of the squares with a narrow scalloped border in Peekaboo Peach. These layered squares are great for creating perfectly aligned borders, frames and shaker cards and can be used in endless different combinations to achieve a different effect each time.

Hello You Happy - I finished my card with a sentiment comprising a little banner using words from the 'Crazy About You' stamp set and a die cut 'happy' using one of the 'Hello You' thinlits. I diecut my 'happy' in Emerald Envy, dipped it in Versamark and then heat embossed it with clear embossing powder and repeated the process 3 times to get a smooth and glossy finish. It really stands out against the patterned papers and the Sweet Sugarplum base  - I love it!

Here is the visual summary of the key products used on today's project for you to pin for easy reference:


You can see all of my 'How To' summaries on my 'How To - Tips and Techniques' Pinterest board in case you've missed any. 

Do visit the other Design Team members to see what they did with this week's sketch; there's lots of inspiration over on their blogs too!

Enjoy your day; I'm getting together with some of my team for a catch-up, which should be fun. I'll be back tomorrow with another project; until then, happy stampin'!


Stampin' Up! Supplies Used:

  • Playful Palette Designer Series Paper Stack
  • Hello You Thinlits Dies
  • Layering Squares Framelits Dies
  • Crazy About You Stamp Set
  • Sweet Sugarplum A4 Cardstock
  • Peekaboo Peach A4 Cardstock
  • Emerald Envy A4 Cardstock
  • Very Vanilla A4 Cardstock
  • Tuxedo Black Memento Ink Pad
  • Versamark Pad
  • Clear Stampin' Emboss Powder
  • Heat Tool (Uk)

Hello Sunshine CAS Card

by Joanne James28. March 2016 09:00

I've been having fun playing along with the CASology challenges for the last couple of weeks, so today I have a couple of clean and simple cards for this week's challenge where the theme is weather:

My first card is a fair weather sunshine card using a freehand cut cloud (I stuck lots of different sized punched circles together and created a template to make this oversized cloud) and a sunburst cut using the Sunburst Thinlit and then punched with a 2 1/2 circle punch:


I can't believe I was 'on the fence' about buying this Sunburst Thinlit when I first saw it in the catalogue; it is so much easier than creating sunbursts by hand! I added a sentiment combination of a 'Hello You' diecut and a stamp from the 'Crazy About You' stamp set. A trio of rhinestones completes my fair weather card.

Here's the visual summary of the key supplies used to make this card for you to save for future reference:


Here too is the cheery summer colour combination I used - fee free to save it:


This is the weather I will be hoping for with the children home on school holidays this week; I'm rather thinking it might be a little more like my next card! I'll be along with my second card shortly; until then, happy stampin'!


Stampin' Up! Supplies Used:

Table built using Product Table Builder by The Crafty Owl - Independent Stampin' Up! Demonstrator.


He Is Risen Sunburst Easter Card

by Joanne James1. March 2016 21:00

Firstly, Happy Saint David's Day to any fellow Welsh bloggers or blog readers! I have had a busy day of classes today, with the first of my technique classes this month this morning and my Project Life memory keeping class this afternoon. I'm not so organised that I had an early blog post for you; my card was made,I just fell asleep at my laptop yesterday evening before I could schedule it! Today's card is for the 300th challenge over at Just Add Ink where they have this sketch as inspiration this week:

JAI #300

I saw this sketch and knew it would be perfect for a card that I've had in mind for a while using my Sunburst Thinlits Die - take a look: 

I wanted to create an Easter card with a sunburst behind a cross; how to make my cross though? I decided to try and make one using a sunburst, by squaring up the edges and cutting away the diagonal sections. Here's a work in progress picture that shows you how I cut it:


I hope that is helpful. I ran my cross through my Woodgrain embossing folder to add some texture and make it stand out against my super-CAS background of So Saffron and Pear Pizzazz. I allowed my sentiment strip to overhang the width of my paper slightly and made my own sentiment using the stamps in the 'Crazy For You' stamp set, masking off letters where not needed until I had my phrase. The Alphabet Rotary Stamp would also allow you to create something similar. I added a gold button, a twist of retired Tangelo Twist satin ribbon and a sprinkling of Pumpkin Pie sequins to finish my card. This is a great Easter card that can be made using entirely non Easter-specific supplies, which is always useful. What do you think of my cross idea? I'd love to know whether you think this works - do leave me a comment with your thoughts below. 

Here's today's visual summary for easy reference:


That's all from me today; I'll be back tomorrow with another project; until then, happy stampin'!


Stampin' Up! Supplies Used:

Table built using Product Table Builder by The Crafty Owl - Independent Stampin' Up! Demonstrator.


Smooshing Into 2016 With A New Technique

by Joanne James1. January 2016 09:00

A new card for a new year! I know I shared a new year card with you yesterday - well, I have another one for you today! As a rule I only send one happy new year card each year, to my mother-in-law for hosting our family New Year's gathering, however when I saw that the theme this week over at Global Design Project was CASE The Designer and set eyes on Bibi Cameron's gorgeous card, inspiration most definitely struck. Here is her original card:

Isn't it lovely? I was really attracted to the background and decided to have a go at another technique that my good friend Kim Fee over at Simply Fairies affectionately calls the 'smooshing technique' as the basis for my card. So here is my card:


You might wonder why I struggled with this background - looks simple enough, right? Well, having thrown away many a piece of ruined cardstock I would have to disagree - there is clearly an art to getting it right! The lovely Kim recently made a short video after much pleading by myself and other smoosh-challenged friends; you can watch it here and I seriously recommend you do if you want to try this technique as it contains some great hints and tips. 

I used extra-thick Whisper White cardstock for my base, then created my inked layer on a piece of shimmery white cardstock using Pacific Point, Island Indigo and Night of Navy inks. The cardstock gives the card a wonderful all over shimmer in real life. I then used the stars stamp from Holly Jolly Greetings (a carryover set, yay!) stamped in Versamark and heat embossed in gold for added interest, then used some gold glimmer numbers, diecut using the new Large Numbers Framelits Dies (love these!). My Hello is from the 'Crazy About You' stamp set, which I popped up on dimensionals and finished with a trio of gold metallics sequins.

I really love the randomness of this background, which is quite different from my usual style, even though the card still feels true to me. So thanks Bibi and Kim for the inspiration for today's card. I hope it inspires you too to create something a little different this week - the new year is full of new creative possibilities and I am so looking forward to sharing them with you!

Happy New Year wishes to you all, my customers, blog and social media followers and friends and the ladies over at SUO Challenges where I'm linking up my second New Year card. I'll be back tomorrow with another project; until then, happy stampin'!


Stampin' Up! Supplies Used:

Available January 5th:

140622 Large Numbers Framelits Dies

Table built using Product Table Builder by The Crafty Owl - Independent Stampin' Up! Demonstrator.


Crazy About You One Sheet Wonder Cards

by Joanne James17. November 2015 21:55

I am having a busy week with another two classes today, so today's post is light on words but with lots of pictures to make up for it. I wanted to share the cards we made at my Stamp-A-Stack class last week. My ladies decided they wanted a change from Christmas cards, so instead we did a One Sheet Wonder adapted from a template by LeeAnn Greff. I wanted to go totally bright so we used Calypso Coral, Crushed Curry, Wild Wasabi and Pool Party and flowers from the 'Crazy About You' stamp set along with a little one from 'Flower Patch' and a mix of sentiments from other sets. We made 10 cards in total - here they are:

I didn't add sentiments on many of them - sometimes it's nice to be able to add a sentiment as you use the card: 


There you go - 10 cards for any occasion. We had so much fun at this class we are going to do it all again next month, only this time using the Vintage Leaves stamp set to make a set of masculine cards. This class will be on Friday 11th December and the cost for the class is £15 or free with a £45 order. There are still a couple of places available, so if you would like to join us do get in touch to reserve your place. 

Back tomorrow with another project; until then, happy stampin'!


Stampin' Up! Supplies Used:

Table built using Product Table Builder by The Crafty Owl - Independent Stampin' Up! Demonstrator.


Sheltering Tree Cherry Blossom Card

by Joanne James30. October 2015 09:00

Today I have a change from Christmas cards; I wanted to use this week's sketch over at Less is More and I am also playing along with the challenge over at The Card Concept:


I decided that the colours over at The Card Concept would make a pretty thank you card so here's my card for today:

I've been seeing some wonderful autumnal cards made with the Sheltering Tree stamp set so I thought I would use it on this card, although I think my card looks more Spring-like than autumnal! I used a base of Pink Pirouette with a mat of Early Espresso, and stamped my tree off the edge of the panel in Early Espresso onto Very Vanilla cardstock. I overstamped the blossom in Pink Pirouette with a little Cherry Cobbler, then for my sentiment used a combination of my 'thanks' Greeting thinlits die for the negative die cut in my Cherry Cobbler banner, with 'For Being You' stamped in Early Espresso using the 'Crazy About You' stamp set. 

Clean and simple with a hint of cherry blossom - a nice change from the autumnal, Halloween and Christmas cards of late!

Back tomorrow with another project; until then, happy stampin'!


Stampin' Up! Supplies Used:

Table built using Product Table Builder by The Crafty Owl - Independent Stampin' Up! Demonstrator.


Flowerpot Thanks For The Paper Players

by Joanne James22. March 2015 10:00

It's Sunday and time for a new challenge over at The Paper Players. There were some great CAS florals last week and this week we have my favourite kind of challenge. My good friend and talented team member LeAnne has a great sketch challenge for us:

I decided this sketch would be great for a DSP showcase, so today I have a very bright and colourful card to share with you:

I covered my entire card front with a piece of one of the 'busy' patterns from the Flowerpot DSP pack then used a piece of vellum to tone down the pattern so that my 'thanks' die cut in Night of Navy would still stand out against the pattern. I wrapped a piece of Tangerine Tango around the vellum in a bow before adhering it to my card base, using glue dots where they are covered by other elements so that they don't show through. I added the second part of my sentiment from the 'Crazy About You' stamp set and layered over my banner trio, punched out of colours I had picked up from the pattern using my banner punch. Lastly, I finished with a bold orange flower finished with a candy dot.

This card has such a clash of bright and bold colours and yet I think they work with the sketch beautifully. There are some great cards from the Design Team this week, all of whom have interpreted the sketch in interesting ways. Do pop by their blogs and take a look:

The Paper Players Design Team
 
Here's a quick recap of our challenge rules:
 
1.  Create a new paper project
2.  Upload your creation to your blog with a link back to us and provide a direct link to the post featuring your challenge submission.
3.  Please link your card to no more than three challenges, TOTAL.
4.  Have FUN! 

I look forward to seeing your takes on this week's sketch in our gallery this week. 

No lie in for me as I am off for an early morning of hockey as today is tournament day and then hopefully home again to dinner cooked by the men in our house - this is becoming something of a habit! Back tomorrow with another project; until then, happy stampin'!


Stampin' Up! Supplies Used:

Table built using Product Table Builder by The Crafty Owl - Independent Stampin' Up! Demonstrator.


Happy Birthday To You Colour Blocked Birthday Card

by Joanne James5. March 2015 12:00

Aren't you all lucky - this is my second post of the day! I have another card to share with you that I would like to link up with this week's CAS(E) This Sketch challenge and The Color Throwdown:


I love that block-striped welly boot and I thought these colours would be perfect for a masculine birthday card that would totally work with the sketch and my 'Hello You' thinlit dies. Here's my card:

I used Crumb Cake for my base and the 'happy' thinlit, and inset the thinlit into a panel of Real Red and Night of Navy, with Tempting Turquoise centres. I then stamped the 'Birthday To You' on the red panel in Night of Navy. A couple of epoxy stars - love these! - one backed with turquoise, one backed with gold foil, and a Navy candy dot finished off my card. I love this card - I think I'm going to have to make a few more of these!

Back tomorrow with another project; until then happy stampin'!


Stampin' Up! Supplies Used:

Table built using Product Table Builder by The Crafty Owl - Independent Stampin' Up! Demonstrator.


Tags: , , , , , , ,

Cards | Stamping

Current Promotions

Stampin Cut and Emboss

Save up to 30% off on all your favourite kits from 1 to 31 October! 

Click here to see the current kits available and order yours online today.

Join My Team

It's always a great time to join Stampin’ Up! During October you can get even more in your starter kit! New team members can get £160 worth of products for only £99 + free business supplies + free shipping + all the fun being a part of Stampin’ Up! Stampin' Up! has something for everyone: join my growing team and benefit from my support to enjoy Stampin' Up! however you choose.

If you're interested, call me for a chat to understand how I can help you realise your goals. Alternatively, if you have already decided to sign up and you just can't wait, please click here for the link to the online form where you can sign up and order your starter kit right away! 

Shop Online

Access my online shop 24 x 7, 365 days of the year:

Current October hostess code:

9NKXDTTR

Shop Online

Scrapbooking

Stampin' Up! has introduced a new range of 12x12" scrapbooking product and kit - the full range is now available to purchase online. To download a copy of the new digital Scrapbooking Catalogue click here.

Mini Catalogue

BROWSE THE CATALOGUE

'Tis The Season - the new Stampin' Up! Mini Catalogue is here! For more details and to download your copy click here

2024-25 Annual Catalogue

BROWSE THE CATALOGUE

Click on the image to download your copy of the 2024-25 annual catalogue. For a full list of current SU! supplies, go to my online store. If you would like any help or advice, please drop me a line at joanne@thecraftyowl.co.uk or give me a call on 07773 421446 - I'd be happy to help.

Latest Kits!

Stampin Cut and Emboss

The Christmas Ornaments Kit and Card Keeper Kit are the latest kits in the online store - get yours here!

New Online Exclusives

There are new products available exclusively in the online store from 5 November - check them out here.

About Me

Hi I'm Joanne and live in Northampton and when I'm not looking after my husband and two beautiful children, am an avid crafter with a passion for all things Stampin' Up!

I must confess that I have never been a big rubber stamper - until I discovered Stampin' Up! that is. I love the fact that I can get such great results with co-ordinating stamps, inks, papers and punches - the possibilities are endless! Join me on my stamping journey as I share the things I love and be inspired to create amazing things yourself!

Follow Me

Monthly Newsletter

Box Builder

Click the button above to use Box Buster to create your custom box design using the Envelope Punch Board!

Kits Collection Now Available!

Stampin Cut and Emboss

The new Kits Collection from Stampin' Up! is now available!

Click here to see the current kits available and order yours online today.

I Design For


Stampin' Up Stuff

This is my personal blog and is not endorsed by Stampin’ Up! I hope you find it a plentiful source of ideas and personal inspiration but please don't copy my designs for contest submission or use for classes, publication or sale without express permission.