Love For You Anniversary Card TTT212

by Joanne James8. June 2023 17:00

It's Thursday and time for a new challenge over at TicTacToe! It's the turn of Team X to host this week and the lovely Betty is our featured designer this week. This is the fun board that we are playing along with: 


I went down the right hand column with yellow, diecut and floral and used the Sketch Saturday layout to make a bright and colourful wedding anniversary card - take a look:


Here's the low-down on today's card:

I was rather pressed for time this week and I needed a wedding anniversary card, so I grabbed some retired Abstract Beauty designer paper for my torn layer and used the colours as the inspiration for the rest of my card: 

The 'Love For You' stamp set and dies did all the heavy lifting on this one and I finished by mounting the whole thing on a Crushed Curry card base with a couple of gold gems to decorate. This is rather bright and colourful, but I think it still works for a modern anniversary card. This one is headed to my brother- and sister-in-law who are celebrating their 25th wedding anniversary next week. I could have gone with a more traditional silver to celebrate this milestone, but they are anything but a typical couple so I think this card suits them perfectly!

Here is the visual summary of the key products used on today's project for you to pin for easy reference:


You can see all of my Product and 'How To' summaries on my 'How To - Tips and Techniques' Pinterest board in case you've missed any. 

A tictactoe board offers so many creative possibilities - how does this week's board inspire you? Why not have a go? We would love to see you in the gallery and who knows - you might be selected for Designer's Choice and be eligible to be a guest designer on a future challenge. 

Enjoy your day; I'll be back tomorrow with another project. Until then, happy stampin'!


Stampin' Up! Supplies Used: 

Table built using Product Table Builder by The Crafty Owl - Independent Stampin' Up! Demonstrator.

Love For You Trifold Valentines Card PP625

by Joanne James29. January 2023 08:00

Today it's Sunday and time for this week's new challenge over at The Paper Players! It's my turn to host this week and I have my favourite, a sketch challenge, for you to work with:


I took my inspiration from the pink and red hearts and flowers in the top right corner of the Hand Stamped Sentiments inspiration board and decided to make a slightly fancier card for a loved one today featuring the Love For You bundle - take a look:


Here's the low-down on today's card:

Today's card is a trifold card. I wanted to use the Love For You layered dies in a different way, so decided to make a two-colour tri fold card and cut each piece out of the alternating layers. I cut the largest aperture from the front section, then cut the second aperture from the second flap, having first added a piece of gingham to the centre of the panel:


 The last skinny set of diecuts were adhered to the inside of the card, with the 'so much love' being adhered with foam sheets for added dimension. I also added a small stamped sentiment and a sprinkle of hearts. The card has a double ribbon bow tie closure, tied through a couple of diecut slits. Here's another photo of the front that shows the detail of the layering, depth and dimension, along with the the pretty stamped pearl-centred flowers and diecut leaves that I used to accent my focal sentiment:


 A few hearts and a sprinkle of in-colour dots complete my card. I love the layered effect of these dies and the trifold really steps it up, yet is easy to achieve. What do you think? I'd love to hear your thoughts - do leave me a comment below.

Here is the visual summary of the key products used on today's project for you to pin for easy reference:


You can see all of my Product and 'How To' summaries on my 'How To - Tips and Techniques' Pinterest board in case you've missed any. 

Before you reach for your ink and papers, check out what our amazing team has created to inspire you this week:

Here's a quick recap of our challenge rules:
 
1.  Create a new paper project
2.  Upload your creation to your blog with a link back to us and provide a direct link to the post featuring your challenge submission.
3.  Please link your card to no more than four challenges, TOTAL.
4.  Have FUN!

Enjoy your day; I'll be back tomorrow with another project. Until then, happy stampin'!


Stampin' Up! Supplies Used: 

Table built using Product Table Builder by The Crafty Owl - Independent Stampin' Up! Demonstrator.

Birds and More Anniversary Card CCS 438

by Joanne James21. September 2021 13:00

It's Tuesday and time for a new challenge over at CAS Colours & Sketches. This week Jenny has a great colour challenge for us: 


I love Jenny's fresh colour palette this week! For my card today I decided to dig out one of my rather neglected annual catalogue sets to make an anniversary card for a friend's upcoming celebration:


Here's the low-down on today's card:

I added some Coastal Cabana ink to my cardbase and then added the circular diecut from the Birds and More dies to create an aperture to go over the top. I threaded through a diecut branch in Granny Apple Green and a pair of Misty Moonlight birds popped up on dimensionals, with black matt dots added for eyes. A simple sentiment from the (retired) Itty Bitty Greetings set completes the front of my card:


I used the negative aperture of the branch die to sponge some green ink onto the inside of my card, along with another Itty Bitty Greeting:


Here is the visual summary of the key products used on today's project for you to pin for easy reference:


You can see all of my 'How To' summaries on my 'How To - Tips and Techniques' Pinterest board in case you've missed any. 

As a reminder, for our colour challenges, you must use all of the stated challenge colours. You may also use neutral colours; however, the challenge colours should be the most noticeable ones featured on your card. We use Stampin' Up! colour names for reference, but you are welcome to use any other companies' products as long as you match the challenge colours as closely as possible.

Enjoy your day and I'll be back tomorrow with another project. Until then, happy stampin'!


Stampin' Up! Supplies Used:

Table built using Product Table Builder by The Crafty Owl - Independent Stampin' Up! Demonstrator.

Always in My Heart Ombre Stripe Anniversary Card

by Joanne James14. February 2021 11:00

Today I'm sharing another card using that oh-so-pretty floral die, this time using this week's Global Design Project #GDP278 sketch. Those pretty pink stripes and florals were also inspired by the pastel-striped biscuits in the good-enough-to-eat inspiration photo over at Time Out this week and I'm also having a second entry over at Addicted to CAS where the theme is hearts:


My card is all heart for sure with my white floral version - take a look:


Here's the low-down on today's card:

I used a few narrow strips cut from some left over pieces of Oh So Ombre DSP (gotta love a Sale-A-Bration freebie!) I decided to make this card a clean and simple anniversary card, so added a silver heat-embossed sentiment to the banner that also comes in the Floral Heart Dies set. I've not used this before but I really like the way it folds and the stitched detailing. A sprinking of Rococco Rose sequins separated from my Woven Threads sequin assortment complete my card:


 I love the clean and delicate appearance of this card, with the soft pinks against the white. Very romantic, don't you think?!

Here is the visual summary of the key products used on today's project for you to pin for easy reference:


You can see all of my 'How To' summaries on my 'How To - Tips and Techniques' Pinterest board in case you've missed any. 

Enjoy your day and I'll be back tomorrow with another project. Until then, happy stampin'!


Stampin' Up! Supplies Used:

Table built using Product Table Builder by The Crafty Owl - Independent Stampin' Up! Demonstrator.

Red and White Heart Hello For TTT96

by Joanne James14. January 2021 17:00

It's Thursday and time for a new challenge over at TicTacToe! It's the turn of Team X to host this week and the lovely LeAnne is our featured designer this week. This is the fun board that we are playing along with: 


Lots of love-related elements on this week's board, but you are by no means restricted to creating a Valentines/wedding/anniversary card - this is your opportunity to get creative! I couldn't resist another card using my Floral Heart Dies and the sentiment that made me buy the accompanying stamp set - take a look:


Here's the low-down on today's card:

You Had Me At Hello - Any of my regular readers will know that the sentiment that features on the central heart that features on today's card is a line from one of my most favourite movies of all time - Jerry Maguire. If you'd like to read the back story to this, check out this previous post where I explained all. The Floral Hearts Dies were definitely on my wish list, but it was this stamp that sold me on the bundle. What can I say - I am an old romantic at heart!

Hearts and Flowers - Having stamped my sentiment in Real Red so that the wording would appear in white (I definitely recommend using your Stamparatus for this to give good, solid ink coverage), I decided to border it with the main die from the Floral Hearts Dies in white. This card is unashamedly made with Valentines in mind, with its red and white colour combination and showy red satin ribbon and bow detail, but sometimes it just has to be done!

And More Hearts - The background designer paper is now retired, but there is a similar design in the Snail Mail pack or you could even stamp a similar design with the tiny heart stamps in the Always in my Heart stamp set. I also added a trio of bright red resin hearts to my card to finish; these are actually from the Snail Mail Suite, but work perfectly for a Valentine's card and blend easily with other sets too.

Here is the visual summary of the key products used on today's project for you to pin for easy reference:


You can see all of my Product and 'How To' summaries on my 'How To - Tips and Techniques' Pinterest board in case you've missed any. 

I might keep this card for the DH, as he would certainly appreciate the sentiment, if not the fancy heart and showy bow. We don't generally send each other Valentine's cards since we got married, as our wedding anniversary is the following week, but it sometimes serves as a useful reminder to him to get a card for the following week - it is fair to say Mr James is not known for either remembering or celebrating memorable dates without a little help, much preferring spontaneous romantic gestures. Unexpected flowers are always lovely though, so I'm not complaining!

A tictactoe board offers so many creative possibilities - how does this week's board inspire you? Why not have a go? We would love to see you in the gallery and who knows - you might be selected for Designer's Choice and be eligible to be a guest designer on a future challenge. 

Enjoy your day; I'll be back tomorrow with another project. Until then, happy stampin'!


Stampin' Up! Supplies Used:

Table built using Product Table Builder by The Crafty Owl - Independent Stampin' Up! Demonstrator.

From My Heart Valentine's Card for PP476

by Joanne James2. February 2020 10:00

Today it's Sunday and time for this week's new challenge over at The Paper Players! It's the turn of my sweet friend Claire to host this week and she has a timely theme challenge for you to work with:


It's the first Sunday in February and the month of Valentine's so love is definitely in the air! I combined our challenge this week with the colour palette over at Global Design Project and Julee's Mojo Monday sketch and am linking up with Just Us Girls where they are looking for bows. All of these elements came together for my love-filled card - take a look:


Here's the low-down on today's card:

From My Heart - My card today features three of the patterns in the From The Heart specialty designer series paper. With playful patterns featuring red and pink foil accents on some designs, these papers are perfect for Valentine's Day cards and packaging. I used a pink and red random heart design for my largest panel and layered two of the foiled heart designs for the uppermost layer and focal point of my card. Check out the foil effect - so pretty:


Two Hearts Are Better Than One - I loved the layering of Julee's sketch and decided it would be a great way to showcase my favourite foiled heart pattern in the paper pack. I layered it on a pink heart from another of the designs, both of which I punched out using the punches in the Heart Punch pack: one has straight edges and the other scalloped and they nest together beautifully. I love it when you can punch shapes out of paper this easily - it makes card making a breeze! 

Add A Bow - I finished my card with a fancy glossy red satin ribbon bow. The foil detailing and the faceted gems make this card something special and a luxurious bow seemed like the perfect way to complete my card.

Here is the visual summary of the key products used on today's project for you to pin for easy reference:


You can see all of my Product and 'How To' summaries on my 'How To - Tips and Techniques' Pinterest board in case you've missed any. 

Before you reach for your ink and papers, check out what our amazing team has created to inspire you this week:

Here's a quick recap of our challenge rules:
 
1.  Create a new paper project
2.  Upload your creation to your blog with a link back to us and provide a direct link to the post featuring your challenge submission.
3.  Please link your card to no more than four challenges, TOTAL.
4.  Have FUN!

Enjoy your day; I will be crafting and getting ready for my technique class tomorrow and might even sneak in a movie this afternoon. To my fellow PP teamies and anyone else stateside who is watching the Super Bowl and hosting or attending a Super Bowl party - enjoy!

I'll be back tomorrow with another project. Until then, happy stampin'!


Stampin' Up! Supplies Used: 

Table built using Product Table Builder by The Crafty Owl - Independent Stampin' Up! Demonstrator.

Botanical Bliss Anniversary Cards

by Joanne James18. May 2019 09:00

Hurrah for the weekend! Today I'm sharing a couple of cards I made using the current sketch over at Fab Friday that are also perfect for the celebrations over at AsYouSeeIt where it's all about the twos as they celebrate their 200th challenge - woohoo!:


I needed an anniversary card so decided to make something using my Botanical Tags Thinlits as one of them features a pair of birds - take a look:


Here's the low-down on today's card:

Botanical Tags - I bought this bundle because I fell in love with the detail on these tags, but I think this is the first time I've used them properly on a card and the detail is so pretty. I decided to go with a dark colour and back it with a handcut tag using a scrap of Wood Textures DSP left over from another project. I think this tag works well for a wedding or anniversary card - they could be love birds, right? 

Layers and Textures - My card feels quite busy for me: tags, twine, banners, an embossed background and a stitched rectangle sentiment and foliage branch - that's a lot going on in one place! Aside from the diecut tag, the shapes are all quite simple and my patterned papers are used in quite small quantities so as not to overwhelm and I quite like the effect.  

Take Two In Green - I liked my first card so much, I decided to create another one in a green Mint Macaron/Tranquil Tide colourway. I switched out the embossed background from Subtle to Layered Leaves which adds a little more detail, and the back piece of DSP comes from the Tranquil Textures DSP as opposed to Share What You Love, and I added a flower embellishment to my slightly larger sentiment piece, but otherwise the cards are the same:

The colour scheme for the first card was inspired by the piece of floral DSP I used for my banner, but I quite partial to greens, particularly in home decor. What do you think - which one do you prefer? 

Here is the visual summary of the key products used on today's project for you to pin for easy reference:


You can see all of my 'How To' summaries on my 'How To - Tips and Techniques' Pinterest board in case you've missed any. 

Enjoy your day and I'll be back tomorrow with another project. Until then, happy stampin'!


Stampin' Up! Supplies Used:

Table built using Product Table Builder by The Crafty Owl - Independent Stampin' Up! Demonstrator.

Forever Lovely Double Diecut Anniversary Card PP427

by Joanne James3. February 2019 09:00

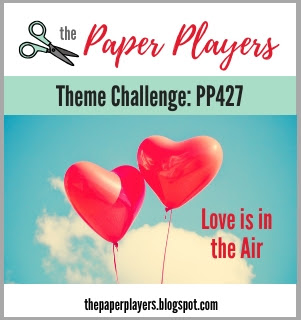
Today it's Sunday and time for this week's new challenge over at The Paper Players! It's my turn to host this week and I have a timely theme challenge for you to work with:
     Paper Craft Crew Tic Tac Toe Challenge 324! Play along with the latest challenge by visiting www.papercraftcrew.com #stampinup #papercraftcrew #papercrafts #stamping #sunnygirlscraps #crafting #crafts #craft #creative #creativity #create #tictactoechallenge   

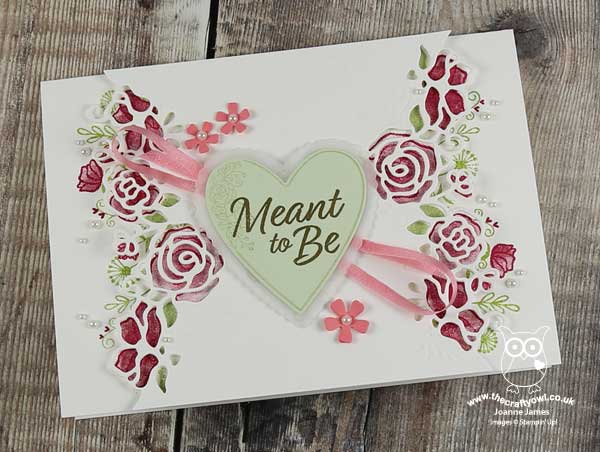
It's February and in the James Household love is definitely in the air: Valentine's Day is around the corner and this is also the month when Mr James and I celebrate our wedding anniversary and this year it's a milestone one too, so it seemed appropriate to choose this as my theme this week. I decided to make a pretty anniversary card and matching gift box  - take a look:


Here's the low-down on today's card:

All My Love - I went all hearts and flowers for my card today with the Forever Lovely stamp set and Lovely Flowers Edgelits Dies. I have been itching to get this beautiful set out and use it so I couldn't resist creating not one but two border edges spraying out either side of my heart centrepiece. I was a little nervous as to how easy the stamped florals and greenery were going to be to line up with my diecut borders, but needn't have worried - the Stamparatus made light work of it and I was very pleased with the result. My layout was inspired by the sketch over at Just Add Ink this week - and my card also works for TicTacToe over at The Paper Craft Crew (I went diagonally: something new-Valentines-floral).

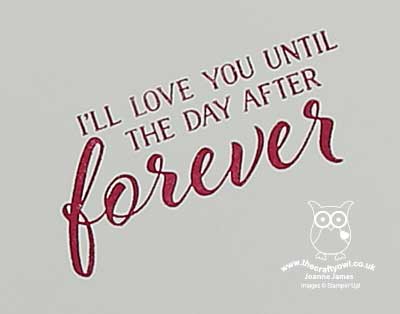
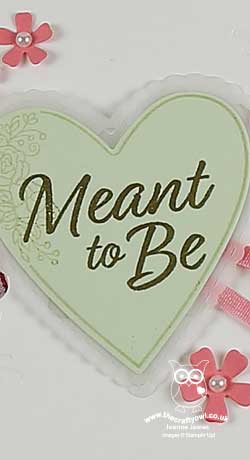
Meant To Be - I combined Forever Lovely with another of the Valentine's themed sets in the seasonal catalogue, 'Meant To Be', a set of decorative hearts that co-ordinate with some beautiful stitched dies. I heat-embossed my sentiment in gold onto a vellum-bordered Soft Sea Foam heart - I know it's not pink, but having tried both the pink heart seemed a little too much; the soft sea green, with a few pink flowers and delicate pink ribbon, worked much better. Plus that's the beauty of creating your own cards right? You can make things any colour you want them to be! And I finished my sentiment inside my card with this one:


Perfect words for the one you love!

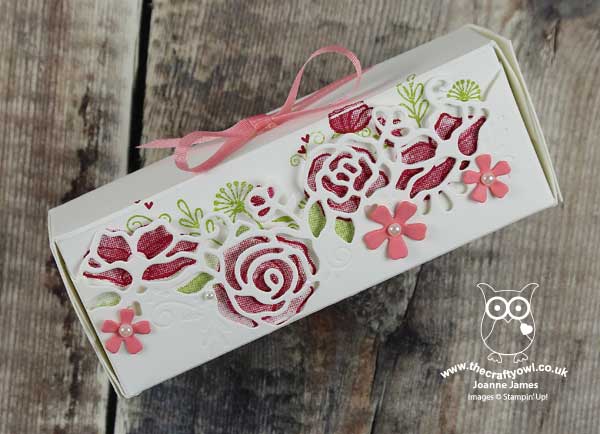
Self-Closing Lovely Flowers Edgelits Treat Box - I decided to make a small treat box to co-ordinate with my card, that would also show off that lovely diecut edge. My box is self-closing and measures 4" x 1" x 1 1/2" and is just large enough to hold 6 heart truffles:


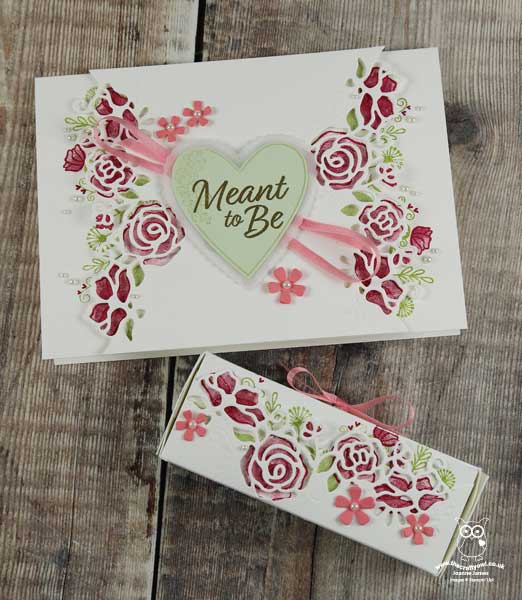
Here's one last photo of both my projects together:

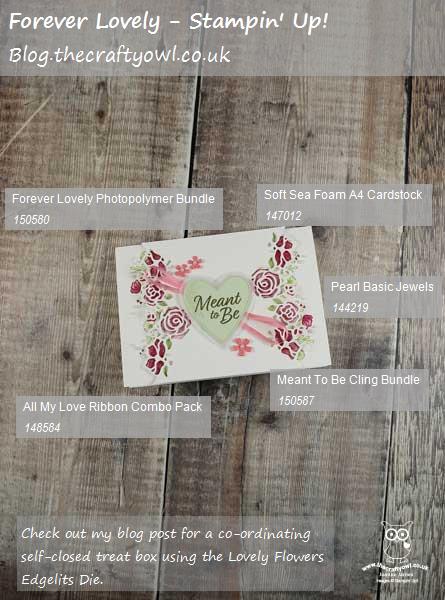
Here is the visual summary of the key products used on today's project for you to pin for easy reference:


You can see all of my Product and 'How To' summaries on my 'How To - Tips and Techniques' Pinterest board in case you've missed any. 

Before you reach for your ink and papers, check out what our amazing team has created to inspire you this week:

Here's a quick recap of our challenge rules:
 
1.  Create a new paper project
2.  Upload your creation to your blog with a link back to us and provide a direct link to the post featuring your challenge submission.
3.  Please link your card to no more than four challenges, TOTAL.
4.  Have FUN!

You can see all of my 'How To' summaries on my 'How To - Tips and Techniques' Pinterest board in case you've missed any. 

I'm looking forward to seeing what you create for our challenge over at The Paper Players this week.

Enjoy your day; we have guests for dinner but otherwise will be enjoying a cosy day indoors, with our hockey match today being cancelled due to a frozen pitch. I for one am pleased to not be standing out on the touchline in these freezing temperatures we have been experiencing here in the UK this week! I'll be back tomorrow with another project. Until then, happy stampin'!


Stampin' Up! Supplies Used: 

Table built using Product Table Builder by The Crafty Owl - Independent Stampin' Up! Demonstrator.

Painted With Love Hearts Valentine Card and Co-ordinating Fold Flat Top Heart Box

by Joanne James4. February 2018 09:00

It's Sunday and time for this week's new challenge over at The Paper Players! It's the turn of my lovely and talented friend Claire to host this week and she has a rather timely theme challenge for you to work with:


February at last and Valentine's is on the way! I have both a card and gift box to share with you this week and hearts were definitely on my mind when I started creating - take a look:


Here's the low-down on today's card:

Painted With Love - Whilst I used this week's sketch over at As you See It as the inspiration for the layout for my card today, the Painted With Love papers are most certainly the inspiration for my colour scheme. I couldn't wait to use these colourful papers with their gold foil accents on my project, and carried through the shades of purple and pink to the rest of my card design. Here's my colour palette in case you would like to save it for your future inspiration:


Hearts A Plenty - Both the teams over at CAS-ual Fridays and SUO Challenges are looking for hearts, hearts and more hearts this week. I've used a combination of hearts in all different sizes stamped from the 'Heart Happiness' stamp set and some diecuts using the Sweet and Sassy Framelit Dies, along with a sprinkling of gold metallic heart shapes for my full heart quota.

Love You - My sentiment is a combination of a 'love' diecut from the Sunshine Wishes Framelits and 'YOU' from the Sale-A-Bration 'Celebrate You Thinlits' - I love being able to play around and take bits and pieces from my collection to create the perfect combination. I also added a little stamping to the inside - this lovely stamp from the 'Petal Passion' set: 

I also created a co-ordinating box with a heart fold flat closure in the same paper, perfect to enclose a Valentine's treat - here it is with my card: 


I may well do another blog post on the box - it's very pretty and turned out even better than I hoped it would! Here is the visual summary of the key products used on today's project for you to pin for easy reference:
 

You can see all of my Product and 'How To' summaries on my 'How To - Tips and Techniques' Pinterest board in case you've missed any. 

Before you reach for your ink and papers, check out what our amazing team has created to inspire you this week:

Here's a quick recap of our challenge rules:
 
1.  Create a new paper project
2.  Upload your creation to your blog with a link back to us and provide a direct link to the post featuring your challenge submission.
3.  Please link your card to no more than four challenges, TOTAL.
4.  Have FUN!

I can't wait to see how you interpret this week's theme and look forward to visiting your blogs this week! Blogland has lots of challenges with love in mind so I think this could be something of a theme around here in coming days! Enjoy the rest of your weekend as it will be over all too quickly. We were out at a swimming gala yesterday and Ben has a basketball tournament today, so it's all go here. I'll be back tomorrow with another project; until then, happy stampin'!


Stampin' Up! Supplies Used: 

Table built using Product Table Builder by The Crafty Owl - Independent Stampin' Up! Demonstrator.

Falling For You Anniversary Card

by Joanne James14. March 2017 07:00

Today I'm here nice and early sharing a card for the current sketch challenge over at Fab Friday:

This team have such great sketch designs and I've been playing with this one a lot of the weekend. I instinctively wanted to avoid using a doily for that bottom semi-circle, but I had a card design in mind that wouldn't go away and suited a doily perfectly so I went with it - take a look:


It's all about the pretty today! Here's the low-down on today's card:

Falling For You - Do you ever buy a stamp set because it contains one sentiment that resonates with you and you just have to have, regardless of whatever else the set has to offer? I do - and this is one of those sets! 'Falling For You' contains some lovely sentiments in a fabulous swirly, romantic font that work for weddings and anniversaries, but this one for me sells it - who wouldn't want to receive a card that says 'Every heart needs one special person to love - you're my person'? Maybe I'm an old romantic at heart, but it's fair to say I definitely fell for this stamp set hook, line and sinker!

Falling In Love Too - I used a piece if the Falling In Love designer series paper for my background and embellished with some of the other products in the Falling In Love Suite - including that doily! I'm not overly partial to a doily, but I do like these ones - the sharp laser-cut design and the versatility of them being white on one side and vanilla means they don't look as out of place with my clean and layered style. 

A Romantic Colour Combo - I took today's colour combination straight from the Falling In Love papers too - perfect for softer cards that evoke that marriage of romance and shabby chic. Feel free to save it if you would like to try it out too:

I just love the soft colours, falling hearts pattern and romantic feel of this card - all I need now is to find someone to send it to me!!!

Here is the visual summary of the key products used on today's project for you to pin for easy reference:


You can see all of my 'How To' summaries on my 'How To - Tips and Techniques' Pinterest board in case you've missed any. 

Enjoy your day and I'll be back tomorrow with another project - perhaps an alternative take on the same sketch! Until then, happy stampin'!


Stampin' Up! Supplies Used:

Table built using Product Table Builder by The Crafty Owl - Independent Stampin' Up! Demonstrator.

New Online Exclusives

There are new products available exclusively in the online store from 5 November - check them out here.

Latest Kits!

Stampin Cut and Emboss

The Layered Landscapes Kit and Nature's Paintings Kit are the latest kits in the online store - get yours here!

Shop Online

Access my online shop 24 x 7, 365 days of the year:

Current November hostess code:

9NKXDTTR

Shop Online

Mini Catalogue

BROWSE THE CATALOGUE

'Tis The Season - the new Stampin' Up! Mini Catalogue is here! For more details and to download your copy click here

Scrapbooking

Stampin' Up! has introduced a new range of 12x12" scrapbooking product and kit - the full range is now available to purchase online. To download a copy of the new digital Scrapbooking Catalogue click here.

2024-25 Annual Catalogue

BROWSE THE CATALOGUE

Click on the image to download your copy of the 2024-25 annual catalogue. For a full list of current SU! supplies, go to my online store. If you would like any help or advice, please drop me a line at joanne@thecraftyowl.co.uk or give me a call on 07773 421446 - I'd be happy to help.

Join My Team

It's always a great time to join Stampin’ Up! New team members can get £130 worth of products for only £99 + free business supplies + free shipping + all the fun being a part of Stampin’ Up! Stampin' Up! has something for everyone: join my growing team and benefit from my support to enjoy Stampin' Up! however you choose.

If you're interested, call me for a chat to understand how I can help you realise your goals. Alternatively, if you have already decided to sign up and you just can't wait, please click here for the link to the online form where you can sign up and order your starter kit right away! 

About Me

Hi I'm Joanne and live in Northampton and when I'm not looking after my husband and two beautiful children, am an avid crafter with a passion for all things Stampin' Up!

I must confess that I have never been a big rubber stamper - until I discovered Stampin' Up! that is. I love the fact that I can get such great results with co-ordinating stamps, inks, papers and punches - the possibilities are endless! Join me on my stamping journey as I share the things I love and be inspired to create amazing things yourself!

Follow Me

Monthly Newsletter

Box Builder

Click the button above to use Box Buster to create your custom box design using the Envelope Punch Board!

Kits Collection Now Available!

Stampin Cut and Emboss

The new Kits Collection from Stampin' Up! is now available!

Click here to see the current kits available and order yours online today.

I Design For


Stampin' Up Stuff

This is my personal blog and is not endorsed by Stampin’ Up! I hope you find it a plentiful source of ideas and personal inspiration but please don't copy my designs for contest submission or use for classes, publication or sale without express permission.