Party Panda Spinner Card For Fab Friday

by Joanne James17. January 2018 23:00


Another late one I'm afraid as I've been tied (figuratively, not literally!) to my desk all day pushing paperwork. Just time to share a card for the current challenge over at Fab Friday where they have a super-bright colour combo to work with:

I love brights so was really keen to play along with one of my favourite challenges. I figured the best way to use this trio of bold colours was to ensure that I also incorporated plenty of white. I decided to get out my Party Pandas Sale-A-Bration stamp set again and do something I haven't done in a while - take a look:


Yes, it's a fun spinner card - isn't that party panda just the cutest?! I made this card over a week ago but delayed sharing it with you as I made a video tutorial to go with it. I still need to finish editing so will post it here once complete but in the meantime I couldn't not share this cutie! Here's the low-down on today's card:

Get Spinning - Everyone loves the fun element created by adding a spinner - young and old alike! I've made my Sale-A-Bration Party Panda the spinning star of today's card, but this technique works with lots of other stamps too. The panda looks like he was meant to cartwheel though I think! To make the panda spin, you simply attach him to two penny coins (or a dime, or a washer - you get the idea) separated by a dimensional, with the pennies sitting either side of the track. If I've lost you already, come back when I upload the video - all will become clear! 

Creating The Track - I used the Classic Label Punch to create the track for my spinning panda, by repeatedly punching along my cardfront in order to get an extended gap. This is one of the easiest ways to create a spinner track. The key to getting a freely-spinning panda though is to use Stampin' Up!'s foam strips to adhere your front panel to your card base. This ensures the gap is deep enough for the panda to spin freely.

Let's Celebrate - I pulled my sentiment from another of my free Sale-A-Bration sets, Amazing You, and inked up the words in contrasting colours. Such a great sentiment that allows this card to work for all kinds of celebrations, not just birthdays. In fact, I am going to dedicate this one to one of the Fab Friday design team members, the awesome Brian King, who at the time of posting this challenge had announced the day before that he is also joining the design team over at CAS(E) this Sketch, another great challenge blog favourite of mine - way to go Brian! 

I love these bright colours, so perfect for this fun card. Do check out the design team cards over at Fab Friday and the gallery, where there are some amazing and varied entries that will provide great inspiration.

Here is the visual summary of the key products used on today's project for you to pin for easy reference:


You can see all of my 'How To' summaries on my 'How To - Tips and Techniques' Pinterest board in case you've missed any. 

I'll be back tomorrow with another project. Until then, happy stampin'!


Stampin' Up! Supplies Used:

Table built using Product Table Builder by The Crafty Owl - Independent Stampin' Up! Demonstrator.

Sale-A-Bration 2018 And The New Spring-Summer Catalogue Is Here!

by Joanne James3. January 2018 08:00


It's time to shake off the January blues, today is THE day - yes, the highlight of the Stampin' Up! calendar, Sale-A-Bration is here! No more sneak peeks - the catalogue is available, the shop is live and from now until 31st March the benefits are yours for the taking. You can click on the catalogue on the right hand side of my blog page to access the Sale-A-Bration leaflet to download a copy or click on the icon above or on the right to go directly to my online shop to place an order - we are LIVE!


So what is Sale-A-Bration? For anyone who hasn't come across it before, it's Stampin' Up!'s annual promotion that is loaded with offers whether you shop, join or host:


Earn a free Sale-A-Bration product for every £45 you spend between 3 January and 31 March. This year for the first time there is also the opportunity to earn even bigger rewards with a £90 purchase. It's the perfect time to purchase those products you've had on your wish list and earn more products for free! 


It’s the best time of year to join Stampin’ Up! During Sale-A-Bration, you can become a demonstrator for just £99 and choose £30 more of FREE products for your Starter Kit. Plus, the kit ships for free! There is plenty of choice and flexibility, whether you want to be a hobby demonstrator and just use your discount to enable you to purchase craft supplies more cheaply, or alternatively would like to build a flourishing direct sales business and sell supplies to others - it's entirely up to you. In addition, you can choose two free stamp sets of your choice (except for bundles, kits or Sale-A-Bration items) - that could be worth as much as another £90 to you!


Earn an additional £20 in hostess credits when you host a party and have party sales of £200 or more (this also applies to individual orders). So for party sales of £200, that makes a whopping £40 of Stampin' Rewards - more freebies! What's more, you can even apply your Stampin' Rewards to a Starter Kit and become a demonstrator yourself - I would love to welcome you to my team!

If you would like to host a party, real or virtual, please do get in touch; my diary is filling up but there are still lots of slots available and I would love to share these great benefits with you. If you've ever thought about becoming an SU! demonstrator, now is a great time to do so - I would love to have a no-obligation chat with you about joining my team and the benefits.

As if that wasn't enough, today also sees the launch of the new Spring-Summer catalogue - full of gorgeous new products:


Just click on the image above or in the sidebar on the right to browse the catalogue online, or contact me on 07773 421446 if you would like a paper copy posted out to you and you don't already have a demonstrator. If you are as excited as me and just can't wait, here's the link to my online store - everything is available to purchase from today!

Here's a fun little video too that showcases some of the excitement that lies within:

If you would like more information on any of the above, please don't hesitate to get in touch! 

Thanks so much for popping by - it's always nice to share good news! Back tomorrow with a project showcasing some of the products from the new catalogue. Until then, happy shopping!

Painted Harvest Triple Fold Card

by Joanne James15. November 2017 22:00

Today I'm just popping by with a quick blog post to share a quick card with you - the last of my cards from my technique class featuring the Painted Harvest bundle earlier this month. Our final card is a real showcase of the fabulous Painted Autumn designer series papers in the form of a triple fold card - take a look:


Continuing with our 'thankful' theme, the triple fold design of this card showcases the gorgeous Painted Autumn papers, with five different panels of paper on the main Very Vanilla folded section and a sixth on the belly band that holds it closed. There is a hidden circle on the inside of the back panel on which to write your greeting and the belly band is decorated with another of those lovely sunflowers and another of the sentiments in the Painted Harvest set. I can't find my photo of the card when open, showing the inside - if I manage to track it down in my backed up projects I'll come back and update this post. In the meantime, I'm sure you get the idea!

Here is the visual summary of the key products used on today's project for you to pin for easy reference:


You can see all of my 'How To' summaries on my 'How To - Tips and Techniques' Pinterest board in case you've missed any. 

If you've enjoyed the outputs of this class, I have a similar one featuring the Delightful Daisy Suite on Monday 4th December with a couple of spaces left - you can see the full details here. Contact me for more information or to book your place - I would love you to join us!

Don't forget 9PM tomorrow is the first opportunity you will have to go online and reserve the new Stamparatus stamp positioning tool - you can read all about it here. I'll be back tomorrow with another reminder and hopefully a creative project too. Until then, happy stampin'!


Stampin' Up! Supplies Used:

Table built using Product Table Builder by The Crafty Owl - Independent Stampin' Up! Demonstrator.

Introducing The Stamparatus - The Best Stamp Positioning Tool EVER And How To Get Yours!

by Joanne James14. November 2017 15:20

Hello lovely readers! Apologies for an even longer blogging absence than usual - as many of you will know if you follow me on Facebook, I was at Stampin' Up!'s #Onstage2017 UK event at Solihull at the weekend, in readiness for the launch of the new Spring-Summer catalogue. Not only did I attend the event, I was one of the Onstage presenters and had the privilege of presenting one of the new product collections to the 480 demonstrators present. This was a great gig for me, as I love presenting and was so excited to share the things I had been working on secretly in the weeks leading up to the event. I will of course be sharing them with you too in due course, however today I have some news that is SO exciting it just can't wait!

It’s big news when something breaks the mould and changes everything. The Stamparatus will change the way you stamp, and before long, you’ll wonder how you ever crafted without it! Why do YOU need one? You’ll fall in love with stamping all over again when you learn everything you can do with it!

  • Make multiples with ease
  • Consistently stamp crisp, clean images
  • If you want a darker impression, apply more ink and restamp—no need to start over
  • Make fewer mistakes, saving time and money
  • Easily create 2-step, 3-step, and 4-step stamped images using reversible plates
  • Develop new and specialised stamping techniques with adjustable stamping plates and precision placement

I am very excited about this product: the idea of a stamping positioning tool was conceptualised, designed and produced in collaboration with a select group of Stampin' Up! demonstrators, of whom I was one. Demonstrator input has been critical to the final design. This is a product that has been designed by demonstrators, for stampers - and it shows.  Here are the crucial details you need to know:

  • Compatible with Stampin’ Up!’s red rubber and photopolymer stamps
  • Includs a foam mat to use with photopolymer stamps
  • Rulers and gridlines for quick measuring
  • 2 open sides so you can stamp on larger paper
  • 2 reversible plates: a total of 4 surfaces to work with
  • 2 magnets to hold the paper in place
  • Magnet storage areas on the reverse
  • Retail Price: £44.00/59,00 €

 Here are some images of the tool that show these features in more detail:


And this animation shows just how easy it is to use:


Want the scoop on this life-changing tool? check out the 5 things you need to know in this informative video by Carrie at the Stampin' Up! Home Office:


With the launch of this tool, Stampin' Up!  are trying something different too: we are testing a new reservation system. And it acts like a true pre-order. You reserve your spot and we guarantee shipment as soon as the product arrives in our warehouse. Everyone will place reservations and receive their product at the same time. This system will allow us to get the product to market as soon as possible while avoiding backorders and efficiently managing inventory.

The global launch will feature three reservation windows. For each window, please note the following:

  • Reservation quantities are while supplies last only.
  • Limit is 1 tool per customer per reservation window, however you may participate in multiple reservation windows.
  • The 3 reservation windows and approximate delivery dates are as below:

16–30 November 2017

   -   Approx. 1 February 2018

5–30 December 2017

   -  Approx. 19 March 2018

15–30 January 2018

   -  Approx. 15 April 2018

So how can you get your hands on one?

You can PRE-ORDER your Stamparatus in any of the reservation windows over the next few months. The first window will open on Thursday 16th November at 9PM GMT - that's two days from now. To reserve yours then, simply visit my Online Store and log in. If you don't already have an account, set yourself one up. Make sure you see my name as your demonstrator in the top right corner of the screen.


Once you are logged in, visit the STAMPARATUS page and click on RESERVE. You can see more instructions below if you decide to cancel or try to order outside of a reservation window. All the details regarding when you'll receive your Stamparatus and more detail on the points above can be found in the Customer Q&A document that you can read by clicking here

What Happens When Your Stamparatus Arrives?

Your Stamparatus will be added to a shopping basket for you, and you will sent an email asking you to complete the transaction and pay. You can add other Stampin' Up! goodies to your basket at that time, so you only pay one lot of P&P. If this is during either of the first two delivery windows, you will be checking out during Sale-A-Bration, so it's worth adding a little something to your basket to take your order over £45 so that you will qualify for a free Sale-A-Bration item too! Also, be sure to add my current HOST CODE for that month if your order is less than £150 - you can always find this in the 'Shop Online' box on the right hand side of my blog. You'll then earn fabulous rewards direct from me - including a free 'Stampin' With The Stamparatus' class to ensure you get the most out of this amazing new tool.

A long post today but there's a lot of information to communicate. If you've any questions or queries, do get in touch with me prior to Thursday.

Back tomorrow hopefully with a creative post! Until then, happy stampin'!


Announcing The First Stampin' Sanctuary Craft Retreat - Book Your Spot Now!

by Joanne James10. November 2017 09:00

I am off to Solihull today to attend Stampin' Up!'s UK Onstage Event, where demonstrators from all over the UK come together for the launch of the Spring-Summer catalogue - exciting times! The last few days have been busy with last-minute preparations and I am looking forward to a wonderful Centre Stage evening reception today and a jam-packed day of activity tomorrow, lots of which I will share with you in due course.

On my blog today though I wanted to share a new venture with you: I am delighted to announce the first in an ongoing calendar of luxury residential craft retreat weekends, that will be known as Stampin’ Sanctuary Craft Retreats.


Do you fancy a weekend away, full of crafting and good company? Does getting away from everyone and everything and having some 'me' time appeal? How about 2 whole days of crafting and making new projects? If all of this sounds attractive then a Stampin’ Sanctuary Retreat is just what you need.


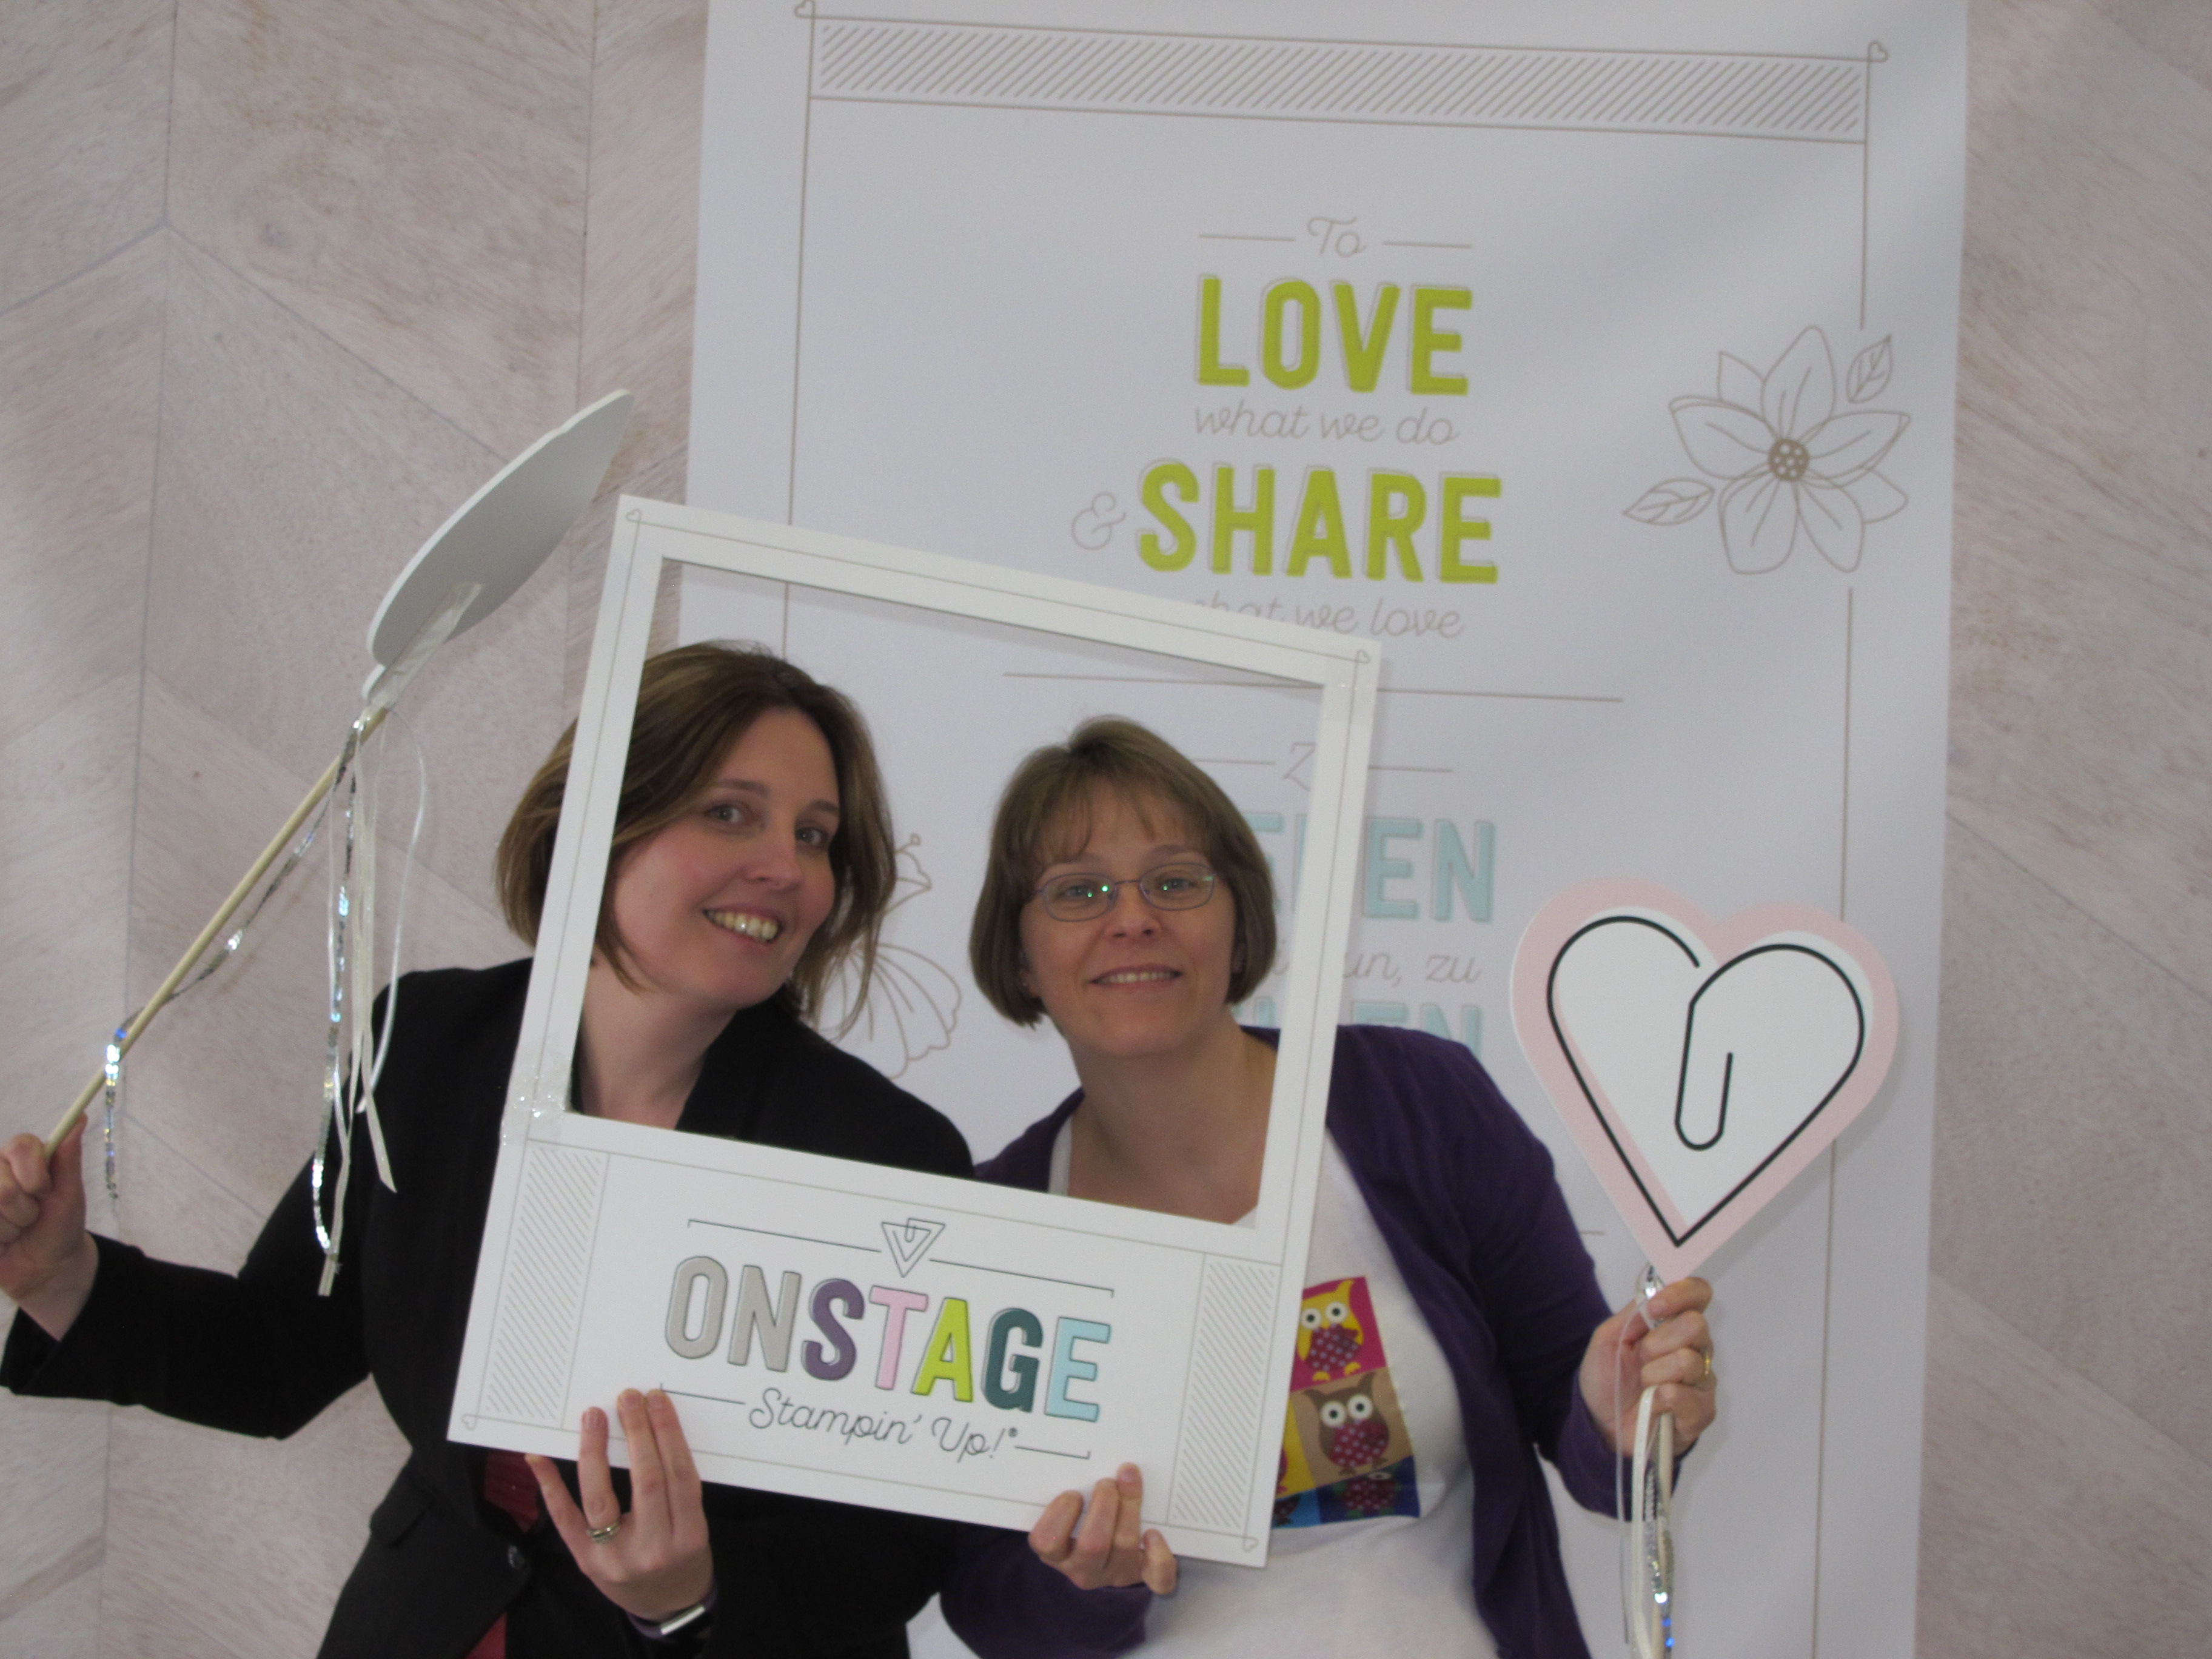
The Stampin’ Sanctuary is a collaboration between top UK Stampin’ Up demonstrators: myself, Joanne James, and my good friend Louise Sims. We are two Midlands-based Stampin' Up! demonstrators who both run successful all day events and classes have come together to offer you the best weekend of crafting.


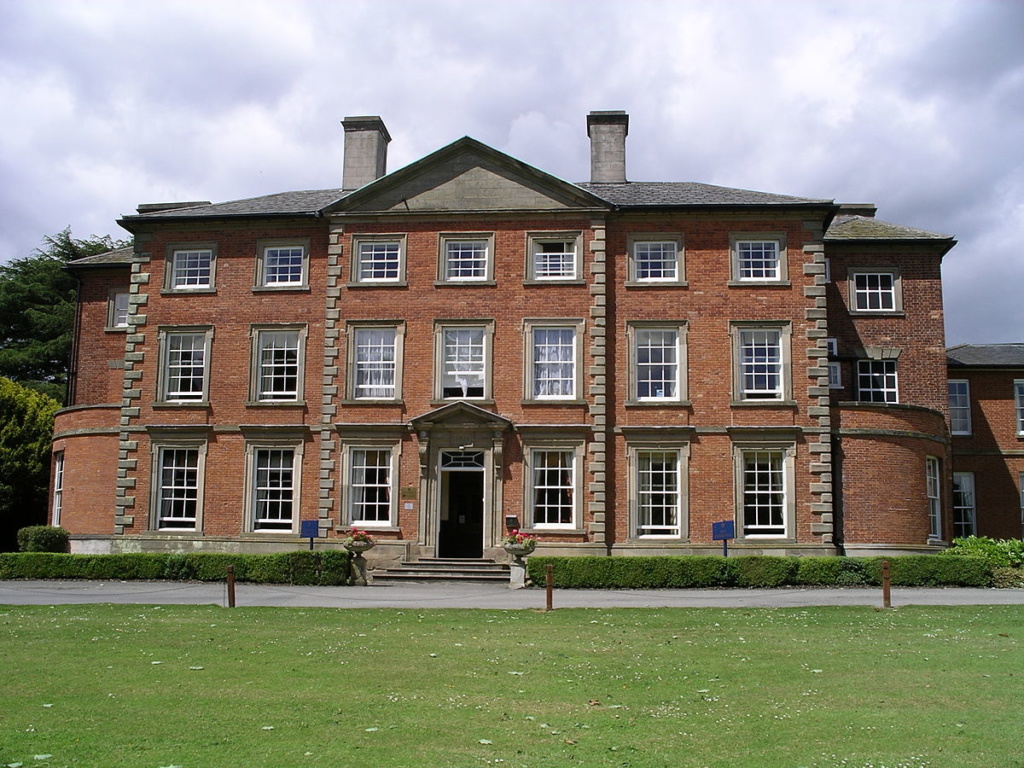
The venue for the Craft Retreat is the gorgeous 4 star Macdonald Ansty Hall Hotel, conveniently located just off the M6/M69, near Coventry, Warwickshire.Set in beautiful grounds it is the perfect destination for a getaway; gorgeous surroundings, good food and your own stylish bedroom for the night.Its central location means it has easy access from all parts of the country – making it a perfect destination break for you and your friends from afar.

What is included?

The Craft retreat package includes an overnight stay and all food for the weekend, lunches, snacks, evening meal and breakfast together with unlimited tea and coffee. You have 2 full days of crafting with your own table for the whole weekend – no need to tidy away! Bliss!A goody bag of Stampin’ Up! crafting supplies is also part of the package and will be more than £100 in value. The supplies will enable you to complete the projects for the classes run throughout the weekend and you'll have lots left over to take home too!

The Classes

The Classes offered during the weekend by both Joanne and Louise are optional. The weekend is yours, so you can choose to keep with class pace or do your own thing. There is no requirement to complete everything, you can do exactly what you want – chat, craft, chill … the choice is yours. Choose to craft at every possible moment, or take a break for a walk or a drink in the lounge – it’s all up to you. 

When Will It Take Place?

The first in our calendar of retreats is scheduled for Saturday 3rd March – Sunday 4th March 2018

Fully inclusive price for 1 nights accommodation,  with lunch and a 3 course dinner on Saturday, followed by breakfast and buffet lunch on Sunday. It also includes unlimited tea, coffee or hot chocolate & snacks, 4 crafting classes and a goody bag worth more than £100 full of Stampin’ Up! products. Spaces are limited so book your spot today to avoid disappointment; this retreat is already partially filled, so if you're interested don’t delay!

How do I book?

Sounds like your kind of fun? Register your interest here and and I will contact you to confirm if space is available and payment details. I offer a payment plan so you can split the cost into monthly payments (depending on when you book). Please note there is a cancellation fee should you need to cancel. Book & pay before 20th November and the rates will be as follows:

Single occupancy is £292 per person or
Double occupancy is £272 per person

From 21st November 2017 the price will increase to £325 for single and £305 for double per person.

I would so love you to join me for what promises to be a fabulous weekend! This would make a great Christmas present too, so if you're stuck for gift ideas for yourself or your nearest and dearest, maybe this is the answer.

Back later in the weekend with news from Onstage and a project or two. Until then, check those diaries and get booking! 


The Boring but Important Stuff

A Deposit of £60 is required to guarantee your place on a first come, first served basis. All payment plan instalments must reach us by 1st of each month. If you are late by more than 1 week, we will assume you are cancelling your place and apply the appropriate cancellation fees (see below).The fees are inclusive of VAT, set at the current rate of 20%. Should this change, the final price of the Craft Retreat will also change.The % of your fee that will be forfeit should you cancel within the time periods is shown below. If I can fill your place then the cancellation fee will not be applied. The cancellation fee will be based on when you cancel with me in writing and is to cover outgoing costs to the venue and the product kit ordered prior to the event. You will receive the balance as a refund via a cheque or bank deposit.

Cancellation Notice

% Cancellation Fee: 

  • Before the 30th November: 50%
  • 1st December to 20th January:75%
  • 21st January to 3rd March:100%

Should the Stampin’ Sanctuary need to need to cancel the event at short notice a refund will not be provided. This will only be due to sickness or unforeseen circumstances. You may use the hotel facilities as booked & paid for. Goody bags will be shipped to you at Stampin’ Sanctuary's cost (provided full payment has been received).


Painted Autumn Suite Collage Card

by Joanne James7. November 2017 06:00


I'm back with another of the cards made at yesterday's technique class featuring the Painted Autumn Suite, which also uses the current sketch over at The Paper Craft Crew:

 Play along with the Paper Craft Crew for Square Sketch Challenge 266. The challenge starts November 1st and ends November 7, 2017 at 1 PM EST. Visit the blog at www.papercraftcrew.com to check out the design team samples and to submit your project. #papercraftcrew #papercrafting #sketchchallenge #color #playalong #imakecards #cardmaker #diy #sendacard #craft #stampinup #cardchallenge #papercraft #bigshot #rainydayfun #designteam #becreative #artsandcrafts #hobby #snailmail #createeveryday #crafttherapy #creativelifehappylife #pcc2017

I love the fact that the sketch had lots of bits and pieces which allowed me to use lots of the items in the Painted Autumn Suite:


Here's the low-down on today's card:

Painted Autumn Patterns - I decided to use the panel to feature a piece of the gorgeous Painted Autumn DSP that I hadn't used previously. I hope you, like me, stocked up on this paper when it was part of the 'buy 3, get 1 free' offer -  the designs really are beautiful. I took my inspiration from the swirly leaves and branches of the paper and using the sketch built my design from there.

All About Texture - This card is full of elements that add texture: ribbon, burlap, enamel dots, punched leaves, touches of nature elements, punched border - all of which add to the loose, collage feel. 

Realistic Planks - The background panel is embossed with the Pinewood Planks Textured Impressions Embossing Folder. This 3D, dynamic folder creates deep and realistic dimensional embossed impressions that look just like the grain of pinewood planks - the perfect way to add interest to my background without detracting from the other elements.

I'm also linking up with the gals over at SUO Challenges today where they currently have a 'thankful' theme going on. 

Here is the visual summary of the key products used on today's project for you to pin for easy reference:


You can see all of my 'How To' summaries on my 'How To - Tips and Techniques' Pinterest board in case you've missed any. 

I am managing an early post today as I have an all-day Christmas stamp-a-stack and then I'm out talking to a local women's group about festive packaging this evening. I hope you have a great day; I'll be back tomorrow with another project. Until then, happy stampin'!


Stampin' Up! Supplies Used:

Table built using Product Table Builder by The Crafty Owl - Independent Stampin' Up! Demonstrator.

Painted Harvest Eclipse Thank You Card

by Joanne James6. November 2017 21:30

It's Monday and the start of another week - only 7 weeks to go until Christmas! I'm not counting down today though; Today I'm sharing a card that I made with the ladies in the second of my technique classes this month that also fits a new(ish) challenge that has appeared in blog land - the TicTacToe Challenge:


I went across the top row for my Painted Harvest thank you card - take a look:


Here's the low-down on today's card:

Large Letter Eclipse - Eclipse cards that use a word raised out of a background are everywhere right now and so on-trend, i thought it was about time I shared one with you. What a great opportunity to use those Large Letter Framelits again - these framelits really are so worth the investment! I went with a wide, thinner card than usual that is just right to fit my 'thanks'.

Painted Harvest - I created my sunflower background using a repeating pattern of bright sunflowers; my chosen colours are Crushed Curry and Peekaboo Peach and I think the latter most certainly adds a vibrancy to this card - the letters really 'pop' against those sunflowers.

A Split Sentiment - I decided to use a split sentiment to really tie my raised letters into the theme of my card: on my small cut oval I partially stamped one of the sentiments from the Painted Harvest set that says 'gather together & give thanks', omitting the 'thanks' and selectively inking the remaining portion, so that my raised letters complete the sentiment. 

Here is the visual summary of the key products used on today's project for you to pin for easy reference:


You can see all of my 'How To' summaries on my 'How To - Tips and Techniques' Pinterest board in case you've missed any. 

I hope your day was a productive one; the ladies in today's class all produced some fabulous creations! My next class in December is using the Delightful Daisy bundle - for more details check out the event on my Facebook page here and get in touch to book your place. I'll be back tomorrow with another project using the Painted Harvest stamp set. Until then, happy stampin'!


Stampin' Up! Supplies Used:

Table built using Product Table Builder by The Crafty Owl - Independent Stampin' Up! Demonstrator.

Color Theory Winter Memories And More Scrapbook Layout

by Joanne James4. November 2017 08:00

I have had a busier than usual schedule this week which has necessitated a few blog-free days - I hope you will all bear with me, whilst I like to think I'm organised clearly I'm not organised enough! So much to share and so little time really is my motto at the moment.

Anyway, today I am back with it and I have something a little different for you - this week the team over at Global Design Project have a family theme and CAS-ual Fridays are challenging us to make anything but a card - so I thought I would share one of my recent scrapbooking layouts:


Here is my layout featuring the Color Theory Memories and More card pack:


Here's the low-down on today's project:

A Traditional Layout - Whilst I don't often share my layouts with you here on my blog, I'm a real fan of the pocket-style memory keeping that we introduced with the Project Life range and subsequently with Memories and More. The pocket cards make it so easy to put pages together quickly and I love that I can organise my pages with minimal supplies and 'pretty' them up as I go or add extra detail later. Here I've used the Memories and More cards in a traditional 12" x 12" scrapbook layout as I wanted to show how these cards can be used in a variety of different ways. The pre-printed sentiment cards mean that whatever type of layout you use, Memories and More cards make it easy to create a colourful layout with no stamping required.

Color Theory For All Seasons - This layout is one of four that I created using the Color Theory Memories and More card pack, as I created one for each season. I will share the other layouts in a future blog post; as you can see this page is my Winter layout featuring the rest of the James family on our annual ice skating trip. This is something we love to do every year and make a point of doing together, just the four of us - it has become a tradition and is generally accompanied by different novelty hats each year - in the photo above Rebecca is sporting a Christmas tree whilst Ben's has elf ears! In addition to the Memories and More cards, I used some coloured embossing paste with my Pattern Party Decorative Masks to add some texture and interest to my background, along with some diecut snowflakes courtesy of the Seasonal Layers Thinlits, a little glimmer paper and some glitter enamel dots to add some festive sparkle. I added stickers from the Color theory card pack for additional sentiments and accents.

Hidden Thoughts - My layout features space for journaling on the card above my photograph, but it also features a 'hidden journaling' card concealed beneath the photograph and revealed by pulling the tab on the left hand side attached to the card that says 'Details'. The circle tab punch is great for adding tabs to your journaling cards in this way.

I'll be back tomorrow with another project for this week's challenge over at The Paper Players; until then, happy stampin'!


Stampin' Up! Supplies Used:

Table built using Product Table Builder by The Crafty Owl - Independent Stampin' Up! Demonstrator.

Cherry Cobbler Monochromatic Be Merry Christmas Card

by Joanne James16. October 2017 10:00

It's Monday again - doesn't a new week roll around quickly? Today I'm sharing a Christmas card that I made using this week's sketch over at Freshly Made Sketches:

I decided to go monochromatic with this one using a bunch of co-ordinating products from the Be Merry Suite - take a look:


Here's the low-down on today's card:

Be Merry - I decided to feature the charming reindeer from the 'Merry Mistletoe' stamp set front and centre on my card today. This was one of the sets that was available at a discount during the World Card Making Day promotions, so I'm sure lots of you will have snapped it up! I am also featuring this set, along with the Be Merry designer series papers - still available until the end of the month as part of the current 'Buy 3, get one free' promotion on designer series paper - at my November Christmas Stamp-A-Stack Event on Tuesday 7th November. This is an all-day event that will enable you to make 40, yes 40 Christmas cards and envelopes in one go! you can see more details on my Facebook Events page here - if you live in or around Northampton do get in touch if you'd like to join me in person for this event. This class can also be provided as a 'class to go' in the mail, so if you're further afield and this is something that interests you, do get in touch to order yours. 

Mask It - The observant amongst you will notice that the sentiment I used on my card today is also from the 'Merry Mistletoe' stamp set, but not as designed. On the stamp the words are one on top of the other, but I wanted them to run one after the other to fit across the banner on my card. I am not one to cut up my stamps (absolute sacrilege in my book!); luckily there was no need for such drastic measures. I simply used some low-tack tape to mask off the bottom word before inking my stamp, removed the tape and stamped 'Christmas' then did the same in reverse and used my Stamp-a-ma-jig to add 'Wishes' alongside it.

Is It A Sprig? - I needed an embellishment to finish my card and immediately reached for the metal pieces in the Year of Cheer embellishments pot. The little stars speak for themselves, but the other design, the one that I used on my card today I'm not really sure what it is supposed to be - is it a foliage sprig perhaps? I think they look a little like a reindeer antler - hence my choosing it for my card today. What do you think - I'd love to hear your thoughts!

Here is the visual summary of the key products used on today's project for you to pin for easy reference:


You can see all of my 'How To' summaries on my 'How To - Tips and Techniques' Pinterest board in case you've missed any. 

Enjoy your day and I'll be back tomorrow with another project. Until then, happy stampin'!


Stampin' Up! Supplies Used:

Table built using Product Table Builder by The Crafty Owl - Independent Stampin' Up! Demonstrator.

Painted Harvest Christmas Wreath CAS Card

by Joanne James11. October 2017 20:51

Wednesday already?! Just time for a really quick share of another clean-and-simple Christmas Wreath using the Painted Harvest stamp set that I made with some ladies in a Christmas card class a couple of weeks ago:


Here's the low-down on today's card:

A Christmas Wreath - Today's Painted Harvest stamp set Christmas wreath uses the largest of the petal stamps, stamped once in Wild Wasabi then rotated through 180 degrees before inking and stamping again in Garden Green over the top. This gives a much fuller, more dimensional wreath than the one on Monday's card. I then used the small dot stamp to stamp my Real Red berries.

Painted Autumn - I added a narrow strip of Painted Autumn designer series paper to my card; I love that the reverse side of our papers often feature a more neutral design, such as these watercoloured stripes, that lend themselves to more than just autumn/fall projects. Some of the ladies in my class used the leafy pattern on the reverse of this strip and I must say that looked great too. I'm so happy the Painted Autumn papers are included in the 'buy 3, get 1 free' offer on designer series paper this month too - all the more reason to stock up!

Season's Greetings - Today's card features a big, bold sentiment from the 'Snowflake Sentiments' set, perfect for today's card and not a snowflake in sight!

Here is the visual summary of the key products used on today's project for you to pin for easy reference:


You can see all of my 'How To' summaries on my 'How To - Tips and Techniques' Pinterest board in case you've missed any. 

Hopefully I'll be back tomorrow with another project. Until then, happy stampin'!


Stampin' Up! Supplies Used:

Table built using Product Table Builder by The Crafty Owl - Independent Stampin' Up! Demonstrator.

Mini Catalogue

BROWSE THE CATALOGUE

The mini catalogue is now live! Read and download your copy here.

Shop Online

Access my online shop 24 x 7, 365 days of the year:

Current March hostess code:

S9F2XJJW

Shop Online

Join My Team

It's always a great time to join Stampin’ Up! New team members can get £130 worth of products for only £99 + free business supplies + free shipping + all the fun being a part of Stampin’ Up! Stampin' Up! has something for everyone: join my growing team and benefit from my support to enjoy Stampin' Up! however you choose.

If you're interested, call me for a chat to understand how I can help you realise your goals. Alternatively, if you have already decided to sign up and you just can't wait, please click here for the link to the online form where you can sign up and order your starter kit right away! 

Latest Kit!

Stampin Cut and Emboss

The Rock Legend Kit has all you need to make 8 cards with coordinating envelopes. Along with the new Panda Friends Kit, both are available from January 4th for just £14 each - get yours here!

2023-24 Annual Catalogue

BROWSE THE CATALOGUE

Click on the catalogue for a full list of current SU! supplies - if you would like to order any of the items featured, please drop me a line at [email protected] or give me a call on 07773 421446 - I'd be happy to help.

New Online Exclusives

There will be new products available exclusively in the online store from 5 March - check them out here.

About Me

Hi I'm Joanne and live in Northampton and when I'm not looking after my husband and two beautiful children, am an avid crafter with a passion for all things Stampin' Up!

I must confess that I have never been a big rubber stamper - until I discovered Stampin' Up! that is. I love the fact that I can get such great results with co-ordinating stamps, inks, papers and punches - the possibilities are endless! Join me on my stamping journey as I share the things I love and be inspired to create amazing things yourself!

Follow Me

Monthly Newsletter

Box Builder

Click the button above to use Box Buster to create your custom box design using the Envelope Punch Board!

Kits Collection Now Available!

Stampin Cut and Emboss

The new Kits Collection from Stampin' Up! is now available!

Click here to see the current kits available and order yours online today.

I Design For


Stampin' Up Stuff

This is my personal blog and is not endorsed by Stampin’ Up! I hope you find it a plentiful source of ideas and personal inspiration but please don't copy my designs for contest submission or use for classes, publication or sale without express permission.