Today I'm sharing my design team card for our new challenge over at As you See It where it's time for a 'fill in the blank' challenge:
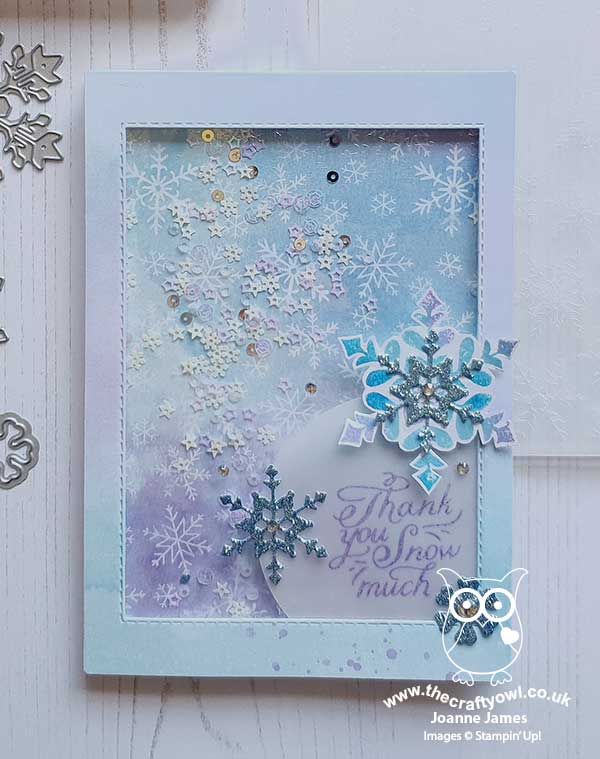
There are lots of colour combinations that I love, but must confess that one of my current favourites is Balmy Blue and Highland Heather. I have always been a fan of purple, but the beautiful papers featuring this combo in the Snowflake Splendor Suite have me creating a lot with this colour combo at the moment. For today's card I decided to share one of the cards that I created on one of my live Zoom demonstration sessions with my lovely customers last week that showed them how to step up their shaker cards with embossing folders - take a look:
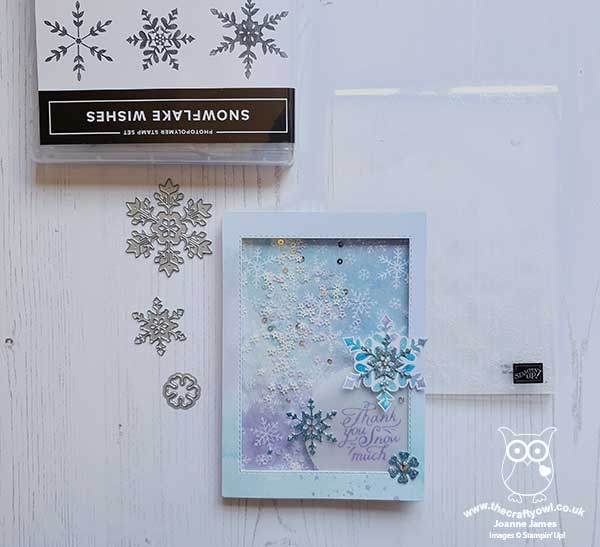
Here's the low-down on today's card:
Snowflake Splendor - I've mentioned previously how much I love this suite; having started creating with it for my class last month, I am quite hooked and have been using it for lots of projects lately, some of which I've shared here already. I love the papers, that give the patterns a hand-painted feel, with wonderful watercoloured patterns too.
A Fresh Winter Colour Combo - I love the way the colours combine in the Snowflake Splendor papers and I think the addition of Highland Heather amongst the blues really rings the changes and freshens up this wintery colour scheme. For my shaker, I paired a watercolour design frame with a background printed with white snowflakes, and added a fussy cut snowflake stamped in my colour duo (in the interests of full disclosure, I did also add a little Pacific Point to this particular snowflake), along with some diecut snowflakes in Balmy Blue glimmer paper for added sparkle:
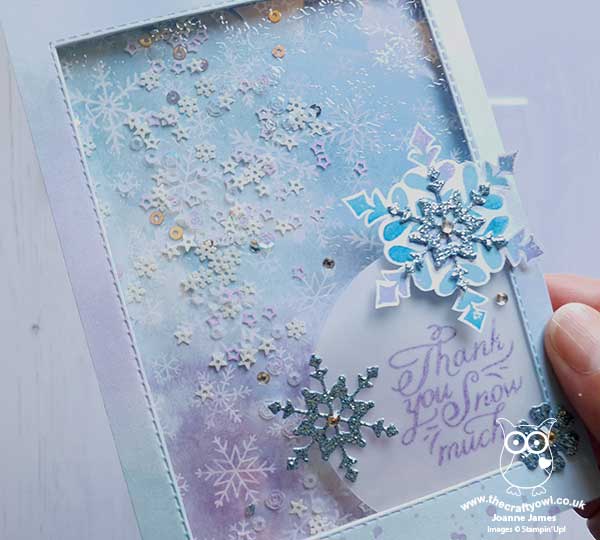
A Winter Snow Shaker - Before mounting my shaker window, I ran my window sheet through the Winter Snow Embossing folder. This was a tip I saw recently shared by one of Stampin' Up!'s artisan designers, Stesha Bloodhart, using the Seabed 3D embossing folder, and couldn't wait to try it with the snowflakes. If you look carefully at the photo below you can see the snowflake impressions:
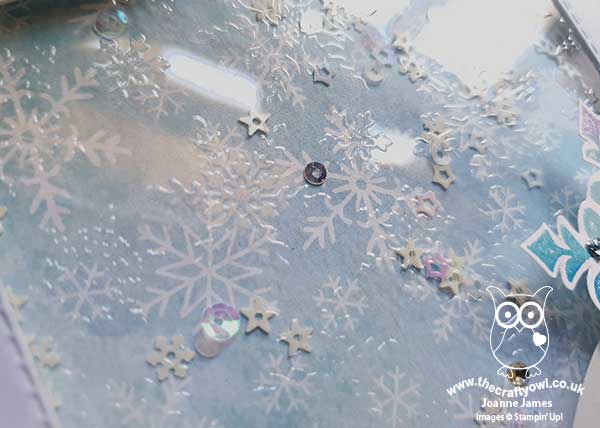
I think this is such a great way to step up a shaker card as it adds lovely texture and detail.
If you'd like to see a little video clip of my shaker in action, in all its snowflake shaker glory, you can see that on my Facebook page here.
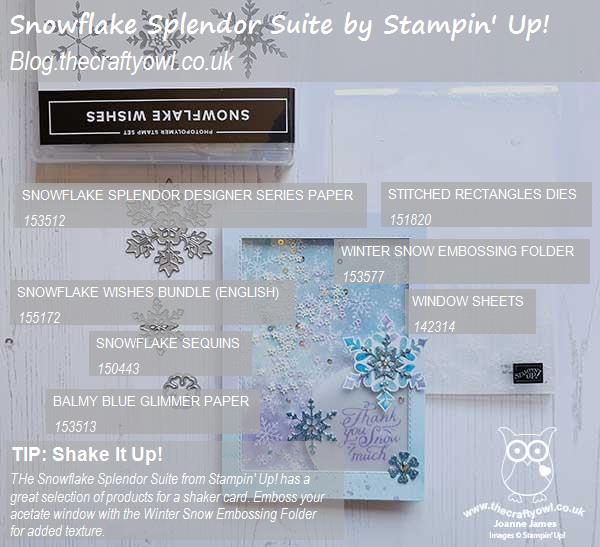
Here is the visual summary of the key products used on today's project for you to pin for easy reference:
You can see all of my 'How To' summaries on my 'How To - Tips and Techniques' Pinterest board in case you've missed any.
Here's a summary of our challenge rules:
- Create any card, scrapbooking page, 3D project or packaging project that fits the challenge.
- Fill in the blanks with the words that are right for you and then create your project with those words in mind. Tell us, in your blog or on your site, what words you used.
- Please include the challenge graphic and link back to the challenge in your blog post. Turn off word verification so we can leave you lots of lovely comments. Make sure you link the post not the whole blog to the Linky. Use #AYSIXXX when uploading to a public gallery.
- If you’re unsure about ‘the rules’, check the details under the Challenge Guidelines tab on the As You See It Challenge homepage.
We look forward to seeing your creations in the AYSI gallery.
Enjoy your day. Mine is going to be a rather special one, as young Master James finally gets to attend his Year 8 Prize Giving Ceremony today. For him and the other year 8 pupils, this year has not been full of the post-Common Entrance Examination rewards that might have been in different times, but today we will have a special year 8 only socially-distanced Speech Day, with Prize Giving and picnic lunch, followed by family cricket (weather permitting) and then the children will be having a disco and hog roast in the evening, in lieu of their Leaver's Ball. They are all very much looking forward to it and it will be a wonderful way to end this special period of his educational journey before moving to his new school and the next chapter.
I'll be back tomorrow with another project. Until then, happy stampin'!
Stampin' Up! Supplies Used: