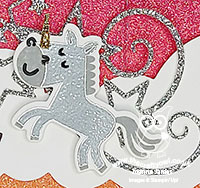
Happy Monday everyone! Today I'm sharing a card inspired by that fabulous photo over at Fusion and using this week's Freshly Made Sketches sketch by Amy:

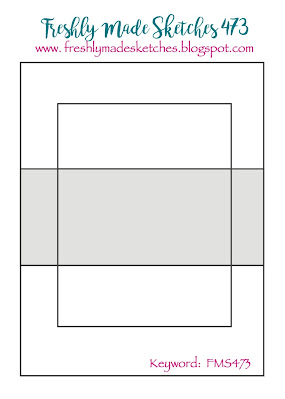
I adore that rainbow unicorn outfit in the inspiration photo - what would be princess wouldn't like to dress up in that?! I had been contemplating Amy's panelled sketch and decided that I could combine the two to create the sparkly card of my dreams. If you're not a fan of the the glimmer and glitter, then you should look away now, as this card has it in spades! Ok, you have been warned!! This is what I came up with - take a look:

Here's the low-down on today's card:
When Is A Hippo Not A Hippo? - When is a hippo not a hippo? Well, when it's a unicorn of course! My unicorn comes from the Hippo Happiness bundle, which in addition to the hippo, a butterfly, a sheep and a horse, there is of course a unicorn! I stamped mine in Smoky Slate with the second step stamp heat embosssed in silver, and gave her a gold sparkly unicorn horn. I think one of the things I love most about this stamp set is the sentiment I used on today's card - words to live by, right?! You can see the detail on my unicorn a little better below:
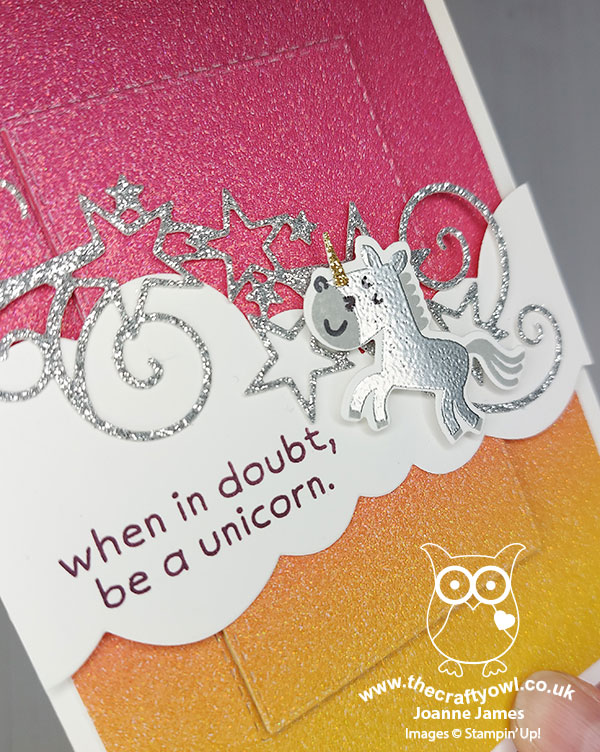
Rainbow Glimmer - Having decided on a silver unicorn, I went all out to create my background panel from a complete piece of rainbow glimmer paper, spreading in colour from deep purple, through to pink, orange and yellow. I haven't used this for a while and was having definite withdrawal symptoms! I decided to leave my central clouds as one piece across the centre of my card; I tried it split with the rectangle, but preferred it as one piece. This also worked better for my sentiment, which sits nicely on the cloud.
Stitched Stars - Not satisfied with my rainbow glimmer alone, I decided to add a swirl of (retired) silver glimmer stars from the Stitched Stars die to the edge of my cloud to back my unicorn. I love this die and it's probably my most used in this set.
So what do you think - too much glimmer? I have to say I love it and I know a certain Miss James Junior who will love it too, teenager or not!! I spent the morning with a lovely bunch of my customers having our first proper online class of the year featuring florals and the Art Gallery bundle - a world away from all of this sparkle, although we did have a little play with gilded leafing - an altogether messier affair, albeit with very pretty results!
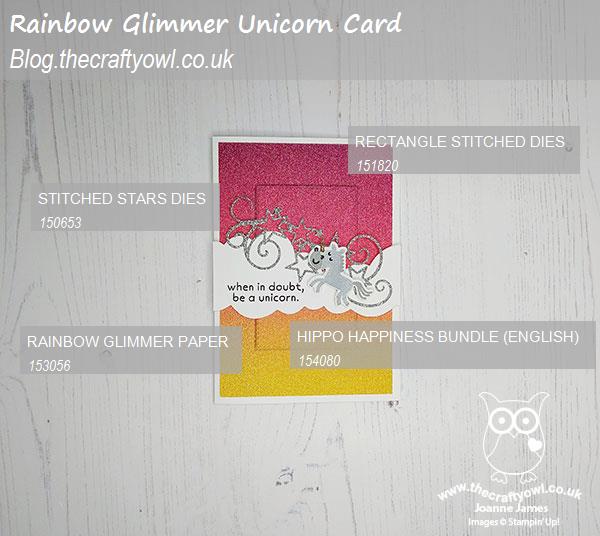
Here is the visual summary of the key products used on today's project for you to pin for easy reference:
You can see all of my 'How To' summaries on my 'How To - Tips and Techniques' Pinterest board in case you've missed any.
Enjoy the rest of your day and I'll be back tomorrow with another project for this week's new sketch challenge over at CAS Colours & Sketches. Until then, happy stampin'!
Stampin' Up! Supplies Used: