Sending Smiles Sunny Days CCS 531

by Joanne James20. February 2024 13:00

It's Tuesday and time for a new challenge over at CAS Colours & SketchesThis week's challenge is a sketch challenge and Michal has asked that we include a large focal sentiment on a bordered panel:


Feel free to flip or rotate the sketch when making your card. For my card today I wanted to showcase more of the free Sale-A-Bration papers before they go away - so I paired them with one of my favourite large sentiment sets for a cheery card - take a look:


Here's the low-down on today's card:

There is only a small area of designer series paper showing on my card (we are aiming for clean and simple, after all) but the bold and colourful flowers of the Sunny Days paper can still be seen. I paired them with sentiment from the Sending Dies and 'Sending Smiles' co-ordinating stamp set and added a trio of tiny diecut flowers for an added pop of colour to tie in with the paper:


That pattern is my absolute favourite in the Sunny Days pack so I had to show real restraint to use so little of it! If you would like some, you have another 9 days to place an order of £45 or more in order to receive a pack of this paper for FREE.

Here is the visual summary of the key products used on today's project for you to pin for easy reference:


You can see all of my 'How To' summaries on my 'How To - Tips and Techniques' Pinterest board in case you've missed any. 

Enjoy your day; today I'm going out to lunch with hubby to celebrate my 25th wedding anniversary - where did those years go?! I'll be back tomorrow with another project. Until then, happy stampin'!


Stampin' Up! Supplies Used:

Table built using Product Table Builder by The Crafty Owl - Independent Stampin' Up! Demonstrator.

Perennial Postage Lavender Layers AYSI317

by Joanne James16. February 2024 13:00

Today I'm sharing my design team card for our new challenge over at As you See It where it's time for a 'fill in the blank' challenge chosen by the queen of CAS, Jane:


Since we are post Valentine's Day there will be less pink and hearts moving forward - today my favourite purple is making an appearance! I started my card today with a look through my designer series paper collection to find some plaid paper. Having found this neutral pattern in the Perennial Lavender pack, the rest of my card actually came together quite quickly - take a look at my finished card:


Here's the low-down on today's card:

Perennial Lavender - I layered my plaid panel with another of the floral patterns in the Perennial Lavender paper pack and interspersed my layers with a small panel of Crumb Cake, embossed with the Timeworn Type 3D embossing folder, having distressed the edges with my scissors to add to the vintage feel.  

Perennial Postage - My final layer was diecut with one of the Perennial Postage dies, onto which I stamped a sentiment from the co-ordinating stamp set in Gorgeous Grape to pick up the colour in the flowers. I also wrapped my panel with a piece of green ribbon, that I tied with a linen thread bow:


Paper Butterfly Accent - I inked one of the diecut butterflies from the Paper Butterfly Accents pack with a variety of blue and purple inks before adding to the corner of my sentiment panel. These diecut butterflies are so useful for adding a final touch of detail to a project, whether in their original, uncoloured state or inked in the colours of your choice to coordinate. A trio of purple shimmer gems were the final ingredient to complete my card - and my recipe! 

Here is the visual summary of the key products used on today's project for you to pin for easy reference:


You can see all of my 'How To' summaries on my 'How To - Tips and Techniques' Pinterest board in case you've missed any. 

Here's a summary of our challenge rules:

  • Create any card, scrapbooking page, 3D project or packaging project that fits the challenge.
  • Please include the challenge graphic and link back to the challenge in your blog post. Turn off word verification so we can leave you lots of lovely comments. Make sure you link the post not the whole blog to the Linky. Use #AYSIXXX when uploading to a public gallery.
  • If you’re unsure about ‘the rules’, check the details under the Challenge Guidelines tab on the As You See It Challenge homepage.
We look forward to seeing your creations in the AYSI gallery.

Enjoy your day and I'll be back tomorrow with another project. Until then, happy stampin'!


Stampin' Up! Supplies Used:

Table built using Product Table Builder by The Crafty Owl - Independent Stampin' Up! Demonstrator.

Thoughtful Moments Happy Day Rainbow CCS 530

by Joanne James6. February 2024 13:00

It's Tuesday and time for a new challenge over at CAS Colours & Sketches. The talented Michal is hosting this month and our first challenge is a colour challenge: 


I don't mind admitting, this trio of colours properly threw me for a loop! I couldn't get past the fact that they would make a great Pixar ball image and struggled to use them to make a card featuring anything else! I made a few discarded cards for today's challenge, before finally going uber-simple and paring my card back to the basics - take a look: 


Here's the low-down on today's card:

A simple red frame, a panel cut with one of the Everyday Details Dies for a little border interest, and a sentiment from the Thoughtful Moments hybrid embossing folder and die set. A diecut rainbow from the same set for a final pop of colour completes my card. There are some great little dies in this set in addition to those that cut out the embossed sentiments that are perfect for clean and simple cards or an extra embellishment. I decided to go with an all-white sentiment with no colour outline:


A little unusual, but I actually quite like it! 

Here is the visual summary of the key products used on today's project for you to pin for easy reference:


You can see all of my 'How To' summaries on my 'How To - Tips and Techniques' Pinterest board in case you've missed any. 

As a reminder, for our colour challenges, you must use all of the stated challenge colours. You may also use neutral colours; however, the challenge colours should be the most noticeable ones featured on your card. We use Stampin' Up! color names for reference, but you are welcome to use any other companies' products as long as you match the challenge colours as closely as possible.

Enjoy your day and I'll be back tomorrow with another project. Until then, happy stampin'!


Stampin' Up! Supplies Used:

Table built using Product Table Builder by The Crafty Owl - Independent Stampin' Up! Demonstrator.

Hooray For Surprises Gender Reveal Card AYSI316

by Joanne James2. February 2024 13:00

Today I'm sharing my design team card for our new challenge over at As you See It where it's time for a 'fill in the blank' challenge chosen by my dear friend Jan:


Time to confess, crafty shoppers - what was the last thing you purchased? At first glance you might be thinking I'm pulling your leg today, as my card features the 'Sweet Songbirds' stamp set and co-ordinating punch, both of which I've had for ages and shared several times before. Look more closely though and you will see I paired them with my most recent craft purchase: the 'Hooray For Surprises' bundle - take a look:


Here's the low-down on today's card:

Hooray For Surprises - The 'Hooray For Surprises' bundle is so fun! The dies create perforated edges with a tab that allow you to easily create your own interactive cards. Simply pull the tab to reveal the message inside! I've been creating with this bundle a lot in recent weeks as it features in the next 'Join In With Joanne and Jan' craft tutorial bundle that I create with the lovely Jan Clothier. There are so many different ways you can create with the stamp set and dies together in this bundle, but for my card today I wanted to use one of the dies to show that there are tons of possibilities when you combine them with other sets too. I used Jen T's fabulous sketch over at Freshly Made Sketches this week as my starting point (turned through 90 degrees) and paired the largest of the round circle tab dies with my pair of birds and nest for a fun gender reveal card.

Here's the card front with a close up of the tab before opening:


It's A ... - When the tab is removed, there is a message underneath that reveals whether or not the mummy and daddy bird parents are expecting a boy or a girl - check it out below:

Isn't that so fun?! I made two cards, showing both boy and girl inserts. Here's a close up of the baby girl version: 

 And here's the baby boy version:


I stamped the surprise greeting with a combination of sets: the 'It's a' is from a couple of the sets in the Sweet Songbirds set and the 'Baby Boy/Baby Girl' comes from a long-retired set called 'Itty Bitty Baby', but you could just as easily hand write your own message or type one on the computer. So what do you think? I think this would make a lovely card to announce an impending birth to soon-to-be grandparents, for example, but I'd love to hear your thoughts - why not leave me a comment below!

Here is the visual summary of the key products used on today's project for you to pin for easy reference:


You can see all of my 'How To' summaries on my 'How To - Tips and Techniques' Pinterest board in case you've missed any. 

Remember if you purchase the 'Hooray For Surprises' bundle from either myself if you are in the UK or Europe or Jan if you are in New Zealand, then you will receive our tutorial featuring this set for FREE, along with access to our Private Facebook Group for more tips and tricks too. In addition, if you purchase before the end of February you will only be £1 away from a free Sale-A-Bration gift too!

Here's a summary of our challenge rules:

  • Create any card, scrapbooking page, 3D project or packaging project that fits the challenge.
  • Please include the challenge graphic and link back to the challenge in your blog post. Turn off word verification so we can leave you lots of lovely comments. Make sure you link the post not the whole blog to the Linky. Use #AYSIXXX when uploading to a public gallery.
  • If you’re unsure about ‘the rules’, check the details under the Challenge Guidelines tab on the As You See It Challenge homepage.
  • In a Fill in the Blank challenge, complete the sentence in the Challenge Banner with the phrase that is true for you and create your project using the words you used. Tell us what you said in your blog or on your site.
We look forward to seeing your creations in the AYSI gallery.

Enjoy your day and I'll be back tomorrow with another project. Until then, happy stampin'!


Stampin' Up! Supplies Used:

Table built using Product Table Builder by The Crafty Owl - Independent Stampin' Up! Demonstrator.

Flight And Airy Notecard CCS 529

by Joanne James23. January 2024 13:00

It's Tuesday and time for a new challenge over at CAS Colours & SketchesThis week's challenge is a sketch challenge and Jeanne has asked that we use a diagonal along with a central focal point:


Feel free to flip or rotate the sketch when making your card and the heart doesn't have to be a heart - you can choose an alternative shape too. For my card today I did that and I used a pair of birds that I fussy cut from the Flight & Airy designer series paper that is one of the gifts that can be yours FREE with an order of £45 during the current Sale-A-Bration promotion. Here's my card:


Here's the low-down on today's card:

I spent ages trying to decide how best to use the diagonal. I wanted to avoid using a piece of designer paper for half of the panel so instead used a piece of Boho Blue watercolour, also from the Flight & Airy pack, as a layer beneath a piece of white card, across which I diecut a diagonal line using one of the new Essential Details Dies. It doesn't quite go corner-to-corner, as I wanted to preserve the horizontal/vertical aspects, but it follows the intent of the sketch and allows some of that lovely blue paper to peek through:

Fussy cutting the birds was a labour of love but so worth it as they make a lovely centrepiece. I added a few sequins and a sentiment from the 'Charming Sentiments' stamp set to finish. This card is a notecard to send to someone I've not spoken to in a while, to share news and let them know I'm thinking of them. Sometimes a card is better than a text, right?

I'm also playing along with my old teamies over at TicTacToe with my card today; I followed the diagonal diecut/patterned paper/pink.

Here is the visual summary of the key products used on today's project for you to pin for easy reference:


You can see all of my 'How To' summaries on my 'How To - Tips and Techniques' Pinterest board in case you've missed any. 

As a reminder, for our colour challenges, you must use all of the stated challenge colours. You may also use neutral colours; however, the challenge colours should be the most noticeable ones featured on your card. We use Stampin' Up! color names for reference, but you are welcome to use any other companies' products as long as you match the challenge colours as closely as possible.

Enjoy your day and I'll be back tomorrow with another project. Until then, happy stampin'!


Stampin' Up! Supplies Used:

Table built using Product Table Builder by The Crafty Owl - Independent Stampin' Up! Demonstrator.

Gorgeous Garden Florals For A New Friend AYSI315

by Joanne James19. January 2024 13:00

Today I'm sharing my design team card for our new challenge over at As you See It where it's time for a bright and colourful colour challenge chosen by the lovely Heather H:


I decided these bold colours called for a bold card so I grabbed my Gorgeous Garden Dies, specifically the floral one, and set to work - take a look at what I came up with:


Here's the low-down on today's card:

Gorgeous Garden Florals - The Gorgeous Garden Dies are a pair of dies found on page 164 of the annual catalogue that can be easily overlooked, since they do not have a co-ordinating stamp set. That said, they are certainly not to be dismissed - they make fabulous cards! I featured the floral die on my card today and having created a tone-on-tone base in Mossy Meadow, I used the three additional colours to add bright pops of colour to the flowers themselves. 

Did someone say FREE? - I have mentioned it previously, but today's post is a great opportunity to remind you that the Gorgeous Garden Dies feature in the current 'Join In With Joanne and Jan' tutorial collection that I have designed in collaboration with my As You See It teamie and good friend Jan Clothier:


This tutorial features 4 main projects with a couple of extras thrown in too featuring a range of techniques and of course the Gorgeous Garden Dies. The projects that feature in the tutorial are exclusive to the tutorial itself and you won't find them on our blogs or anywhere else. How can you get it? Well, if you purchase the Gorgeous Garden Dies from either Jan or myself, then the tutorial with photos and full detailed instructions will be yours FREE - it's as simple as that. 

Celebrating Friends - I finished my card with a diecut sentiment from the 'Love For You' bundle, which seems appropriate since today is 'New Friend Appreciation Day' - isn't there a day for everything these days?! You can see it in more detail below, including the layering detail that I just love: 

I think these dies are an annual catalogue 'hidden gem' - they really are so versatile. I'm linking today's card up with the ladies over at Just Add Ink where their theme this week is 'Just Add ... Florals'.

Here is the visual summary of the key products used on today's project for you to pin for easy reference:


You can see all of my 'How To' summaries on my 'How To - Tips and Techniques' Pinterest board in case you've missed any. 

Here's a summary of our challenge rules:

  • Create any card, scrapbooking page, 3D project or packaging project that fits the challenge.
  • Please include the challenge graphic and link back to the challenge in your blog post. Turn off word verification so we can leave you lots of lovely comments. Make sure you link the post not the whole blog to the Linky. Use #AYSIXXX when uploading to a public gallery.
  • If you’re unsure about ‘the rules’, check the details under the Challenge Guidelines tab on the As You See It Challenge homepage.
  • In a colour challenge, black or other neutral can be used in outlines and sentiments but no other colours should be included. Stampin’ Up colours are used for reference but colours that are a close match are welcome.
We look forward to seeing your creations in the AYSI gallery.

Enjoy your day and I'll be back tomorrow with another project. Until then, happy stampin'!


Stampin' Up! Supplies Used:

Table built using Product Table Builder by The Crafty Owl - Independent Stampin' Up! Demonstrator.

Planted Paradise Clean And Simple Hello CCS528

by Joanne James9. January 2024 13:00

It's Tuesday and time for our first challenge of the year over at CAS Colours & Sketches. We have some new designers so do check out the refreshed team. The lovely Jeanne is hosting this month and our first challenge is a colour challenge: 


For my card today I was so tempted to go with Perennial Lavender again for today's card with this colour palette, but decided instead to change tack and break out a new stamp set that I received at our Online launch event for the mini catalogue, called 'Planted Paradise' - take a look:


Here's the low-down on today's card:

Planted Paradise - The 'Planted Paradise' stamp set is a reversible stamp set that contains lots of different pots and leaves that you can use to build your own plants, pots and hanging baskets - so fun! I actually intended to use an alternative pot in my design, until I remembered that the stamps are actually shown at 60% of size, so they are larger than I anticipated and I had to scale down my choices. I had originally intended to use the rounded flower-patterned pot - so I added a single punched flower to the one I eventually used in homage to that! These stamps are so easy to use and offer lots of creative options - if you like the ability to just stamp and see what you can create - this stamp set is for you. 

Glorious Gingham - Everything's better with gingham, right?! I used a square of Berry Burst gingham to back my pot, as a way to incorporate a pop of berry goodness and following the Try A Sketch on Tuesday that I included above (previously Try Stamping on Tuesday). The team are doubling up with Double Trouble where they want you to choose a background that reflects your introvert or extrovert personality. Well, since today is clean and simple day it's no surprise that I chose a clean white base, which I guess could fit either - which works for me, as I can be both introvert and extrovert!

Heartfelt Hellos - The 'Planted Paradise' stamp set is sentiment-free, so I needed to find one from elsewhere to complete my card. I wanted a 'Just For You' type set so that I could play along over at CAS on Friday this week as that is their theme, so I decided to ink up 'hello' from a new, FREE, set called 'Heartfelt Hellos' that can be yours too with a purchase of £45 or more. This is such a useful set with a mix of sentiments for a variety of occasions - I particularly love the font of the greeting I used on today's card. 

Here is the visual summary of the key products used on today's project for you to pin for easy reference:


You can see all of my 'How To' summaries on my 'How To - Tips and Techniques' Pinterest board in case you've missed any. 

As a reminder, for our colour challenges, you must use all of the stated challenge colours. You may also use neutral colours; however, the challenge colours should be the most noticeable ones featured on your card. We use Stampin' Up! color names for reference, but you are welcome to use any other companies' products as long as you match the challenge colours as closely as possible.

Enjoy your day and I'll be back later this week with another project. Until then, happy stampin'!


Stampin' Up! Supplies Used:

Table built using Product Table Builder by The Crafty Owl - Independent Stampin' Up! Demonstrator.

Bee Mine I Love You No Matter What AYSI314

by Joanne James5. January 2024 12:00

Happy New Year everyone - the cardmaking has officially begun! Today I'm sharing my design team card for our new challenge over at As you See It where our first challenge for the new year is my favourite, a sketch challenge, designed by our wonderful challenge leader and chief organiser, Heather C:


I love Heather's cascade of hearts - I thought it would be perfect for a cascade of buzzy bees and a showcase of some of the lovely new papers in the new January-April Mini Catalogue - take a look:


 Here's the low-down on today's card:

Bee Mine - Today's card is all about the paper - no surprise there then! The Bee Mine designer series paper has so many beautiful bee-inspired patterns. I chose a rather busy one for my background and added a simple diecut panel that I stamped with some 'bee lines' using one of the stamps in the 'Bee My Valentine' stamp set to create a little space to showcase my cascade of bees.


Snip, Snip - For my bee cascade, i used my paper snips scissors to fussy cut four different bees from another of the sheets in the pack, each with a different expression - they really are so comical! - and popped these up on dimensionals on top of my card base, having already added my sentiment banner too. Here's a close up for you:


Stampin' Up!'s Paper Snips Scissors really do make light work of fussy cutting shapes from paper in this way - the super sharp and pointed tips make it easy to get into even the smallest nooks and crannies. If you don't own a pair, I would highly recommend you invest in some - you won't regret it.

No Matter What - The sentiment from the 'Bee My Valentine' stamp set does have love as its theme, but like many of the greetings in this set they have a much broader use than for Valentine's Day alone. This one is heading to one of the James Juniors - I think it is a great reminder of a parent's unconditional love. 

Here is the visual summary of the key products used on today's project for you to pin for easy reference:


You can see all of my 'How To' summaries on my 'How To - Tips and Techniques' Pinterest board in case you've missed any. 

Here's a summary of our challenge rules:

  • Create any card, scrapbooking page, 3D project or packaging project that fits the challenge.
  • Please include the challenge graphic and link back to the challenge in your blog post. Turn off word verification so we can leave you lots of lovely comments. Make sure you link the post not the whole blog to the Linky. Use #AYSIXXX when uploading to a public gallery.
  • If you’re unsure about ‘the rules’, check the details under the Challenge Guidelines tab on the As You See It Challenge homepage.
  • In a sketch challenge, you are welcome to rotate or flip a sketch. You can replace shapes used such as substituting a circle panel for a square panel. However, we must be able to still see the basis of the original sketch in your finished product.
We look forward to seeing your creations in the AYSI gallery.

Enjoy your day and I'll be back tomorrow with another project. Until then, happy stampin'!


Stampin' Up! Supplies Used:

Table built using Product Table Builder by The Crafty Owl - Independent Stampin' Up! Demonstrator.

Reasons to Celebrate Today: Sale-A-Bration 2024, A New Mini Catalogue And 2 New KitsToo

by Joanne James4. January 2024 09:00

Happy New Year everyone! I took an extended blog break over Christmas to spend time with family and loved every minute of it. That said, it's the 4th January and time for a new mini-catalogue and our 2024 Sale-A-Bration promotion so today I'm back to tell you all about it! Once again this year there will be only one Sale-A-Bration promotion: it runs from today until 29th February. You can click on the catalogue on the right hand side of my blog page or below to access the Sale-A-Bration leaflet to download a copy or click on the icon above or on the right to go directly to my online shopto place an order - we are LIVE!


So how does Sale-A-Bration work? For anyone who hasn't come across it before, it's Stampin' Up!'s annual promotion that is loaded with offers whether you shop, join or host.


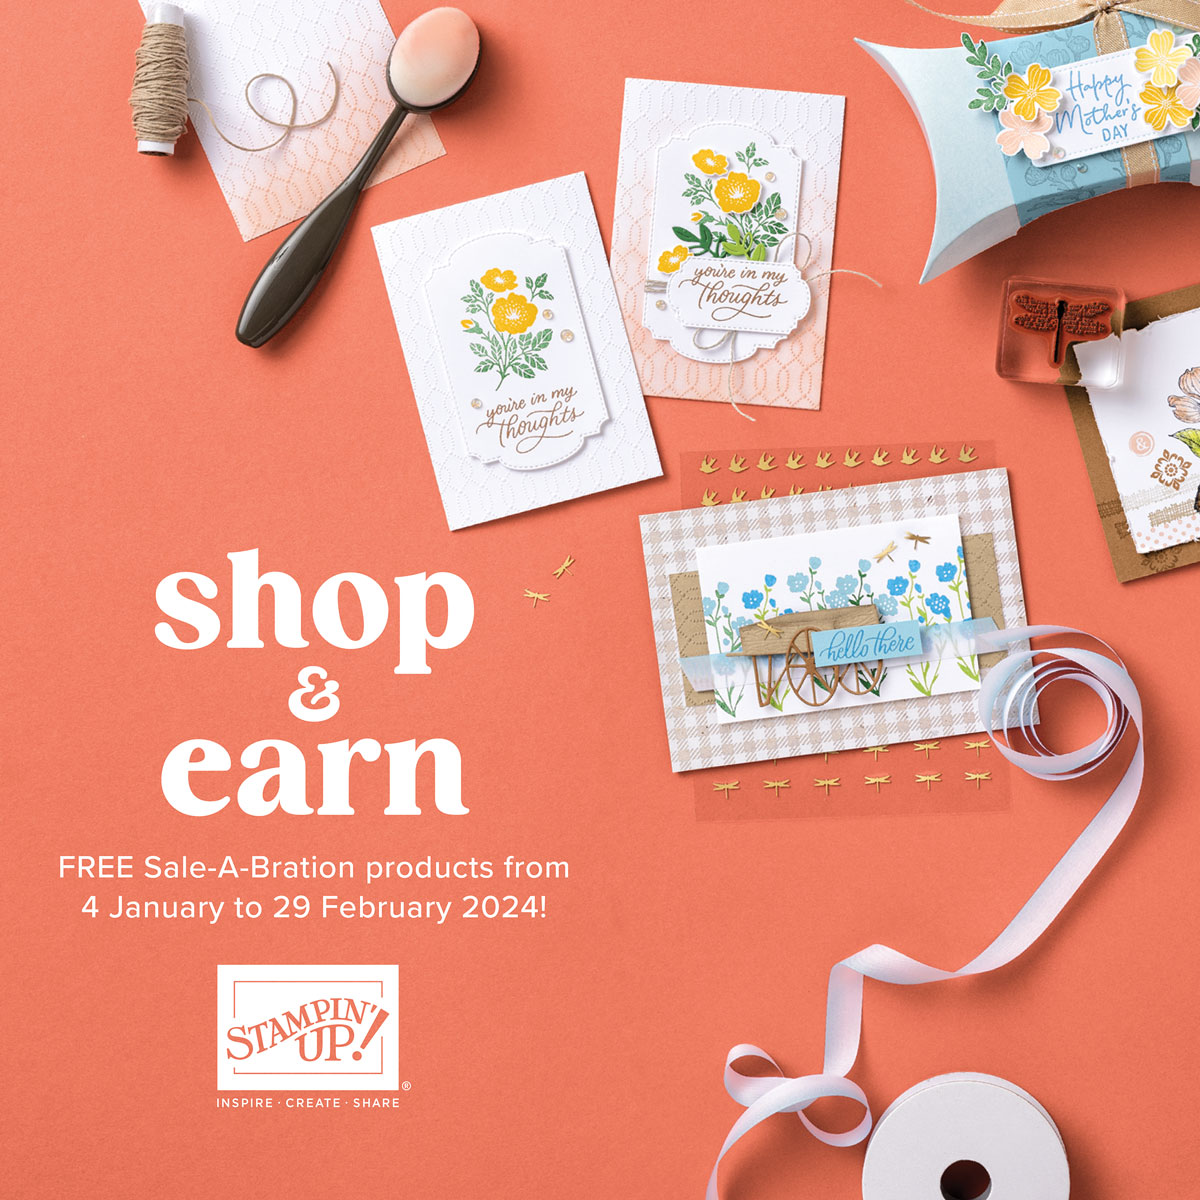
You can earn a free Sale-A-Bration product for every £45 you spend between 4 January and 29 February. There is also the opportunity to earn even bigger rewards with a £90 purchase. It's the perfect time to purchase those products you've had on your wish list and earn more products for FREE! 


If you host a party or place an individual order with purchases of £275 or more, you can choose an additional £27.50 of products in addition to your standard rewards for FREE!

It’s also one of the best times of the year to join Stampin’ Up! There are two fabulous joining options during this year's Sale-A-Bration promotion: 


  • OPTION 1: Spend £99 and receive £130 of product of your choice and a Stampin' Glass Mat Studio (retail value £56)

CUST_FTR_JOIN_L2_US_0124_SAB_GO_LIVE

The Stampin’ Glass Mat Studio is a paper crafter’s dream! The heavy-duty glass mat comes printed with a ruler and grid lines for easy measuring, while the large surface space gives ample room for spreading out while paper crafting. The safety-tempered glass has a heat and scratch resistant surface that wipes clean with the included cloth and water—no chemicals needed. The reusable cloth also cleans ink off your stamps! The nonslip, heat resistant, waterproof silicone mat features four palette squares for mixing custom ink colours or for holding small ink spots in place while crafting. Each component can be used separately or you can use all three items together for a multipurpose paper crafting studio that’s both functional and elegant. 

The Stampin’ Glass Mat Studio includes:

GLASS MAT
* 5 mm thick
* 17" x 14" (43.2 x 35.6 cm)
* Safety-tempered
* Heat and scratch resistant
* Wipes clean with water or alcohol
SILICONE MAT
* 8-3/8" x 6" (21.3 x 15.2 cm) 
* Multiuse, nonslip
* Waterproof, heat resistant
* 4 palette squares for custom-colour mixing or holding Stampin’ Spots
* Product colour: white
CLEANING CLOTH
* 8-1/4" x 8-1/4" (21 x 21 cm) 
* Durable, reusable
* Lint free
* Cleans stamps and other surfaces with only water
* Product colour: dark grey

If the Stampin' Glass mat Studio isn't of interest to you, you might prefer the following alternative:

  • OPTION 2: Spend £99 and receive £160 of product of your choice.

There is plenty of choice and flexibility, whether you want to be a hobby demonstrator and just use your discount to enable you to purchase craft supplies more cheaply, or alternatively would like to build a flourishing direct sales business and sell supplies to others - it's entirely up to you. Above all else, it's a great opportunity to connect with like-minded individuals united through a common love of crafting.

If you would like to host a virtual or in-person party, please do get in touch. Equally if you've ever thought about becoming an SU! demonstrator, now is a great time to do so - I would love to have a no-obligation chat with you about joining my team and the benefits.

As if that wasn't enough, today also sees the launch of the new January-April 2024 mini catalogue - full of gorgeous new products:


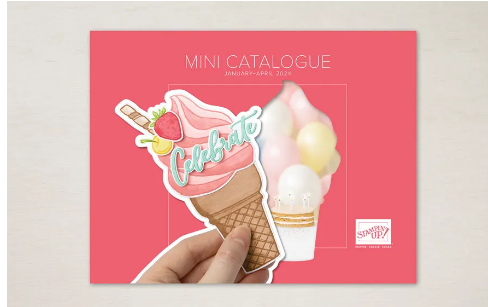
Just click on the image above or in the sidebar on the right to browse the catalogue online, or contact me on 07773 421446 if you would like a paper copy posted out to you and you don't already have a demonstrator; paper copies have been sent to my regular customers. If you are as excited as me and just can't wait, here's the link to my online store - everything is available to purchase from today!

Finally, two new kits have also been added to the online store today:


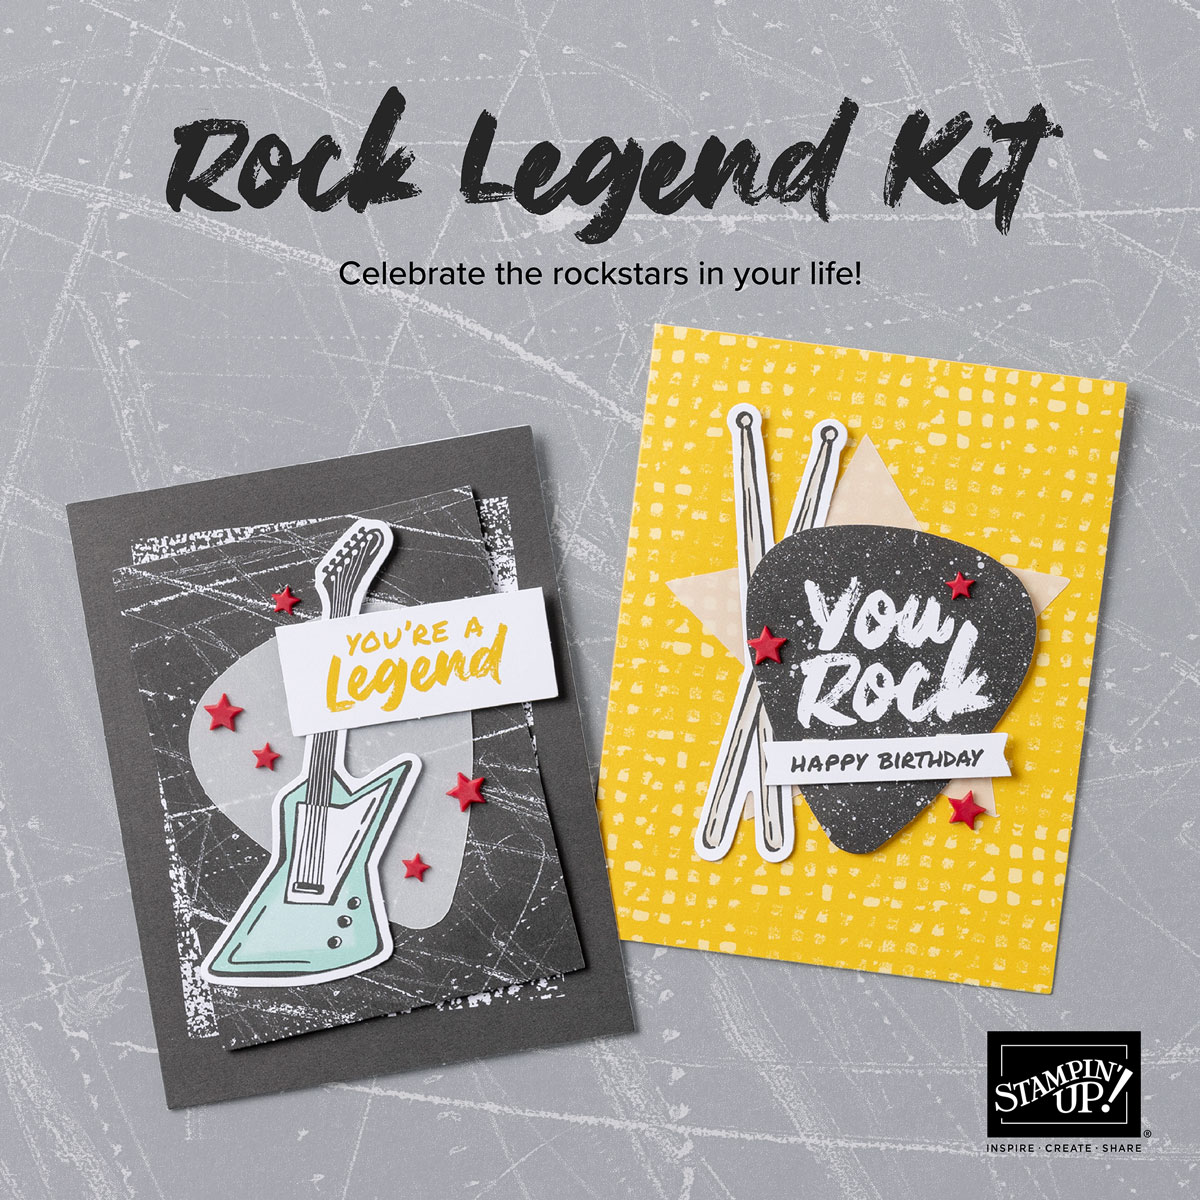
Create handmade cards for all the rockstars in your life with the Rock Legend Kit! This all-occasion paper crafting kit comes with everything you need to make cards that totally rock. Get crafting with die-cut paper pieces of electric guitars, lightning bolts, stars, and other fabulous designs. Make eight cards (four each of two designs) with bold colours and pre-printed sentiments to celebrate birthdays and more!

The kit costs £14 and includes:
*Pre-designed projects
*Step-by-step instructions
*Pre-cut pieces (No prep work! Get right to crafting)
*Printed sentiment labels in Dutch, English, French, and German
*Makes 8 cards: 4 each of 2 designs
*Folded card size: 5-1/2" x 4-1/4" (14 x 10.8 cm)
*8 pre-printed envelopes
*Enough adhesive to complete projects
*Adhesive-Backed Star Embellishments
*A 9-7/8" x 6-1/2" x 1-3/4" (25.1 x 16.5 x 4.4 cm) printed designer box for storage or crafting on the go


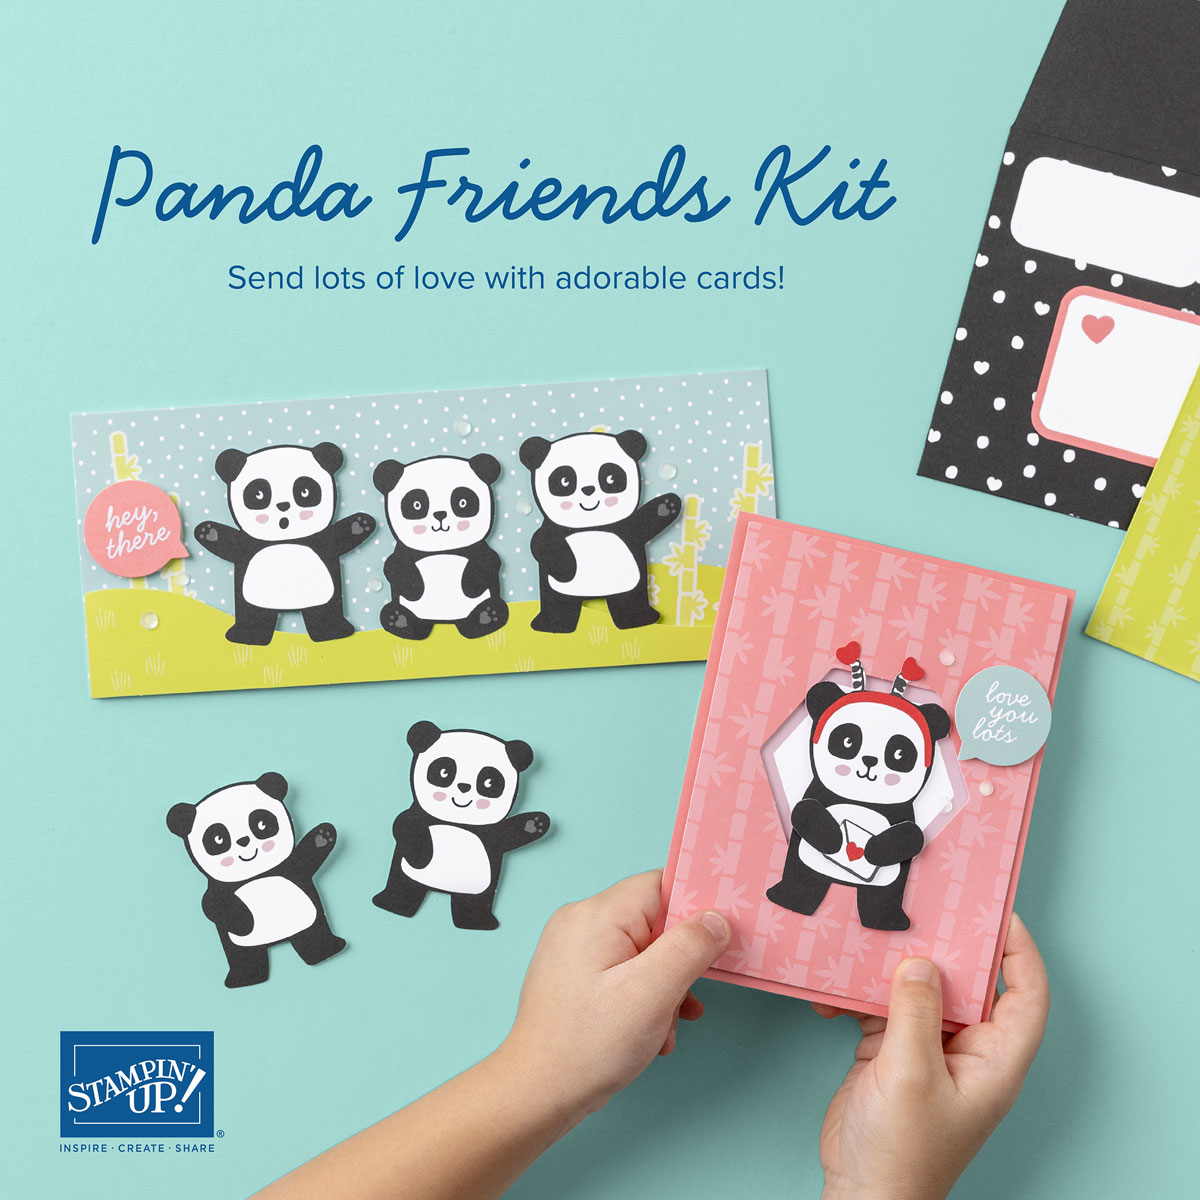
Send adorable cards filled with love with the Panda Friends Kit! These irresistible pandas are perfect for celebrating love and friendship throughout the year. This kit includes cards in two different sizes to keep your crafting versatile and fresh. Use the pre-printed sentiments to make quick multiples and send happy hello greetings to those you care about!

This kit also costs £14 and it includes:
*Pre-designed projects
*Step-by-step instructions
*Pre-cut pieces (No prep work! Get right to crafting)
*Printed sentiment labels in Dutch, English, French, and German
*Makes 8 cards: 4 each of 2 designs
*Folded card size: 4-1/4" x 5-1/2" (10.8 cm x 14 cm), 8-1/2" x 3-1/2" (21.6 cm x 8.9 cm)
*8 pre-printed envelopes
*Enough adhesive to complete all projects
*Iridescent Sequin Embellishments
*A 9-7/8" x 6-1/2" x 1-3/4" (25.1 x 16.5 x 4.4 cm) printed designer box for storage or crafting on the go.

If you would like more information on any of the above, please don't hesitate to get in touch! 

Thanks so much for popping by - it's always nice to share good news! Back tomorrow with a creative post that uses some exciting new product! That post will go live at noon. Until then, happy shopping!


Table built using Product Table Builder by The Crafty Owl - Independent Stampin' Up! Demonstrator.

Gorgeous Garden Glittered Christmas Amaryllis TTT238

by Joanne James7. December 2023 18:00

It's Thursday and time for a new challenge over at TicTacToe! It's the turn of Team X to host this week and the lovely Felicita is our featured designer this week. This is the fun board that we are playing along with: 

    May be an image of flower and text that says '#156 Real Red TI COLOUR NKSPIRATION CHALLENGES Shaded Spruce Basic White Basic Black'   

I went down the right-hand column with red or green (I used both), patterned paper and diecut, and paired it with the fabulously festive colours over at Colour Inkspiration and made a card that is perfect for the 'add glitter' challenge over at Inkspirational - there's definitely plenty of that! I'm definitely in full-on Christmas mode still, so couldn't resist another Christmas card - or two! - take a look:


Here's the low-down on today's card:

Gorgeous Garden - I decided to use a die that you possibly don't immediately consider as a Christmas one. The Gorgeous Garden Dies feature both a leaf coverplate and a floral coverplate die. The floral die reminds me of amarylllis flowers, that are often associated with the festive season, so I decided to create a card using red and green as my chosen colours to add to the Christmassy feel. 

All That Glitters - Whilst my card looks quite simple and straightforward, it actually showcases a neat technique. I covered a two-ply cardstock panel with an adhesive sheet, then placed the die on top and ran it through my diecutting machine so that the adhesive sheet was cut but the cardstock based remained intact. I then firstly removed the backing paper from the green sections, and having diecut another floral plate out of the mottled Shaded Spruce pattern in the Joy of Christmas designer series paper set, added the negative space green diecut pieces to the adhesive background. The pattern is subtle, but it adds just a little more interest than a plain green. Next, I removed the backing paper from the negative space of the flowers themselves, then sprinkled this with some Real Red glittered embossing powder that I found in my drawer. I heated it to set the powder, then finally removed the main piece of backing paper and add a double-layered diecut coverplate in Real Red. I just love the finished effect - check out the sparkle on the close up below:


 I also made a second version of this card, this time using pure fine red glitter. This wasn't Stampin' Up! branded glitter, so the colour is slightly deeper. I gives a slightly more textured finish - just as effective though:


The glitter just needs to be pressed firmly against the adhesive paper; any stray excess can be removed with the sticky end of your Take Your Pick tool. I know glitter is ecologically out-of-fashion right now (although there are eco-friendly versions available), but if you have old tubs of fine glitter hanging around like I do, this is a fun way to use it up. Here's another photo of both cards together so that you can see the subtle difference between the two:


Which one do you prefer? Do leave me a comment below - I'd love to hear your thoughts.

Brightest Glow - Finally, the sentiment on the front of my card is from the oh-so-useful festive sentiment set in the annual catalogue called 'Brightest Glow', heat-embossed in white on Basic Black for a little more emphasis against that red and green background and added some black and white gingham ribbon too. I added another sentiment from the same set to the inside of my card:


So what do you think? I absolutely love these Gorgeous Garden Dies - I think they are one of the unsung heroes of the annual catalogue, since they are standalone dies. You will definitely be seeing more of them in the weeks and months to come - watch this space!

Here is the visual summary of the key products used on today's project for you to pin for easy reference:


You can see all of my Product and 'How To' summaries on my 'How To - Tips and Techniques' Pinterest board in case you've missed any. 

One last thing to mention: this will be my last challenge with the TicTacToe Challenge team. I have absolutely loved being a part of this team and will miss Felicita and everyone very much; moving into 2024 I will be reducing my design commitments to allow me to focus on other opportunities. A tictactoe board offers so many creative possibilities - how does this week's board inspire you? Why not have a go? We would love to see you in the gallery and who knows - you might be selected for Designer's Choice and be eligible to be a guest designer on a future challenge. 

Enjoy your day; I'll be back tomorrow with another project. Until then, happy stampin'!


Stampin' Up! Supplies Used: 

Table built using Product Table Builder by The Crafty Owl - Independent Stampin' Up! Demonstrator.


Promotions

BROWSE THE CATALOGUE

Bonus Days are here! Shop between 3-31 July and spend £45 and earn a £4.50 coupon to be redeemed during August! Shop online with me here.

Shop Online

Access my online shop 24 x 7, 365 days of the year:

Current July hostess code:

3NR3FB9W

Shop Online

2024-25 Annual Catalogue

BROWSE THE CATALOGUE

Click on the image to download your copy of the 2024-25 annual catalogue. For a full list of current SU! supplies, go to my online store. If you would like any help or advice, please drop me a line at [email protected] or give me a call on 07773 421446 - I'd be happy to help.

Join My Team

t's always a great time to join Stampin’ Up! New team members can get £130 worth of products for only £99 + free business supplies + free shipping + all the fun being a part of Stampin’ Up! Stampin' Up! has something for everyone: join my growing team and benefit from my support to enjoy Stampin' Up! however you choose.

If you're interested, call me for a chat to understand how I can help you realise your goals. Alternatively, if you have already decided to sign up and you just can't wait, please click here for the link to the online form where you can sign up and order your starter kit right away! 

Latest Kits!

Stampin Cut and Emboss

The fabulous Scenic Route Travel Journal Kit is perfect for summer and costs £21; the new Garden of Thanks kit costs £22 for 9 cards and both are available now - get yours here!

New Online Exclusives

There are new products available exclusively in the online store from 3 July - check them out here.

About Me

Hi I'm Joanne and live in Northampton and when I'm not looking after my husband and two beautiful children, am an avid crafter with a passion for all things Stampin' Up!

I must confess that I have never been a big rubber stamper - until I discovered Stampin' Up! that is. I love the fact that I can get such great results with co-ordinating stamps, inks, papers and punches - the possibilities are endless! Join me on my stamping journey as I share the things I love and be inspired to create amazing things yourself!

Follow Me

Monthly Newsletter

Box Builder

Click the button above to use Box Buster to create your custom box design using the Envelope Punch Board!

Kits Collection Now Available!

Stampin Cut and Emboss

The new Kits Collection from Stampin' Up! is now available!

Click here to see the current kits available and order yours online today.

I Design For


Stampin' Up Stuff

This is my personal blog and is not endorsed by Stampin’ Up! I hope you find it a plentiful source of ideas and personal inspiration but please don't copy my designs for contest submission or use for classes, publication or sale without express permission.