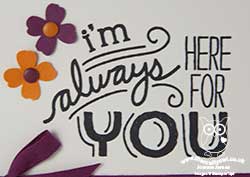
Hearth & Home Thinlits Roman Blind Card

by Joanne James27. May 2016 08:00

Happy Friday everyone! Today I'm sharing a card that I made in my shaker card technique class that featured the Hearth & Home Thinlits at the back end of last year:


So long ago I know, and whilst some of the products on this card are retiring (namely the flower and bird punches, the Alphabet Rotary Stamp and the ribbon), the Hearth & Home Thinlits are staying so it's still worth a share! Not only that, but the new Foam Adhesive Strips that are coming in the new catalogue will make this kind of card a breeze. 

This one isn't a shaker card; I made a little video tutorial to show how I created my colourful roman blind window treatment and have finally got around to editing it, so here it is:


I'm so glad the Hearth & Home Thinlits are staying, they really are so useful. I'm looking forward to seeing what new ribbons are coming our way to see how I can give my next window a makeover!

Here is the visual summary of the key products used on today's project for you to pin for easy reference:


You can see all of my 'How To' summaries on my 'How To - Tips and Techniques' Pinterest board in case you've missed any. 

That's all from me today; back tomorrow with another project. Until then, happy stampin'!


Stampin' Up! Supplies Used: 

Table built using Product Table Builder by The Crafty Owl - Independent Stampin' Up! Demonstrator.

Friendly Wishes Onstage Swap Cards

by Joanne James27. April 2016 19:00

Mid-week already! I spent a pleasant morning at my Coffee and Card Session at Bell's in Kingsthorpe, Northampton making birthday cards and the afternoon at my desk. Today I'm sharing the card that was my swap at the Stampin' Up! UK Onstage Local event that I attended with some of my team the weekend before last. The event itself was a blast! I thought it was about time I shared some photos with you, so here goes!

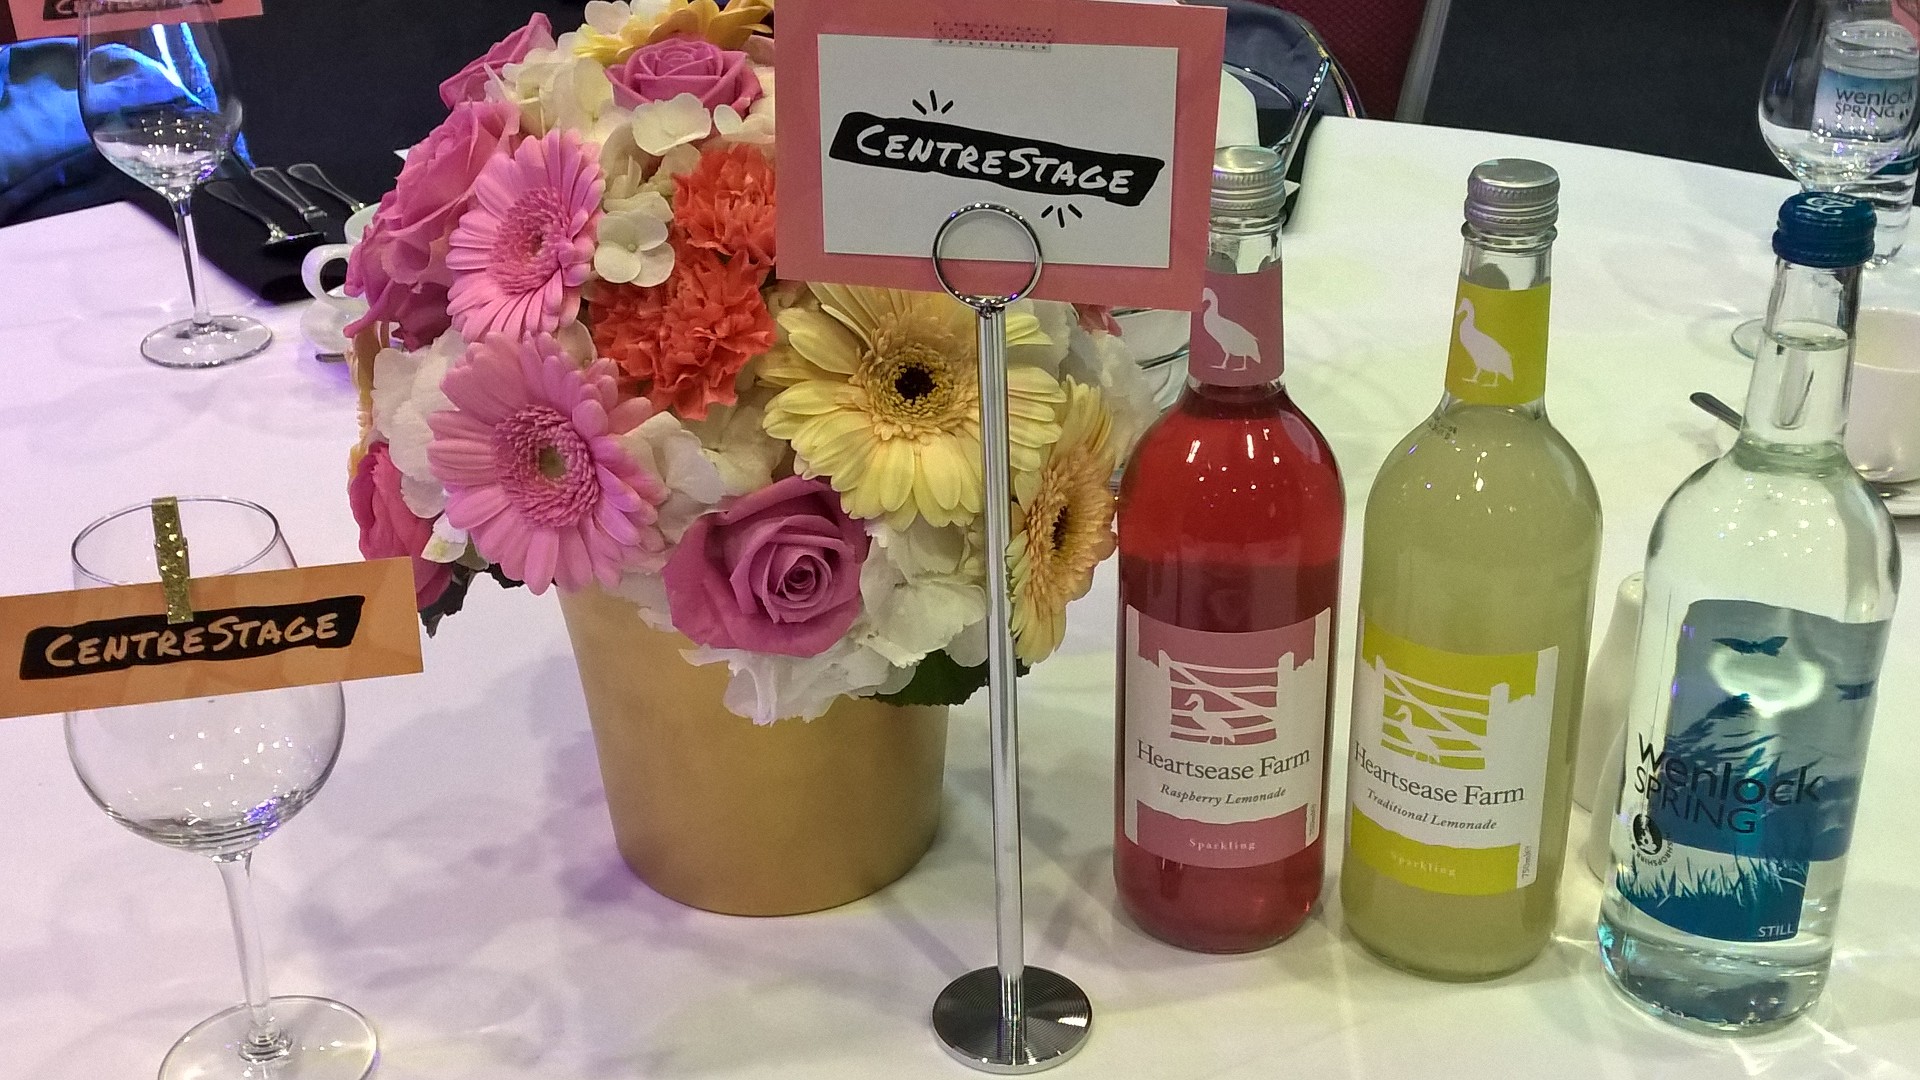
I was treated to a wonderful Centre Stage reception the evening before the main event with other Stampin' Up! leaders - here's a picture of the beautiful table settings:
 

I managed a quick selfie with my good friend Louise Sims, only to be right royally photo-bombed by the equally charming if mischievous Natalie O'Shea:
 

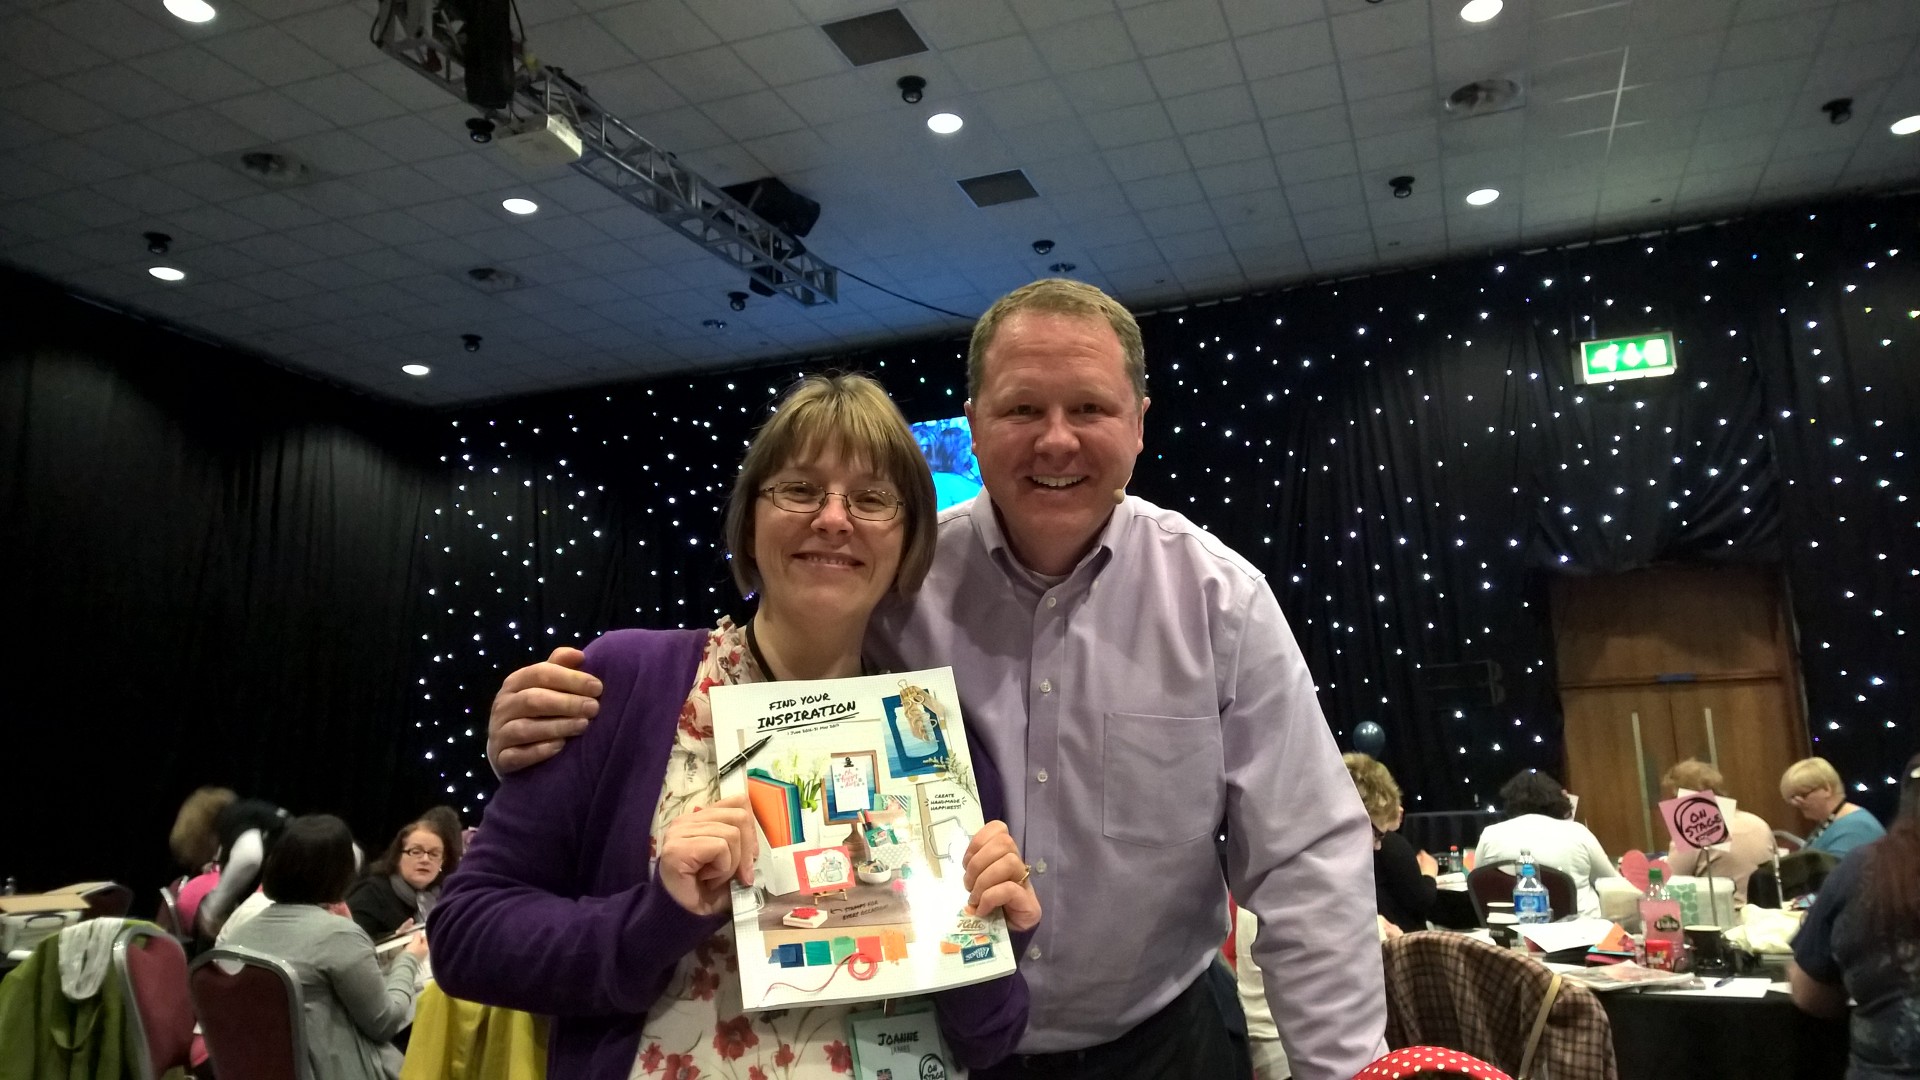
We got our hands on the new catalogue - here's me with mine courtesy of the lovely Dave Baugh, Stampin' Up!'s Vice President of Global Operations who came all the way from Utah to join us for the event:
 

It really is a good one! Here's also a photo of some of my team enjoying the day of presentations and new product reveals:
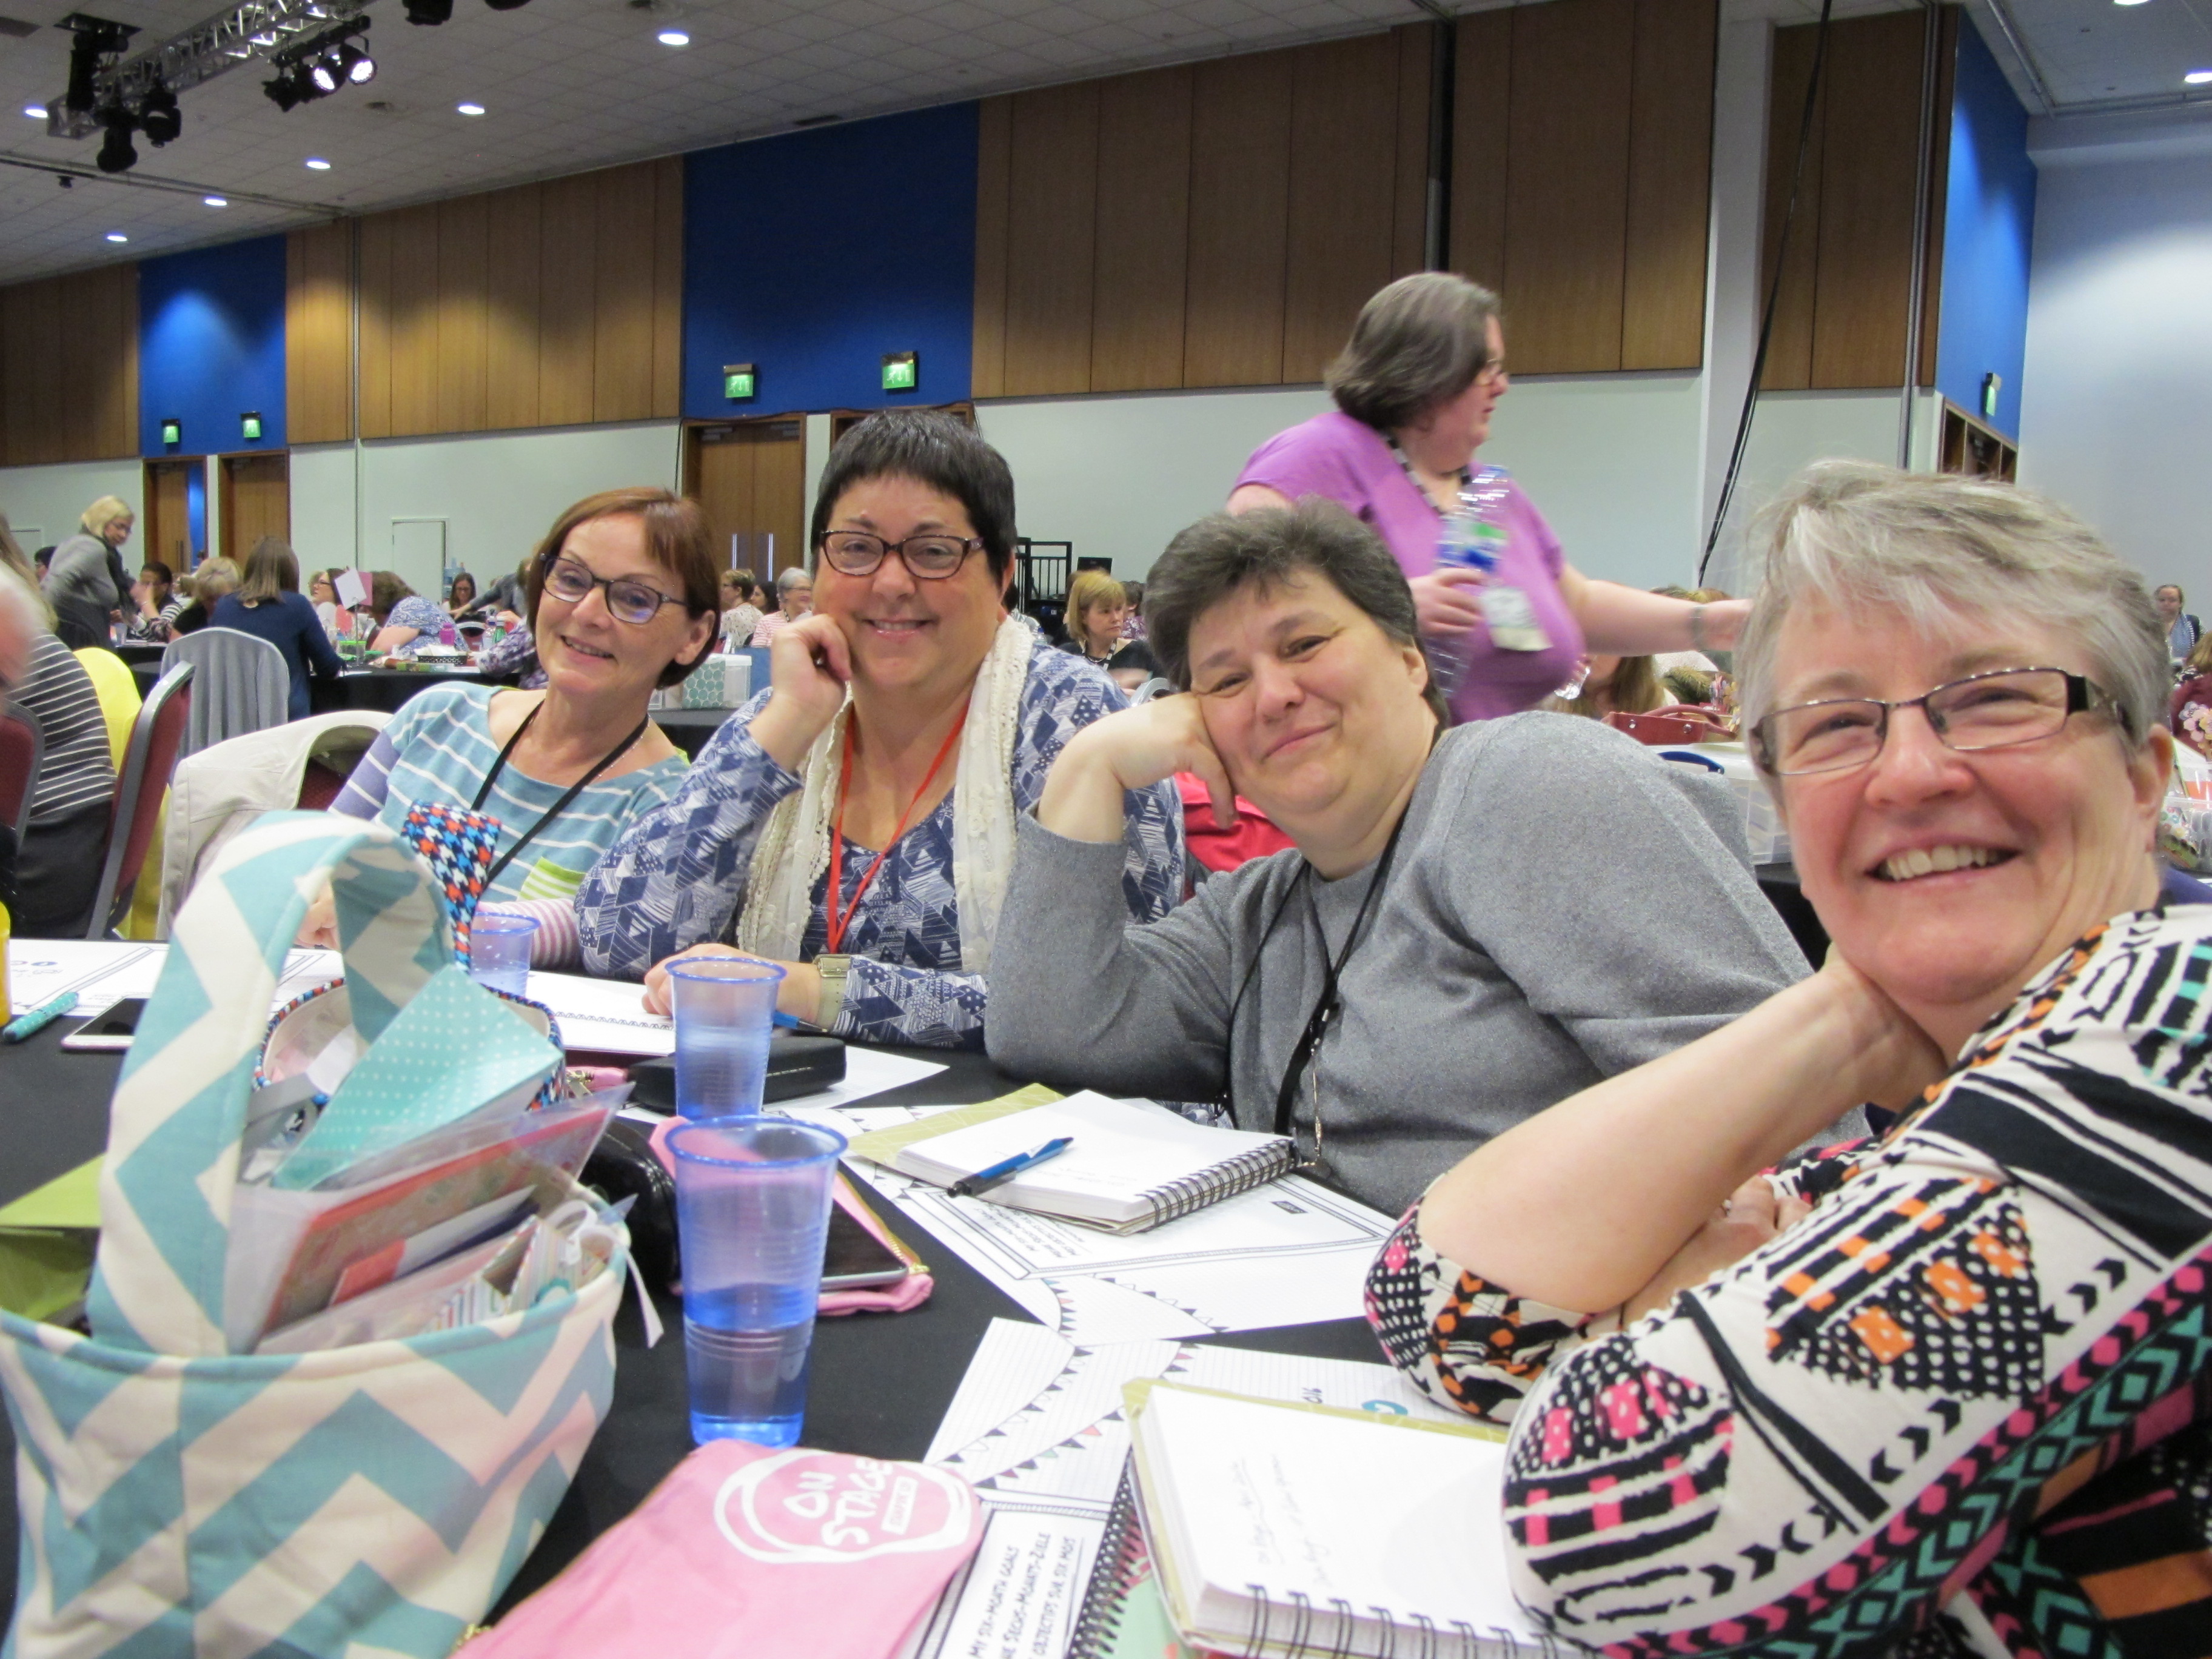
 

I could share a ton of new product 'spoilers' too, but with more than a month to go still until the new catalogue is officially released, I think I'll save those for nearer the time!

Anyway, onto today's creative make - my swap for this event, using some retiring accessories but featuring the 'Friendly Wishes' stamp set that I'm pleased to say will be carrying over to the new catalogue: 
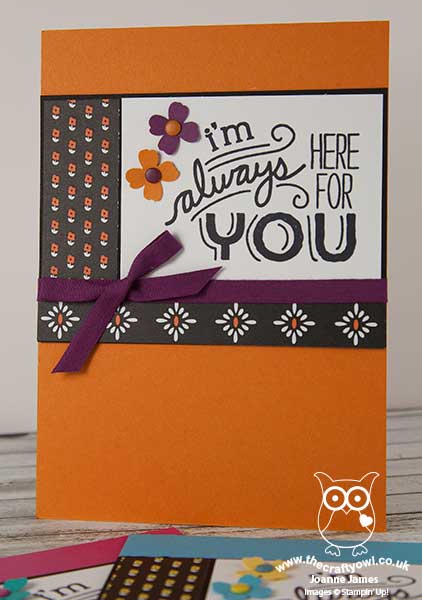
I made these in a range of colourways - the one I've featured here is in Pumpkin Pie and Rich Razzleberry - read on for the low-down on this card:

Brights - I love the Brights colour collection and as I wanted my swap to be bright and colourful this family was the natural choice. I actually chose my colour combinations based on ... the candy dots I had most of in my part-used packets! I use lots of these, but find myself using some colours way more than others. I used a card base of Pumpkin Pie, then used accents in this colour and the contrasting Rich Razzleberry to highlight my black and white stamping, including a cotton seam binding ribbon bow.

Black and White Everyday Chic - I stamped my sentiment from the 'Friendly Wishes' stamp set in Archival Black on Whisper White cardstock, to give a clean, crisp design that was easy to replicate - an important consideration when you are mass-producing a design. To compliment this, I used two different patterns of the black and white Everyday Chic Designer Series Paper to border my focal sentiment, elements of which I highlighted with my Stampin' Write marker. This is a great way to add interest and makes this designer series paper very versatile.

Itty Bitty Flowers - My final embellishment was a pair of Itty Bitty Accents Punch Pack punched flowers, each finished with a contrasting candy dot. I can't quite believe that this punch pack is retiring - I've used all three of these little punches on many, many projects but I think it's this itty bitty flower I will miss the most.

Here is the visual summary of the key products used on today's project for you to pin for easy reference:
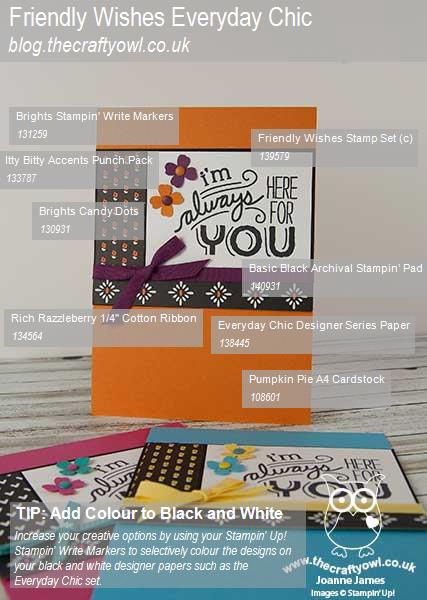
 

You can see all of my 'How To' summaries on my 'How To - Tips and Techniques' Pinterest board in case you've missed any. 

I had some lovely swaps in return which the ladies in my classes have 'ooh'd and ahh'd' over this week. I'll be back tomorrow with my card for this week's new challenge over at Create With Connie and Mary; until then, happy stampin'!


Stampin' Up! Supplies Used: 

Table built using Product Table Builder by The Crafty Owl - Independent Stampin' Up! Demonstrator.

Work of Art Easter Egg and Honeycomb Happiness Chick

by Joanne James25. March 2016 18:57

Good Friday blessings one and all! I've spent most of today outdoors making the most of the sunny weather; I met my girlfriends for a run this morning and we went on a James family bike ride this afternoon. No time to craft, but since the forecast is dreadful for the rest of the week I'm sure I'll make up for it! Today's card is for the challenge over at The Friday Mashup. I love this challenge and am sad to read that this one is their last one!

This week you can use the sketch above or create a project with an Easter theme and chicks or bunnies, or mashup and create with both. I went with the latter for this card, although I do have a mashup card planned for a few days time! Here's today's card:

I actually made this card with the ladies at my Coffee and Card session at Bell's in Northampton this week. The key elements of my fun Easter card are as follows:

An oval egg - I used my Big Shot and Ovals Framelits to create my fun Easter egg in my layer of Pink Pirouette cardstock. Now I know that technically an egg is more pointed at one end, but without an egg framelit this oval makes a pretty good alternative! Before cutting out my oval, I stamped my chick onto the card. Why? Read on below to find out!

An Easter work of art - To decorate my egg, I cut a second mat of white the same size as my pink layer and stamped the large brushstroke stamp from the 'Work of Art' stamp set in a variety of pastel colours and placed this behind the aperture. The curve of the stamped image adds to the illusion of the egg shape.

A happy chick - The little chick from the 'Honeycomb Happiness' Sale-A-Bration set has been getting lots of use this week as he is perfect for Easter cards. I stamped mine onto So Saffron cardstock, snipped him out with my paper scissors and coloured his beak with my Pumpkin Pie Stampin' Write marker. I didn't fussy cut those fiddly legs though - remember the chick I stamped on the pink layer earlier? Yes, I simply coloured the ones on this layer with my Pumpkin Pie Stampin' Write marker and then lined up my yellow chick with the stamp outline, adhering him with a couple of Stampin' Dimensionals. Clever, right? You have just 6 more days to get your hands on the 'Honeycomb Happiness' stamp set for free with a £45 order; if it's on your wish list, don't leave it too late!

An Easter sentiment courtesy of the 'Easter Lamb' stamp and a trio of Itty Bitty punched flowers completes my card. 

Here's the visual summary of the key supplies used to make today's card for you to save for easy reference:


That's all from me today; if you would like to know more about my drop-in Coffee and Card Sessions, you can read all about it here. We have a short break for Easter then the next one is scheduled for 13th April - I'd love to see you there. I'll be back tomorrow with another project. until then, happy stampin'!


Stampin' Up! Supplies Used:

Table built using Product Table Builder by The Crafty Owl - Independent Stampin' Up! Demonstrator.


Love and Embossing Folders!

by Joanne James10. February 2016 21:00

I've had a busy day today with a couple of meetings and a long task list, but many jobs ticked off so very productive! I even managed to fit in a quick spot of crafting this evening so rustled up this fun card for this week's sketch over at As you See It:

AYSIChallenge122     SIP Challenge 34 - Love 800   

Whilst I started out with the sketch (as is often my way!), I also have a few more linkups, as I used the Color Throwdown colours too for my card, the technique that is being featured over at Happy Little Stampers and my card fits with the theme over at Stamps, Ink, Paper. It's not often that this happens, but all of these came together neatly for today's card which is definitely destined for a Valentine - take a look:

I created some simple layering using Pink Pirouette, Rich Razzleberry and Gold foil cardstock to frame my central panel, which I created by inking the solid heart side of my Happy Heart embossing folder and using it to stamp the pattern onto a piece of Shimmery White cardstock. I tried a few different versions, some that I spritzed with water and some without, and this one which was stamped on 'dry' was my favourite. To finish I added a melon Mambo punched heart and my diecut 'love' sentiment from the retired Expressions thinlits - retired it may be, but I will never part with mine, I just love those diecut words and this one was perfect for today's card. 

This is one of those cards that was really fun to make - a little time getting well and truly inky can bring such pleasure! I just love the effect from the inked embossing folder too - I think it makes an unusual background and is a great way to get further mileage out of your embossing folders. In real life this card has a wonderful lustre and sparkle too - difficult to see in the photograph though, so you'll just have to take my word for it!

That's all from me today; back bright and early tomorrow with this week's new challenge over at Create With Connie and Mary. Until then, happy stampin'!


Stampin' Up! Supplies Used:

Table built using Product Table Builder by The Crafty Owl - Independent Stampin' Up! Demonstrator.


Birthday Bouquet For You

by Joanne James4. January 2016 08:00

Happy Monday everyone! I've had the first of my classes this year this morning (I'll share one of those cards with you tomorrow) but for today I have my last sneak peek for you, this time featuring some of the gorgeous new Birthday Bouquet designer series paper from the forthcoming Spring-Summer Stampin' Up! catalogue. This set has some beautiful patterns, featuring everything from confetti to ice creams, balloons to spots and stripes; my card today highlights one of the two flower patterns in the set:

I used some simple layers in Old Olive and Soft Sky to co-ordinate with the designer paper and stamped a sentiment from the co-ordinating 'Birthday Blooms' stamp set on a wide cross panel of Blushing Bride. I finished with a small Itty Bitty Accents punched flower and that's my card - done! I did add a little stamping on the inside but this card really was so quick I made two at the same time as it really didn't take twice as long. I love it when the paper does all the hard work for you!

So only one more sleep to go then it's here - the new 2016 Stampin' Up! Spring-Summer catalogue and the start of this year's Sale-A-Bration promotion! The catalogues have all been mailed to my online customers and my local customers will receive theirs either at their classes this week or at my open house next week on Thursday 14th January 10am-2pm. If you live in or around Northampton and would like to attend, please get in touch for details.

That's all from me today; back tomorrow with another project. Until then, happy stampin'!


Stampin' Up! Supplies Used:

Available 5th January:

140557 Birthday Bouquet Designer Series Paper

140658 Birthday Blooms Stamp Set (clear mount)

Table built using Product Table Builder by The Crafty Owl - Independent Stampin' Up! Demonstrator.


I'm Always There For You In Red, White and Blue

by Joanne James6. July 2015 13:19

Happy Monday everyone! I have had my first of this week's technique card classes this month and spent a pleasant morning catching up with my ladies, who all left very pleased with their cards. I will share these cards in due course once all my classes are complete (I don't want to spoil the surprise for the next group of ladies!). Meanwhile, today I have a card made with this week's sketch over at Freshly Made Sketches:

I'm also linking this card up with the ladies over at Less Is More this week, where the challenge is to use red, white and blue on your card, which I most certainly have - take a look: 

I decided to pair my bright Real Red with the softer tones on Sky Blue for today's card and added some detail to my main panel using some retired 'Back To Black' DSP although the new Everyday Chic paper would work just as well. I coloured both pieces with my retired Soft Sky Blendabilities pens. My sentiment is from the new 'Friendly Wishes' stamp set and I finished my caard with a few pops of Real Red: some cotton ribbon, an Itty Bitty Accents punched flower (or two!) and a retired button from my storecupboard, tied with some white baker's twine.

I really love the way the combination of bright red with the pale blue, and I think the set off the black and white of the DSP and sentiment beautifully. 

That's all from me today; a basket of ironing awaits, although hopefully I'll catch another match at Wimbledon on the TV as I go, so much less of a hardship than usual! Back tomorrow with another card and a new product share! until then, happy stampin'!


Stampin' Up! Supplies Used:

Table built using Product Table Builder by The Crafty Owl - Independent Stampin' Up! Demonstrator.


Park Lane Thank You and Another Painted Petals Card

by Joanne James25. May 2015 19:20

Well the Bank Holiday didn't bring the sunshine I was hoping for, but it did stay nice and dry and we managed a bracing long bike ride this afternoon, so it's all good! Today I have not one but two cards for you! The first one is my card for the current Fab Friday Challenge where they have a sketch challenge this week:

Before I share my card, a big thank you to the team over at Fab Friday for choosing my In-Colour thank you card as their Fab Fave - I'm honoured! You can see that card here. Now onto today's card:


I'm still on my quest to use up more of my Designer Series Paper (I am such a DSP hoarder!) and this sketch was the perfect opportunity to showcase some. So no 'sneak peeks' today; instead a Daffodil Delight base with some mats in Soft Suede, and two of the patterns in the Park Lane pack. I used one of my favourite retiring thank you stamps, 'One in a Million', for my sentiment, stamped in Soft Suede onto Very Vanilla, and I chose to fussy cut one of the flowers for my accent. I liked the clean lines of this card so much, I made two identical ones - if you are one of my contactable online customers, you may find one winging its way to you to you this month!

My next card is for this week's TGIF challenge:

I saw the inspiration photo and I had my Painted Petals set out on my desk preparing for my technique class next month (this is the set we are going to be using) and I just knew the two would work together. Here's my card:


I used So Saffron for my card base and matted a strip of the already retired Gingham Garden DSP (I told you I was a DSP hoarder!) onto a strip of Pear Pizzazz and adhered this to the front of my card. I stamped the flowers on a large circle of Whisper White cut out using my Big Shot and Circles framelits, inking them with one of the new in-colours, Watermelon Wonder, and adding some Blackberry Bliss using my Stampin' Write marker to the flower centres before stamping. I stamped the sentiment in Blackberry Bliss too and to finish added a few So Saffron flowers, punched using one of the Itty Bitty Accent punches and centred with pearls. I popped this circle up on dimensionals to stand away from the card. 

Please do check out the design team inspiration for both of the above challenges; they are some amazing cards on both blogs this week. I'll be back tomorrow with another card; until then, happy stampin'!


Stampin' Up! Supplies Used (Card 1):

Table built using Product Table Builder by The Crafty Owl - Independent Stampin' Up! Demonstrator.


Stampin' Up! Supplies Used (Card 2):

Table built using Product Table Builder by The Crafty Owl - Independent Stampin' Up! Demonstrator.


Hello Birthday Girl!

by Joanne James23. May 2015 17:47

I've had a lovely crafty morning earlier but am later with my blog post as I've been at a basket ball tournament this afternoon with the youngest James Junior (his school club team were tournament winners - woohoo!) and then since we have a rare swim-free Saturday, the children are sleeping over at Grannies and the DH and I treated ourselves to dinner and a movie - Pitch Perfect 2 (aka-awesome - every bit as good as the first one!) All in all a great day, but since what you're really here for is my card let's get to it! Today I used this week's Freshly Made Sketches sketch as my inspiration:

I needed a birthday card for a 10 year old girlfriend of Rebecca's and decided that this sketch would be perfect for what I had in mind - here's my card:


I started out with my Simply Created Hooray It's Your Day Card Kit and co-ordinating stamp set, and whilst I used the stamp set and embellishment and took my ideas from the kit, I really wanted something altogether more pink so chose a combination of Strawberry Slush and Pink Pirouette for my card and sponged onto a piece of Sale-A-Bration Irresistibly Yours Designer Series Paper for my background. I did interpret the sketch somewhat loosely, but you can see the main elements: the glimmer strip in the background, the speech bubbles (I am so going to miss these retiring framelits!) for the panel and the wooden 'hello' embellishment as my main focal point, although I did also add an Itty Bitty Accents punched flower and a glimmer butterfly to balance it out and add to the girly feel. I also added a Tip Top Taupe speech bubble to break up the pink a little - this colour goes so well with Pink Pirouette!

I hope you like today's birthday card; come back tomorrow to see what fun we have in store for this week's new challenge over at The Paper Players - there will be more sneak peeks, so you won't want to miss it! Until then, happy stampin'!


Stampin' Up! Supplies Used:

Table built using Product Table Builder by The Crafty Owl - Independent Stampin' Up! Demonstrator.


Something Lacy Congratulations Card

by Joanne James12. May 2015 21:32

I've had a busy couple of days with this month's classes (hence no blog post yesterday - I'm sorry about that!) so today I thought I would share with you one of the cards we made. This month's technique class has focused on using background stamps and our chosen feature stamp set was the lovely 'Something Lacy'. The class also featured heat embossing and this card shows how coloured embossing powder adds a real touch of luxury to a card:

For our Blushing Bride monochromatic wedding card, we stamped the Something Lacy background stamp in Versamark and heat embossed with Blushing Bride embossing powder. This panel was wrapped with some White satin ribbon before adhering the Blushing Bridge cardstock base. A couple of layered labels cut with the Big Shot and Labels framelits were then added, with the sentiment chosen from the now retired 2015 Sale-A-Bration set 'Simply Wonderful', which was also heat embossed. A few pearls and punched flowers, along with a big bow, finish my card. This card has a lovely sheen in real life that really isn't captured in the photograph and the monochromatic colour scheme is so very pretty.

The 'Something Lacy' background stamp is available until the end of the current seasonal catalogue on the 2nd June and isn't carrying over into the annual catalogue, so if it's on your wish list, you only have a couple of weeks left to purchase. The Labels Framelits are retiring and have already sold out, however Blushing Bride embossing powder is still in stock and half price, so there's still time to snap up a bargain!

That's all from me today; back tomorrow with another project and this week's Wednesday Weekly Deals. Until then, happy stampin'!


Stampin' Up! Supplies Used:

Table built using Product Table Builder by The Crafty Owl - Independent Stampin' Up! Demonstrator.


Hello Easter For The Paper Players

by Joanne James29. March 2015 10:00

It's Sunday and time for a new challenge over at The Paper Players and this week my good friend and talented papercrafter Claire has a fun tic-tac-toe challenge for us:


I decided to go with the first vertical line - yellow, die-cut and flowers (or in my case, flower!) - and this week's sketch over at Pals Paper Arts:

I am still in need of a few Easter cards, so I thought those five circles on the sketch would make some cute Easter chicks, bright yellow and chirpy. I decided on the chick trio from the 'For Peep's Sake' stamp set but I needed five chicks, not three. My solution? I stamped the first two chicks on the right, then masked the outer chicks and just masked the central one, lining up with my stamp-a-ma-jig, then lastly stamped the two chicks on the left, masking off the one I didn't need. I stamped the chicks again a few times on some scrap cardstock, twice in Melon mambo and once in Bermuda Bay, and fussy cut out the eggshells and adhered them on top of the ones on my card. I punched a Bermuda Bay flower using the flower punch from the Itty Bitty Accents Punch Pack and added a Melon Mambo candy dot for the centre. lastly, I added my die cut 'hello'; this might seem a little odd in the context of an Easter card, but it is destined for the mail and someone I don't get to see in person, so combined with the inside greeting works just fine. 

I hope you like my card today.  There are some great cards from the Design Team this week - so many different ways of combining the elements of the grid. Do pop by their blogs and take a look:

The Paper Players Design Team
 
Here's a quick recap of our challenge rules:
 
1.  Create a new paper project
2.  Upload your creation to your blog with a link back to us and provide a direct link to the post featuring your challenge submission.
3.  Please link your card to no more than three challenges, TOTAL.
4.  Have FUN! 

I look forward to seeing your tic-tac-toe combinations in our gallery this week. Back tomorrow with another project; until then, happy stampin'!


Stampin' Up! Supplies Used:

Table built using Product Table Builder by The Crafty Owl - Independent Stampin' Up! Demonstrator.


New Online Exclusives

There are new products available exclusively in the online store from 5 November - check them out here.

Latest Kits!

Stampin Cut and Emboss

The Perpetual Beauty Calendar Kit and Cherry Blossoms Treat Boxes Kit are the latest kits in the online store - get yours here!

Shop Online

Access my online shop 24 x 7, 365 days of the year:

Current December hostess code:

9NKXDTTR

Shop Online

Mini Catalogue

BROWSE THE CATALOGUE

'Tis The Season - the new Stampin' Up! Mini Catalogue is here! For more details and to download your copy click here

Scrapbooking

Stampin' Up! has introduced a new range of 12x12" scrapbooking product and kit - the full range is now available to purchase online. To download a copy of the new digital Scrapbooking Catalogue click here.

2024-25 Annual Catalogue

BROWSE THE CATALOGUE

Click on the image to download your copy of the 2024-25 annual catalogue. For a full list of current SU! supplies, go to my online store. If you would like any help or advice, please drop me a line at joanne@thecraftyowl.co.uk or give me a call on 07773 421446 - I'd be happy to help.

Join My Team

It's always a great time to join Stampin’ Up! New team members can get £130 worth of products for only £99 + free business supplies + free shipping + all the fun being a part of Stampin’ Up! Stampin' Up! has something for everyone: join my growing team and benefit from my support to enjoy Stampin' Up! however you choose.

If you're interested, call me for a chat to understand how I can help you realise your goals. Alternatively, if you have already decided to sign up and you just can't wait, please click here for the link to the online form where you can sign up and order your starter kit right away! 

About Me

Hi I'm Joanne and live in Northampton and when I'm not looking after my husband and two beautiful children, am an avid crafter with a passion for all things Stampin' Up!

I must confess that I have never been a big rubber stamper - until I discovered Stampin' Up! that is. I love the fact that I can get such great results with co-ordinating stamps, inks, papers and punches - the possibilities are endless! Join me on my stamping journey as I share the things I love and be inspired to create amazing things yourself!

Follow Me

Monthly Newsletter

Box Builder

Click the button above to use Box Buster to create your custom box design using the Envelope Punch Board!

Kits Collection Now Available!

Stampin Cut and Emboss

The new Kits Collection from Stampin' Up! is now available!

Click here to see the current kits available and order yours online today.

I Design For


Stampin' Up Stuff

This is my personal blog and is not endorsed by Stampin’ Up! I hope you find it a plentiful source of ideas and personal inspiration but please don't copy my designs for contest submission or use for classes, publication or sale without express permission.

DSP Special Release

Check out 3 popular designer series paper designs in fresh new colourways! Available exclusively in the online store from 3 December - check them out here