by Joanne James1. October 2022 18:00
Happy World Card Making Day everyone! No cardmaking for me today as both the James Juniors were hosts at their respective school open days this morning then one played hockey and I took the other to the theatre to watch 'An Inspector Calls'. I thought I'd pop by with a quick post to share a card that was inspired by the challenge over at AAA Cards that I made last week and have finally found time to blog.

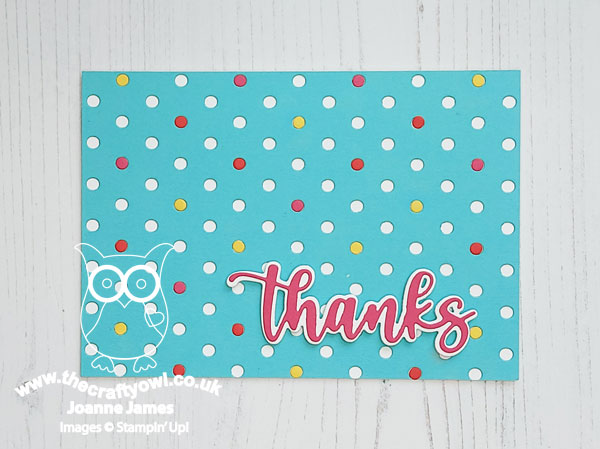
I love the bright colours of the inspo photo and went with the option of dots & spots too for today’s no-stamping card - take a look:
Here's the low-down on today's card:
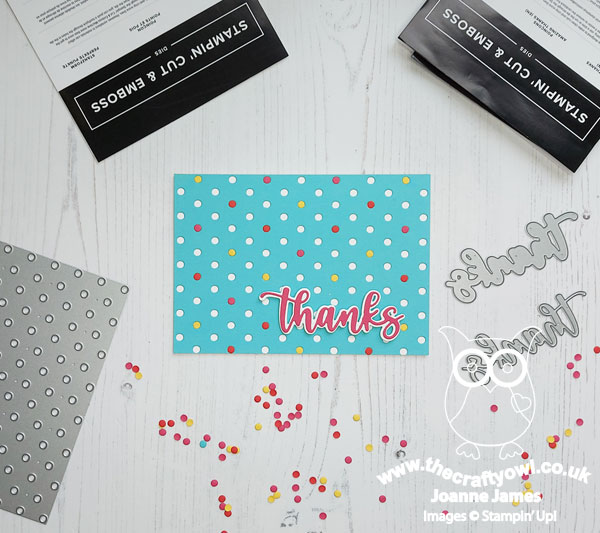
I used the Dots and Spots die for my background and cut it in each of the colours, so that once I’d put my Coastal Cabana panel onto my white card base, I could use some dots in the remaining colours to fill in some of the holes.
I added a layered diecut sentiment from the Amazing Thanks dies popped up on some dimensionals to complete my card:

That’s it - done! A perfect quick thank you and no stamping required!
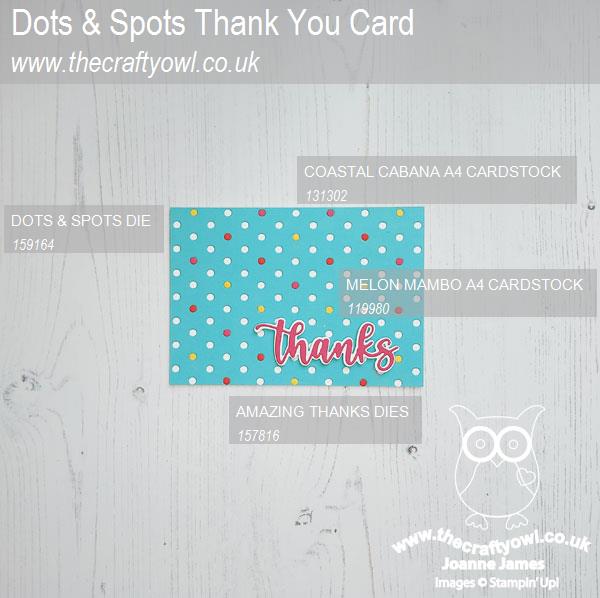
Here is the visual summary of the key products used on today's project for you to pin for easy reference:
You can see all of my 'How To' summaries on my 'How To - Tips and Techniques' Pinterest board in case you've missed any.
Enjoy your evening and I'll be back tomorrow with my card for this week's Paper Players challenge where I am the hostess this week. Until then, happy stampin'!
Stampin' Up! Supplies Used:
by Joanne James30. September 2022 08:00
Today I have my card for the new challenge over at Festive Friday.
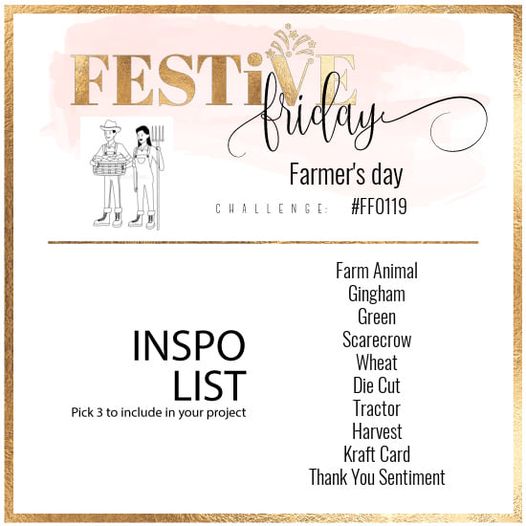


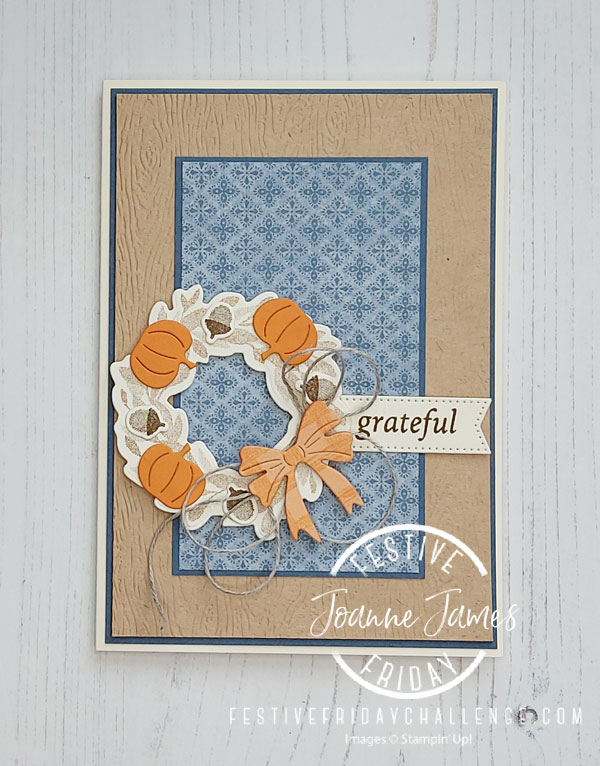
The challenge that we are celebrating this week is 'Farmer's Day' which is on October 12th. Remember the fun thing is that at Festive Friday you do not need to actually celebrate the occasion; your goal is to simply use three or more items from the inspiration list on your project. This week I used gingham, die cut, kraft card and a thank you sentiment, along with the sketch layout over at Hand Stamped Sentiments and the colour palette over at Color Throwdown this week and this is what I came up with:
Here's the low-down on today's card:
Timber Texture - For my base layer, I added some texture to my kraft 'frame' using the Timber 3D embossing folder. I really like the effect of the added texture, which adds to the rudtic feel of my card.
Cottage Wreath - The star of today's card is the autumn wreath, decorated with acorns (and pumpkins) courtesy of the Cottage Wreaths bundle. There are some great standalone wreath dies in this set, but today I chose to diecut one of the stamped versions, full of leaves. I went neutral and decorated my wreath, before finishing with a gingham bow cut from the Country Gingham DSP pack:

A Throwback Trio - I did use a trio of retired products on today's card - did you spot them all? They were Misty Moonlight cardstock for my layers, a piece of Harvest Meadow DSP for the central panel as the blue design coordinated perfectly and finally my pumpkins were cut using the retired Seasonal Swirls Dies, which I rediscovered when I was hinting for retired pumpkin goodies for the pumpkin speed stamping challenge a couple of weeks ago! Some things will always have a use in the craft space, right?!
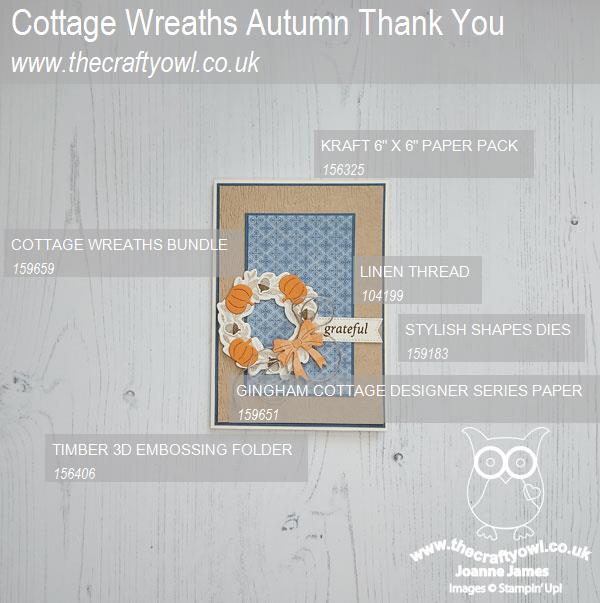
Here is the visual summary of the key products used on today's project for you to pin for easy reference:
You can see all of my 'How To' summaries on my 'How To - Tips and Techniques' Pinterest board in case you've missed any.
How does our board inspire you? I can’t wait to see what YOU create! For more inspiration, be sure to visit the rest of the Festive Friday Challenge Design team:
Ann Schach
Beth McCullough
Sharon Hashimoto Burkert
Melanie Hungerford
Helen Jennings
Melva Peters
Jaydee
Diane Evans
Joanne James
Enjoy your day; mine is going to be a busy one and it includes a visit to the hairdressers for an overdue colour. I might be happy to grow old(er) gracefully but go grey in the process - I'm afraid not! I'll be back tomorrow with another quick project. Until then, happy stampin'!
Stampin' Up! Supplies Used:
acc5896f-813a-40a9-8272-82c2ce3c0fe6|0|.0|96d5b379-7e1d-4dac-a6ba-1e50db561b04
Tags: Shop Stampin' Up! Online, Stamping Shop Stampin' Up online, Shop online, Stampin' Up, Stampin' Up Card ideas, Stampin' Up Supplies, Stampin' Up Card, Festive Friday, Harvest Meadow, Gingham Cottage, Country Wreaths Dies, Cottage Wreaths, Timber Embossing Folder
Cards | Shop Online | Shop Stampin' Up! Online | Stamping
by Joanne James27. September 2022 12:00
It's Tuesday and time for a new challenge over at CAS Colours & Sketches. Today we have Valerie's final sketch challenge:
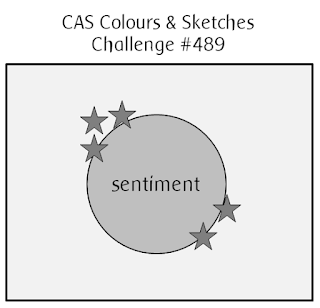


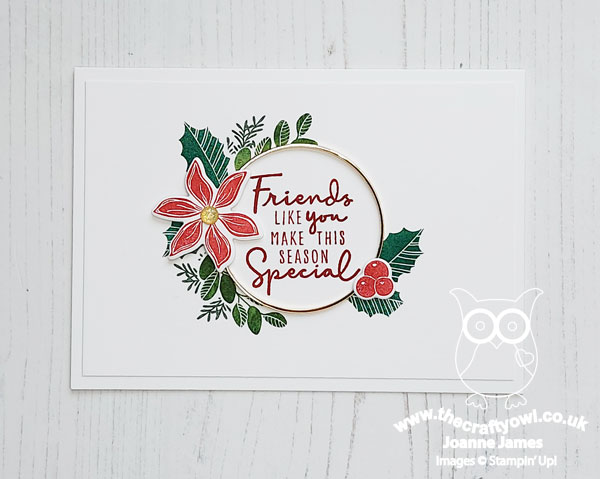
Feel free to flip or rotate the sketch when making your card. I thought this was a great sketch and perfect to enable me to play along with a few other challenges too: the ladies over at Just Add Ink have a 'Choose 2' challenge this week, at Less is More the theme is 'friendship' and since over at CAS on Friday the theme is Christmas, I am playing there too! So - to my card:
Here's the low-down on today's card:
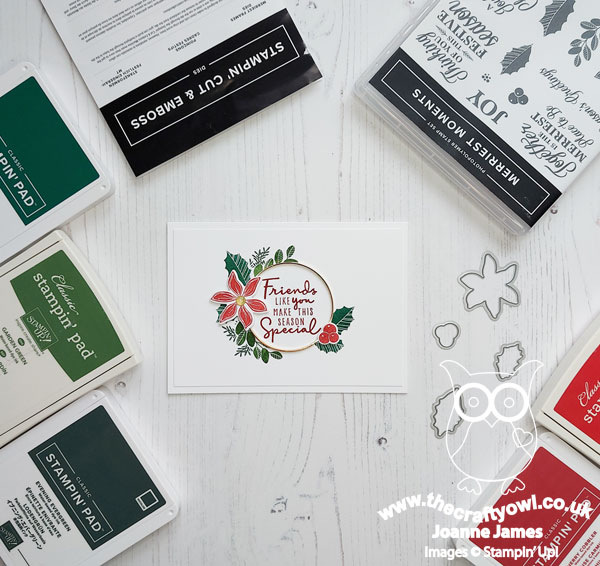
Masked Merriest Moments - I decided to properly rise to the challenge over at Just Add Ink this week and would use not just two but all three of their options! For my foliage and masking, I used the Merriest Moments stamp set - one of my all-time Christmas festive favourites. I used a circle framelit to cut a circle of masking paper, then stamped a selection of festive foliage around the edge, masking the individual pieces too to create a sense of depth and dimension. Once the masking paper was removed, I stamped my sentiment in the clear circle in the centre and used a thin (retired) gold hoop embellishment to outline the edge of my masked circle, then added some diecut red berries and a poinsettia to the front of the hoop - I like the subtle depth that this gives and pop of additional colour amongst the greens of the foliage:

Words of Friendship - My festive friendship sentiment comes from the 'Christmas To Remember' stamp set - a set of sayings perfect for this time of year. I used another two to add detail to the inside of my card, along with a little more festive foliage decoration:

Simple as that! I wish in hindsight I'd taken step by step photos of the construction process for this card, because whilst easy to explain contained a fair number of steps to achieve the desired effect. I really like the finished card though and I know that when one of my oldest, dear friends who I don't see often, but is always in my thoughts, receives this card she will love it too!
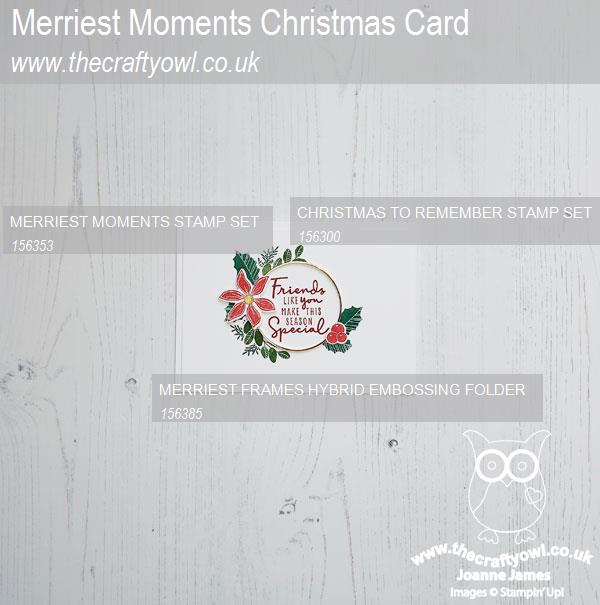
Here is the visual summary of the key products used on today's project for you to pin for easy reference:
You can see all of my 'How To' summaries on my 'How To - Tips and Techniques' Pinterest board in case you've missed any.
Enjoy your day and I'll be back tomorrow with another project. Until then, happy stampin'!
Stampin' Up! Supplies Used:
5fc38bf7-79dd-4a38-84e0-404f2549743f|0|.0|96d5b379-7e1d-4dac-a6ba-1e50db561b04
Tags: Stampin' Up, Stampin' Up Card, Stampin' Up Card ideas, Stampin' Up Supplies, Shop online, Shop Stampin' Up online, Shop Stampin' Up! Online, CAS Colours and Sketches, Merriest Moments, Merriest Wishes, Christmas To Remember, Christmas, Masking
Cards | Shop Online | Shop Stampin' Up! Online | Stamping
by Joanne James26. September 2022 12:44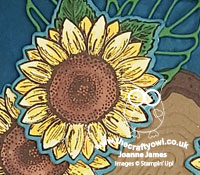
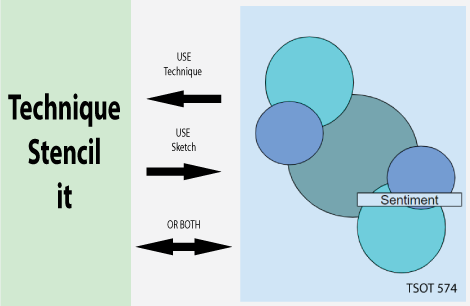
Here's my second card for today! This one was inspired by both the colours and inspiration photo over at Color Throwdown and uses the sketch over at Try Stamping on Tuesday for my layout:
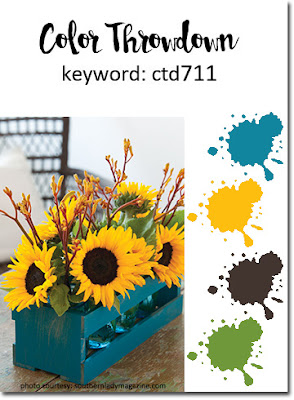
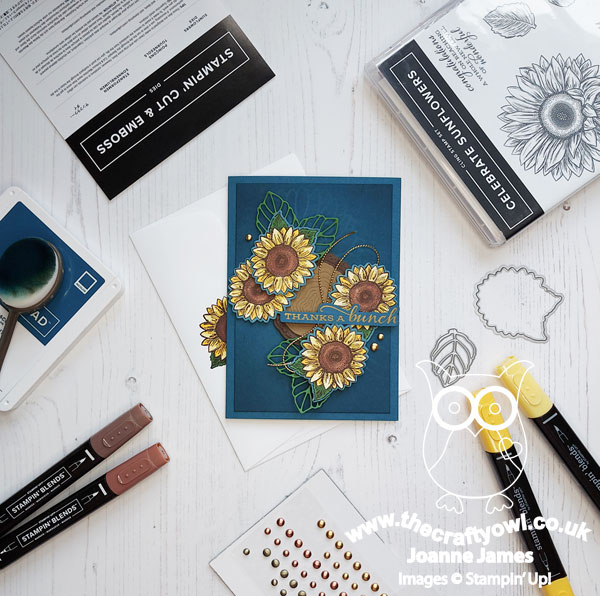
Another card with a dark background - this time courtesy of some (retired) Pretty Peacock cardstock - the perfect base for some vibrant sunflowers - take a look:
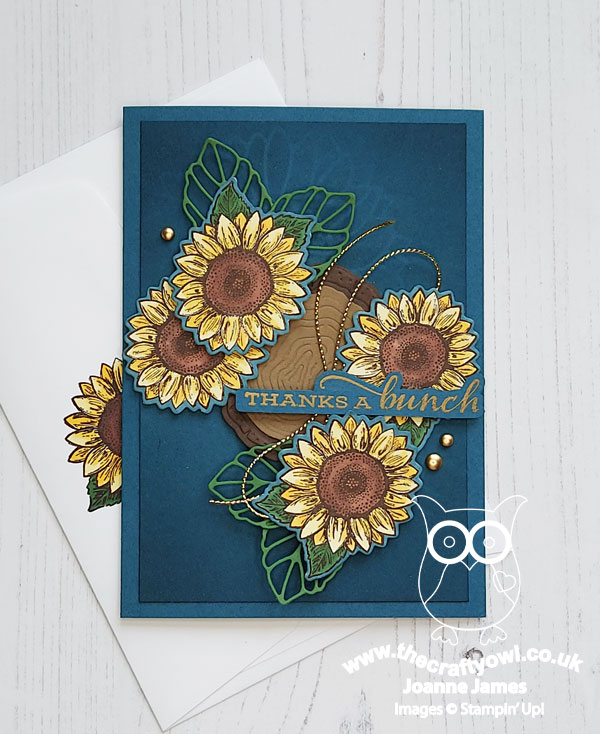
Here's the low-down on today's card:
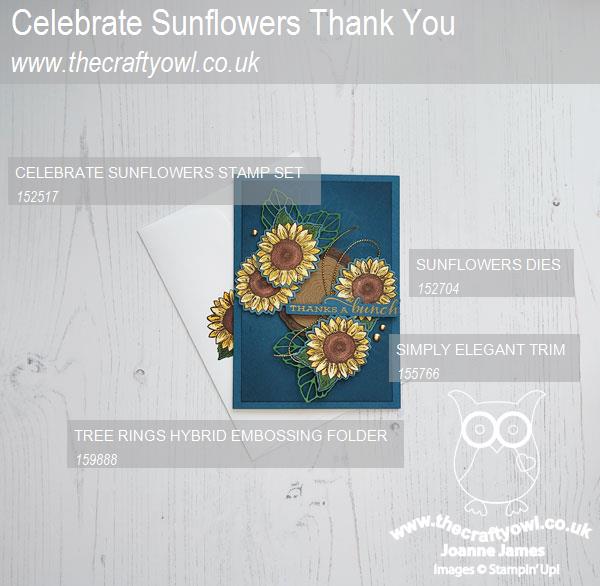
I used an embossed tree ring for the centre of my card and added my quartet of sunflowers, coloured with a combination of Stampin' Write and Blends markers, and some diecut green leaves around this. I added a heat embossed sentiment with some twine and enamel dots for extra touches of gold. Whilst it's tricky to see on the main photo, I did add in the option of stencilling to the card base, by using some tone-on-tone blending through a stencil made from one of my Sunflower Dies - you can see it a little better on the photo below:
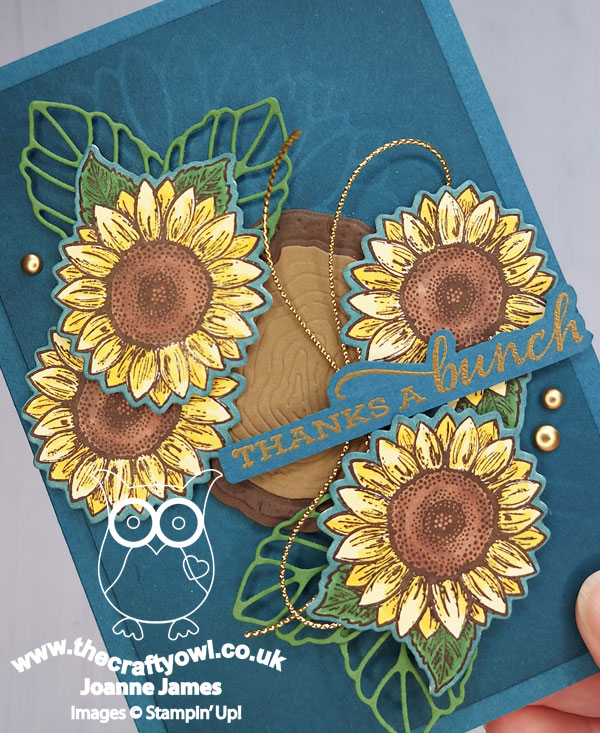
I also used my (retired) Pretty Peacock Blends to colour the edges of my stamped sunflower images to remove the harsh white border against my background. I haven't used the oldie-but-goodie 'Celebrate Sunflowers' stamp set in ages, but it is so perfect for this time of year as summer fades all too quickly into autumn. Another thank you card that will be winging its way to one of my lovely customers this month!
Here is the visual summary of the key products used on today's project for you to pin for easy reference:
You can see all of my 'How To' summaries on my 'How To - Tips and Techniques' Pinterest board in case you've missed any.
Enjoy your day and I'll be back tomorrow with another project for our new challenge over at CAS Colours & Sketches. Until then, happy stampin'!
Stampin' Up! Supplies Used:
by Joanne James26. September 2022 11:49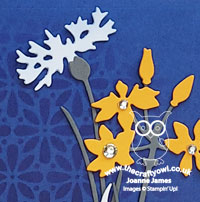
Happy Monday everyone! I managed to spend some quality time in my craft room over the weekend and as a result of trying to overcome my 'crafting hiatus' I've a couple of extra cards to share with you today! The first one uses Karren's layout over at Freshly Made Sketches this week and the fabulously bold Colour Inkspiration colour palette:
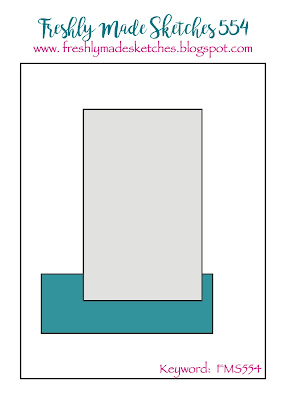

I really wanted to make the most of the bright blue and mango of the inspiration photo, so I went with a bold use of colour - take a look:

Here's the low-down on today's card:
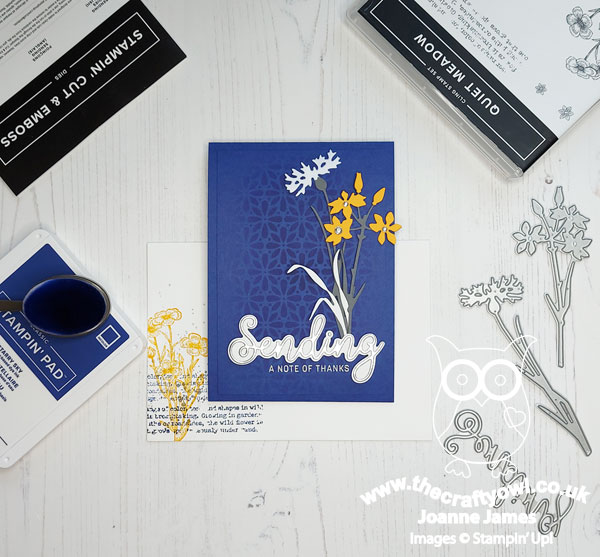
I used one of my (retired) stencils to add some tone-on-tone colour to my Starry Sky card base, then added a cluster of Meadow Dies flowers to the right hand side in the challenge colours, having added a light touch of Starry Sky ink to my cornflower and embellished my Mango Melody flowers with some sparkly rhinestones.
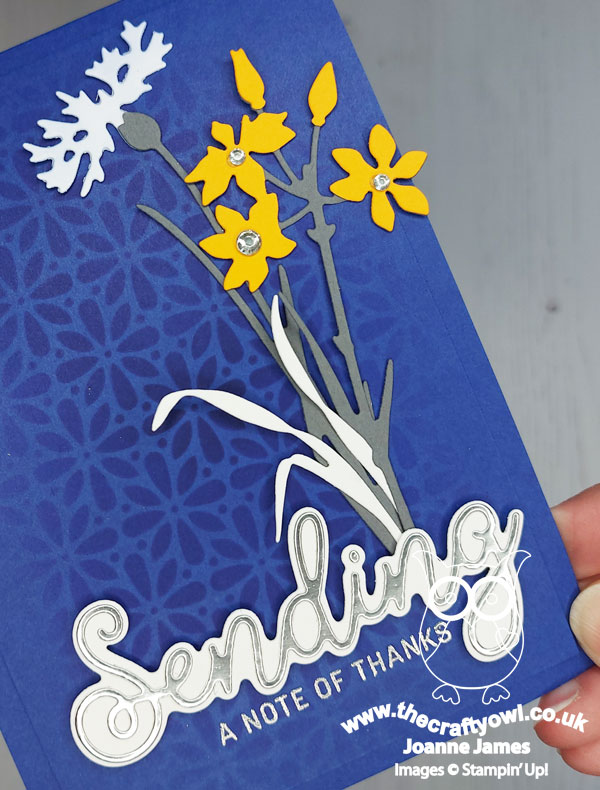
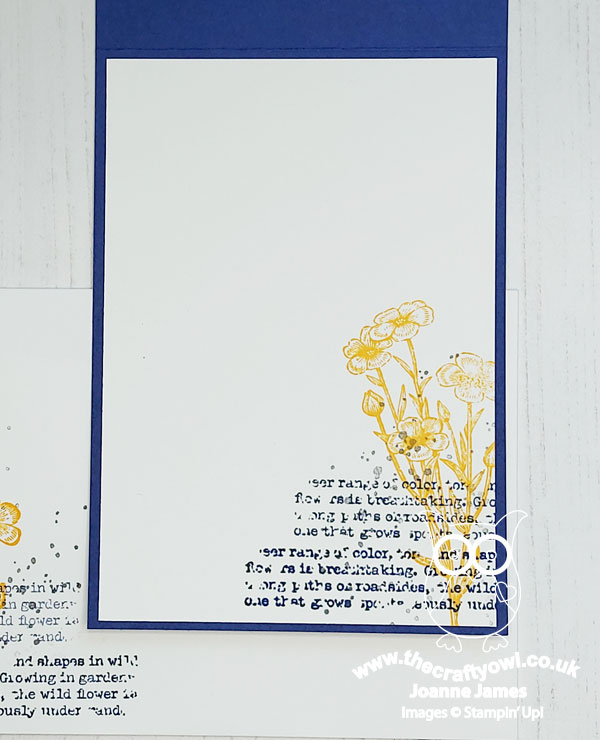
For the horizontal element of the sketch, I layered a diecut 'Sending' in silver foil on white with the remainder of the sentiment stamped and heat embossed in silver directly onto the cardbase. I finished the inside of my card and the corner of my envelope with a collage of stamped images in co-ordinating colours from the 'Quiet Meadow' stamp set:
A liberal interpretation of this week's FMS sketch for me, although the shapes are clearly visible - I just love this card! What do you think? Do leave me a comment below, I'd love to hear your thoughts!
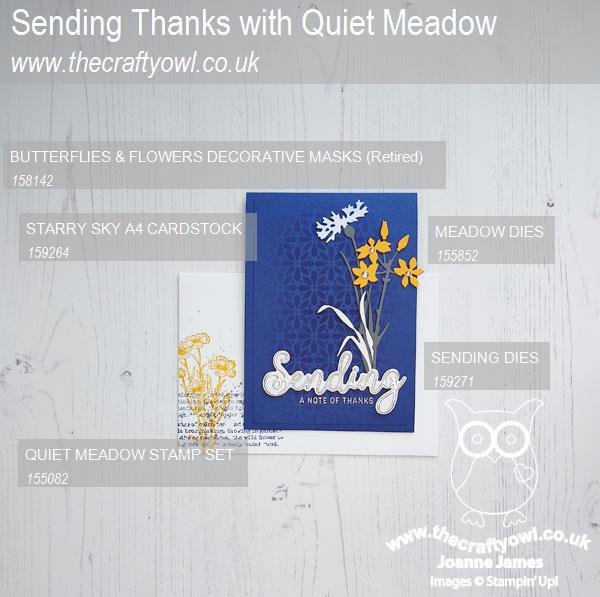
Here is the visual summary of the key products used on today's project for you to pin for easy reference:
You can see all of my 'How To' summaries on my 'How To - Tips and Techniques' Pinterest board in case you've missed any.
Enjoy your day and I'll be back shortly with card number two. Until then, happy stampin'!
Stampin' Up! Supplies Used:
38588dda-b94b-44d2-8428-9a2bd6a5050c|0|.0|96d5b379-7e1d-4dac-a6ba-1e50db561b04
Tags: Shop Stampin' Up! Online, Stamping Shop Stampin' Up online, Shop online, Stampin' Up, Stampin' Up Card ideas, Stampin' Up Supplies, Stampin' Up Card, Quiet Meadow, Sending Dies, Meadow Dies, Sending Smiles, Stencilling, Butterflies and Flowers Layering Decorative Masks
Cards | Shop Online | Shop Stampin' Up! Online | Stamping
by Joanne James25. September 2022 08:00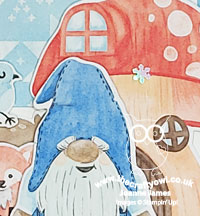
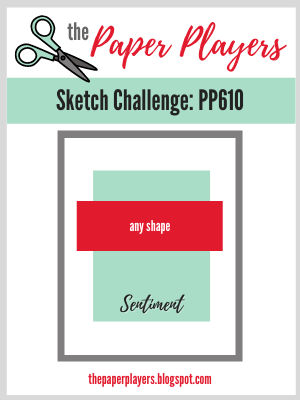
Today it's Sunday and time for this week's new challenge over at The Paper Players! It's the turn of the fabulous Jaydee to host this week and she has my favourite, a sketch challenge for us to work with:
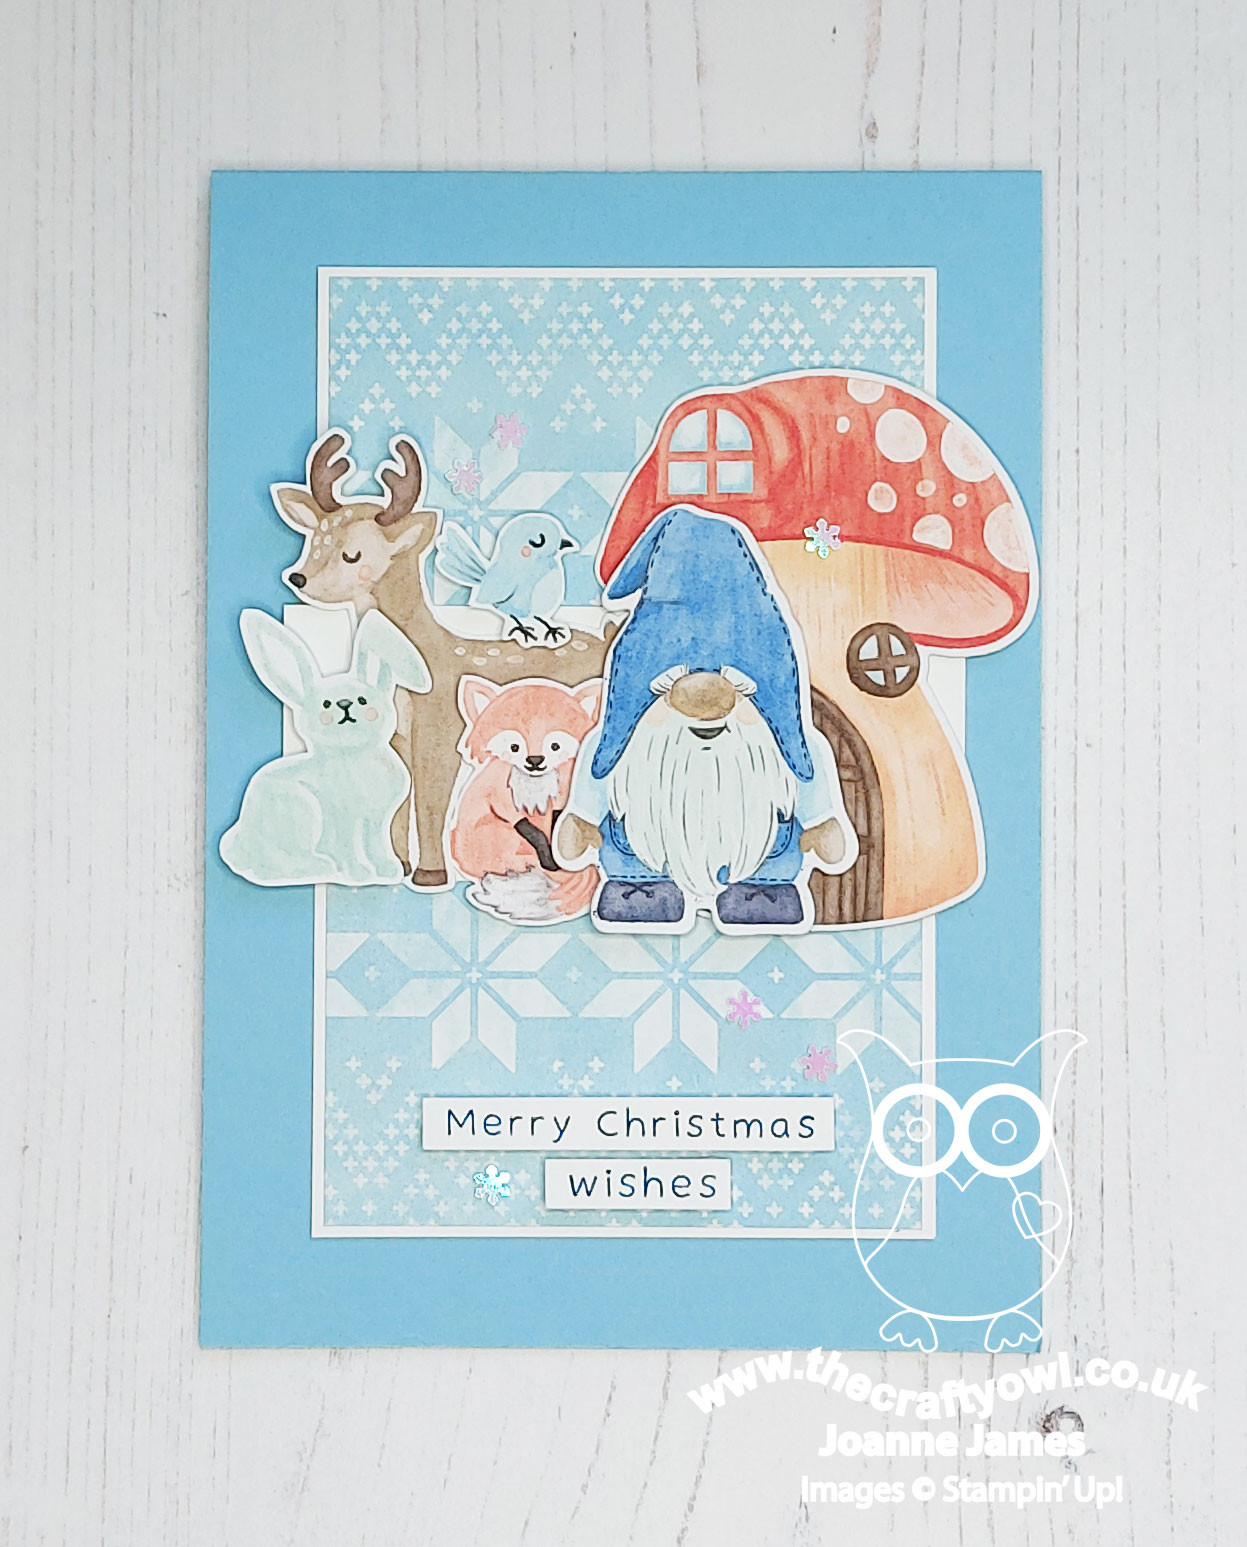
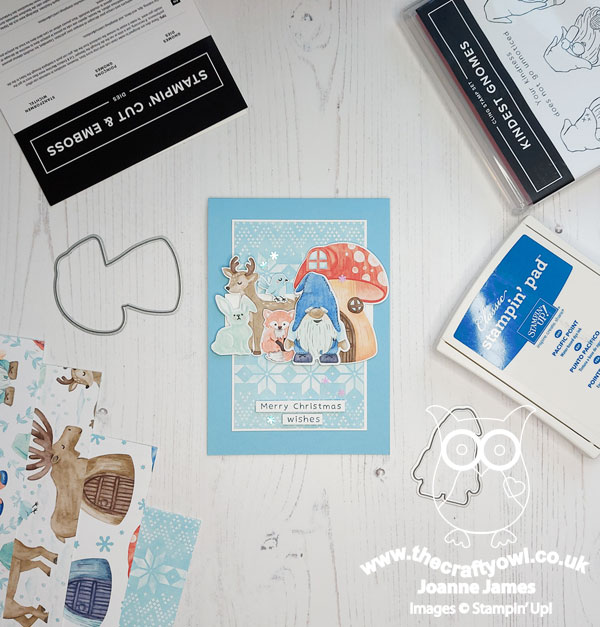
I decided to go with another Christmas card today and spent some time fussy cutting a host of cute and cuddly animals, gnomes and toadstools from my Storybook Gnomes designer series paper to create a sweet festive scene - take a look:
Here's the low-down on today's card:
If you don't mind a little fussy cutting, this card comes together really easily. I added a panel of patterned paper to my Balmy Blue card base, then built my little scene for the horizontal element. The gnome and toadstool can be cut out with the Gnomes Dies - only the remaining animals require fussy cutting. Here's my completed lineup:

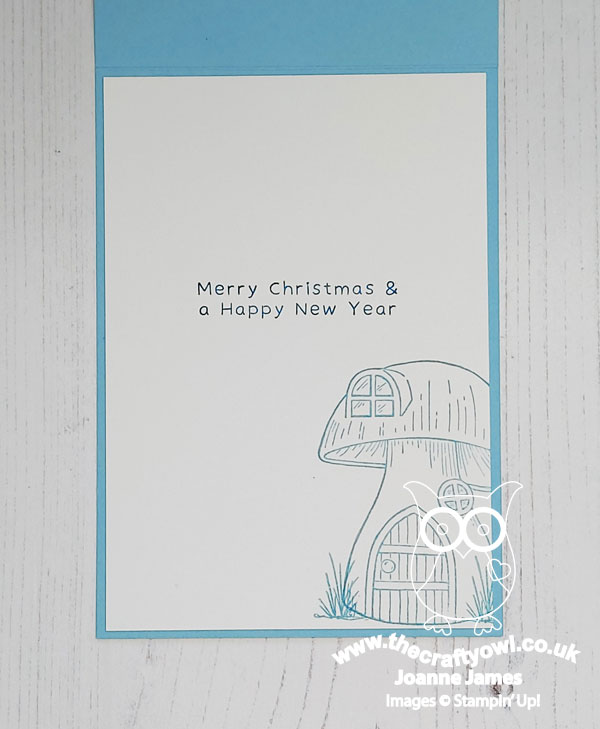
A sprinkling of (retired) adhesive snowflakes, a simple stamped sentiment from the 'Kindest Gnomes' stamp set and a little stamping on the inside completes my card:
I am also linking up today's card over at Alphabet Challenge Blog where they are currently on 'M is for Magic', so my magical gnome and friends should fit right in!
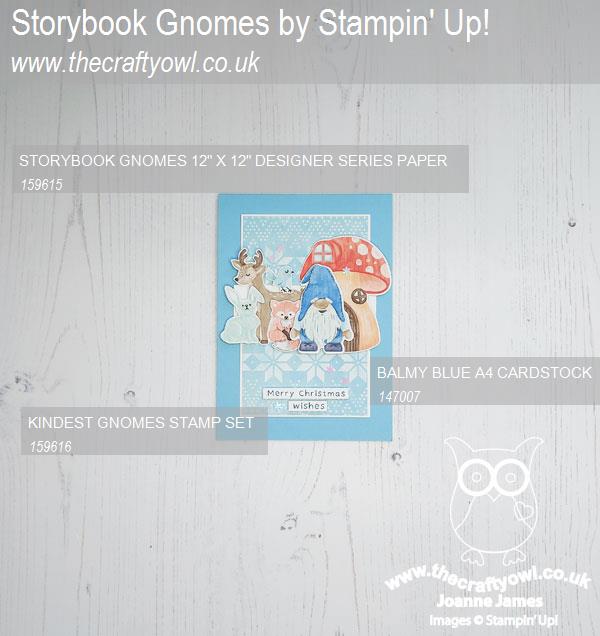
Here is the visual summary of the key products used on today's project for you to pin for easy reference:
You can see all of my Product and 'How To' summaries on my 'How To - Tips and Techniques' Pinterest board in case you've missed any.
Before you reach for your ink and papers, check out what our amazing team has created to inspire you this week:
The Paper Players Design Team
Here's a quick recap of our challenge rules:
1. Create a new paper project
2. Upload your creation to your blog with a link back to us and provide a direct link to the post featuring your challenge submission.
3. Please link your card to no more than four challenges, TOTAL.
4. Have FUN!
Enjoy your day; we are having a day of catching up with homework, ready to start the new school week. I managed a little crafty time yesterday so I'll be back tomorrow with another project. Until then, happy stampin'!
Stampin' Up! Supplies Used:
91b8f084-d2ab-4b81-a79c-24ce29c0cde1|0|.0|96d5b379-7e1d-4dac-a6ba-1e50db561b04
Tags: Shop Stampin' Up! Online, Stamping Shop Stampin' Up online, Shop online, Stampin' Up, Stampin' Up Card ideas, Stampin' Up Supplies, Stampin' Up Card, The Paper Players, Storybook Gnomes, Kindest Gnomes, Christmas, Gnomes Dies
Cards | Shop Online | Shop Stampin' Up! Online | Stamping
by Joanne James23. September 2022 12:00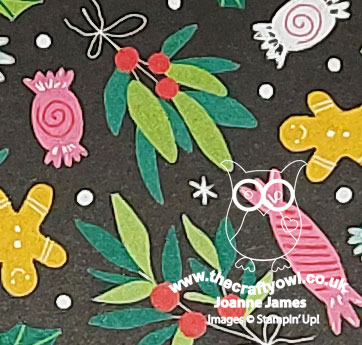
Today I'm sharing my design team card for our new challenge over at As you See It where it's time for my favourite, a sketch challenge:
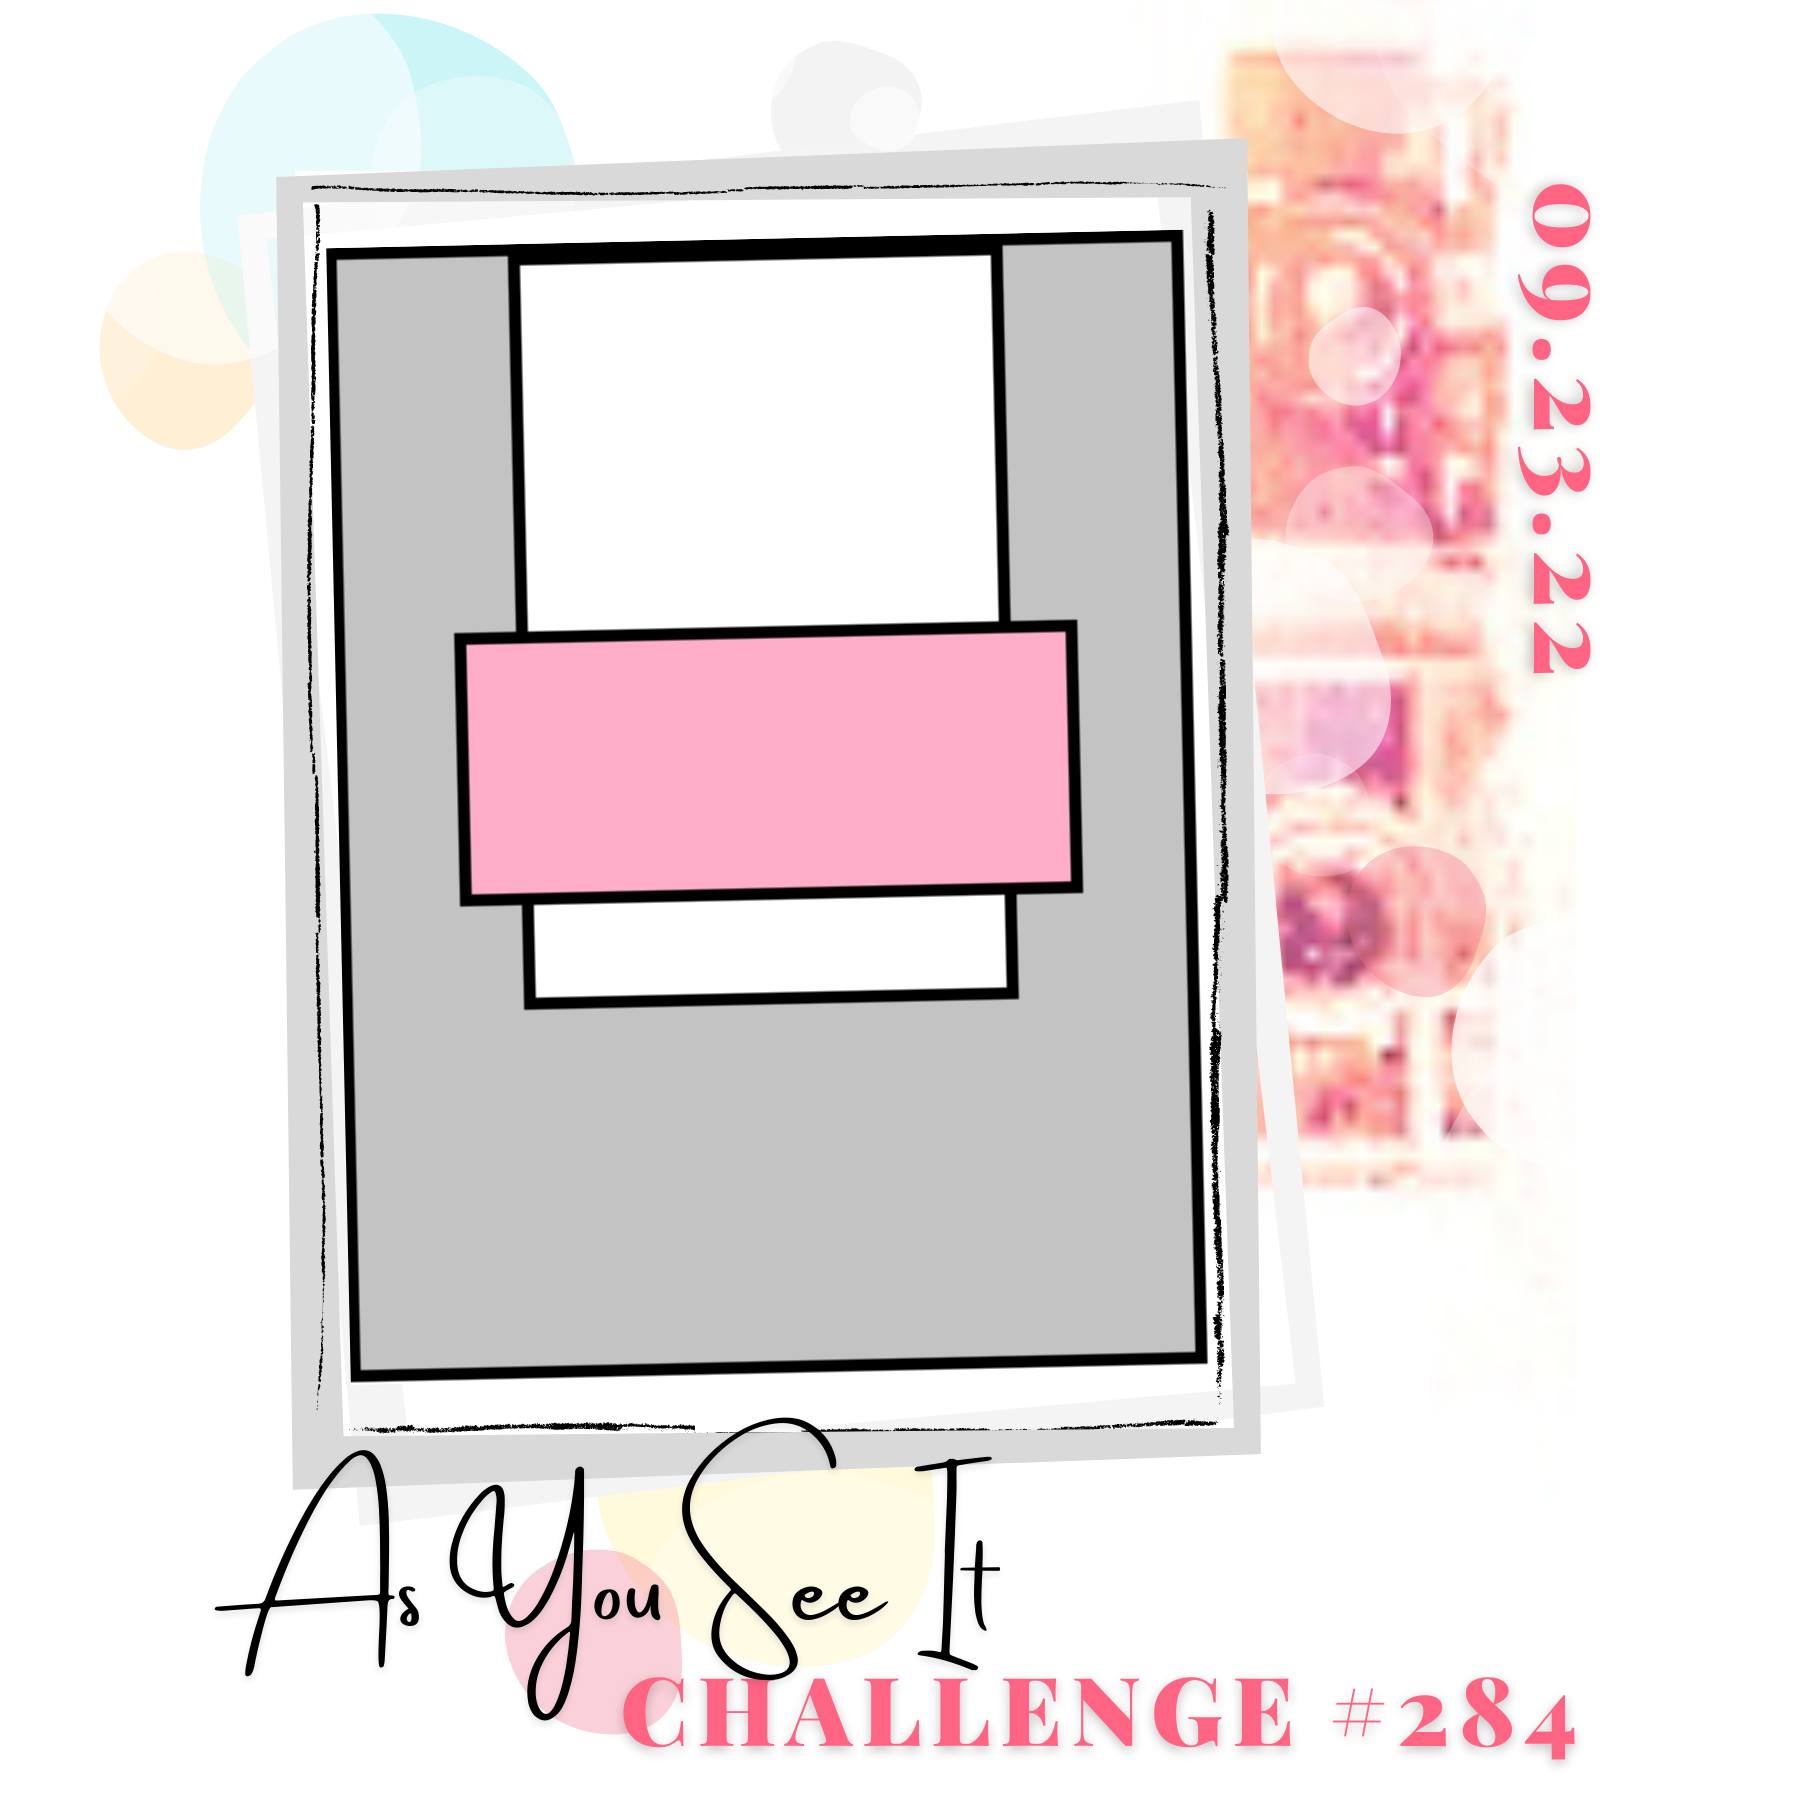
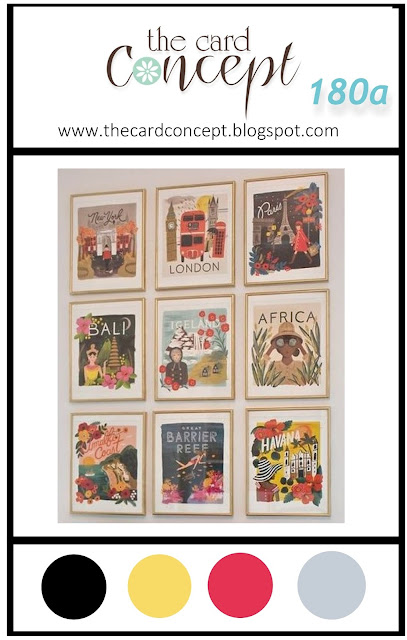
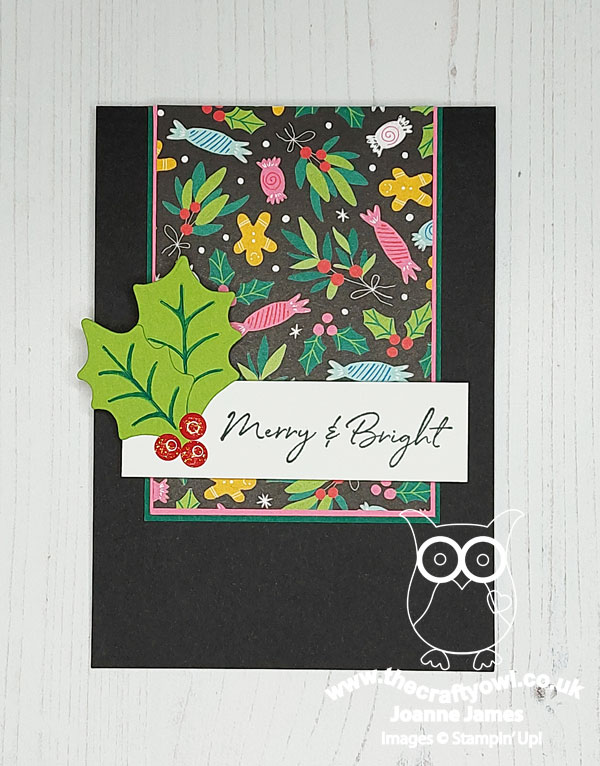
I love a good sketch, but I don't mind admitting this week's card was a struggle! Too little craft time and a chaotic craft room are not a good mix, so with my card making deadline looming, I was feeling the pressure. A few failed attempts and I decided therefore that simple would be best. I had seen the inspiration photo earlier in the day over at The Card Concept (there are actually two now for their second challenge of the month - fun!) and whilst I wasn't inspired by the travel theme, I loved their first inspo photo of brightly coloured stylised prints and the one for Bali was the inspiration for my card design today. The bold colours on a dramatic black background with bright pink floral accents led me to grab another of the designs in the 'Celebrate Everything' designer series paper pack and pull together a simple clean and layered Christmas card - take a look:
Here's the low-down on today's card:
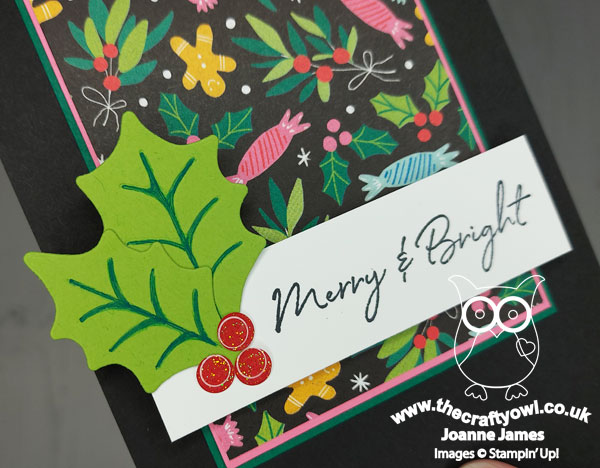
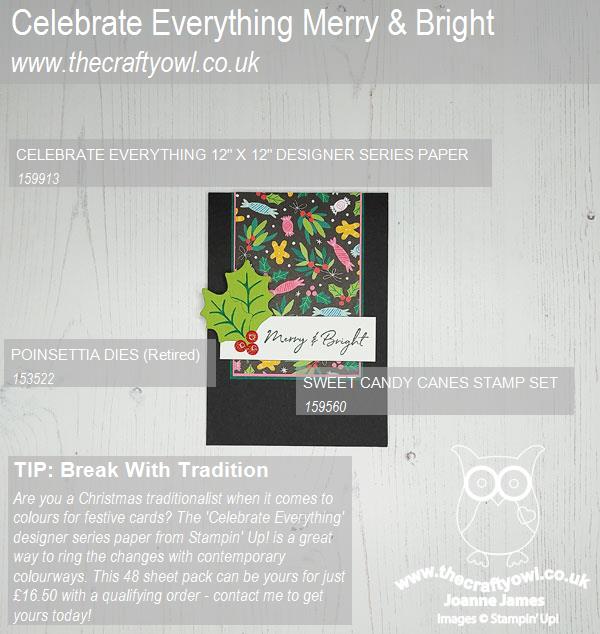
I cut a panel of this brightly patterned paper, double mounted it onto Polished Pink and Shaded Spruce, and added it to a Basic Black cardbase. I added a sentiment from the 'Candy Canes Christmas' stamp set that seemed to fit this bold, fun design and accented it with a couple of diecut holly leaves (taken from the retired Poinsettia Dies, as they were just the right shape and style). I added some detail to the embossed lines with a Shaded Spruce marker to echo the holly design on the paper and finished with a trio of large red glittery enamel dot berries, taken from my stash:
So what do you think? Are you a traditionalist when it comes to Christmas colour schemes or do you like to break the mold every now and again and go with something more contemporary? I admit a black card base is not my usual Christmas card 'go to', but I think it works. I'm not sure I'm going to win any awards with this one (haha!) and the design team over at As You See It have created some AMAZING cards with this sketch, so you should definitely check those out. One thing's for sure I love the 'Celebrate Everything' designer series paper pack - this is definitely the paper that keeps on giving!
Here is the visual summary of the key products used on today's project for you to pin for easy reference:
You can see all of my 'How To' summaries on my 'How To - Tips and Techniques' Pinterest board in case you've missed any.
Here's a summary of our challenge rules:
- Create any card, scrapbooking page, 3D project or packaging project that fits the challenge.
- Please include the challenge graphic and link back to the challenge in your blog post. Turn off word verification so we can leave you lots of lovely comments. Make sure you link the post not the whole blog to the Linky. Use #AYSIXXX when uploading to a public gallery.
- If you’re unsure about ‘the rules’, check the details under the Challenge Guidelines tab on the As You See It Challenge homepage.
- In a sketch challenge, you are welcome to rotate or flip a sketch. You can replace shapes used such as substituting a circle panel for a square panel. However, we must be able to still see the basis of the original sketch in your finished product.
We look forward to seeing your creations in the AYSI gallery.
Enjoy your day; I'm off to a funeral - the wet and gloomy day definitely is reflective of that mood. I am hoping to be back in my craft room tomorrow though, so will hopefully be ready to share another project. Until then, happy stampin'!
Stampin' Up! Supplies Used:
9dc351f9-2ba3-4880-bcc6-507385c730d7|0|.0|96d5b379-7e1d-4dac-a6ba-1e50db561b04
Tags: Stampin' Up, Stampin' Up Card, Stampin' Up Card ideas, Stampin' Up Supplies, Shop online, Shop Stampin' Up online, Shop Stampin' Up! Online, As You See It Challenge, Christmas, Poinsettia Dies, Candy Cane Christmas, Celebrate Everything
Cards | Host a Party | hosting | Shop Online | Shop Stampin' Up! Online | Stamping
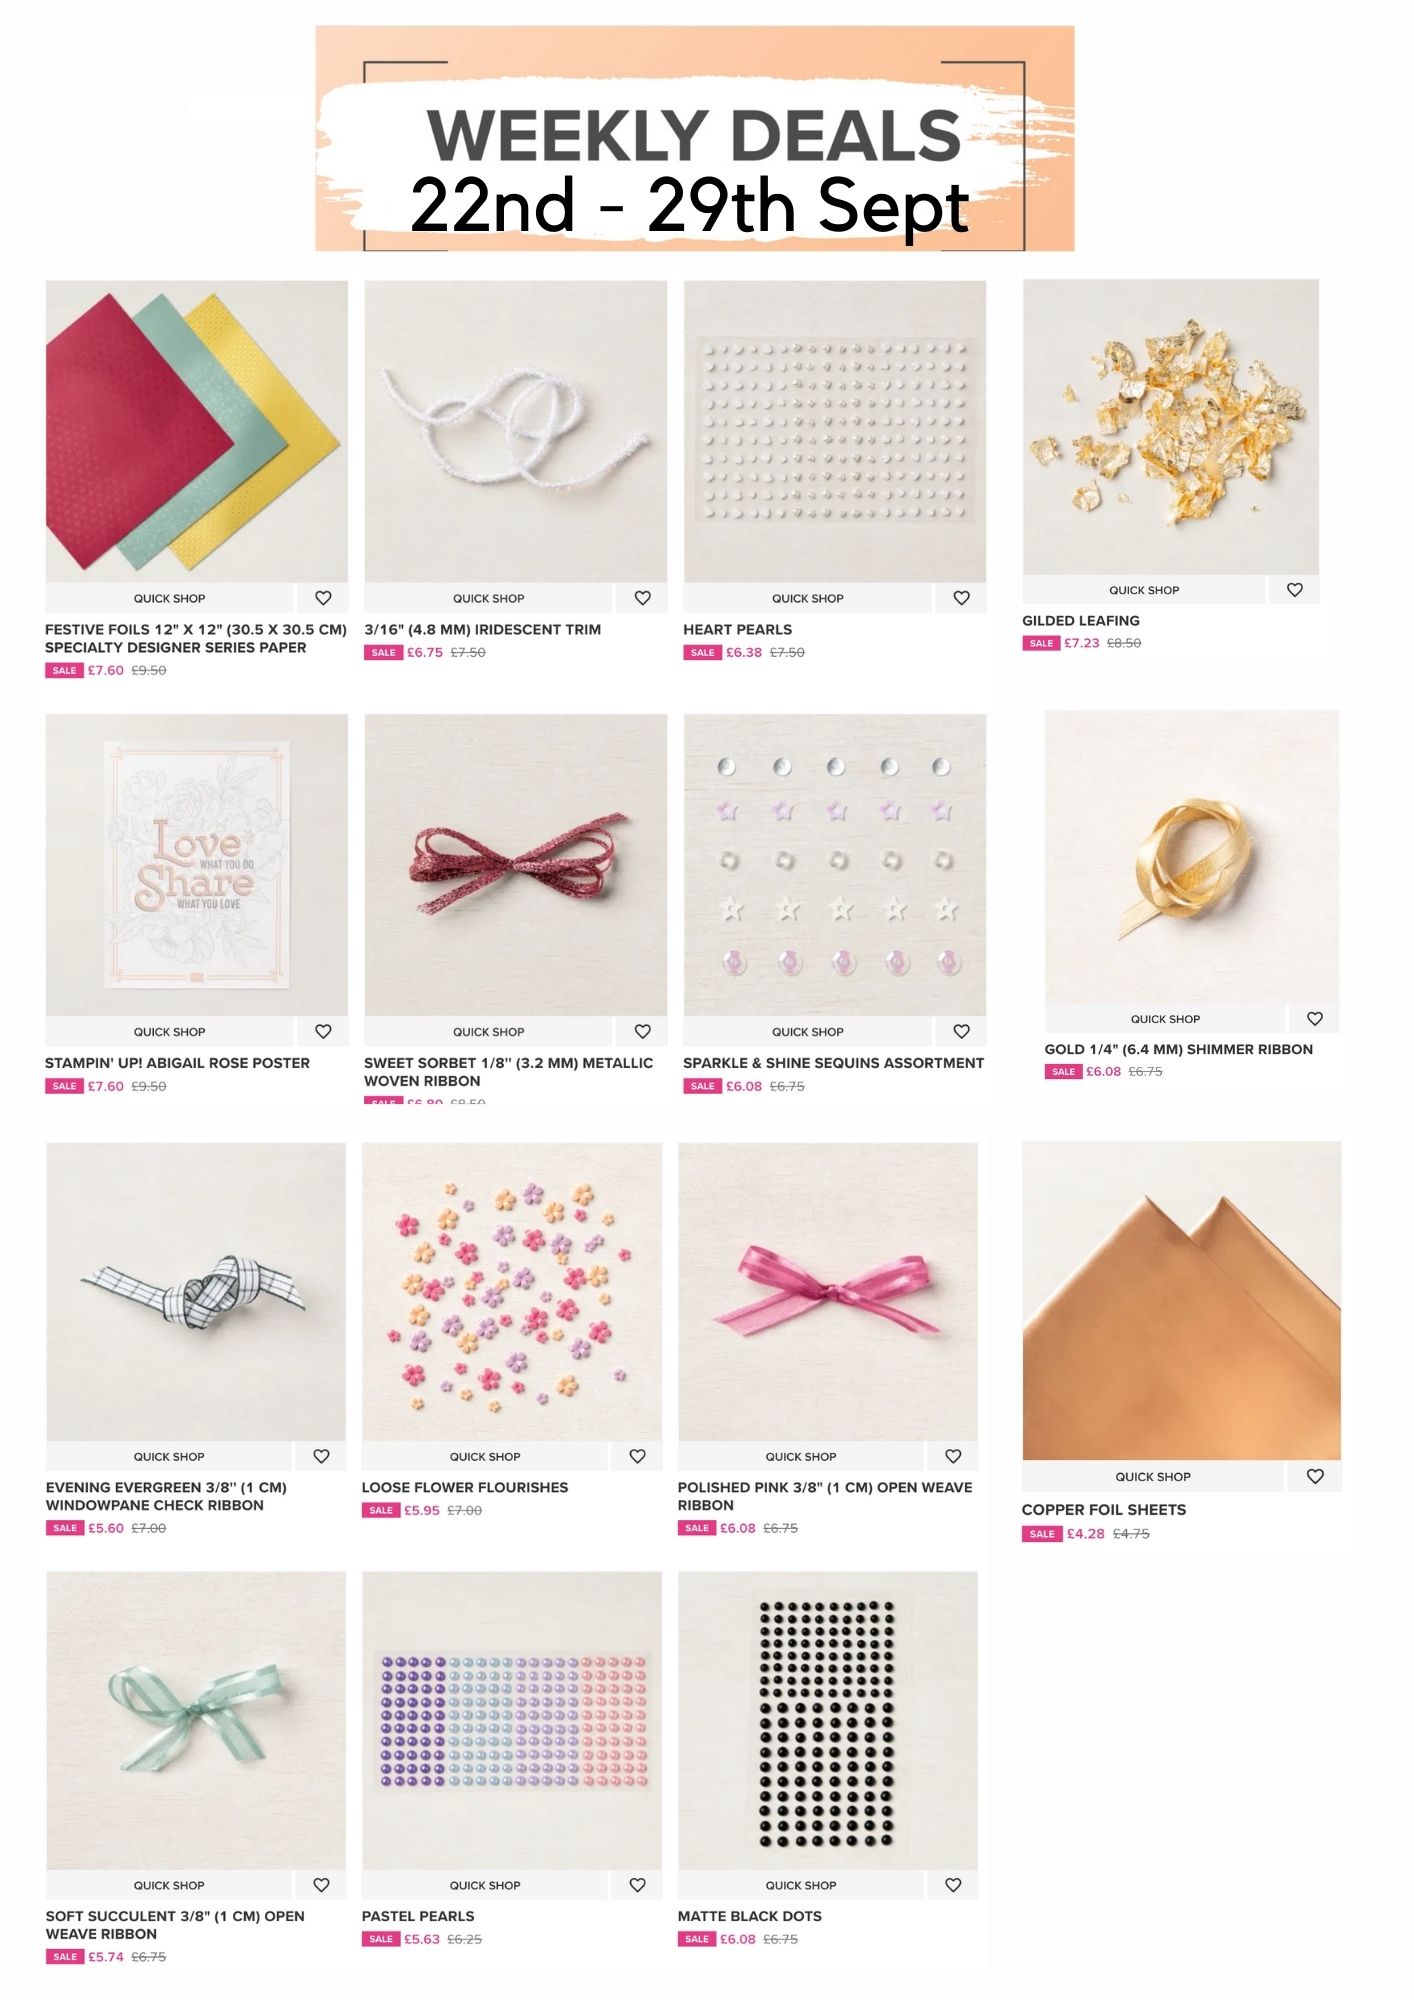
by Joanne James21. September 2022 11:00As promised in yesterday's post: it's Wednesday and there is a new collection of Wednesday Weekly Deals! Here are this week's deals:
If you want to take advantage of any of the deals on offer, you can support my business by placing your order online by clicking here or using the link to my store on the right hand side of my blog page where it says 'Shop Online' or with me in person. Don't forget to add the Hostess Code for September WUN4D92Q if your order is under £150 and be sure to make sure that you don't check the 'no contact' box if you'd like to be kept updated with the progress of you order and receive a little thank you in the post from me.
Here's a summary of this week's one-week only Wednesday deals - lots to choose from this week! Click on each item to go to the online store to purchase:
In other news - my office window is finally in and I am hurriedly trying to get everything unpacked so that I can start creating again. Normal service will be resumed shortly; meanwhile, happy shopping!
by Joanne James20. September 2022 10:00
There is no creative post today; I am having new windows fitted at home and unfortunately there has been a problem with the one for my craft room, so my office is currently out of action and has been inaccessible for longer than I anticipated. These things happen and things are being sorted out today so hopefully I will have my CAS Colours and Sketches card for you tomorrow.
Instead, I thought I'd share some promotional news with you that I have yet to post here on the blog - my recent vacation caught me on the hop with September announcements and there is lots going on! Those of you that have been around for a while will remember Wednesday Weekly Deals: the way they work is a range of products will be discounted each week for one week only; new weekly deals will be announced every Wednesday. We won't know what they are in advance: you will simply need to go to my online DBWS store to find out what they are. Wednesday Weekly Deals are running for the month of September - so there are two weeks of deals remaining. I've included links to this week's deals below and will share next week's deals when they are announced in a separate post tomorrow.
As always, if you want to take advantage of any of the deals on offer, you can support my business by placing your order online by clicking here or using the link to my store on the right hand side of my blog page where it says 'Shop Online' or with me in person.
Here's a summary of this week's one-week only Wednesday deals, available until tomorrow evening 10.50pm - click on each item to go to the online store to purchase:
Back tomorrow with a new set of deals - until then, happy shopping!
by Joanne James18. September 2022 08:00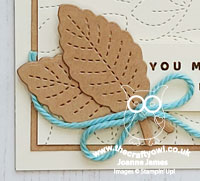
Today it's Sunday and time for this week's new challenge over at The Paper Players! It's the lovely Claire's turn to host this week and she has a seasonal clean and simple challenge for us to work with:
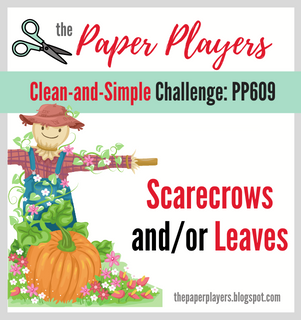

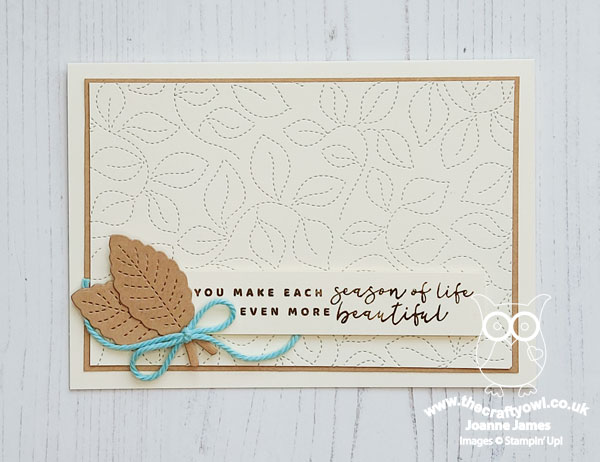
Scarecrows and/or leaves! Well, I don't have any scarecrow stamps in my collection, so it was punch art (rarely a good choice for clean and simple cards!) or leaves! I have lots of leaf options and I thought the Stitched Greenery die would be perfect for a clean and simple card that celebrates leaves - take a look:
Here's the low-down on today's card:
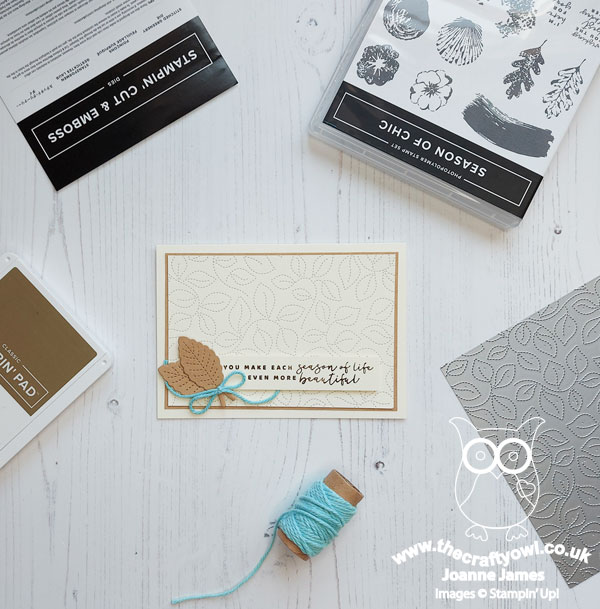
I used the neutral colour palette over at The Color Throwdown and made my Very Vanilla stitched leaves backplate the centrepiece of my card. I added a simple greeting from 'Season of Chic', anchored with a couple of leaves cut using the (retired) Stitched Leaves dies in kraft that I tied with a bow of (retired) thick Pool Party baker's twine. Check out that stitched detailing:
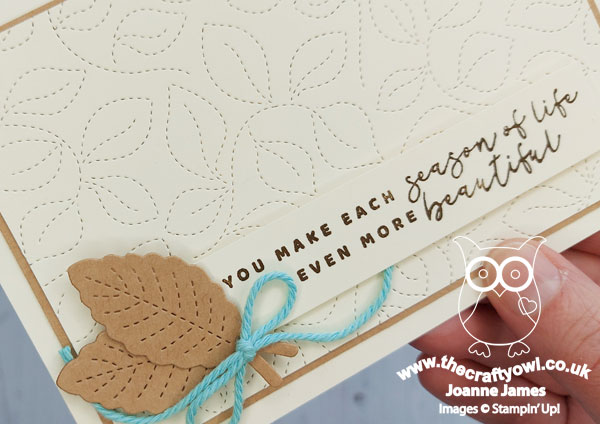
I love the simplicity of this card with the neutrals and the pop of aqua blue from the twine. A great seasonal notecard and so quick and easy to make too!
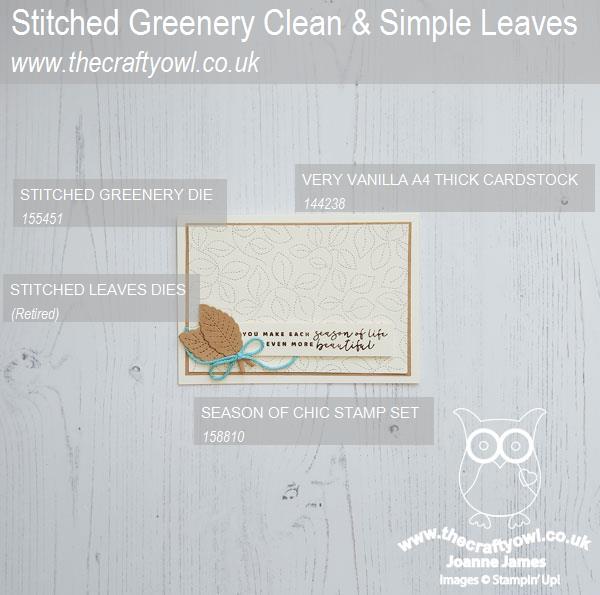
Here is the visual summary of the key products used on today's project for you to pin for easy reference:
You can see all of my Product and 'How To' summaries on my 'How To - Tips and Techniques' Pinterest board in case you've missed any.
Before you reach for your ink and papers, check out what our amazing team has created to inspire you this week:
The Paper Players Design Team
Here's a quick recap of our challenge rules:
1. Create a new paper project
2. Upload your creation to your blog with a link back to us and provide a direct link to the post featuring your challenge submission.
3. Please link your card to no more than four challenges, TOTAL.
4. Have FUN!
Enjoy your day; nothing special planned here today - if I can find a little crafty time I'll be back tomorrow with another project. Until then, happy stampin'!
Stampin' Up! Supplies Used:
914557b9-9a64-4aa8-bcdf-c6e0e6a16af8|0|.0|96d5b379-7e1d-4dac-a6ba-1e50db561b04
Tags: Shop Stampin' Up! Online, Stamping Shop Stampin' Up online, Shop online, Stampin' Up, Stampin' Up Card ideas, Stampin' Up Supplies, Stampin' Up Card, The Paper Players, Stitched Leaves Dies, Stitched Greenery, Season of Chic
Cards | Shop Online | Shop Stampin' Up! Online | Stamping