Pretty Pines Christmas Home Decor Frame

by Joanne James13. November 2016 09:00

It's Sunday and time for a new challenge over at The Paper Players! It's my turn to host this week and I have a colour challenge for you to work with:


I have another Pretty Pines project for you today, but a 3D project for a change as opposed to a card. I made this home decor frame to showcase these fabulous dies - and adorn my home during the festive season of course! Take a look:


Here's the low-down on today's project:

Pretty Pines - I love these dies and they are perfect to create festive embellishments for cards, gift packaging or a home decor project such as this one. I focused on the pine needles, berries and mistletoe pieces to make my wreath - not a pinecone in sight - as I wanted to stick to my red, green and white colour scheme. Using the Big Shot Precision Base Plate and the die brush also made light work of removing the pieces from the framelits. I added a bow in Real Red stitched edge ribbon as a finishing touch:

A Joyful Christmas and a Wonderful Year - I chose the Joyful Christmas sentiment from the 'Wonderful Year' stamp set as the focal point for my frame. This is the perfect sentiment for this frame, which I am intending to display in my hallway to welcome guests over the festive season.

Ombre, Ombre - I stamped my focal sentiment in Emerald Envy using the ombre stamping pad for added interest. I love the gradation of colour you get with these stamp pads and they really are so easy to use.

Here is the visual summary of the key products used on today's project for you to pin for easy reference:
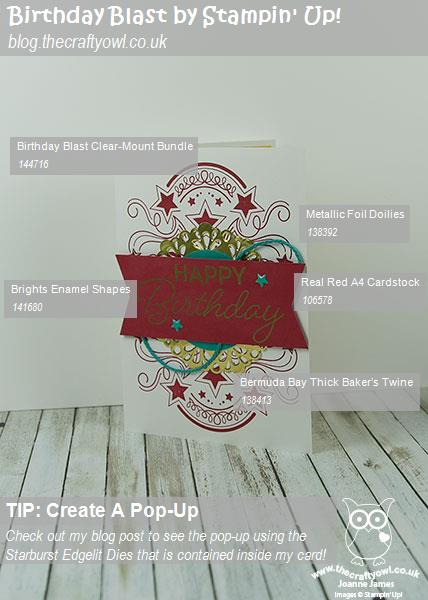
 

You can see all of my 'How To' summaries on my 'How To - Tips and Techniques' Pinterest board in case you've missed any. 

Before you reach for your ink and papers, check out what our amazing team has created to inspire you this week:

The Paper Players Design Team
 
 
Here's a quick recap of our challenge rules:
 
1.  Create a new paper project
2.  Upload your creation to your blog with a link back to us and provide a direct link to the post featuring your challenge submission.
3.  Please link your card to no more than four challenges, TOTAL.
4.  Have FUN! 

I look forward to seeing what you create with my colour choices this week. We are doing something a little different in terms of sporting pursuits today: Ben is off for his usual session of basketball, however Rebecca is going to be at the swimming pool bright and early as she is participating in a sponsored swim in aid of For Zachary, a charity set up in memory of a little boy who lived for only 69 days before dying from a rare neonatal lung disease. The swimmers are aiming to cover a distance of 69km in total, one kilometre for each day of young Zachary's life - and Rebecca is aiming to swim just over 3km herself. That will be no mean feat! She is still collecting sponsorship, so if you're reading this and you would like to sponsor her, here is the event's JustGiving page - many thanks and I''l let you know how she gets on.

Enjoy the rest of your weekend as it will be over all too quickly; I'll be back tomorrow with another project; until then, happy stampin'!


Stampin' Up! Supplies Used:

Table built using Product Table Builder by The Crafty Owl - Independent Stampin' Up! Demonstrator.

Forever Evergreen Project Kit Christmas Trees

by Joanne James2. November 2016 09:40

Wednesday already? Happy 'hump day' everyone! Today I have a 3D project for a change - I want to share the trio of Christmas trees I made using the Forever Evergreen Project Kit in the seasonal catalogue. My regular readers will know what a fan I am of Stampin' Up!'s kits: they are great for everyone from the complete novice to the seasoned crafter and are the perfect option for a fun afternoon or evening activity with friends.

The Forever Evergreen kit comprises three Christmas trees, one 33cm tall and two 27.9cm tall - complete with decorations. You then need some additional basic items to complete the project: the Forever Evergreen stamp set, ink pads and adhesives. Here are my trees in all their glory - first the largest one in Garden Green:


The second, smaller one also in Garden Green:


And lastly, the final smaller one, this time in Wild Wasabi:


I have to say the catalogue really doesn't do these trees justice; they are way more impressive in real life and having had them on display at the craft show I exhibited at recently they were the subject of many 'oohs' and 'aahs'. Many of my customers have passed comment on them as they've been in and out for classes too. If you would like to purchase these kits to make at home, Stampin' Up! has produced a very helpful video that is worth watching before you start putting the kit together:

If you would like to get together with me in person to make this kit, you have a couple of options: you can gather with friends and purchase a kit each and have me bring the extra supplies needed for a crafty afternoon or evening in with friends. Alternatively you could join me for my next Crafternoon Tea at Bell's in Kingsthorpe, Northampton, on Saturday 19th November from 10am-2pm, when we will be making this kit and finishing with an afternoon tea prepared by the Cafe @ Bells in store - contact me to book your place. 

I hope you've enjoyed your day today; I enjoyed a crisp autumn day kicking leaves in the country park and a hockey match (unfortunately no win today, but another match on Saturday so hopefully their luck will change!). I'll be back tomorrow with a Christmas card for this week's new challenge over at Create With Connie and Mary. Until then, happy stampin'!


Stampin' Up! Supplies Used:

Table built using Product Table Builder by The Crafty Owl - Independent Stampin' Up! Demonstrator.

Halloween Spooky Fun Treat Boxes

by Joanne James25. October 2016 21:35

Another week and Tuesday already! The James Juniors are on their half-term holiday from school this week as are lots of other children in the area; I had a children's class today making fun Christmas crafts (you can read all about it on my Facebook page here - do give me a 'like' if you'd like to be kept up to date with events and photos). This week I have lots of Halloween fun for you, starting with some quick and easy cute packaging ideas for Halloween treats that are perfect for this week's TGIF Challenge:


I used some of the clear tiny treat boxes so that you could see the goodies inside and decorated with belly bands made from Halloween Night Designer Series Paper and black baker's twine. Here's the first one, a box of pumpkin chocolate balls decorated with a tag made using the Tags and Labels framelits and the Spooky Fun/Halloween Scenes bundle:


For my second box I created an eyeball tag using a 1 1/4" circle punch:


Well, what else for a box of eyeballs, right? In case you're wondering how I achieved the bloodshot look, it's actually really easy - I used the tips of the tree branches from the Sheltering tree stamp set:


Clever and rather effective, even if I say so myself! I love it when a set can be used for more than one thing.

Here is the visual summary of the key products used on today's project for you to pin for easy reference:


 You can see all of my 'How To' summaries on my 'How To - Tips and Techniques' Pinterest board in case you've missed any. 

I'll be back tomorrow with more Halloween treats, so stay tuned. Until then, happy stampin'!


Stampin' Up! Supplies Used: 

Table built using Product Table Builder by The Crafty Owl - Independent Stampin' Up! Demonstrator.

Did You Miss Me?

by Joanne James4. October 2016 21:31

A four day blogging break - that has to be the longest in a while! Did you miss me? Last week went by in something of a whirlwind as I was exhibiting at the Great British Craft Show in Stoneleigh Park with my good friend and fellow Stampin' Up! demonstrator Louise Sims, so my time was taken up with last minute preparations for the show and then attending the show itself. Here's a picture of us in front of our stand on Saturday morning raring to go:

We had a great couple of days and it was lovely to meet so many wonderful crafters who we were able to introduce to Stampin' Up! and I am very much looking forward to seeing them again in the future at an event, class or online. 

Whilst I have lots of wonderful projects to share with you here in the coming days and months, today I'm sharing two special offers that you definitely need to know about. The first is one that ends tomorrow, so get in quick!

To celebrate World Card Making Day last Saturday, there are a limited number of products on offer until 5th October:

Lots of great card making staples in there, including great deals on Fast Fuse and in-colour cardstock and envelope paper. Best of all though has to be the offer price on the Envelope Punch Board and the Designer Tin of Cards Kit - you know what a fan I am of Stampin' Up! kits, well this one really doesn't disappoint. A great product for a fun crafty night in with friends or it would make a lovely early Christmas gift. Do get in touch if you'd like to purchase; I will be putting in an order tomorrow night and if you are local to me you are welcome to add to my order and save on postage.

As if that wasn't enough, there is also an amazing offer on designer papers for the entire month of October:

B3G1DSP_DemoHeader_UKSP

This sale includes Designer Series Paper from both the annual catalogue and the recently released autumn/winter catalogue (not including Specialty Designer Series Paper or Designer Series Paper Stacks). Here are the full details of the paper collections that are included: 

I will be sharing lots of samples using these papers - in fact, pop back tomorrow and you will see the first of many!

Until then, happy stampin'!

Thoughtful Branches Family Tree Home Decor Frame

by Joanne James3. August 2016 10:00

Happy Wednesday everyone! As promised, I have another project today using the limited time stamp set and thinlits bundle 'Thoughtful Branches' - a home decor frame that includes my family tree. As soon as I saw this set I knew it would be perfect for a family tree idea that I've had in mind for a while, so combined with my 'Letters For You' stamp set and co-ordinating Large Letters Framelits I set to work. Here is my finished project:


This is a rather large project - it has a finished frame size of 9" x 19 3/4" - so was something of a challenge to photograph - but I absolutely love it! 

Here's the low-down on today's project:

Letters For You - I recently invested in this letters bundle - 'invested' being the key word here, as at £119.50 the bundle is the most expensive in the catalogue - but so worth it for projects like this one. The set has the whole alphabet along with useful punctuation and just like the Large Numbers Framelits and Number of Years stamp set, it is a set that can be used for so many projects and is timeless - a definite 'keeper'. I stamped my letters in Early Espresso and cut them out using my Big Shot and co-ordinating framelits, then substituted the 'I' in 'FAMILY' with my family tree.

Thoughtful Branches Tree - I stamped and cut out my tree trunk, then in order to create a tree big enough to comfortably accommodate my family members, I cut three treetops and layered them to create a fuller tree. Each one was backed with another base (so I cut 6 tree tops in all) for rigidity and I layered them together for added dimension. 

Family Touches - I stamped the names of each of my family members in black onto Whisper White cardstock using the modern Labeler Alphabet and cut them out by hand, then placed them in my tree in descending order of age and with a couple of birds to identify the parents and the apples identifying my children. Here's a close up of the tree so that you can see all of the elements in more detail:

This took longer to work out and put together than explain - but I am so pleased with the end result and am looking forward to hanging it on the wall. You are so going to want to get the Thoughtful Branches Bundle this month!

Here is the visual summary of the key products used on today's project for you to pin for easy reference:


You can see all of my 'How To' summaries on my 'How To - Tips and Techniques' Pinterest board in case you've missed any. 

I'm linking today's project up with the team over at SUO Challenges where the theme this week is 'Delightful Dies' - the two I've used on this project are definitely firm favourites.

Enjoy your day; I'm off for a bike ride and some fresh air whilst the unpredictable British weather holds! I'll be back tomorrow with this week's new challenge over at Create With Connie and Mary. Until then, happy stampin'!


Stampin' Up! Supplies Used:

Table built using Product Table Builder by The Crafty Owl - Independent Stampin' Up! Demonstrator.

Just a Note Music Note Thank You Card and Box Frame

by Joanne James14. May 2016 21:45

Well after an incredibly busy week I've finally managed to squeeze in another blog post! What's more, I also had a few hours at my desk this afternoon and instead of tidying up or sorting out retiring stock, I decided to get making - I've not put ink to a stamp in a whole week myself! I'm sat watching the annual music fest that is Eurovision as a type, so it seemed like a good day to share a couple of music-themed projects with you.

As my regular readers will know, we are something of a musical family: three pianists, a guitarist and we all like to sing (some of us better than others, it has to be said!) Rebecca recently sat her Grade 3 singing exam and subsequently wanted to make a little something for her vocal coach to say thank you for all her teaching and support. We don't have much in the way of musical stamp supplies, so armed with a suitable sentiment from the 'Watercolour Wishes' stamp set, some retired designer series paper and my Silhouette Cameo e-cutter, we set to work to create two projects. We created both a card and a boxed dimensional frame. Here is the frame, complete with layered treble clef:

Rebecca was so pleased with this, we then downloaded a second cut file and created this co-ordinating thank you card:

I love both of these projects and they definitely made me want to use my e-cutter more. Rebecca and I certainly had a lot of fun putting them together and her singing teacher loved them. Rebecca also got a merit for her exam performance too, so all in all a great result all round. Let's hope the United Kingdom Eurovision entry achieves similar success tonight!

I'll be back tomorrow with this week's new challenge over at The Paper Players; until then, happy stampin'!


Crafternoon Tea at Bell of Northampton - Spaces Available!

by Joanne James11. April 2016 19:00

I have had a busy start to my week: the James Juniors are back at school after an enjoyable Easter break so today has been spent catching up on correspondence, spending more time making my swaps for Onstage later this week and planning for my week ahead, which includes the fist of this month's Technique Classes tomorrow - more on that later this week.

Today I want to share a home decor project that I will be making at my 'Crafternoon Tea' event that I am holding at Bell of Northampton in Kingsthorpe on Saturday 7th May, featuring the Botanical Builder Framelits Dies and the 'Hello Life' stamp set:

All instruction and materials will be provided for the session and each person will leave with a decorated 9” x 9” frame to keep. Check out this close-up of the gorgeous flowers: 

Once you’ve completed your project, you can tuck into a scrumptious afternoon tea for two with scones and cakes alongside a large selection of sandwiches stuffed to bursting with egg mayonnaise, chicken and horseradish, cheddar cheese with chilli jam and many more scrumptious fillings freshly prepared by Tea and Cake @ Bell.

The session will run from 10am-2pm on Saturday 7th May and cost £56 for two people. Buy it for yourself or as a gift! Why not treat yourself and your mum, friend or daughter to a voucher for an indulgent afternoon tea and crafting session! There are still spaces left for this event - I would love you to join me! If this is something that appeals to you, click here to make your booking online.

I'll be back tomorrow with a 'sneak peek' of the card that I will be making in my drop-in Coffee and Card Session at Bell's on Wednesday this week between 10-12 noon. Until then, happy stampin!

Tags: , , , ,

3D Projects | Classes

Sleigh Ride Edgelits Christmas Ornament with Salt Technique Background

by Joanne James20. December 2015 21:29

It's Sunday and whilst there is no Paper Players post from me today - we are taking a couple of weeks off from our design commitments to enjoy the festive season with our families - however fear not - as promised I still have a project to share with you today! 

My December technique classes featured creating backgrounds with the salt technique. I had created the following pair of cards cased from the lovely Jen Timko just for fun:

I just loved the white, layering and beautiful and unique sky created using this fun technique:


You can see Jen's card and a great video on the technique here. In my class we made a similar card using the 'Jingle All the Way' stamp set but the real focus of our class was a 3 dimensional Christmas bauble ornament and a co-ordinating box to gift it in, all featuring backgrounds made using this technique. Here is my finished bauble:

This bauble is quite stunning in real life; the layering, silver foil and embossing and dazzling diamonds glimmer paper, along with that amazing sky, really show the Sleigh Ride Edgelits off to full advantage. I'm so sorry that these will not be carried over on 4th January; if you haven't already purchased them, place your order now before it's too late!

Back soon with another project; until then, happy stampin'!


Stampin' Up! Supplies Used:

Table built using Product Table Builder by The Crafty Owl - Independent Stampin' Up! Demonstrator.


Christmas Cheer With Project Life Seasonal Snapshot 2015

by Joanne James2. December 2015 11:46

It's Wednesday already? The week is zipping by! I'm sure that time moves quicker the nearer to Christmas we get! I have a great festive monochromatic Christmas card for you today: big on layers, easy to recreate - just what we like at this time of year! I made today's card with a couple of challenges in mind:

    CYCI#97

The sketch over at CAS(E) This Sketch this week is a classic and I just love the inspiration photo at CanYouCaseIt - so much shine! I took my inspiration from the red and white elements and the shiny foil which I incorporated into the border frame for my card:

Isn't that striped Holiday vellum just gorgeous? I matted it on a piece of Whisper White cardstock before adhering to my Real Red base so that the red foil stripes would really stand out. For the focal point of my card, I used the sentiment from the 'Cheer All Year' stamp set - so versatile - and my little hot cocoa mugs are from the 'Project Life Hello December 2015' stamp set - another one of those sets that is useful for so much more than its designed purpose.

Are any of you out there joining in with the #decemberdaily project? I love to create a Project Life mini-album each December documenting the goings on in the James household during the festive season, so the above stamp set was a must for me to decorate this year's journalling, along with the Hello December 2015 Project Life Card Collection and Accessory Kit:

I'm mindful that I don't often share my Project Life documenting here on my blog - I just tend to get on with it! - but I'm trying to consciously change that, so throughout December I will be sharing some of the inspiration for my daily journalling and occasionally some of my completed pages in the hope that they will inspire you to get involved in active memory keeping too. Yesterday's page will feature the arrival of our Christmas Elf Charlie, who often gets up to mischief in the run up to Christmas and yesterday appeared with a fun piece of home decor I made to remind the James Juniors that good behaviour is important more now than ever since the elf will be reporting back to Santa on everything he sees and hears:

Isn't that fun? Surprisingly easy to create with the help of my e-cutter and some Stampin' Up! cardstock. Here's a picture of Charlie as he made his first appearance of the year:

This morning Ben was out of bed, up and dressed in record time and off on the hunt for Charlie to see what mischief he had got up to overnight; he eventually found him hiding in the basil pot amongst the herbs on the kitchen windowsill. Here's to more mayhem as the month progresses!

If you would like to join me in documenting your December, it's not too late to order the supplies to create your own album; just click on the links below to go to the online store or give me a call and I would be happy to place an order for you. More tips and Project Life #decemberdaily inspiration to come! Equally, if you would like to share your own #decemberdaily memories, feel free to upload them to my Facebook page here - I would love to feature them.

That's all from me today; I'll be back tomorrow with a festive card for this week's new challenge over at Create With Connie and Mary. until then, happy stampin'!


Stampin' Up! Supplies Used:

Table built using Product Table Builder by The Crafty Owl - Independent Stampin' Up! Demonstrator.


Project Life #dailydecember Stampin' Up! Supplies Used:

Table built using Product Table Builder by The Crafty Owl - Independent Stampin' Up! Demonstrator.


Reason For The Season Pillar Candle Christmas Table Decoration

by Joanne James27. November 2015 21:48

Yay - it's Friday - always a good day! I've had a busy one with a few errands, appointments and a pleasant afternoon watching Ben play rugby. Not much time for crafting today (I did help a friend make good progress on some Christmas bunting, but we still have a few finishing touches to make so I'll share that another time!) so I'm sharing a home decor project I made in a class with a lovely group of ladies last week. We decided to decorate a pillar candle and make a table centre, using the Festive Flower Punch and the Spiral Flower Originals Die to make a wreath of flowers around the base.

Here's my finished project, in Real Red with Very Vanilla roses:

I stamped the flower from 'Reason to the Season' on filter paper and melted it into the candle to set it, then covered a small polystyrene wreath with Very Vanilla satin ribbon before adhering my flower to it. A few gold glimmer and pearl flower centres and some loops of gold glitter ribbon interspersed in between completes the project.

The ladies in my class made their arrangements in a variety of colours; you can see their creations on my Facebook page here (feel free to give me a 'like' whilst your there!) for more colour inspiration. This was such a fun project to make and another way to show the versatility of the 'Reason for The Season' stamp set and co-ordinating Festive Flower Punch - this is one bundle that just keeps on giving, so many creative possibilities! The new Spring-Summer catalogue also offers another stamp set that co-ordinates with this useful punch - watch this space!

I'm linking up with the lovely ladies over at SUO Challenges too who are working with your favourite holiday colours - my traditional colour scheme remains a favourite, even though it's sometimes nice to step out of the creative comfort zone (see next Sunday's post for an example of that!) That's all from me today; back tomorrow with another project. Until then, happy stampin'!


Stampin' Up! Supplies Used:

Table built using Product Table Builder by The Crafty Owl - Independent Stampin' Up! Demonstrator.


Mini Catalogue

BROWSE THE CATALOGUE

The mini catalogue is now live! Read and download your copy here.

Shop Online

Access my online shop 24 x 7, 365 days of the year:

Current April hostess code:

VDKNV7BH

Shop Online

Join My Team

It's always a great time to join Stampin’ Up! New team members can get £130 worth of products for only £99 + free business supplies + free shipping + all the fun being a part of Stampin’ Up! Stampin' Up! has something for everyone: join my growing team and benefit from my support to enjoy Stampin' Up! however you choose.

If you're interested, call me for a chat to understand how I can help you realise your goals. Alternatively, if you have already decided to sign up and you just can't wait, please click here for the link to the online form where you can sign up and order your starter kit right away! 

Latest Kit!

Stampin Cut and Emboss

The Rock Legend Kit has all you need to make 8 cards with coordinating envelopes. Along with the new Panda Friends Kit, both are available from January 4th for just £14 each - get yours here!

2023-24 Annual Catalogue

BROWSE THE CATALOGUE

Click on the catalogue for a full list of current SU! supplies - if you would like to order any of the items featured, please drop me a line at [email protected] or give me a call on 07773 421446 - I'd be happy to help.

New Online Exclusives

There are new products available exclusively in the online store from 5 March - check them out here.

About Me

Hi I'm Joanne and live in Northampton and when I'm not looking after my husband and two beautiful children, am an avid crafter with a passion for all things Stampin' Up!

I must confess that I have never been a big rubber stamper - until I discovered Stampin' Up! that is. I love the fact that I can get such great results with co-ordinating stamps, inks, papers and punches - the possibilities are endless! Join me on my stamping journey as I share the things I love and be inspired to create amazing things yourself!

Follow Me

Monthly Newsletter

Box Builder

Click the button above to use Box Buster to create your custom box design using the Envelope Punch Board!

Kits Collection Now Available!

Stampin Cut and Emboss

The new Kits Collection from Stampin' Up! is now available!

Click here to see the current kits available and order yours online today.

I Design For


Stampin' Up Stuff

This is my personal blog and is not endorsed by Stampin’ Up! I hope you find it a plentiful source of ideas and personal inspiration but please don't copy my designs for contest submission or use for classes, publication or sale without express permission.