Pop Up Teacher Thank You Card

by Joanne James9. July 2013 21:38

Back again with the last of my teacher cards (I think!) this year - this time a pop-up card using my dress up framelits. The credit for this design goes to Fran Sabad; you can see her original card, a teacher birthday card, here. If you're looking for ways to use your Dress Up Framelits, I thoroughly recommend you check out Fran's blog - she has made some amazing cards using the Pop 'n' Cuts base and co-ordinating framelits. I thought this card would work equally well as a teacher thank you card with a few minor alterations and give me yet another opportunity to get stuck in to my Storytime DSP. So here is the outside of my card:

It's the inside that is the real star of the show though - a teacher mannequin in her classroom, in front of a traditional blackboard:

I absolutely love this card, complete with all the little details - check out the apple on the corner of the teacher's desk - how cute is that?! In case you're wondering about the glimmer paper 'brooch' pinned to the teacher's blouse, I know it looks a little out of place against the muted colours and traditional classroom feel, but Rebecca's teacher has what can only be described as a glitter obsession - she can't complete an art project without using tons of the stuff, so I know she wouldn't think this card complete without just a little bit of 'bling'. I wish I could convert her to the benefits of SU no-shed glimmer paper; well, Ben is likely to have her as his teacher the year after next, so there's still time!

The funniest thing about this card was when I showed it to Rebecca to see if it met with her approval; she said, "I love it - but why is there a blackboard? We've never had one of those in the classroom Mummy, all our classrooms have interactive whiteboards". What can I say? A sign of the times and made me feel quite old!

Back tomorrow with something different; until then, happy stampin'!


Stampin' Up Supplies:

Stamps: Word Play (retired), For My Family (retired)

Cardstock: Cherry Cobbler, Baja Breeze, Wild Wasabi, So Saffron, Pumpkin Pie, Pink Pirouette, Gumball Green, Crumb Cake, Storytime DSP

Ink/Stampin' Write Markers: Cherry Cobbler

Tools: 1 3/4" Circle Punch, 2 3/8" Scallop Circle Punch, Large Scallop Edgelits, Dress Up Framelits, Pop 'n' Cuts Card Base

Finishing Touches: White Baker's Twine, Silver Glimmer Paper

Elements of Style Mannequin Tri-Fold Card

by Joanne James30. June 2013 21:06

A busy day today with lots more swimming and family fun in the garden, making the most of the sunshine. Time for a little bit of crafting this evening, but today I'm going to share a card I made a little while ago when I was last playing with my Dress Up framelits that features two retiring products - the Elements of Style stamp set and the lovely Tea for Two DSP. This is a case of a card by Julie Kettlewell, who like me also seems to have had something of a love affair with the Dress Up framelits and has made some fabulous cards with this set: you can check out her card here and look at lots of other great examples of how to get the most from this versatile set. So here is my card:

As my regular blog followers will know, I don't really do 'fussy' and this card is about as vintage as I get! I really like the flower stamping over the newsprint though, and I think the Crumb Cake ribbon really finishes off this card. I used a Calypso Coral marker pen to colour the flowers to echo the colour of the flowers on the designer paper and used a blender pen to get some depth to the colour. The tri-fold design is also just a little different and yet the card still folds flat for postage.

That's all for today - tomorrow is the start of a very busy Stampin' Up! week: a new annual catalogue, a new monthly stamp set and lots of other great news and new products to share in the coming weeks, so lots of planning, making and fun to be had!

Back tomorrow with another project; until then, happy stampin'!


Stampin' Up Supplies:

Stamps: Elements of Style

Cardstock: Crumb Cake, Very Vanilla, Tea for Two DSP, First Edition Specialty DSP

Ink/Stampin' Write Markers: Early Espresso, Calypso Coral, Lucky Limeade

Tools: Dress Up Framelits, Blender Pen

Finishing Touches: Crumb Cake Seam Binding Ribbon

Happy Birthday Sister

by Joanne James18. June 2013 20:30

Today I'm back with the birthday card I promised yesterday: this time the card I made from her little brother. I saw a great card by Wendy Cranford on Pinterest a while ago and whilst this was for a LaLa Loopsy doll, I thought I could make a great likeness of Rebecca from it. Here's the link to Wendy's original card where she also provides a great video tutorial with step-by-step instructions on how she created her version. Now for my card:
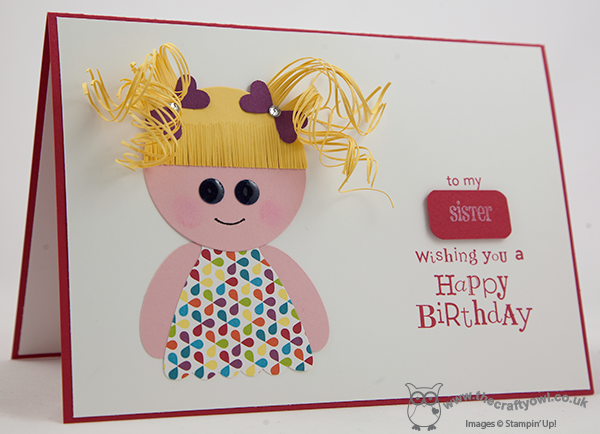
I made my hair blonde and cut in a fringe - don't you just love the hair tied in bunches?! Also, instead of buttons for eyes, I used some punched navy circles and painted with Crystal Effects to make them shiny. Another sentiment courtesy of 'For My Family', this time pairing 'sister' with the 'Happy Birthday' from Wacky Wishes. Another set I'll be sorry to see go; if you would like to own this set, you need to host a party before the end of the month so get in touch!

Here's a close up of the little girl's face again:
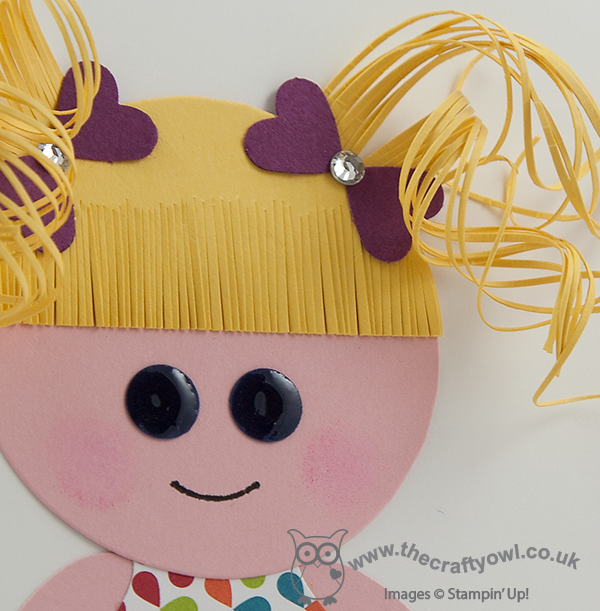
I know, totally impractical for putting in an envelope, but I love the hair! So simple to recreate - just cut the card using paper snips into thin strands, then curl around a pencil - but so effective. The perfect card for little girls and I love that you can make them individual to look like the recipient. To be fair, this photo looks more like 'baby Rebecca' than my now 8 year-old - this is the photo that inspired my version of this card:
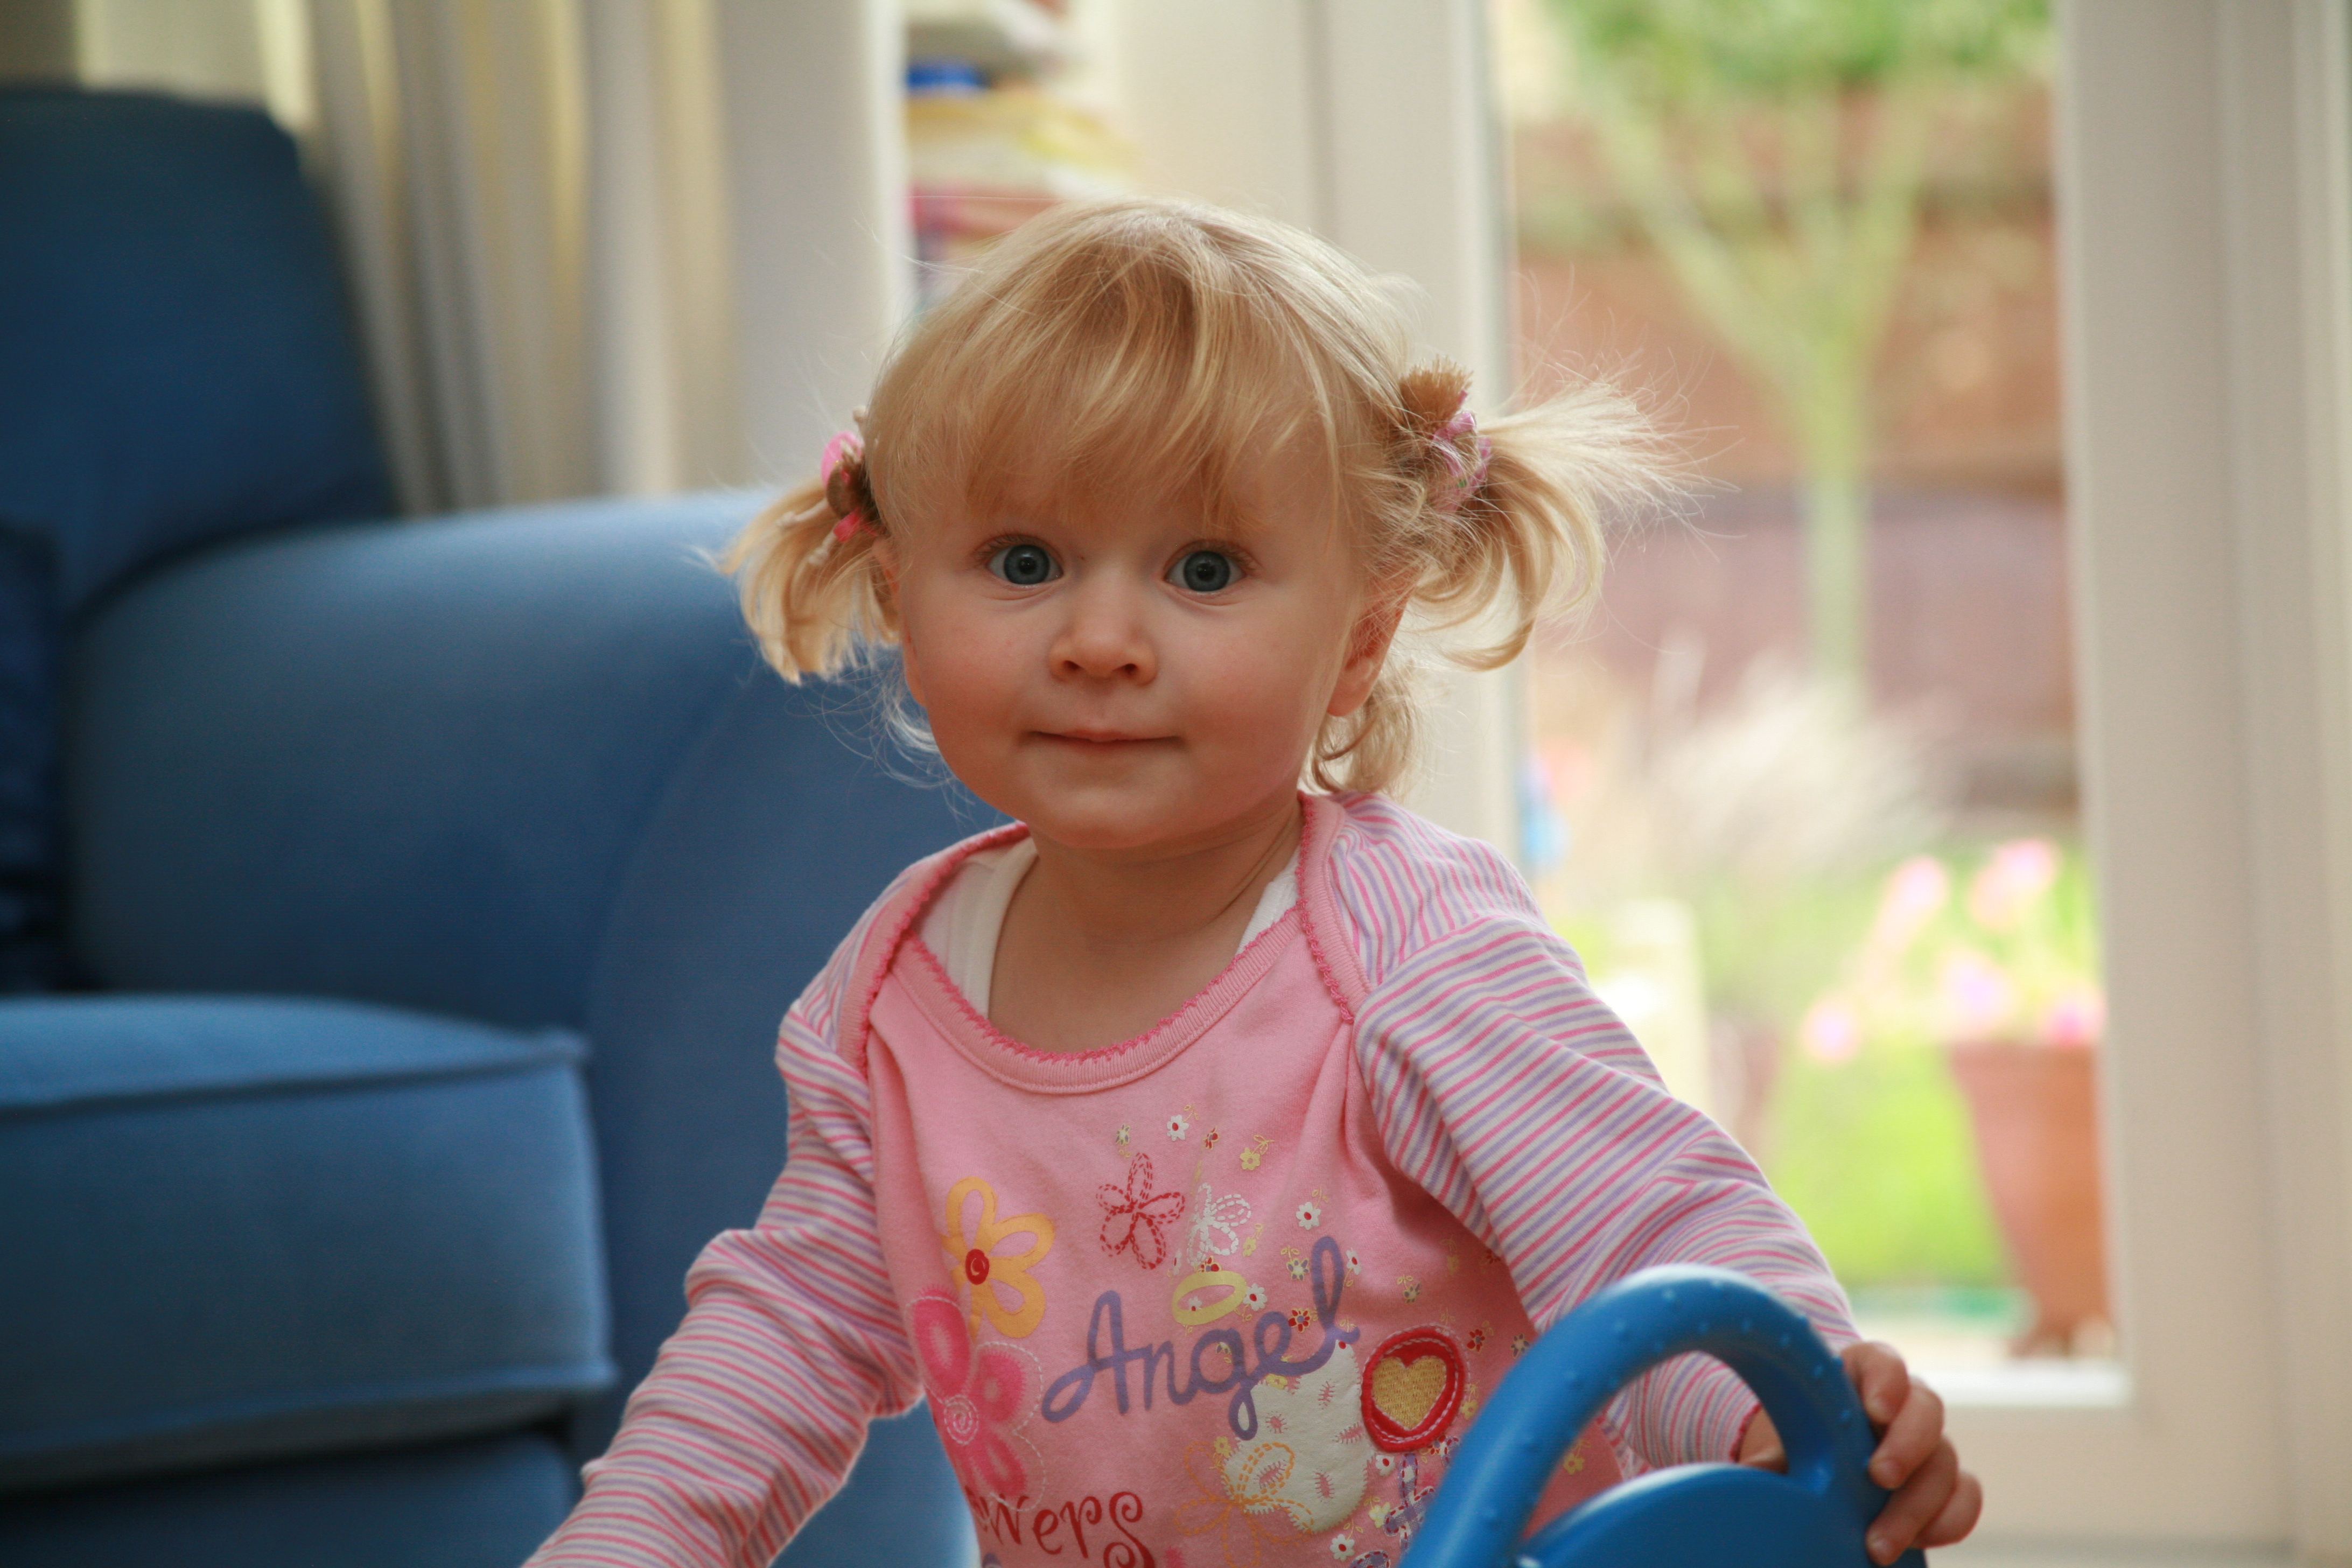
I guess in my mind's eye she will always look this way to me - beautiful!

Back tomorrow with another project - until then, happy stampin'!


Stampin' Up Supplies:

Stamps: For My Family, Wacky Wishes

Cardstock: Whisper White, Real Red, Daffodil Delight, Rich Razzleberry, Night of Navy, Blushing Bride, Summer Smooches Parade Designer Series Paper

Ink/Stampin' Write Markers: Real Red, Melon Mambo, Whisper White Kraft Ink

Tools: Circles #2 Originals Die, Small Heart Punch, Corner Punch, Dress Up Framelits, Itty Bitty Punches (circle), Small Oval Punch, Stamp-a-ma-jig

Finishing Touches: Basics Rhinestones

Elements of Style Birthday Mannequin

by Joanne James7. June 2013 19:51

A change from the masculine theme today, to something much more feminine: a birthday card using my much-loved Dress Up framelits and a couple of soon to be retired products. So here is my card:


The design of the card was inspired by a card kit that has recently been on sale to Stampin' Up's American customers, but not available here in the UK. So have you worked out the retiring products yet? The mannequin is made from the First Edition Specialty Designer Series Paper, which has been partially overstamped with the floral stamp from the Elements of Style set. This has then been coloured with Stampin' Right Markers in Perfect Plum and Elegant Eggplant. This has been layered with a paper doily beneath the dark background oval to add to the vintage feel - well, this is about as vintage as I get! The card has been finished with a birthday sentiment banner that has been attached with a lovely vintage brad, to add to the overall effect.

I liked the finished result and made another card using the same design but in a blue colourway using Marina Mist and Night of Navy, which you can see below:

If you would like to own Elements of Style or get your hands on some First Edition paper, then act now as they will only be available until the end of the month (or until stocks last).

Back tomorrow with another project using more retiring goodies; until then, happy stampin'!


Stampin' Up Supplies:

Stamps: Elements of Style, Happiest Birthday Wishes (retired)

Cardstock: Whisper White, Perfect Plum, Elegant Eggplant, Marina Mist, Night of Navy, First Edition Specialty DSP

Ink/Stampin' Write Markers: Basic Black, Perfect Plum, Elegant Eggplant, Marina Mist, Night of Navy, Daffodil Delight, Wild Wasabi

Tools: Dress Up Framelits, Oval Framelits, Blender Pen

Finishing Touches: Paper Doily, Antique Brads

Dotty Dress Up Lip Balm Boxes

by Joanne James7. May 2013 17:51

Another dress up project today, but today I'm going 3D with these cute boxes, the perfect size to hold a lip balm. I actually made a couple of these as quick gifts, but then couldn't resist making a third one for myself! I got busy with my polka Dot Parade paper; here they are - guess which one is mine?

The first one is in Marina Mist polka dots with taffeta ribbon:

The second one is in Real Red with some of the flower trim: 

Lastly, Rich Razzleberry with some stitched grosgrain ribbon:


I think there's something very 'Pretty Woman' about these and they really are so easy to make. They make great little treat boxes, or would make lovely table favours for a leavers prom too, perhaps with a couple of chocolates inside. Another great use for this versatile set (oh, and in case you were wondering - the red one is mine!).

One last thing - further to my post last week about Stampin' Up!'s new This and That Journal and the discounted bundle offer that can be purchased in May (see the 'Special Offers' section in the side bar for more details), I will be posting a 'This and That' journal tip on my Facebook page each day for the rest of the month, with lots of thoughts and ideas on how you can get great use from your journal. Click the 'follow me on Facebook' icon on the right-hand side to make sure you see these tips in your daily news feed and do drop me a line when you're ready to purchase yours!

Back tomorrow with another project - until then, happy stampin'!

Stampin' Up Supplies:

Cardstock: Marina Mist, Real Red, Rich Razzleberry, Whisper White, Polka Dot Parade DSP

Ink: Marina Mist, Real Red, Rich Razzleberry

Tools: Dress Up Framelits, Big Shot, Jewelry Tag Punch

Finishing Touches: Taffeta Ribbon Marina Mist, 1/4" Stitched Grosgrain Ribbon Rich Razzleberry, Flower Trim, Baker's Twine

Tags: , , , , , , , ,

3D Projects | Boxes

Quick Mannequin Card

by Joanne James6. May 2013 17:41

What a lovely day for a Bank Holiday! I'm writing this post sat in the afternoon sunshine in my garden, that I have been lovely trying to whip into shape all day after a winter that has lasted far too long for my liking - a blissful weather day. Today's card is another showcasing the versatility of the Dress Up framelits (well, I haven't blogged one for a few days now, so it must be time for another!). Here it is: 

I love to design my own cards, but sometimes it's nice to recreate something I've seen designed by someone else too. Crafters are generous folks and don't mind you casing so long as you give them due credit; sometimes I just case because I really love the design and it needs no further explanation, however I decided to reproduce today's card because there were some specific things I liked about it that I thought would be good to share with you:

  • This makes great use of the Tea for Two designer series paper; I had this out on my desk as I'd been using it for another project, but what better way to remove the indecision associated with which side of the DSP to use - simply cut out the mannequin and flip it over - you get to see both sides of the paper and there's no waste!
  • This card is so quick and easy to make - you could turn one of these out in under 5 minutes. Sometimes time is of the essence!
  • I love the little trick with the Bitty Banners: instead of printing and punching flat, you print and cut two banners, then cut the ends off one and adhere underneath the ends of the complete one using glue dots. This gives them just enough height to look like a ribbon floating across the mannequin. Another great way to get extra mileage from this set and create a different look.

This card was so quick to make, I made another one with a different banner at the same time - here they are both together: 

Well, that's all for today - I'm off to enjoy my first proper BBQ of the year. I can smell the sausages cooking - typing this for the last 5 minutes has been close to torture! Back tomorrow with another project - until then, happy stampin'!


Stampin' Up Supplies:

Cardstock: Very Vanilla, Calypso Coral, Bashful Blue, Tea for Two DSP

Ink: Chocolate Chip

Tools: Dress Up Framelits, Big Shot, Bitty Banners Framelits


Tags: , , , , , , ,

Cards | Stamping

Fashionista Gift Tag Set

by Joanne James3. May 2013 20:49

No stamping today! I have another Dress Up project from last month's quarterly training session: this time a lovely set of gift tags in a nice little pocket holder made using the Pop n' Cuts base again. Here's the outside of the box, decorated with its own dress on a Cute Clip hanger and another of those little filter paper flowers:

Open up the box to reveal a lovely set of dressed mannequin gift tags, each one with its own outfit:

This kind of holder is so easy to make just by adding in a couple of central score lines and box section to hold the tags; it would also make a nice notelet holder. As for the tags - what better way to ensure a gift for someone special is 'all dressed up'? My particular favourite outfit combo is the embossed filter paper sundress with the hot pink patterned bolero cardigan; leave me a comment and let me know which one you prefer, or better still how you would dress yours?

If you would like to get your hands on a gift tag set like the one above, you can do one of three things:

host a party during the month of May - this will be my hostess gift to thank you for booking a party and if you have party sales totally £300 or more, you could use your hostess credits to obtain the Pop 'n' Cuts Card base, Pop 'n' Cuts Dress Form and All Dressed Up framelit and stamps bundle ABSOLUTELY FREE!*

ask me about a class - if I have enough interested crafters, I will run a class featuring the Dress Up framelits and Pop 'n' Cuts base and you can learn how to make this set and more

contact me via [email protected] to place your order today

So many choices - I hope one of them tick's your box and I look forward to hearing from you. Back tomorrow with anohter project - until then, happy stampin'!


*Hostess credits for party sales of £300 totalling £75 (£50 plus £25 bonus if you host a party before May 30th) with one item purchased at 50% discount price


Stampin' Up Supplies:

Cardstock: Marina Mist, Sunshine and Sprinkles DSP

Ink: Basic Grey

Tools: Dress Up Framelits, Big Shot, Itty Bitty Punches, Elegant Bouquet Embossing Folder, Fancy Fan Embossing Folder, Heart Punch

Finishing Touches: Basics Rhinestones, 1/4" Stitched Grosgrain Ribbon Basic Grey, Creped Filter Paper, Cute Clips

One in a Million All Dressed Up

by Joanne James1. May 2013 20:15

Two posts in one day - aren't you lucky?! If you haven't read this morning's post about the new 'This and That' journal bundle, make sure you scroll back and read it after this one; if you like scrapbooking but fancy something a bit more immediate, or even if you have never got into scrapbooking for this reason, you should check it out. The bundle of products including a blank journal, 12 sheets of designer paper, 4 sheets of over 100 stickers, 3 rolls of washi tape and a rotary stamp can be purchased at the discounted price of £29.24 during the month of May only - that's 15% cheaper than the standard catalogue price that will be charged when 'This and That' is part of the annual catalogue from July. 

So for this post, I thought I'd share another card made with the Dress Up framelits, this time using the framelits on a standard card. They really are so versatile, you can achieve so many different effects. This is a case of a card I saw on Stampin Connection - Im afraid I don't know who designed it - and since I was working with my Tea for Two Designer papers too it totally fitted the bill for a birthday card I needed to make for a friend of mine who celebrated her birthday earlier this week:

I am in love with the spotty paper in this set - I've made another card with one of these dresses too - I think the muted coral and vanilla look really nice against the black, which gives it quite a modern feel. This sentiment is from one of my favourite sets too: One in a Million is a set of stamps that can be used alone in some instances but are designed to be used in pairs - the other half of this sentiment that appears inside this card says "...that makes you one in a million!"

Back tomorrow with another project; until then don't forget to drop me a line at [email protected] if you would like to order a 'This and That' bundle, to be delivered directly to your door. Happy stampin'!


Stampin' Up Supplies:

Stamps: One in a Million

Cardstock: Very Vanilla, Basic Black, Tea for Two DSP

Ink: Basic Black

Tools: Dress Up Framelits, Big Shot

Finishing Touches: Basics Pearls, 3/8" Calypso Coral Ruffled Ribbon

Tags: , , , ,

Cards

My First Dress Up Pop Up Card

by Joanne James28. April 2013 20:14

Any of you who saw my Facebook post yesterday will know I am officially 'IN LOVE' with the Dress Up framelits and Pop 'n' Cuts Base in the Spring-Summer catalogue. I've been resisting purchasing them since the catalogue came out - I don't know why, because it really was love at first sight - but having used them at our last training session and spent a fun few hours with my downline Barbara playing fashion designers, I have finally succumbed. I have seen so many great examples of projects made with this set and I'm excited to share these with you in future blog posts.

Today I am going to share a card I made using all three elements: the pop 'n' cuts card base, the dress form and the framelits. So not much stamping today - Big Shot definitely required! I will share some projects later in the week that show how these can be used separately; when used together, they will make a pop up card with a mannequin to be dressed as you wish. For my first card, I used some of my favourite 'More Amore' DSP along with a Pool Party card base. Here's the outside of the card that you see when the card is folded shut:

Then when you open it, the inside looks like this:

How cute is that??! Dressed mannequin, complete with pearls and pretty cardi, in front of a mirror and dresser. What little - or big - girl wouldn't want to get this in the post for their birthday? Here's one last close-up of the mannequin:

This will, I feel, be the first of many such pop-up cards; come back tomorrow to see another use for this great set. Until then, happy stampin'!


Stampin' Up Supplies:

Stamps: One in a Million

Cardstock: Pool Party, Crumb Cake, Very Vanilla, More Amore DSP

Ink: Pool Party

Tools: Pop 'n' Cuts Base, Pop 'n' Cuts Dress Form, Dress Up Framelits, Ovals Framelits, Big Shot, Stamp-a-ma-jig, Small Heart Punch

Finishing Touches: Basics Pearls

Mini Catalogue

BROWSE THE CATALOGUE

The mini catalogue is now live! Read and download your copy here.

Shop Online

Access my online shop 24 x 7, 365 days of the year:

Current April hostess code:

VDKNV7BH

Shop Online

Join My Team

It's always a great time to join Stampin’ Up! New team members can get £130 worth of products for only £99 + free business supplies + free shipping + all the fun being a part of Stampin’ Up! Stampin' Up! has something for everyone: join my growing team and benefit from my support to enjoy Stampin' Up! however you choose.

If you're interested, call me for a chat to understand how I can help you realise your goals. Alternatively, if you have already decided to sign up and you just can't wait, please click here for the link to the online form where you can sign up and order your starter kit right away! 

Latest Kit!

Stampin Cut and Emboss

The Rock Legend Kit has all you need to make 8 cards with coordinating envelopes. Along with the new Panda Friends Kit, both are available from January 4th for just £14 each - get yours here!

2023-24 Annual Catalogue

BROWSE THE CATALOGUE

Click on the catalogue for a full list of current SU! supplies - if you would like to order any of the items featured, please drop me a line at [email protected] or give me a call on 07773 421446 - I'd be happy to help.

New Online Exclusives

There are new products available exclusively in the online store from 5 March - check them out here.

About Me

Hi I'm Joanne and live in Northampton and when I'm not looking after my husband and two beautiful children, am an avid crafter with a passion for all things Stampin' Up!

I must confess that I have never been a big rubber stamper - until I discovered Stampin' Up! that is. I love the fact that I can get such great results with co-ordinating stamps, inks, papers and punches - the possibilities are endless! Join me on my stamping journey as I share the things I love and be inspired to create amazing things yourself!

Follow Me

Monthly Newsletter

Box Builder

Click the button above to use Box Buster to create your custom box design using the Envelope Punch Board!

Kits Collection Now Available!

Stampin Cut and Emboss

The new Kits Collection from Stampin' Up! is now available!

Click here to see the current kits available and order yours online today.

I Design For


Stampin' Up Stuff

This is my personal blog and is not endorsed by Stampin’ Up! I hope you find it a plentiful source of ideas and personal inspiration but please don't copy my designs for contest submission or use for classes, publication or sale without express permission.