Happy Birthday Sister

by Joanne James18. June 2013 20:30

Today I'm back with the birthday card I promised yesterday: this time the card I made from her little brother. I saw a great card by Wendy Cranford on Pinterest a while ago and whilst this was for a LaLa Loopsy doll, I thought I could make a great likeness of Rebecca from it. Here's the link to Wendy's original card where she also provides a great video tutorial with step-by-step instructions on how she created her version. Now for my card:

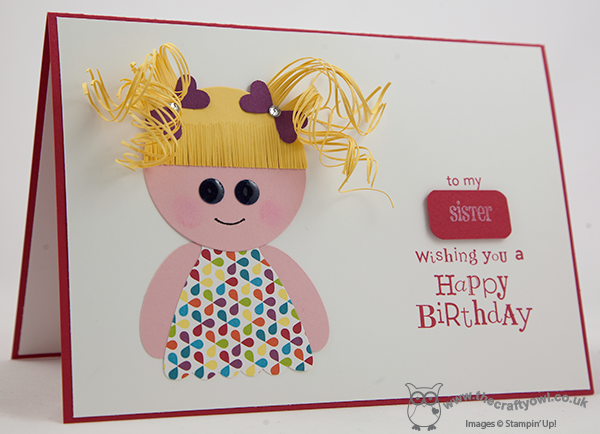
I made my hair blonde and cut in a fringe - don't you just love the hair tied in bunches?! Also, instead of buttons for eyes, I used some punched navy circles and painted with Crystal Effects to make them shiny. Another sentiment courtesy of 'For My Family', this time pairing 'sister' with the 'Happy Birthday' from Wacky Wishes. Another set I'll be sorry to see go; if you would like to own this set, you need to host a party before the end of the month so get in touch!

Here's a close up of the little girl's face again:

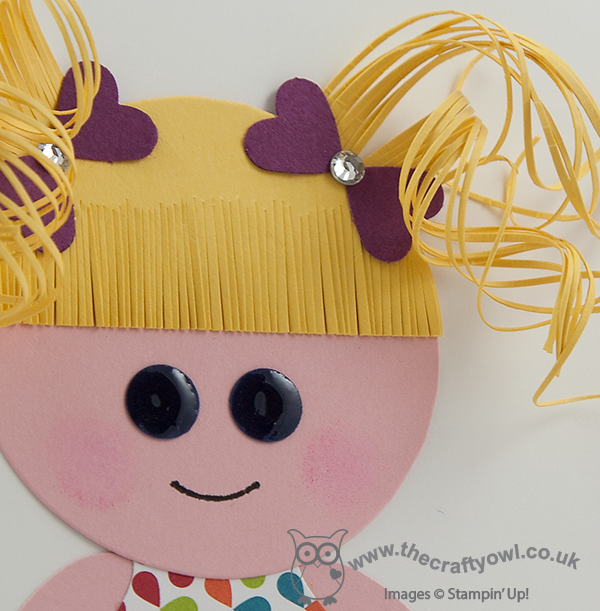
I know, totally impractical for putting in an envelope, but I love the hair! So simple to recreate - just cut the card using paper snips into thin strands, then curl around a pencil - but so effective. The perfect card for little girls and I love that you can make them individual to look like the recipient. To be fair, this photo looks more like 'baby Rebecca' than my now 8 year-old - this is the photo that inspired my version of this card:

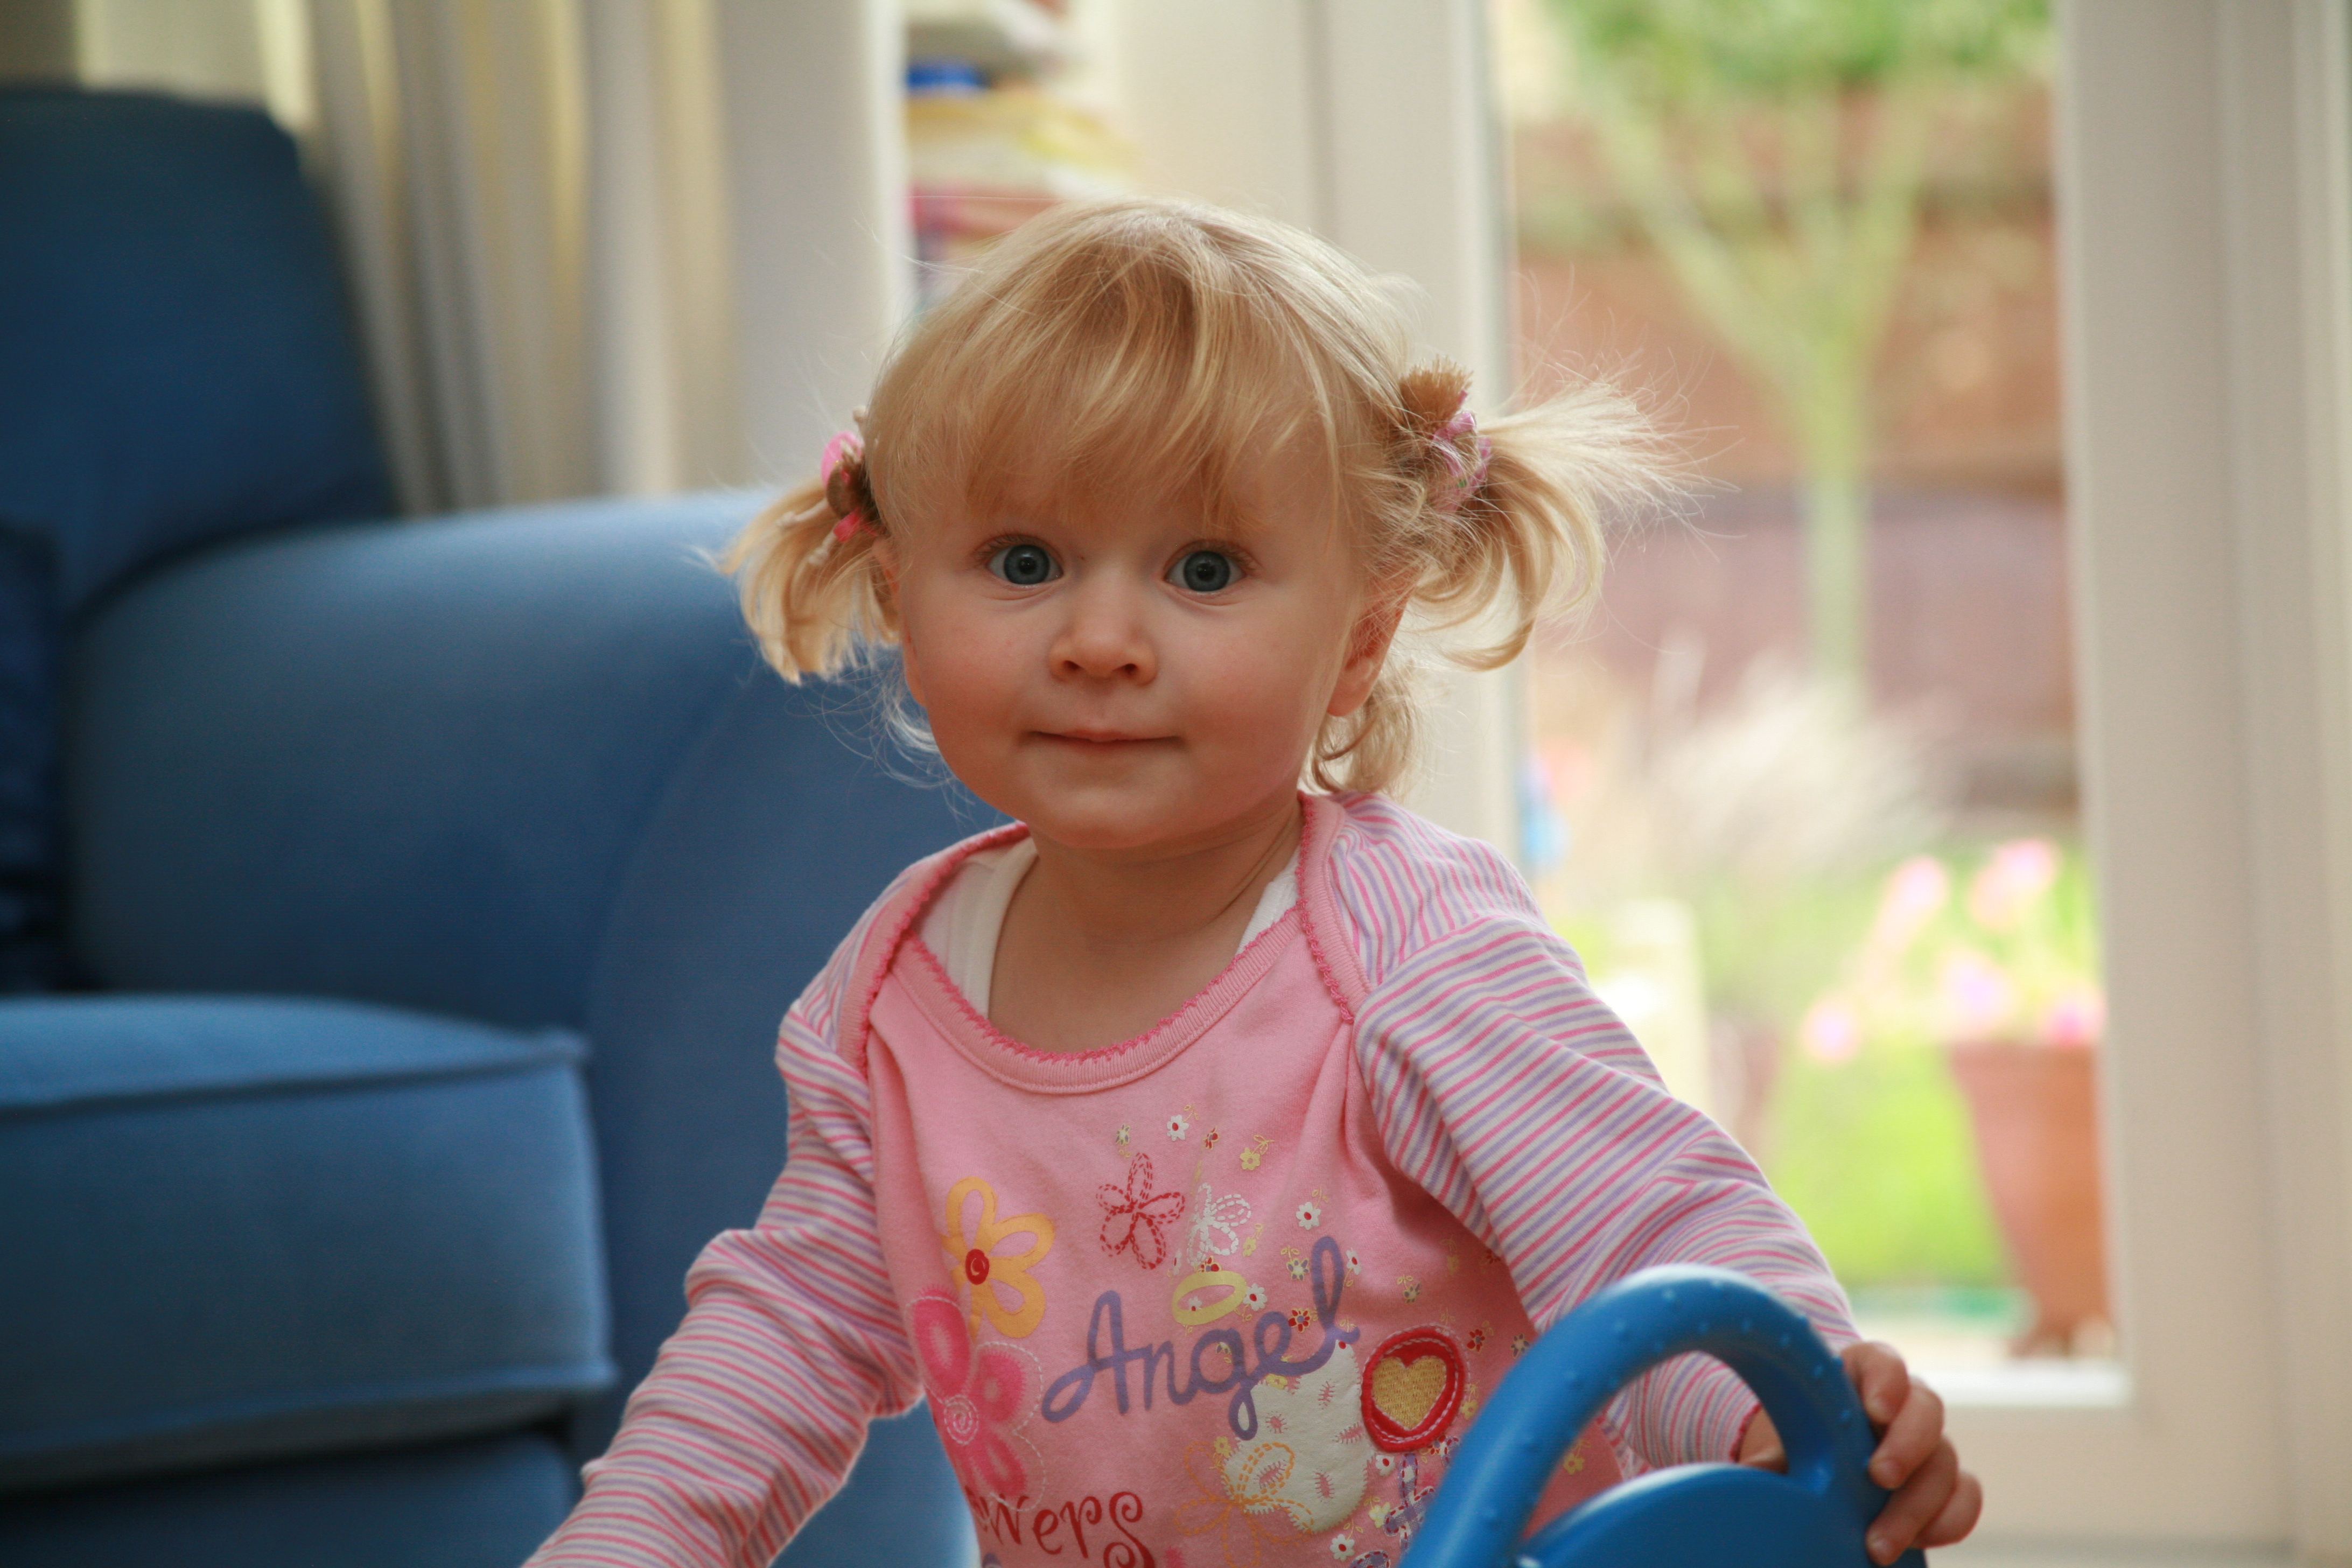
I guess in my mind's eye she will always look this way to me - beautiful!

Back tomorrow with another project - until then, happy stampin'!


Stampin' Up Supplies:

Stamps: For My Family, Wacky Wishes

Cardstock: Whisper White, Real Red, Daffodil Delight, Rich Razzleberry, Night of Navy, Blushing Bride, Summer Smooches Parade Designer Series Paper

Ink/Stampin' Write Markers: Real Red, Melon Mambo, Whisper White Kraft Ink

Tools: Circles #2 Originals Die, Small Heart Punch, Corner Punch, Dress Up Framelits, Itty Bitty Punches (circle), Small Oval Punch, Stamp-a-ma-jig

Finishing Touches: Basics Rhinestones

Feel Goods - The Best of Friends

by Joanne James20. April 2013 21:10

The sun is shining here in the UK - oh, happy days at last! Back to cards today and I thought I'd share a card I made a little while ago using one of the stamps in the 'Feel Goods' stamp set. I loved this stamp set the first time I set eyes on it - 5 great sayings that can be suitable for so many occasions. This is the first card I made with this set, although I will have many more to share in days to come I'm sure:

My favourite bright colours again for this card, with a ribbon of Summer Smooches designer series paper along with a couple of butterflies for interest. Centre stage absolutely goes to the 'feel good' though. I made this card for a good friend of mine for whom the sentiment absolutely fits. In the words of a Fergal Sharkey pop song from the 80s (I know, it shows my age when I start reminiscing like this!) 'A good heart these days is hard to find'. I think the same can be said of good friends - but the recipient of this card is one of the best!

Back tomorrow with another project - until then, enjoy the sunshine and happy stampin'!

Stampin' Up Supplies:

Stamps: Feel Goods

Cardstock: Real Red, Daffodil Delight, Rich Razzleberry, Whisper White, Brights DSP, Summer Smooches DSP

Ink/Stampin' Write Markers: Rich Razzleberry

Tools: Elegant Butterfly punch, Bitty Butterfly punch, Labels Framelits

Finishing Touches: Basics Rhinestones


Summer Smooches Meets Blossom Punch!

by Joanne James12. April 2013 16:58

Every once in a while I get a little bit more creative than usual and make something different to a card or box. I've been wanting to have a go at a paper wreath for a while and initially wanted to make a spring wreath in pastel shades, however when I received my Summer Smooches designer paper I fell in love with the bright colours and decided they would definitely enable me to create something that would brighten things up. So, after much punching, piercing and gluing, here's what I came up with: 

I used a combination of Summer Smooches and Brights designer series papers, mixed in with some solid colours, all finished off with some co-ordinating brads and a lovely piece of wide vanilla and Rich Razzleberry ribbon, sadly now retired. I love the overall fiished effect - perfect to brighten up a dull corner of the house - and not a stamp or ink pad in sight!

Here's a close up of some of the flowers: 

I think the layered flowers look really effective; another great example of what you can do with the blossom punch. You can also make a variety of stemmed flowers using this punch, but that's a blog post for another time! Meanwhile, if you would like to see more of this punch and the co-ordinating Mixed Bunch stamp set in action, join me for next week's Card and Technique class on Wednesday 17th April. The details are included in yesterday's post - if you'd like to come along, just drop me a line at [email protected].

I'll be back tomorrow with another project; until then, happy stampin'!


Stampin' Up Supplies:

Cardstock: Real Red, Tempting Turquoise, Daffodil Delight, Lucky Limeade, Island Indigo, Rich Razzleberry, Tangerine Tango, Summer Smooches DSP

Tools: Blossom Punch, 1" Circle Punch, 3/4" Circle Punch, hot glue gun

Finishing Touches: Brights Brads, Razzleberry Ribbon (retired)

Tags: , , , ,

3D Projects | Classes

Mini Catalogue

BROWSE THE CATALOGUE

The mini catalogue is now live! Read and download your copy here.

Shop Online

Access my online shop 24 x 7, 365 days of the year:

Current April hostess code:

VDKNV7BH

Shop Online

Join My Team

It's always a great time to join Stampin’ Up! New team members can get £130 worth of products for only £99 + free business supplies + free shipping + all the fun being a part of Stampin’ Up! Stampin' Up! has something for everyone: join my growing team and benefit from my support to enjoy Stampin' Up! however you choose.

If you're interested, call me for a chat to understand how I can help you realise your goals. Alternatively, if you have already decided to sign up and you just can't wait, please click here for the link to the online form where you can sign up and order your starter kit right away! 

Latest Kit!

Stampin Cut and Emboss

The Rock Legend Kit has all you need to make 8 cards with coordinating envelopes. Along with the new Panda Friends Kit, both are available from January 4th for just £14 each - get yours here!

2023-24 Annual Catalogue

BROWSE THE CATALOGUE

Click on the catalogue for a full list of current SU! supplies - if you would like to order any of the items featured, please drop me a line at [email protected] or give me a call on 07773 421446 - I'd be happy to help.

New Online Exclusives

There are new products available exclusively in the online store from 5 March - check them out here.

About Me

Hi I'm Joanne and live in Northampton and when I'm not looking after my husband and two beautiful children, am an avid crafter with a passion for all things Stampin' Up!

I must confess that I have never been a big rubber stamper - until I discovered Stampin' Up! that is. I love the fact that I can get such great results with co-ordinating stamps, inks, papers and punches - the possibilities are endless! Join me on my stamping journey as I share the things I love and be inspired to create amazing things yourself!

Follow Me

Monthly Newsletter

Box Builder

Click the button above to use Box Buster to create your custom box design using the Envelope Punch Board!

Kits Collection Now Available!

Stampin Cut and Emboss

The new Kits Collection from Stampin' Up! is now available!

Click here to see the current kits available and order yours online today.

I Design For


Stampin' Up Stuff

This is my personal blog and is not endorsed by Stampin’ Up! I hope you find it a plentiful source of ideas and personal inspiration but please don't copy my designs for contest submission or use for classes, publication or sale without express permission.