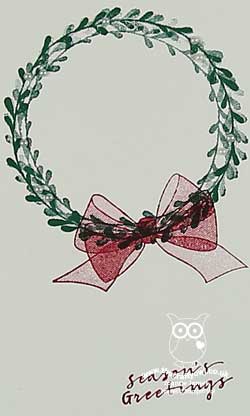
Wishing You Well Thanksgiving Wreath PP417

by Joanne James4. November 2018 09:00

Today it's Sunday and time for this week's new challenge over at The Paper Players - yay! It's the turn of my wonderful friend Claire to host this week and she has a timely theme challenge for you to work with that I know she would love you to play along with:


I know that Claire loves Thanksgiving and whilst it isn't something we celebrate here in the UK, the underlying theme of being grateful and thankfulness is one we should all celebrate. I used both the sketch layout and photo inspiration over at Fusion and CASual Fridays as starting points for today's card: warm autumn leaves and wood textures feature heavily on my card this week - take a look:


Here's the low-down on today's card:

Textured Layers -  I wanted to create texture on my card and did something quite unusual for me: used not one, but two embossing folders on my background panels. To recreate the grey weatherboard effect, I used my Simple Stripes embossing folder on a panel of Smoky Slate. For my feature panel, I used a piece of Wood Textures Designer Series Paper and added further texture by running this through my Pinewood Planks embossing folder. I love the effect this gives - it adds so much interest and detail.

A Wreath of Twigs and Leaves - I stamped the wreath from the Wishing You Well stamp set in Early Espresso onto a stitched circle of Very Vanilla and punched out the middle using my 1 1/4"  circle punch, so that more of the textured wood panel could be seen. I coloured a selection of pearls in various sizes with my Pumpkin Pie, Daffodil Delight and Cajun Craze Blends markers to suggest leaves and then added a trio of actual leaves cut with my Seasonal Layers Thinlits to frame my sentiment (I sponged the edges of the leaves to add depth).

Something For The Thanksgiving Table - When I started my card, I wanted to create a wreath like the one in the Fusion inspiration photo. I made a wreath in autumnal colours using my sprig punch that I really loved, but when it came to adding it to my card, it was a little too bulky so I went back to the drawing board. I didn't want my punched wreath to go to waste though, so instead I attached it to a band of Very Vanilla stamped with my Buffalo Check stamp in Crushed Curry, added a banner sentiment and a braided linen twine bow and made a napkin ring - perfect for the Thanksgiving table. Here's a photo of my finished napkin ring:


I'm linking my napkin ring up with the ladies over at SUO Challenges where they are looking for home decor items for the Thanksgiving table. This was so easy to make yet really effective - you could make a while bunch of these to decorate the Thanksgiving table in a relatively short space of time. 

Here is the visual summary of the key products used on today's project for you to pin for easy reference:


You can see all of my Product and 'How To' summaries on my 'How To - Tips and Techniques' Pinterest board in case you've missed any. 

Before you reach for your ink and papers, check out what our amazing team has created to inspire you this week:

Here's a quick recap of our challenge rules:
 
1.  Create a new paper project
2.  Upload your creation to your blog with a link back to us and provide a direct link to the post featuring your challenge submission.
3.  Please link your card to no more than four challenges, TOTAL.
4.  Have FUN!

You can see all of my 'How To' summaries on my 'How To - Tips and Techniques' Pinterest board in case you've missed any. 

Enjoy your day; it is the last day of the James Juniors' half term and there is hockey to be played along with a little down time before the return to school tomorrow. I'll be back here tomorrow with another project. Until then, happy stampin'!


Stampin' Up! Supplies Used - For the card: 

Table built using Product Table Builder by The Crafty Owl - Independent Stampin' Up! Demonstrator.
 

Stampin' Up! Supplies Used - For the napkin ring: 

Table built using Product Table Builder by The Crafty Owl - Independent Stampin' Up! Demonstrator.

Wishing You Well Festive Wreath Made Easy With The Stamparatus

by Joanne James19. September 2018 10:00


I had a busy day yesterday, having been treated to a rare breakfast catch up with my sister-in-law, and lots of work and prep in between chasing various items around the garden in the face of the terrific winds we've been having here in the UK at the moment. I finished my day by hosting a Stampin' Up! party for the lovely Jane and her crafty friends yesterday evening to share all things Christmas.

Today I'm squeezing in another entry for the current challenge over at at As You See It where the team are all about getting back to basics with stamps, ink and paper:


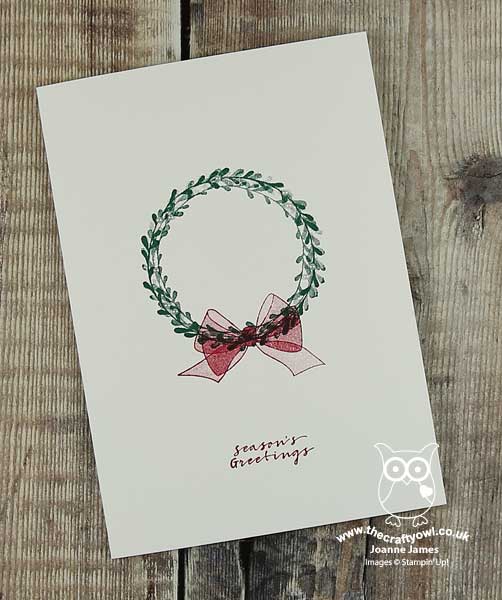
I always send a card out to my customers when I mail them a new catalogue with a 'sneak peek' of what's inside. This is one of my big mass production exercises of the year though, so it needs to be something simple to enable me to get a large volume churned out within a reasonable time frame - yet I still want it to be pretty and have impact. Here's this year's Autumn-Winter catalogue card:
 

Here's the low-down on today's card:

Back To Basics - The theme over at As you See It this week is 'Back To Basics', creating cards using little more than stamps. ink and paper. There is something liberating though about creating with just stamps, ink and paper and it is fun to be able to share creations from time to time like this. They can be quick(er!) to create and show that it's still possible to create something pretty without needing a ton of supplies. My card uses only 5 items: a blank card base, two ink colours, one stamp set and one (optional) embellishment - basic supplies indeed! The 'Wishing You Well' stamp set is perfect for this kind of card; it's one of Stampin' Up!'s Distinktive stamps, where you can ink your stamp once yet create different opacities in a single stamped image, giving the illusion of dimension. The wreath and bow look layered, even though they have been stamped only once. Clever, right?

Mass Production Made Easy With The Stamparatus - My simple wreath with stamped bow and sentiment would be easy to stamp in multiples even if I did it 'freehand', but the days of that kind of mass-production are long gone for me now that I am the proud owner of the best ever stamping positioning tool, Stampin' Up!'s Stamparatus - this tool makes light work of this kind of stamping! I placed my wreath on one plate and my bow and sentiment on another, then inked and stamped without needing to reposition and got my simple stamping done in record time!

Add A Pearl - Or Thirteen - The dimensional inking of these stamps means that I could have just left my card as is, but I decided to add a sprinkling of tiny seed pearls throughout my wreath, a little like mistletoe berries, for some added interest. It seems despite my extensive ribbon collection, I'm more of a magpie - I can't resist a little sparkle or shimmer.

And The Winner Is ... I've been running a fun competition with my customers over on my Facebook page to see if they could guess correctly how long it took me to make 40 of these cards with the help of my Stamparatus. Well, the answer is just 17 minutes and 21 seconds - it took me longer than that to stick all of the pearls on afterwards! I'm pleased to announce the winner of my competition is Barbara Civil who guessed 17 minutes and 50 seconds - clearly already a seasoned Stamparatus user! Samantha Daglish gets the runner-up prize for her best guess of 7 minutes and 7 seconds; I'm afraid I'm just not that good however that is my new target! Congratulations both of you; look out for the postman as there will be a little something in the post to each of you to thank you for playing along this week!

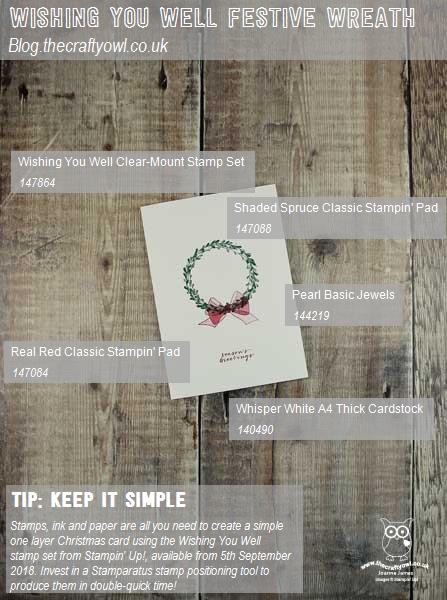
Here is the visual summary of the key products used on today's project for you to pin for easy reference:
 

You can see all of my 'How To' summaries on my 'How To - Tips and Techniques' Pinterest board in case you've missed any. 

Enjoy your day; I have another day of prep, in readiness for an in-home kit party that I'm hosting for a group of friends this evening, although I am minus one of my James Juniors as Ben has gone to the Peak District for a few days with school on an outward bound trip so have a few less school runs for the next few days. I'll be back tomorrow with another project. Until then, happy stampin'!


Stampin' Up! Supplies Used:

Table built using Product Table Builder by The Crafty Owl - Independent Stampin' Up! Demonstrator.

Wishing You Well Purple Notecard

by Joanne James3. September 2018 10:00

Happy Monday everyone! Today is the last full vacation day here in the James household - Ben is back to school for pre-season rugby training tomorrow and then both James Juniors are back to school 'proper' on Wednesday - so we are making the most of it (currently sewing sock puppies and making pizza ready for lunch, amongst other things!) I'm sharing a quick and easy card that I made at the weekend for the challenges over at CAS Colours and Sketches and TGIF Challenges:


I love this sketch layout and was originally planning something different, but when I saw the tictactoe board over at TGIF I couldn't resist the opportunity to create something with my favourite new purples. This is what I came up with:


Here's the low-down on today's card:

Perfectly Paired Purples - I chose to use a combination of two new purples on my card: Highland Heather for the base and bow, and Gorgeous Grape for the flowers and sentiment base. I love how these two colours compliment each other perfectly. I added another new colour, Soft Sea Foam, into the mix for my flower stems - it gives just enough subtle colour and allows my purples to take centre stage. Here's my colour combination in case you would like to save it for future use:


Just A Note - The spray of flowers on my card comes from another new stamp set called 'Wishing You Well' - it's another of Stampin' Up!'s Distinktive Stamps, that allow for great monochromatic ink effects. They allow you to create different ink opacities in a single stamped image for realistic depth and intensity - just check out the detail on that bow, it almost looks like it's been tied on! 

Teeny Tiny Pearls - I went across the top of the tictactoe board - purple, pearls, flowers - so the last thing to do was add a tiny sprinkling of seed pearls to my floral spray. I'm not generally a big user of pearls or rhinestones on my projects, but I actually love this little detail. You can see it better on the close up here:

And that's it - a clean and simple card that would work in lots of other colourways too.

Here is the visual summary of the key products used on today's project for you to pin for easy reference:


You can see all of my 'How To' summaries on my 'How To - Tips and Techniques' Pinterest board in case you've missed any. 

Enjoy your day and I'll be back tomorrow with another project. Until then, happy stampin'!


Stampin' Up! Supplies Used:

Table built using Product Table Builder by The Crafty Owl - Independent Stampin' Up! Demonstrator.

New Online Exclusives

There are new products available exclusively in the online store from 5 November - check them out here.

Latest Kits!

Stampin Cut and Emboss

The Layered Landscapes Kit and Nature's Paintings Kit are the latest kits in the online store - get yours here!

Shop Online

Access my online shop 24 x 7, 365 days of the year:

Current November hostess code:

9NKXDTTR

Shop Online

Mini Catalogue

BROWSE THE CATALOGUE

'Tis The Season - the new Stampin' Up! Mini Catalogue is here! For more details and to download your copy click here

Scrapbooking

Stampin' Up! has introduced a new range of 12x12" scrapbooking product and kit - the full range is now available to purchase online. To download a copy of the new digital Scrapbooking Catalogue click here.

2024-25 Annual Catalogue

BROWSE THE CATALOGUE

Click on the image to download your copy of the 2024-25 annual catalogue. For a full list of current SU! supplies, go to my online store. If you would like any help or advice, please drop me a line at joanne@thecraftyowl.co.uk or give me a call on 07773 421446 - I'd be happy to help.

Join My Team

It's always a great time to join Stampin’ Up! New team members can get £130 worth of products for only £99 + free business supplies + free shipping + all the fun being a part of Stampin’ Up! Stampin' Up! has something for everyone: join my growing team and benefit from my support to enjoy Stampin' Up! however you choose.

If you're interested, call me for a chat to understand how I can help you realise your goals. Alternatively, if you have already decided to sign up and you just can't wait, please click here for the link to the online form where you can sign up and order your starter kit right away! 

About Me

Hi I'm Joanne and live in Northampton and when I'm not looking after my husband and two beautiful children, am an avid crafter with a passion for all things Stampin' Up!

I must confess that I have never been a big rubber stamper - until I discovered Stampin' Up! that is. I love the fact that I can get such great results with co-ordinating stamps, inks, papers and punches - the possibilities are endless! Join me on my stamping journey as I share the things I love and be inspired to create amazing things yourself!

Follow Me

Monthly Newsletter

Box Builder

Click the button above to use Box Buster to create your custom box design using the Envelope Punch Board!

Kits Collection Now Available!

Stampin Cut and Emboss

The new Kits Collection from Stampin' Up! is now available!

Click here to see the current kits available and order yours online today.

I Design For


Stampin' Up Stuff

This is my personal blog and is not endorsed by Stampin’ Up! I hope you find it a plentiful source of ideas and personal inspiration but please don't copy my designs for contest submission or use for classes, publication or sale without express permission.