Nerf Party Ideas For The Stampin' Creative Blog Hop

by Joanne James30. June 2018 06:00

It's Saturday and today I have a special post for you since I, along with the talented Kayla Macaulay, am a guest with the lovely ladies over on the Stampin' Creative Design Team Blog Hop:

You may have just arrived from the colourful Pip Todman over at Queen Pip Cards or alternatively this may be your first stop. Either way, welcome and be sure to continue to the next stop along the hop by clicking on the next name in the list below for more creative ideas. This month the theme is 'party central' and there are lots of ideas and inspiration for parties for many different occasions throughout the hop. 

When I started thinking about what I was going to create today, I immediately jumped to my collection of new catalogue products wondering which new set to use. But in actual fact, I ended up using one of the most long-standing staple items in my crafting arsenal for the majority of my makes today: my Layering Circles Framelits. The next party that I need to plan will be that of the youngest of the James Juniors and whilst we've had lots of debate about what form it will take, one thing is for sure - no party that centres around 11 year old boys is complete without some form of Nerf battle these days, so I decided to get ahead and take the opportunity to start making with this in mind. 

First up is a birthday card that I actually made for a friend of his who is celebrating his birthday today: I used the currently popular 'impossible card' fancy fold and along with some partial diecutting to create a Nerf target for the popped-up section. These cards are really not at all tricky to make, despite their name! You simply score across the horizontal and then make a single cut at the centre of one panel at right angles to this (I made mine at 3"), followed by two cuts wherever you like on the facing panel (mine are at (1 5/8" in from each edge) and then fold each half in opposite directions, leaving a gap front and back and creating the central pop-up. I kept the colour scheme really simple, using the new in-colours Blueberry Bushel and Grapefruit Grove, both of which are a perfect match for Nerf guns and foam bullets, and having layered my diecut target circles added a sight and a bullet popped up on dimensionals for a fun touch. Some in-colour Blueberry Bushel patterned paper and a sentiment courtesy of the Perennial Birthday stamp set finish my card.

This 'impossible card' fold is a fun way to add dimension and interest to a card whilst still enabling it to be folded flat for mailing. My card is an irregular size, since the size of the base was determined by the diameter of the outer target circle. The card measures 5 1/4" x 6" when flat, so requires a bespoke envelope which I created using my trusty Envelope Punch Board with the help of my Envelope Expert tool. 
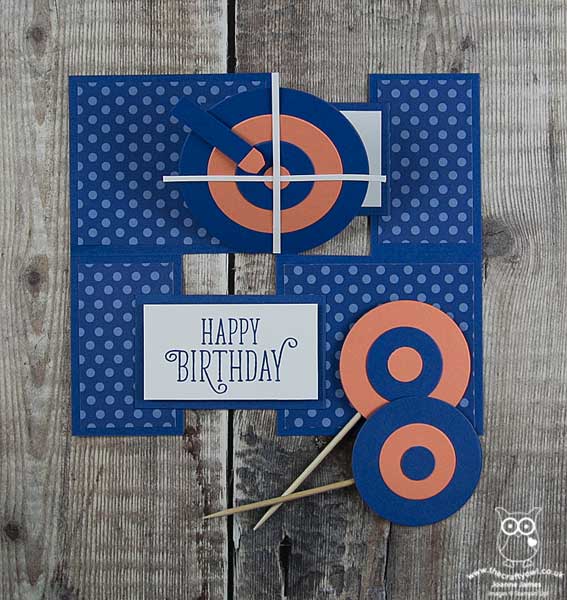
 

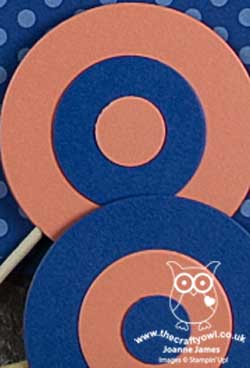
 The other targets you can see in the forefront of my card are some cake toppers I made. I am currently in the middle of a kitchen renovation and have only a microwave and the BBQ for cooking, so there was no opportunity to bake any cakes to put them in but I'm sure you get the idea!

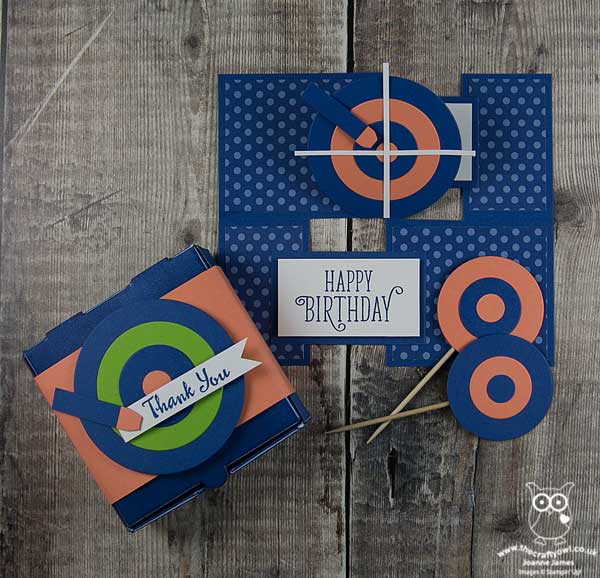
I also created a fun party favour using Stampin' Up!'s Mini Pizza Boxes. I'm so glad these made it into the annual catalogue, they really are so useful for dressing up for all kinds of things. I brayed my box with Bluberry Bushel ink then created a belly band with another target on top and a thank you tag. Can you guess what is inside?
 

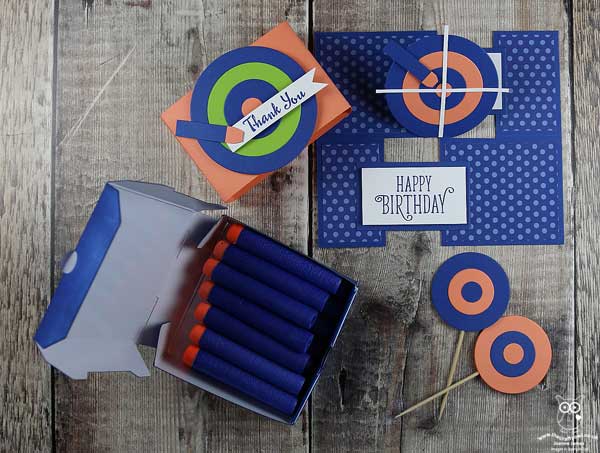
Yes, more foam Nerf bullets! The Mini Pizza Boxes are the perfect size to house 14 bullets and since the children seem to use hundreds of these when they are playing in their Nerf battles, I figured a few more each wouldn't go amiss!
 

 Lastly for today I also created a set of freestanding spinning Nerf targets, based on this one I saw over at Frugal Fun 4 Boys. If you click on the link you can follow the instructions to make your own - I simply used a collection of layered circles, adding in some Whisper White and Granny Apple Green for more colour variety. This is great for indoor or outdoor use, so I'm sure will be added to the toybox supplies. This is my tester in action, declaring it to be too easy - I think he needs to move further away so that it's more of a challenge!
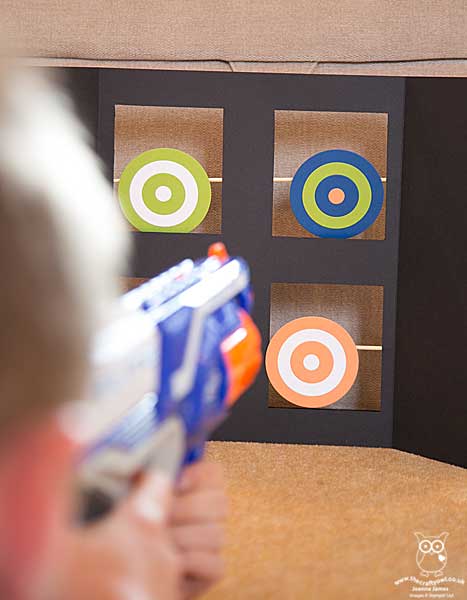
 

I hope you liked my collection of fun party ideas, that in fact require very little in the way of supplies to make. I have another Nerf-themed birthday card to share, which is the one I have made for Ben's birthday, but will save that for another time!

Here is the visual summary of the key products used on today's project for you to pin for easy reference:
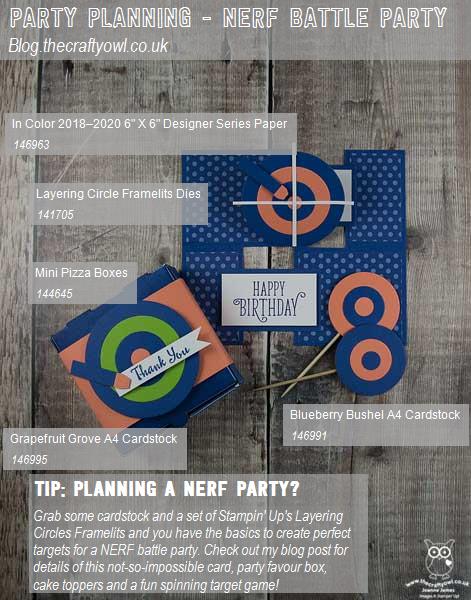
 

You can see all of my Product and 'How To' summaries on my 'How To - Tips and Techniques' Pinterest board in case you've missed any. 

For now, why not continue the blog hop for more creative party ideas? Do check out them rest of the Stampin’ Creative team to see what celebrations they have been preparing for. To carry on with the hop click on the names in the list below:


Enjoy the rest of your day. Mine will be a busy one, with a Family Fun Day, birthday party and sleepover (thankfully not at my house!) and the final performance of The Sound of Music for my eldest singing superstar - can't wait. I'll be back tomorrow with this week's post over at The Paper Players where the celebrations continue as we are celebrating our 400th birthday! We have a very special challenge for you as a result with lots of prizes to give away too so do pop back then - you are not going to want to miss it. Until then, happy stampin'!


Stampin' Up! Supplies Used: 

Table built using Product Table Builder by The Crafty Owl - Independent Stampin' Up! Demonstrator.

Vintage Leaves Autumn Home Decor Wreath

by Joanne James20. October 2015 22:27

I've had a busy day today with my 'Shake It Up!' Children's Craft Class making the shaker cards featured in the 'To You And Yours Shaker Cards Project Kit'. We all had tremendous fun and made lots of great cards. I'll share a picture from our class at the end of today's post, however in the meantime my blog project to share with you today is the one that my Facebook followers had a sneak peek of last week that I made with a lovely group of ladies - our Autumn leaf wreaths. We based our design on this one created by Stampin' Up! Artisan Designer Alison Okamitsu; I made a large wreath like Alison's to hang on my front door and the ladies liked it so much they wanted to create a similar, smaller version - here is ours:


We used a selection of muted colours and the wonderful Vintage Leaves stamp set and cut out the leaves using our Big Shot and co-ordinating Leaflets Framelits (one of the catalogue 15% off bundles if you are a bargain-hunter!), some pinecones, a few leaves punched with the bird builder punch and a burlap bow to finish. Isn't that pretty? The ladies were all so very pleased with their wreaths and their stamping as this is something of a first for them! 

This was a private class that I held for a group of like-minded friends who often invite me to run a class just for them. If you have a group of friends that you would like to arrange a crafty get-together with, or would simply like to join in with one of my existing scheduled classes, then do get in touch - I would love to hear from you! Don't forget the offer of additional Stampin' rewards is also still valid until the 9th November - party sales of £200 or more will earn an extra 3% of Stampin' Rewards (formerly known as Hostess Credits) so if you have a long wish list, I've still a few slots left so contact me to book your party today!

Before I go, let me share a photo of the James Juniors proudly displaying their handiwork from this morning's class:

Like mother, like daughter (and son!) as the saying goes - what else can I possibly add?!

Back tomorrow with another project; until then, happy stampin'!


Stampin' Up! Supplies Used:

Table built using Product Table Builder by The Crafty Owl - Independent Stampin' Up! Demonstrator.


To You And Yours Christmas Shaker Cards

by Joanne James6. October 2015 21:23

Today I have another kit based project to share with you: the 'To You And Yours Shaker Cards' project kit featured on page 4 of the current seasonal catalogue. Whilst I love creating my own cards from scratch, I am also a huge fan of Stampin' Up!'s card kits. Like the rest of the Stampin' Up! product range they are always of a very high quality and represent great value for money and for me are a great way to relax as I craft, as all I have to do is follow the instructions and put them together!

I don't always blog my kit projects because often they are completed then straight out the door (they make great last minute cards for busy crafters too!) however I often get the feedback when people see them made up at classes, parties or open house events that they look so much better in real life than the catalogue images. So, with that in mind I have been making a concerted effort, along with one of my downlines and fellow 'kit fan' Barbara, to get my kits put together ahead of time and share them with you. So here goes! 

The 'To You And Yours Shaker Cards' Project Kit contains everything you need to make 18 cards, 6 each of three designs. You can make them with or without the additional stamping - for this you will need the 'To You And Yours Too' co-ordinating stamp set and a few ink pads (see product table below). The first card features a star shaker, complete with star-shaped sequins:


The second card features a Christmas tree, with sequin baubles and glitter glass shaker:


The last card features a bauble, in gorgeous green and red (in case you're wondering, I swapped the sentiments on the front of each of the star and bauble cards because I preferred them this way) - I think this one is actually my favourite: 

Aren't they just gorgeous?! And not tricky to put together at all! So much so that I am running a couple of children's classes to make these cards during the forthcoming half-term holiday; you can check out the details by clicking on the 'events' tab on my Facebook page here or alternatively send me an email or give me a call - spaces are limited and they are filling up fast! Likewise, if you would like to get together with a group of grown up friends to make this kit then let me know - I'll bring along the inks and stamp sets, you just need to purchase the kits!

If you are purchasing this kit to craft at home, (or need more convincing!) the lovely people at Stampin' Up! have even made a video showing you step by step how to put the kit together:

I hope you enjoyed the review of this fantastic little kit; I'll be back with details of the other kits we offer in due course. That's all from me today - back tomorrow with details of this week's new Wednesday Weekly Deals and a creative punch art project. until then, happy stampin'!


Stampin' Up! Supplies Used:

Table built using Product Table Builder by The Crafty Owl - Independent Stampin' Up! Demonstrator.


Something Borrowed Mother's Day Necklace

by Joanne James16. March 2015 20:47

Happy Monday everyone! No card today - I'm sharing a little 3D project for a change. Last week I was booked to craft with a local Brownie pack to help them make gifts for Mother's Day. I know a few of the Brownies - and mums! - so couldn't share our little project until today, for fear of letting their secret out of the bag. Now we all know that with a special gift it's as much about the packaging as what's inside, so this is what our gifts looked like from the outside:


Each girl had one of the Tiny Treat Boxes to decorate with papers from the All Aboom DSP stack - so pretty for spring - and one covered, each box was finished with a colour-co-ordinated bow made using the Bow Builder punch. We had great fun making these - and used hundreds of glue dots in the process!! Inside the box, it opened to reveal:

Each of them made a delicate silver necklace using one of the Simply Borrowed Embellishments for decoration, beautifully presented on a co-ordinated cardstock insert. How pretty is that? The girls were so pleased with their handiwork and all smuggled them home to keep them as a surprise until yesterday. I had lots of messages from mums today who were thrilled with their gifts, so I think we can safely say it was a job well done!

I love crafting with children, whether my own, when running children's birthday parties or in larger groups such as this. If you live in or around Northampton and would like more information about children's parties or running a Crafty Owl activity for a larger group such as a Brownie or Girl Guide group, then do get in touch - I would love to discuss options with you.

That's all from me today; back tomorrow with a card for you. Until then, happy stampin'!


Stampin' Up! Supplies Used:

Table built using Product Table Builder by The Crafty Owl - Independent Stampin' Up! Demonstrator.


A Sweet Tweet For You!

by Joanne James13. February 2015 22:00

Yay it's Friday! It's been a long week and I'm glad the weekend is finally here. As it's Valentine's Day tomorrow, both James Juniors were keen to take some sweet treats into school to share with their class mates. I found these lovely heart-shaped jelly beans, that fitted perfectly into the thin cello bags:

This is just the first few - production became quite intense at one point and included boy- and girl themed packaging. You can see pictures of the total effort over on my Facebook page. These pretty pink ones were of course headed in the direction of the young ladies; we were stamping the tab top from the 'Hey, Valentine' set in a variety of pinks and colouring in with Blendabilities. Here's a close-up:

I definitely like the Melon Mambo one best (I'm such a 'brights' girl at heart) but they all look cute, especially with the addition of a heart-shaped Hodgepodge clip too. This little bag topper is a perfect fit for these cello bags and will work just as well at any other time of year too, not just Valentines. I also made a batch for a children's birthday party that I am hosting tomorrow afternoon, in pinks and purples. Our cello bags are great value at 50 for £2.25 and make such a nice way to create beautifully decorated party favours.

I'm told that the treats were well received by everyone which is nice to know and provided the perfect start to our forthcoming week-long half-term break.

Back tomorrow with another project; until then happy stampin'!


Stampin' Up! Supplies Used:

Table built using Product Table Builder by The Crafty Owl - Independent Stampin' Up! Demonstrator.


Horse Punch Art SUO #90

by Joanne James17. February 2014 21:26

Today I've had the most fun day. I was privileged to be invited to run a Crafty Owl birthday party for a 10 year old and her classmates, which was great fun. We made some wall art and they had a fun time punching shapes and using the Big Shot to create their masterpieces. When I run a craft party, I always create a punch art kit for the party bags so that the children can continue the crafty fun at home. For today's party, the birthday girl loves horses so I knew that a pony needed to feature on my card. I had a quick surf on Pinterest for some general inspiration then set to work creating my card. This is what I came up with:

I used a variety of punches to create my card (see full list below) and some Core d'inations cardstock embossed with the woodgrain embossing folder to give texture to my stable door. I've always loved grey horses so made my card with a grey pony, but since my eight year-old informed me that this made it look like a donkey, the kits I made for the party girls all had brown horses to remove any doubt!

The girls loved their kits and I'm sure they will have had as much fun completing them as they did at the party itself. I'm linking today's card up with the challenge over at SUO Challenges where the theme this week is 'Punch Art', so this card fits perfectly.

I ended my day with a trip to the cinema to see the new Lego Movie; it was a great children's movie for half term and fulfilled one of Ben's main aims for the week, so all in all a good day was had by all.

Back tomorrow with another project; until then, happy stampin'!


Stampin' Up! Supplies Used:

Table built using Product Table Builder by The Crafty Owl - Independent Stampin' Up! Demonstrator.

New Online Exclusives

There are new products available exclusively in the online store from 5 November - check them out here.

Latest Kits!

Stampin Cut and Emboss

The Layered Landscapes Kit and Nature's Paintings Kit are the latest kits in the online store - get yours here!

Shop Online

Access my online shop 24 x 7, 365 days of the year:

Current November hostess code:

9NKXDTTR

Shop Online

Mini Catalogue

BROWSE THE CATALOGUE

'Tis The Season - the new Stampin' Up! Mini Catalogue is here! For more details and to download your copy click here

Scrapbooking

Stampin' Up! has introduced a new range of 12x12" scrapbooking product and kit - the full range is now available to purchase online. To download a copy of the new digital Scrapbooking Catalogue click here.

2024-25 Annual Catalogue

BROWSE THE CATALOGUE

Click on the image to download your copy of the 2024-25 annual catalogue. For a full list of current SU! supplies, go to my online store. If you would like any help or advice, please drop me a line at joanne@thecraftyowl.co.uk or give me a call on 07773 421446 - I'd be happy to help.

Join My Team

It's always a great time to join Stampin’ Up! New team members can get £130 worth of products for only £99 + free business supplies + free shipping + all the fun being a part of Stampin’ Up! Stampin' Up! has something for everyone: join my growing team and benefit from my support to enjoy Stampin' Up! however you choose.

If you're interested, call me for a chat to understand how I can help you realise your goals. Alternatively, if you have already decided to sign up and you just can't wait, please click here for the link to the online form where you can sign up and order your starter kit right away! 

About Me

Hi I'm Joanne and live in Northampton and when I'm not looking after my husband and two beautiful children, am an avid crafter with a passion for all things Stampin' Up!

I must confess that I have never been a big rubber stamper - until I discovered Stampin' Up! that is. I love the fact that I can get such great results with co-ordinating stamps, inks, papers and punches - the possibilities are endless! Join me on my stamping journey as I share the things I love and be inspired to create amazing things yourself!

Follow Me

Monthly Newsletter

Box Builder

Click the button above to use Box Buster to create your custom box design using the Envelope Punch Board!

Kits Collection Now Available!

Stampin Cut and Emboss

The new Kits Collection from Stampin' Up! is now available!

Click here to see the current kits available and order yours online today.

I Design For


Stampin' Up Stuff

This is my personal blog and is not endorsed by Stampin’ Up! I hope you find it a plentiful source of ideas and personal inspiration but please don't copy my designs for contest submission or use for classes, publication or sale without express permission.