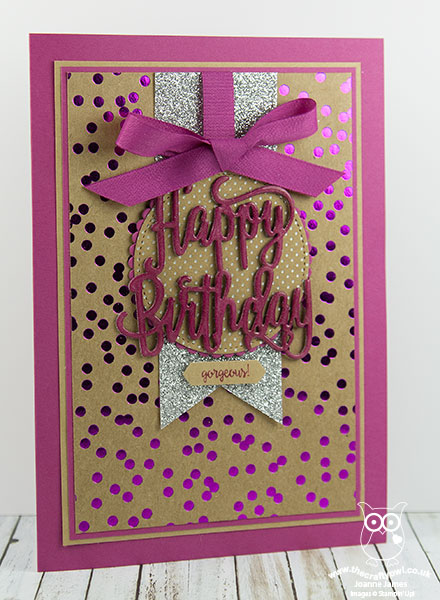
Today is a special day in the James household: the eldest of my juniors turns 12. I'm not sure where those years went by, although I do know that what was once my chubby little baby girl is now rapidly turning into a wonderful young woman with thoughts, hopes and dreams. So today I thoughts I would share the birthday card I made for Rebecca - take a look:

When I came to make Rebecca's card, I knew there were a number of things I needed to include: pink, sparkle and a big birthday wish and today's card is the result! Here's the low-down on my card:
Berry Burst: A Grown Up Pink - Whilst Rebecca isn't a girly-girl, she is most definitely a lover of pink! One of the new in-colours, Berry Burst, was my choice of pinks for her card; I think this pink is a rather grown-up pink and perfectly suited to a card for a discerning young lady. It also has some lovely co-ordinating accessories such as the 1/2" Finely Woven Ribbon, which ties beautiful bows.
Move Over Glimmer, There's A Foil Frenzy Going On! - So I had to include a small piece of silver glimmer paper on my card - Rebecca just loves the stuff! - but the real shimmer and shine comes from the new Berry Burst spotty Foil Frenzy kraft cardstock. With bright, colourful designs, this heavyweight foiled kraft cardstock will be perfect for boxes and I can't wait to start constructing, but for today it made a great base for the front of my card.
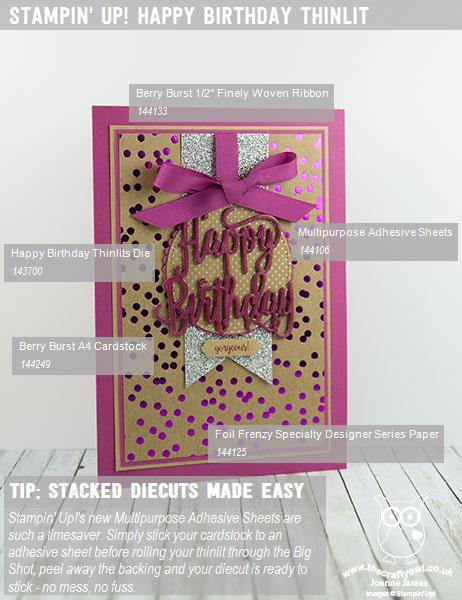
Stacked Diecuts Made Easy - For my sentiment I used the new Happy Birthday Thinlit to create my focal point, cutting and stacking three diecut pieces and brushing with clear Wink of Stella for a subtle sparkle before heat embossing with clear embossing powder a further three times. Effort? Yes. Worth it? Totally! There is a new adhesive that you may not have noticed in the new catalogue that makes light work of stacking and adhering die cuts - the new Multipurpose Adhesive Sheets (page 203 - you are welcome!) are such a timesaver. Simply stick your cardstock to an adhesive sheet before rolling your thinlit through the Big Shot, then you can peel away the backing and your diecut is ready to stick - no mess, no fuss.
Here is the visual summary of the key products used on today's project for you to pin for easy reference:

You can see all of my 'How To' summaries on my 'How To - Tips and Techniques' Pinterest board in case you've missed any.
I'm pleased to report that Rebecca's card received the official 'thumbs up', which is really all you can ask for when you're making a card with a special someone in mind.
I'll be back tomorrow with another project. Until then, happy stampin'!
Stampin' Up! Supplies Used: