Today I have my card for the new challenge over at Festive Friday Card Making and Paper Crafting Challenge.
.png)
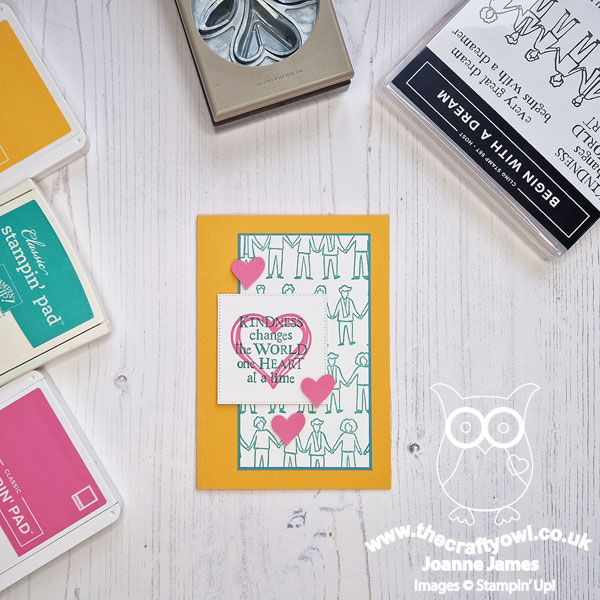
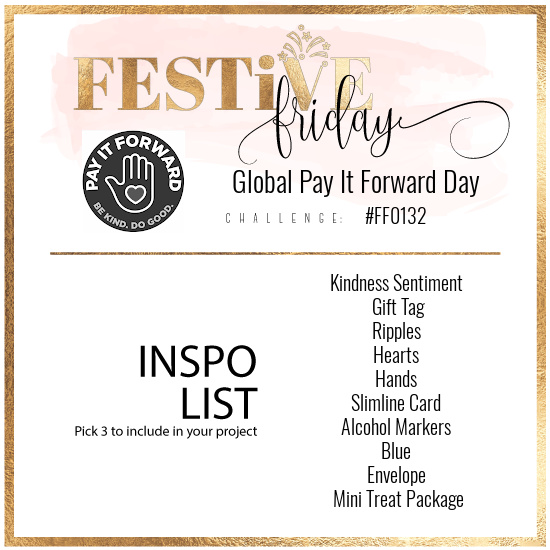
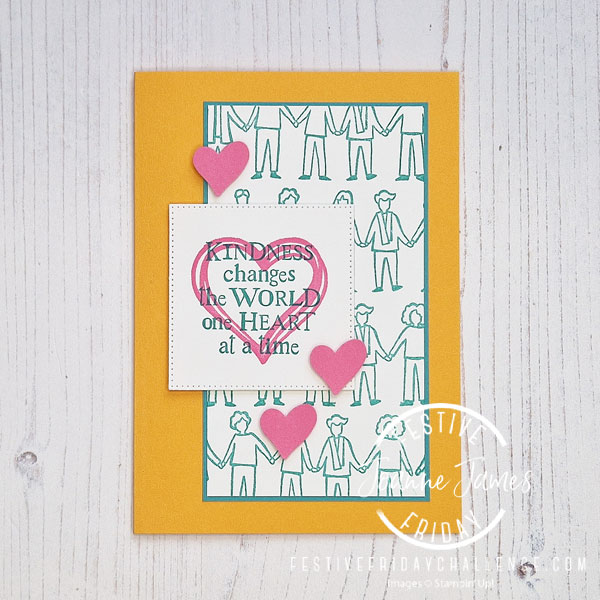
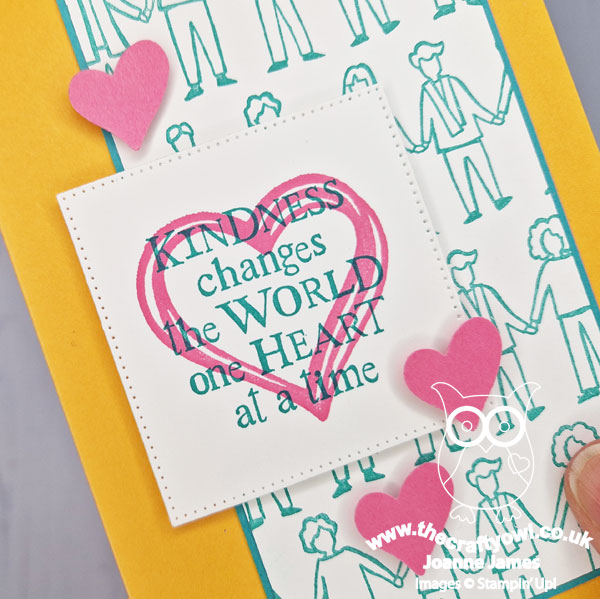
The challenge that we are celebrating this week is 'Global Pay It Forward Day' which is on April 28th. Remember the fun thing is that at Festive Friday you do not need to actually celebrate the occasion; your goal is to simply use three or more items from the inspiration list on your project. This week my card works perfectly for our theme: I used kindness sentiment, hearts and hands along with the trio of retiring colours being showcased over at Inspire.Create and this is what I came up with:
Here's the low-down on today's card:
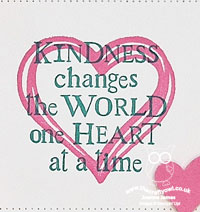
Begin With A Dream - The 'Begin With A Dream' stamp set is a host set, exclusively available to those who earn Stampin' rewards when they host a Stampin' Up! get-together with friends or place a single order of £150 or more. All about love and kindness, this set is perfect for the theme of 'paying it forward'. I used the row of people to create a custom DSP panel and layered my sentiment over a stamped pink heart for a pop of extra colour:
You can still get this stamp set with a qualifying order before the end of the month, so if it's on your list don't delay - get to my online store!
Bye Bye Brights - All three of the colours on today's card are retiring as part of the upcoming colour refresh. Polished Pink is a departing 2021-23 in-colour (I will miss this pink!) and Mango Melody and Bermuda Bay are retiring from the Brights family. I love all three of these colours, but wasn't sure I could make a project that featured all three on one card. I decided simple was best, so used Bermuda Bay as my main colour, with Mango Melody for my base and a pop of Polished Pink for accent colour. I think it works - what do you think? Will you miss any or all of these colours?
All Heart - As I looked at my almost finished card, I decided it needed a touch more pink than just the heart stamped behind my sentiment. I decided to add in a trio of cascading punched hearts for a little extra colour and the small heart on the Country Heart Punch was the perfect size and shape for the job. Love it when that happens!
This card took way more thought than it did execution time, but I really like the cheery result and will be perfect to pair with a treat for someone who is least expecting it. How will you 'pay it forward' later this month?
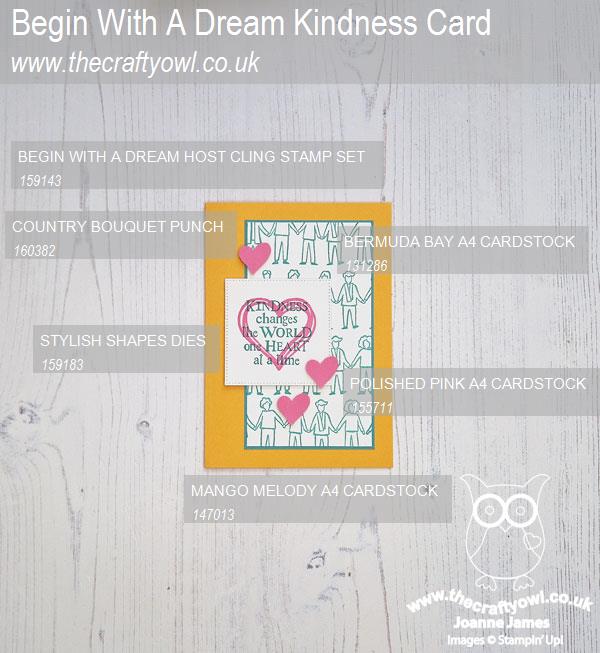
Here is the visual summary of the key products used on today's project for you to pin for easy reference:
You can see all of my 'How To' summaries on my 'How To - Tips and Techniques' Pinterest board in case you've missed any.
How does our board inspire you? I can’t wait to see what YOU create! For more inspiration, be sure to visit the rest of the Festive Friday Card Making and Paper Crafting Challenge Design team:
Enjoy your day and I'll be back tomorrow with another project for my GD spot over at Just Us Girls. Until then, happy stampin'!
Stampin' Up! Supplies Used: