Today I'm just squeaking in my card for the current Fab Friday challenge, helped along by the sketch at Hand Stamped Sentiments:


I love these bold, bright colours, but they did cause me to procrastinate over how to use them to best effect! There are some lovely cards in the gallery that use them as accents against a primarily white background, which looks great. In the end I decided to go full-on colour and even add a little sparkle - take a look:

Here's the low-down on today's card:
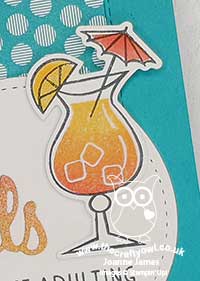
Anyone For Cocktails? - I decided to make another card using the 'Nothing's Better Than' stamp set and co-ordinating dies and featuring a colourful cocktail. These tropical colours reminded me of those fabulous rainbow-ombre type cocktails that you get that have red in the bottom, rising through orange to yellow and I wanted to recreate that on my card. It's really easy to do: just ink your stamp in yellow, then with a sponge dauber add orange and then lastly red to the bottom of the stamp respectively before stamping to achieve an easy ombre effect.
Ombre Sparkle - I cut into my Rainbow Glimmer Paper to create a fun, sparkly orange/yellow ombre diecut to mimic the colours and effect of my cocktail. I also added some clear WInk of Stella to my cocktail glass too for a little added shimmer - check it out here:
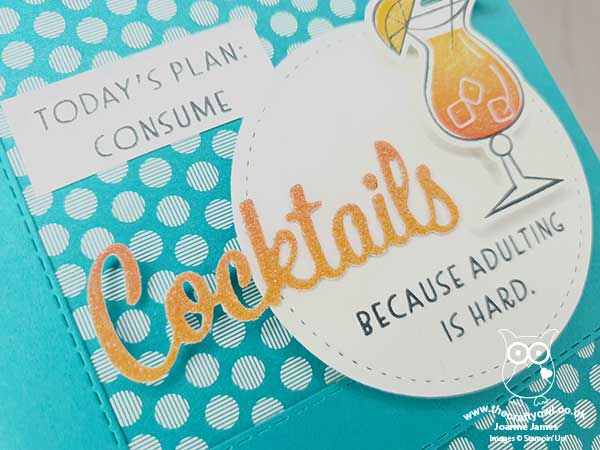
Stitched Rectangles Windows - Instead of adding mats to the top of my card as per the HSS sketch, I decided to get creative with my Rectangle Stitched Dies and create a custom aperture in my Bermuda Bay card base, then added some in-colour DSP in Bermuda Bay featuring the circle design, to echo my feature circle, behind.
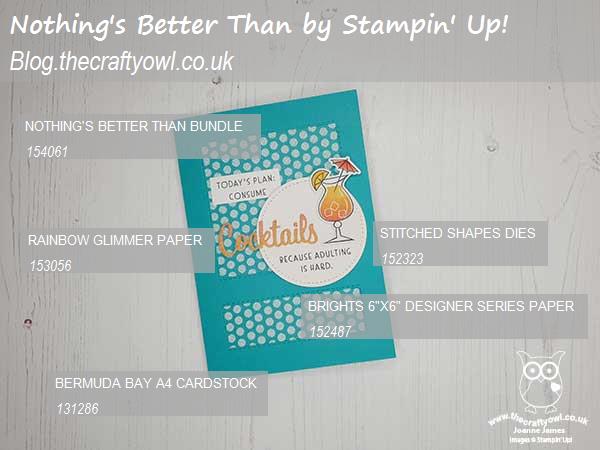
Here is the visual summary of the key products used on today's project for you to pin for easy reference:
You can see all of my 'How To' summaries on my 'How To - Tips and Techniques' Pinterest board in case you've missed any.
I was supposed to post this card yesterday but my day just seemed to run away with me - do you ever have days like that? I've just finished a fun online demonstration session this morning so wanted to squeeze this in before cracking on with the rest of today's activities, which unfortunately do not include consuming cocktails!! Ah well, never mind. Enjoy your day and I'll be back tomorrow with another project. Until then, happy stampin'!
Stampin' Up! Supplies Used:
To follow.