Quilted Christmas Star Quick and Easy Card

by Joanne James24. October 2017 21:00

I've had a busy day with the last of this month's technique classes - I'll share these cards later this week - and a couple of hours of garden tidying ready for the winter. Today I'm sharing another card using our sketch this week over at The Paper Players. Here's a reminder of the sketch:

You can see my original card here; I liked this sketch so much I made a second card too - take a look:


Here's the low-down on today's card:

Quilted Christmas - I used two of the Quilted Christmas patterned papers on today's card. The festive papers and colours in this pack make co-ordination easy and I love this traditional red and green colour combination. 

Add A Banner - The simple banner on my card is 2" wide and was punched with the Triple Banner Punch. This is one of my most useful and most used punches and whilst it gets lots of love I don't often give it a shout-out in my blog write-ups as it's one of those punches that I almost take for granted and there always seems to be something more exciting to talk about. Well, not today - three cheers for the Triple Banner Punch!

All About The Stitching - There is a common thread (pardon the pun!) running through today's card design and that is 'stitching'. From the patterns of my paper, to the stitched border that I used for my sentiment panel, along with the baker's twine bow and that pretty stitched felt star embellishment, stitching links them all and results in a clean and simple card with a seamless design. 

A simpler version of Sunday's card using the same layout, yet I love it - might have to knock a few more of these out to boost my Christmas card stocks! 

Here is the visual summary of the key products used on today's project for you to pin for easy reference:


You can see all of my 'How To' summaries on my 'How To - Tips and Techniques' Pinterest board in case you've missed any. 

Enjoy your day and I'll be back tomorrow with another project. Until then, happy stampin'!


Stampin' Up! Supplies Used:

Table built using Product Table Builder by The Crafty Owl - Independent Stampin' Up! Demonstrator.

Window Box Thinlits Pencil Gift Box and Back To School Card For The Paper Players PP360

by Joanne James3. September 2017 09:00

It's Sunday and time for this week's new challenge over at The Paper Players! My dear friend Claire is the hostess this week and she has a fun and timely theme for us to work with:
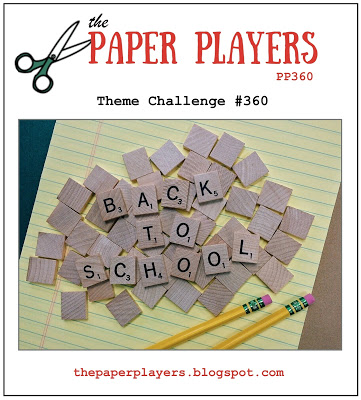
    

I know some of my readers in other countries have already seen a return to school, but for us this week Wednesday is the day, so this week's challenge is a timely one. Is it me or do all Mums especially get just a little excited at the prospect of the start of a new academic year and a return to school after the long summer break? Don't get me wrong, I love having my two Juniors at home and am thankful for the break from the sometimes relentless activities that comprise the school routine, however all good things must come to an end and so it is that we are getting ready to begin a new school year, with the excitement, opportunities and challenges that this will undoubtedly bring.

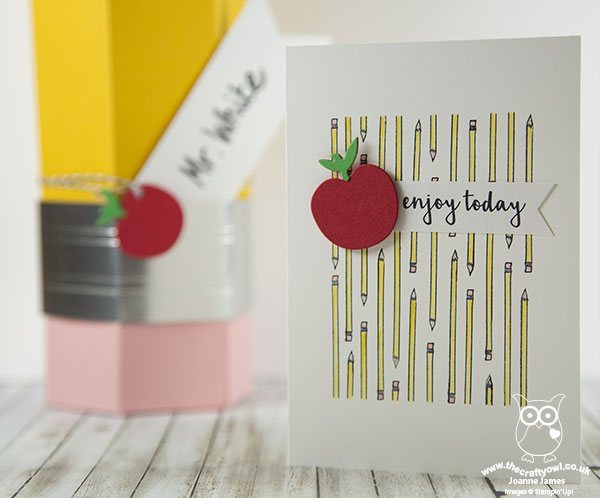
I've double projects for you today as I needed some gift packaging for a teacher gift this week, so took the opportunity to create a fun gift box and co-ordinating card - take a look:
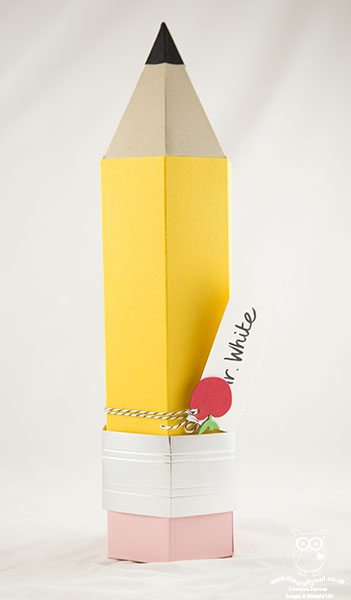
 

The gift box is rather large (approx. 18 inches long) so was something of a challenge to photograph but hopefully the detail below will enable you to see how I made it. Here's the low-down on today's projects:

A Window Turned Pencil Box - Having made an elongated box with my Window Box previously with the ladies in one of my technique classes earlier this year, I knew that I could use the same idea to create my pencil-shaped box. I cut one piece of the window box without cutting straight through and elongated this for the length of my sheet of A4 Crushed Curry cardstock. I then cut another piece that was the same length and the width of three sides, for the opposite 3 sides of my pencil, but without a bottom/lid. Instead I used some Maths to create a template for my pencil point in Crumb Cake, and adhered this inside the end of the tube to create my pencil point:
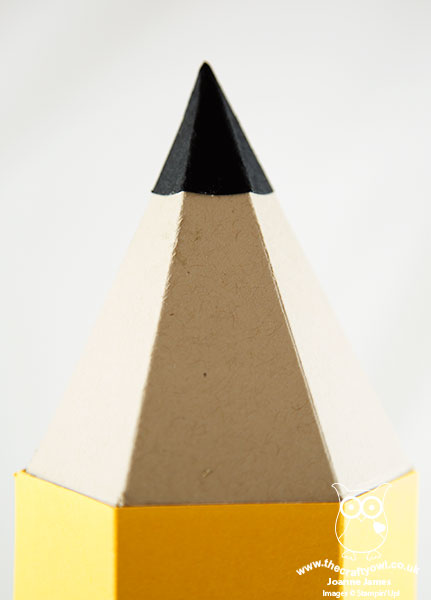
 

Here's a shot showing you how the main body of the pencil box opens to accommodate the main gift:
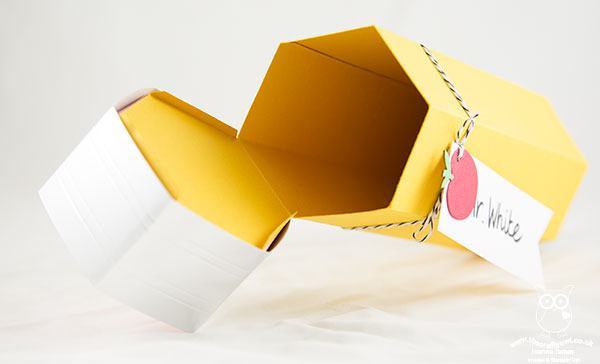
 

In addition to the main box, I also made a complete box using my Window Box Thinlits in Blushing Bride for my eraser and adhered this to the top of my pencil, which also opens separately - just big enough to add a little treat or two inside to accompany my main gift:
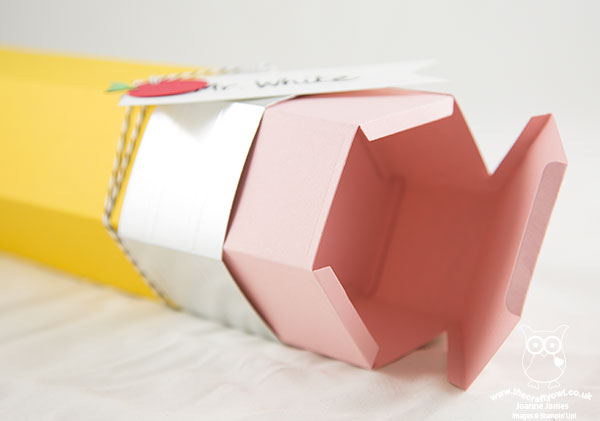
 

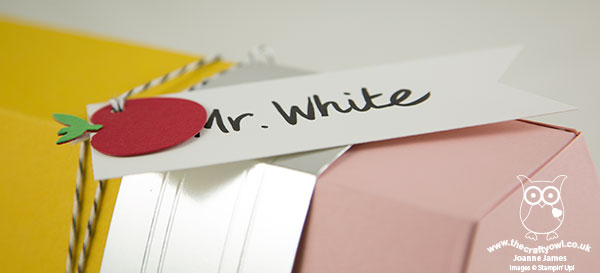
Finally I added a sleeve created from silver foil, to hold the pencil box closed securely - it just slides off to create access to the main box. A banner tag decorated with an apple - every teacher project has to have one, right? - finished my box. 
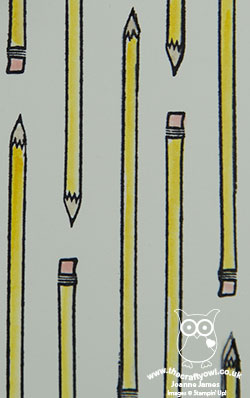
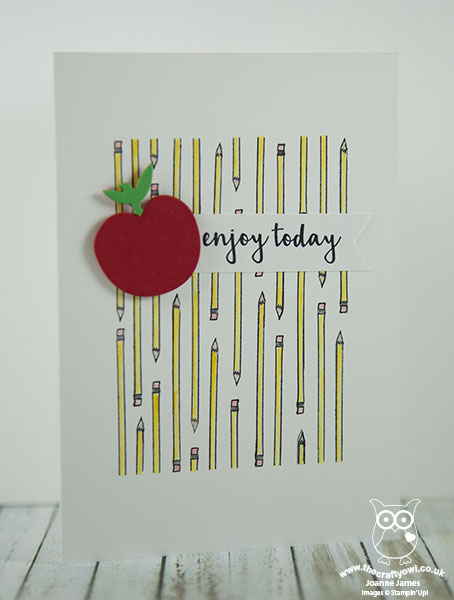
Pieces And Patterns For A Co-ordinating Card - I wanted a card to co-ordinate with my gift box, so decided to replicate the pencil design on a simple card using the pencil stamp from the Pieces and Patterns set. I masked a square and created my own repeating pattern - thank heavens for a stamp-a-ma-jig! - and then added a banner sentiment from the same set, again anchored with an apple (made using an old die I have in my stash):
Back To School Colours - My back-to-school pencil and apple colours fit perfectly with the colour palette and photo inspiration over at The Color Throwdown this week (I hope I'll be allowed my pink eraser and a few neutrals (the pencil really wouldn't be complete without it). I'm also linking my card up with the challenge over at Addicted to CAS where the code word is 'apples' and both of my projects fit the bill over at Paper Craft Crew where they have extended their 'back to school' challenge for another week:

      Play along with the Paper Craft Crew Theme Challenge 257! Visit www.papercraftcrew.com #theme #themechallenge #stampinup #sunnygirlscraps #playalong #cardmaking #papercrafting #papercraft #scrapbooking #handmade #rubberstamping #cards

Here is the visual summary of the key products used on today's project for you to pin for easy reference:
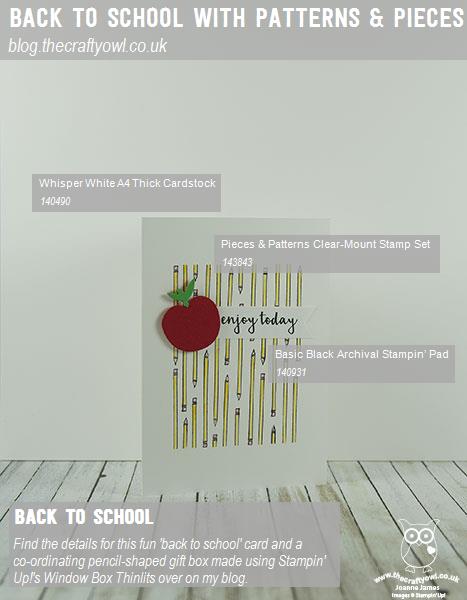
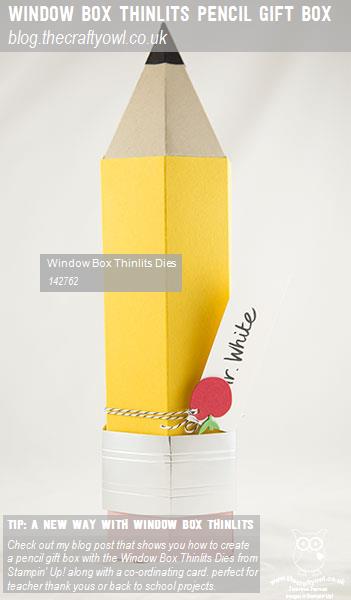
     

You can see all of my Product and 'How To' summaries on my 'How To - Tips and Techniques' Pinterest board in case you've missed any. 

Before you reach for your ink and papers, check out what our amazing team has created to inspire you this week:

The Paper Players Design Team
 
 
Here's a quick recap of our challenge rules:
 
1.  Create a new paper project
2.  Upload your creation to your blog with a link back to us and provide a direct link to the post featuring your challenge submission.
3.  Please link your card to no more than four challenges, TOTAL.
4.  Have FUN! 


I look forward to seeing what you create with this week's theme. Enjoy the rest of your weekend as it will be over all too quickly; I'll be back tomorrow with another project; until then, happy stampin'!


Stampin' Up! Supplies Used: 

Table built using Product Table Builder by The Crafty Owl - Independent Stampin' Up! Demonstrator.

Sale-A-Bration Any Occasion Baby Cards

by Joanne James30. March 2017 19:30

Today I'm sharing a couple of cards that I made for my last Sale-A-Bration class using Stampin' Up!s precut notelets and envelopes - take a look:


These cards would be great for a note to welcome a new baby boy or girl and would also make nice birth announcement cards. I made a video showing how I put these together - here it is if you would like to see just how quick and easy they are to make:

This stamp set contains lots of fun bits and pieces - I'm sure there are lots of similar combinations you could make for well, any occasion! 

Here is the visual summary of the key products used on today's project for you to pin for easy reference:


You can see all of my 'How To' summaries on my 'How To - Tips and Techniques' Pinterest board in case you've missed any. 

The links to my online store for the supplies to make today's cards are included below, but bear in mind you only have until 10.50pm GMT tomorrow evening to snap up your own 'Any Occasion' stamp set before we say goodbye to Sale-A-Bration for another year.

I'll be back tomorrow with another project. Until then, happy stampin'!


Stampin' Up! Supplies Used:


Table built using Product Table Builder by The Crafty Owl - Independent Stampin' Up! Demonstrator.


High Tide By The Shore

by Joanne James18. March 2017 21:00

Today I'm sharing a card for this week's sketch over at Freshly Made Sketches that also fits the current code word over at Addicted to CAS:

I decided to create a little scene for that central panel using the High Tide stamp set - take a look:


 Here's the low-down on today's card:

High Tide - High Tide is one of those sets that has oodles of possibilities: great for masculine cards and beach scenes, with some great sentiments too. The lighthouse is a two-step stamp, but because it is photopolymer this makes the stamps really easy to align the images. 

By The Shore - The colours for my card today were inspired by that wonderful striped panel from the By The Shore Designer Paper. It actually reminds me of old fashioned deckchairs on the beach, so reminiscent of my childhood when I spent many hours happily whiling away my summer days at the beach. 

The Obvious Mistake - Did you spot the obvious mistake on my card today? I didn't until I glued my card together; the funny thing is, I then stamped an alternative panel without the mistake and it wasn't as well balanced - so I went with my original design! If you've spotted it then do leave me a comment below and let me know if you think I should have changed it; if you're reading this and wondering what I'm talking about, then I guess it's not as obvious as one might think - and you should continue, none the wiser!

Here is the visual summary of the key products used on today's project for you to pin for easy reference:


You can see all of my 'How To' summaries on my 'How To - Tips and Techniques' Pinterest board in case you've missed any. 

I'll be back tomorrow with this week's card for the new challenge over at The Paper Players where I am the hostess this week. Until then, happy stampin'!


Stampin' Up! Supplies Used:

Table built using Product Table Builder by The Crafty Owl - Independent Stampin' Up! Demonstrator.

Thankful Thoughts Meets Succulent Garden

by Joanne James12. March 2017 09:00

It's Sunday and time for this week's new challenge over at The Paper Players! It's the turn of the wonderful Jaydee to host this week and she has a fun colour challenge for us to work with:


I love green, especially bright greens - Cucumber Crush is one of my all time favourites! - but for today's challenge I decided to go with an altogether more subtle green in Mint Macaron - take a look:


Here's the low-down on today's card:

Succulent Garden - I chose to use a 'tricky' piece of designer series paper on my card today from the Succulent Garden pack. I have been at a loss as to how I should use some of the papers and patterns in this pack and I felt that this sheet in particular lent itself to a monochromatic card in green and white, so used is to cover my entire card front.

A Bold Sentiment - With such a busy paper pattern, I needed a simple, bold sentiment so I chose this bold thank you from the 'Thankful Thoughts' stamp set. I stamped in Mint Macaron onto Whisper White and I used my Stitched Shape Framelits to add a little interest to my otherwise plain circle. With the exception of my row of stamped cacti inside my card and on the front of my co-ordinating envelope, this is all the stamping to feature on my card.

Triple Banners That Sparkle - I added a trio of banners to anchor my sentiment circle, one each in green and white and the third in Mint Macaron glimmer paper, the latest in the Sale-A-Bration free product offering. The sparkle and texture of the glimmer paper introduces another element yet is still in keeping with the overall monochromatic feel of my card.

Here is the visual summary of the key products used on today's project for you to pin for easy reference:


You can see all of my Product and 'How To' summaries on my 'How To - Tips and Techniques' Pinterest board in case you've missed any. 

So a super simple card today, but one with a very calming colour scheme that I hope Jaydee will appreciate.

Before you reach for your ink and papers, check out what our amazing team has created to inspire you this week:

The Paper Players Design Team
 
 
Here's a quick recap of our challenge rules:
 
1.  Create a new paper project
2.  Upload your creation to your blog with a link back to us and provide a direct link to the post featuring your challenge submission.
3.  Please link your card to no more than four challenges, TOTAL.
4.  Have FUN! 


I look forward to seeing what you create with this week's colour palette. Enjoy the rest of your weekend as it will be over all too quickly; I'll be back tomorrow with another project; until then, happy stampin'!


Stampin' Up! Supplies Used: 

Table built using Product Table Builder by The Crafty Owl - Independent Stampin' Up! Demonstrator.

Detailed Santa Thinlits Banner Card

by Joanne James29. October 2016 19:37

I hope you're all enjoying a lovely weekend. Today I have a card using this week's sketch over at Freshly Made Sketches:

I've finally managed to break the seal on Detailed Santa Thinlits Dies and been putting them through their paces. Today's card also features a new background stamp - take a look:


Here's the low-down on today's card:

Detailed Santa Thinlits Die - Although I haven't used it before, this Santa die was one of my first purchases from the seasonal catalogue. I adore the detail of his face and beard and there are so many ways in which he can be used. Here I've cut a section of the image in Whisper White and mounted it on a banner of Real Red. You can't see in the photograph, but the whole of the white layer has been brushed with clear Wink of Stella and has a lovely subtle shimmer to it.

Put A Label On It - I stamped my sentiment from the co-ordinating 'Greetings From Santa' stamp set and cut it out with one of my Project Life Cards and Labels Framelits, great for memory keeping but perfect for card making too.

A Merry Medley - For my base, I chose to use the 'Merry Medley' background stamp, stamped in Soft Suede onto neutral kraft cardstock. I like that it adds interest without fuss and too much detail, yet is in keeping with the festive theme of my card.

Here is the visual summary of the key products used on today's project for you to pin for easy reference:


You can see all of my 'How To' summaries on my 'How To - Tips and Techniques' Pinterest board in case you've missed any. 

I'll be back tomorrow with another santa project, this time for this week's new challenge over at The Paper Players; until then, happy stampin'!


Stampin' Up! Supplies Used:

Table built using Product Table Builder by The Crafty Owl - Independent Stampin' Up! Demonstrator.

A Little Foxy Festive Reindeer

by Joanne James3. July 2016 09:00

It's been a busy week with blogging every other day I'm afraid as there is just so much happening in the James household. Rebecca gave a sterling performance as Dorothy in the Wizard of Oz on Thursday and whilst Friday evening was a relatively quiet one, I did not manage a post! Yesterday I did manage to finish my preparations for next week's classes and make a few more cards, so onwards and upwards as the saying goes! 

Today it's Sunday and time for a new challenge over at The Paper Players! It's the turn of the lovely Sandy to host this week and she has a festive themed challenge for us to play along with:


Christmas in July - now that is what I call organised! For my card this week I decided to use my Foxy Friends bundle again - this time to create a cute reindeer for my Christmas card. I also used this week's Mojo Monday sketch and the Color Throwdown colour palette for my creation:


Here's the low-down on today's card:

A Little Foxy Festive Reindeer - As I mentioned last week, the 'Foxy Friends' stamp set makes all kinds of cute baby critters and woodland animals - including a festive reindeer. Aren't those little antlers just adorable?

Lots of Labels - I decided to frame my stamped reindeer with a double mat in Real Red and Chocolate Chip using the Lots of Labels framelits. These framelits are great for layering and create a little more interest than a standard rectangle.

Red-Nosed Rudolf - I have used a number of retired products on my card today: the red button, the circle framelits to cut the background circle and the paper that I used for it (it's so vintage I don't even remember its name!) but since the background paper has a lovely glittery red polka dot pattern, I decided I did need to use one of my new favourite embellishments to finish my card in style: a Real Red Enamel Shape circle - the perfect finishing touch for my reindeer's nose!

I just love the versatility of this stamp set; that coupled with my first Christmas card of the year I think makes this a worthy card! Here is the visual summary of the key products used on today's project for you to pin for easy reference:


You can see all of my 'How To' summaries on my 'How To - Tips and Techniques' Pinterest board in case you've missed any. 

Before you reach for your ink and papers, check out what our amazing team has created to inspire you this week:

The Paper Players Design Team
 
 
Here's a quick recap of our challenge rules:
 
1.  Create a new paper project
2.  Upload your creation to your blog with a link back to us and provide a direct link to the post featuring your challenge submission.
3.  Please link your card to no more than four challenges, TOTAL.
4.  Have FUN! 

I look forward to seeing your Christmas creations in the gallery this week.

It is another big day in the James household today: Ben was selected for the Northamptonshire county allstars under-10s basketball team and he has his first match against Oxfordshire this afternoon. It's a big deal as he is one of only 12 children selected across the whole of the county - and we are all going to cheer him on for his match. Wish him luck!

Back tomorrow with another project; until then, happy stampin'!


Stampin' Up! Supplies Used:

Table built using Product Table Builder by The Crafty Owl - Independent Stampin' Up! Demonstrator.

You Did It! With Giggle Greetings

by Joanne James7. February 2016 09:00

Did you miss me? Apologies for the lack of blog posts over the last couple of days. I've had plenty of projects, just not enough time to write up! However today it's Sunday and time for a new challenge over at The Paper PlayersThis week it is the turn of my talented friend LeAnne to host and she has a fun theme challenge for you to play along with:


This proved something of a tricky week for me! As someone known for not being the world's biggest pet lover, I don't have much in the way of cats or dogs in my stamp collection. I'd been thinking about what I was going to do for this challenge all week, wondering whether I should get creative with some punch art, when I had a 'light bulb' moment and thought I would use my Balloon Builders set and build a dog. When I looked at my finished attempt, I wasn't sure about it; my husband poked his head round my office door, looked at it and said "Well, maybe it could pass for Wylie Kyote ... are you SURE you don't have any cat or dog stamps??" and proceeded to go searching along my shelves! So needless to say the balloons got tossed aside in favour of this card, as my dear husband had a 'Eureka!' moment and discovered my long-unused Giggle Greetings set:


I used this week's Colour Q palette and coloured my dog with my retired Blendabilities and created some fun layers with some embossing using my large polka dots embossing folder on the top one. I framed my stamped piece using my Circle Framelits, added a few banners from some retired scraps of designer series paper and some thick Cherry Cobbler baker's twine and my card is complete.

A fun puppy dog that as it turns out was perfect for the job and since I needed a few congratulations cards too I got one of those into the bargain! That will teach me to get all creative and not check my collection thoroughly first!! (edited to add: I did decide to put the balloon animal to good use, although balloon dog might be considered a stretch! You can find him here - let me know what you think!)

Before you reach for your ink and papers, check out what our amazing team has created to inspire you this week:

The Paper Players Design Team
 
 
Here's a quick recap of our challenge rules:
 
1.  Create a new paper project
2.  Upload your creation to your blog with a link back to us and provide a direct link to the post featuring your challenge submission.
3.  Please link your card to no more than four challenges, TOTAL.
4.  Have FUN! 


I look forward to seeing what you create with this week's theme. We have a day of sport today, with basketball and hockey in store and then some time this afternoon making Tudor costumes for Ben's current school history project.

Back tomorrow with another project; until then, happy stampin'!


Stampin' Up! Supplies Used: 

Table built using Product Table Builder by The Crafty Owl - Independent Stampin' Up! Demonstrator.

Awesomely Artistic Banner Punch Card

by Joanne James6. January 2016 20:00

I can't quite believe that it's Wednesday already - this week is just zipping by! I've had two days of classes and a great start to Sale-A-Bration. So a quick post from me today sharing another of the cards from my technique card this week using the 'Awesomely Artistic' stamp set:


This time with a Mint Macaron base, a little Timeless Elegance Designer Series Paper and a double flagged banner across the centre to draw the eye to the collage panel and trio of dragonflies and add interest to the overall design. More Wink of Stella on the dragonfly wings (clear this time) and a coloured enamel dot to highlight the sentiment completes my card. Oh and a co-ordinated envelope too!


Table built using Product Table Builder by The Crafty Owl - Independent Stampin' Up! Demonstrator.


A Happy New Year To You!

by Joanne James31. December 2015 08:05

It's New Year's Eve and it's time for a new challenge over at Create With Connie and Mary and this week we have a great sketch for you:


As soon as I set eyes on this sketch I knew what I was going to do with it - I just love it when that happens! I decided to use up some scraps of Winter Wonderland designer series paper and create a card to celebrate the new year - take a look:


I used a mix of patterns and papers for my banners and then a collection of stars, some solid and some just in outline, cut with my Big Shot and Star Framelits, some metallics star sequins and with my sentiment from the 'Six Sayings' hostess set stamped in Versamark and heat embossed in black across the front of the main star to create the focal point of today's card.

Do visit the other Design Team members to see how they interpreted this week's sketch; there's lots of inspiration over on their blogs too! I will be delivering this card today to my Mother-in-Law who is hosting the annual New Year's James family gathering - I am reliably informed that my brother-in-law's gorgeous puppy Ollie is joining us too, so here's to a day that is likely to be fun and chaotic day!

I'm also linking up today's card over at SUO Challenges where the theme is new years projects.

Enjoy your day and I'll be back tomorrow with another project; until then, happy stampin'!


Stampin' Up! Supplies Used:

  • Winter Wonderland Specialty Designer Series Paper
  • Winter Wonderland Designer Vellum Stack
  • Six Sayings Wood-Mount Stamp Set
  • Stars Framelits Dies
  • Metallics Sequin Assortment
  • Gold Foil Sheets
  • Basic Black 3/8" Stitched Satin Ribbon
  • Banner Triple Punch
  • Big Shot
  • Whisper White A4 Cardstock
  • Embossing Buddy
  • Versamark Pad
  • Heat Tool (Uk)
  • Black Stampin' Emboss Powder
  • Basic Black A4 Cardstock


Mini Catalogue

BROWSE THE CATALOGUE

The mini catalogue is now live! Read and download your copy here.

Shop Online

Access my online shop 24 x 7, 365 days of the year:

Current March hostess code:

S9F2XJJW

Shop Online

Join My Team

It's always a great time to join Stampin’ Up! New team members can get £130 worth of products for only £99 + free business supplies + free shipping + all the fun being a part of Stampin’ Up! Stampin' Up! has something for everyone: join my growing team and benefit from my support to enjoy Stampin' Up! however you choose.

If you're interested, call me for a chat to understand how I can help you realise your goals. Alternatively, if you have already decided to sign up and you just can't wait, please click here for the link to the online form where you can sign up and order your starter kit right away! 

Latest Kit!

Stampin Cut and Emboss

The Rock Legend Kit has all you need to make 8 cards with coordinating envelopes. Along with the new Panda Friends Kit, both are available from January 4th for just £14 each - get yours here!

2023-24 Annual Catalogue

BROWSE THE CATALOGUE

Click on the catalogue for a full list of current SU! supplies - if you would like to order any of the items featured, please drop me a line at [email protected] or give me a call on 07773 421446 - I'd be happy to help.

New Online Exclusives

There will be new products available exclusively in the online store from 5 March - check them out here.

About Me

Hi I'm Joanne and live in Northampton and when I'm not looking after my husband and two beautiful children, am an avid crafter with a passion for all things Stampin' Up!

I must confess that I have never been a big rubber stamper - until I discovered Stampin' Up! that is. I love the fact that I can get such great results with co-ordinating stamps, inks, papers and punches - the possibilities are endless! Join me on my stamping journey as I share the things I love and be inspired to create amazing things yourself!

Follow Me

Monthly Newsletter

Box Builder

Click the button above to use Box Buster to create your custom box design using the Envelope Punch Board!

Kits Collection Now Available!

Stampin Cut and Emboss

The new Kits Collection from Stampin' Up! is now available!

Click here to see the current kits available and order yours online today.

I Design For


Stampin' Up Stuff

This is my personal blog and is not endorsed by Stampin’ Up! I hope you find it a plentiful source of ideas and personal inspiration but please don't copy my designs for contest submission or use for classes, publication or sale without express permission.