Trimming the Town Horizontal Card Three Ways

by Joanne James24. August 2020 08:00

Another Monday, another week! Lots happening this week so I need to be even more organised that usual! Today I'm sharing a card (or 3!) using this week's sketch over at The Paper Craft Crew:

Remember when I cut up that 12" x 12" sheet of scene DSP from the Trimming The Town pack I cut up to make 4 slimline cards here? I showed you the other 3 smaller pieces of DSP I had leftover and this week's sketch was perfect for me to use these to complete my set of cards. Here is each of my cards in turn:


Card 2:


Card 3 - I flipped the sketch on the vertical for this one as the sentiment worked better on the left side of my framed scene:


Here's the low-down on today's card:

Each of my cards uses a Misty Moonlight card base, with a panel of snowflake paper followed by a piece of the scene, which is framed in a Poppy Parade border cut with the scallop-edged Layered Squares dies. The sentiments have also been cut from the Trimming The Town DSP and popped up on dimensionals, along with a fussy cut tree and also a small ribbon bow on one of my cards:


I did a little stamping on the inside of my card, but the outside was all about snipping with my scissors and some diecut frames - nice and straightforward and I've used my whole sheet of DSP.

Here is the visual summary of the key products used on today's project for you to pin for easy reference:


You can see all of my 'How To' summaries on my 'How To - Tips and Techniques' Pinterest board in case you've missed any. 

Enjoy your day and I'll be back tomorrow with another project. Until then, happy stampin'!


Stampin' Up! Supplies Used:

Table built using Product Table Builder by The Crafty Owl - Independent Stampin' Up! Demonstrator.

Gilded Autumn Patterned Paper Trio of Thank You Cards for PP505

by Joanne James23. August 2020 09:00

Today it's Sunday and time for this week's new challenge over at The Paper Players! It's the turn of the amazingly talented LeAnne to host this week and she has my favourite, a sketch challenge for you to work with:


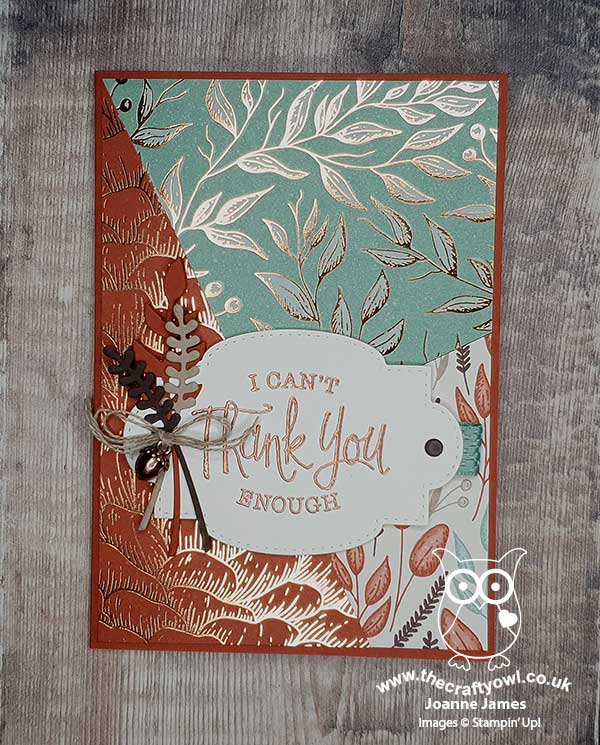
LeAnne's sketch is perfect to showcase some designer series papers and I couldn't resist another card using the Gilded Autumn speciality designer series papers - take a look:


Here's the low-down on today's card:

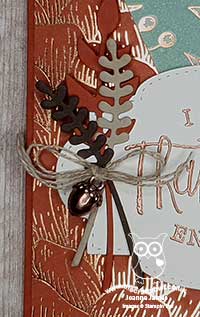
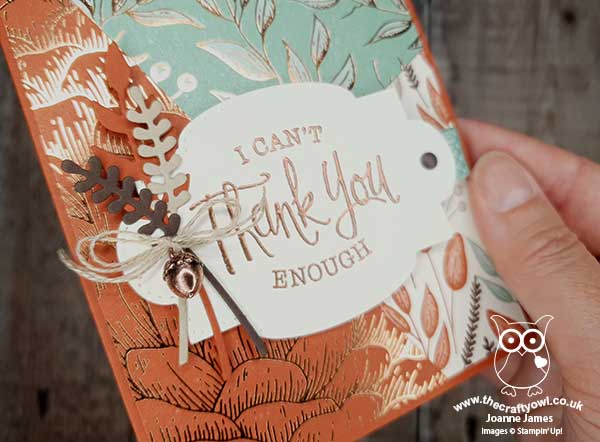
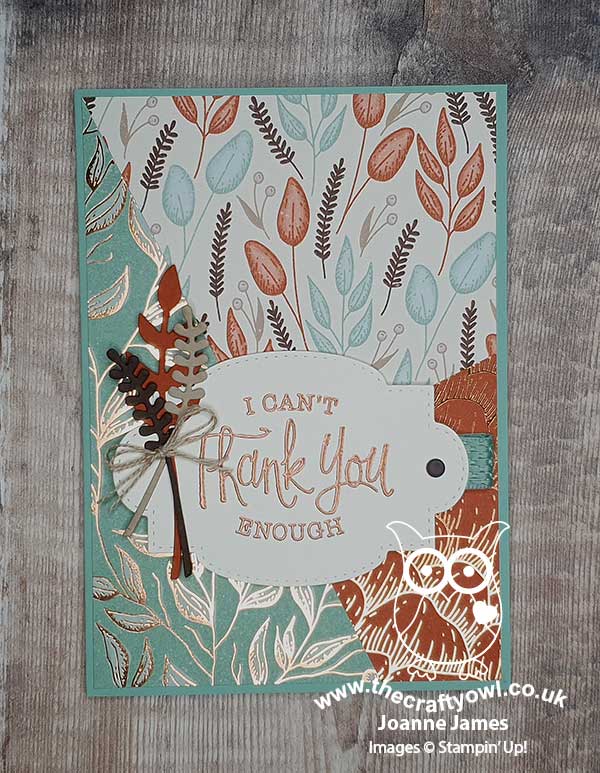
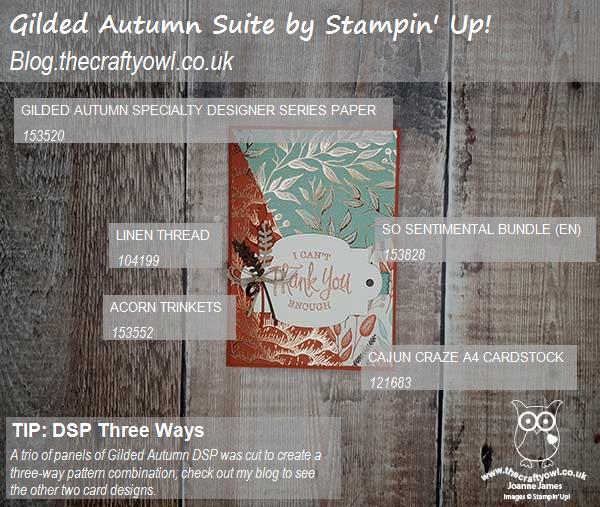
Gilded Autumn Goodness - The Gilded Autumn papers are beautiful, with some fabulous foil detailing. I paired my chosen patterns with a sentiment and label from the 'So Sentimental' bundle and added some of the ribbon from the suite to my label too.

A Copper Acorn - I used some retired dies for my diecut leaves (from the Beautiful Bouquet die set) as they had a shape that works well with the patterns on the paper and added a double linen thread bow. I stopped there on my two additional cards as I wanted them to be post-friendly, however I couldn't resist adding one of the lovely copper acorn trinkets from the suite to one of my cards - these are just so pretty:


I'm going to link this card up over at Hand Stamped Sentiments too - I just love their inspiration photo this week, it's so perfect for the season!

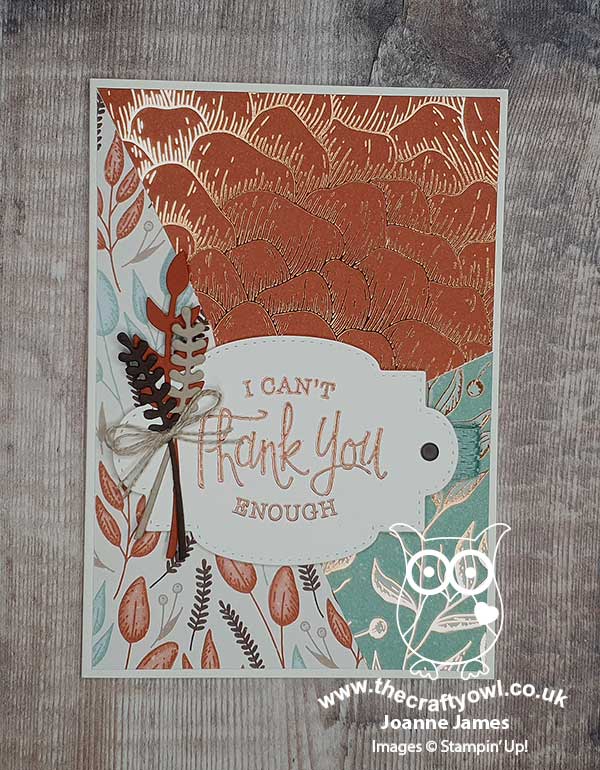
And Two Makes Three - As I mentioned above, having cut 3 rectangular pieces of DSP, and then cut all three together at the same angle on my guillotine, I made another two cards to use up all of the pieces. Here's my second card:


And my third card:


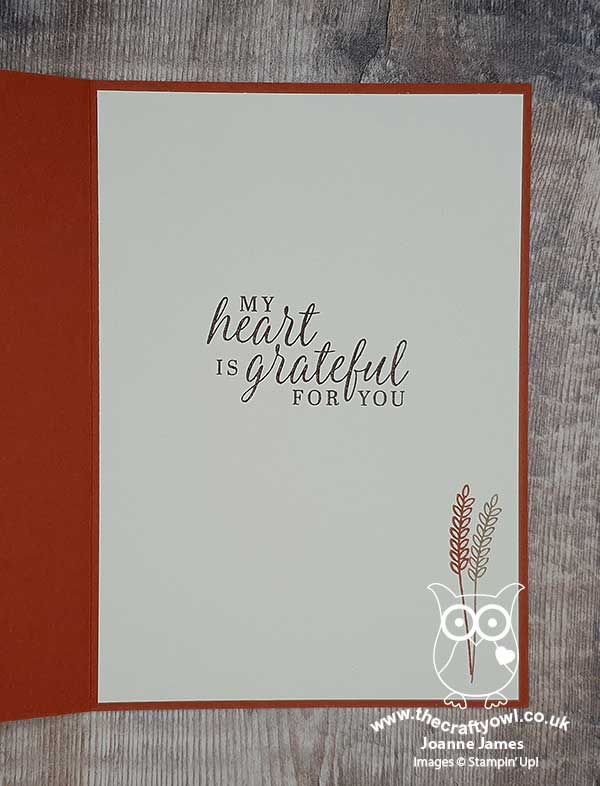
A little simple stamping using the 'Beautiful Autumn' set inside finished each card:


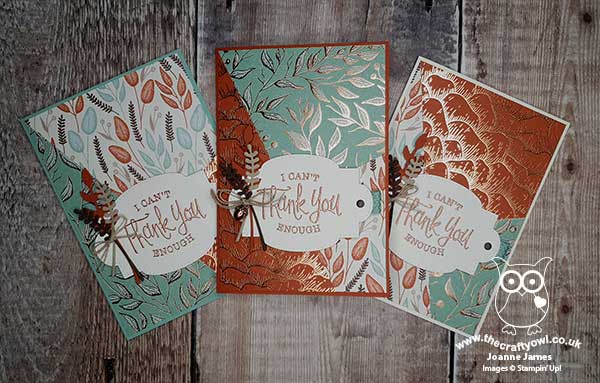
Here's all three of my cards together - do you have a favourite? Leave me a comment, I would love to hear your thoughts.


Here is the visual summary of the key products used on today's project for you to pin for easy reference:


You can see all of my Product and 'How To' summaries on my 'How To - Tips and Techniques' Pinterest board in case you've missed any. 

Before you reach for your ink and papers, check out what our amazing team has created to inspire you this week:

Here's a quick recap of our challenge rules:
 
1.  Create a new paper project
2.  Upload your creation to your blog with a link back to us and provide a direct link to the post featuring your challenge submission.
3.  Please link your card to no more than four challenges, TOTAL.
4.  Have FUN!

You can see all of my 'How To' summaries on my 'How To - Tips and Techniques' Pinterest board in case you've missed any. 

Enjoy your day; I'll be back tomorrow with another project. Until then, happy stampin'!


Stampin' Up! Supplies Used: 

Table built using Product Table Builder by The Crafty Owl - Independent Stampin' Up! Demonstrator.

Gilded Autumn Suite Layered Thank You Card

by Joanne James21. August 2020 20:00

Today I'm sharing another card that uses this week's Global Design Project sketch and this time the inspiration photo over at Hand Stamped Sentiments:


The #GDP254 sketch has so many possibilities and I couldn't resist those autumnal colours, leaves and acorns on the HSS photo. This is the original card I made with the sketch (if you missed it I shared another one yesterday here), along with my first outing with the fabulous Gilded Autumn Suite of products - take a look:


Here's the low-down on today's card:

Gilded Autumn - The catalogue describes the Gilded Autumn Suite as 'nature-inspired imagery, with gold and copper foiling to give autumn an infusion of elegance' - this totally sums up the beauty of the products in this suite, especially the papers. I used a piece of gold-foiled Cajun Craze paper for my card base, then added a layer of brushed gold cardstock before adding a Stitched Rectangle with the reverse of my base pattern, featuring a variety of coloured autumn leaves. 

Leaves and Acorns - I used a trio of gold heat-embossed leaves and acorns to decorate my sentiment label, each of which was easily punched out using the autumn punch pack punches. These punches are quite a decent size; I thought they would be small, like the itty bitty punches we've had previously, but they are more like the size of the small bloom punch. They also co-ordinate with some of the paper patterns - bonus! They are two-step stamps, with an outline and infill and are easy to align - I even used them to decorate the inside of my card: 


Gold, Gold and More Gold - I couldn't resist adding more touches of gold to my card: the designer paper, the heat embossed sentiment and punched leaves, along with the brushed gold cardstock border and a tiny gold twine bow on my acorn give the whole thing a wonderful warm glow:

I think I've fallen in love with the foil detailing on these papers and all of the lovely coordinating products in this suite. Looking forward to creating more with them!

Here is the visual summary of the key products used on today's project for you to pin for easy reference:


You can see all of my 'How To' summaries on my 'How To - Tips and Techniques' Pinterest board in case you've missed any. 

Enjoy your evening and I'll be back tomorrow with another project. Until then, happy stampin'!


Stampin' Up! Supplies Used:

Table built using Product Table Builder by The Crafty Owl - Independent Stampin' Up! Demonstrator.

So Much Happy Happy Birthday Balloons TTT78

by Joanne James20. August 2020 18:00

It's Thursday and time for a new challenge over at TicTacToe! It's the turn of Team X to host this week and the lovely Felicita is our featured designer this week. This is the fun board that we are playing along with: 


I went with the right hand column balloon/any shape die/free, but my card also works for the diagonal balloon/celebration/any colour ink. I needed some birthday cards for my stash so took this opportunity to break out my So Much Happy Bundle for a bold and bright card - take a look:


Here's the low-down on today's card:

That fabulous HAPPY Die is the starting point for my card, set at a jaunty angle. I then added the rest of my sentiment using the coordinating 'So Much Happy' stamp set and stamped a whole bunch of balloons in a variety of sizes and patterns, some of which I diecut and added strings to also, before adding to my card.

I popped a few up on dimensionals to add to the effect - you can see that more closely here:


And finally I added a little extra stamping inside my card to finish:


The dies really make this card a step-up from what is otherwise a collection of stamps, ink and paper - and easy to create in so many different colourways! What colours would you use to recreate this card? Do leave me a comment - I'd love to hear your thoughts!

Here is the visual summary of the key products used on today's project for you to pin for easy reference:


You can see all of my Product and 'How To' summaries on my 'How To - Tips and Techniques' Pinterest board in case you've missed any. 

A tictactoe board offers so many creative possibilities - how does this week's board inspire you? Why not have a go? We would love to see you in the gallery and who knows - you might be selected for Designer's Choice and be eligible to be a guest designer on a future challenge. 

Enjoy your evening; I'll be back tomorrow with another project. Until then, happy stampin'!


Stampin' Up! Supplies Used: 

Table built using Product Table Builder by The Crafty Owl - Independent Stampin' Up! Demonstrator.


Back To School CAS Inspiration PP504

by Joanne James16. August 2020 09:00

Today it's Sunday and time for this week's new challenge over at The Paper Players! It's the turn of the amazing Claire to host this week and she has a timely Clean and Simple challenge for you to work with:


Back to school is still a few weeks away here in the UK, but I'm all for getting organised! Hopefully the Juniors will be returning to school properly; this is a big year for us, with one about to embark on GCSEs and the other moving schools for the start of year 9. So I have a couple of cards to share with you today, each made with them in mind. Here's the first one, that was inspired by the current sketch, colours and photo over at Sugar Pea Designs:


I used the sweet image of a young lady reading a book whilst sheltered under a tree from the annual catalogue hostess set, 'Summer Days', and coloured with my Blends in the likeness of Miss Rebecca, before cropping with my (retired) Circle Framelits and mounting on a Night Of Navy card base, with a Cherry Cobbler banner piece tied with some twine from my stash. The sentiment on the front of my card is from the 'Rooted In Nature' stamp set and I used another stamp from this set to complete the inside of my card:


My second card uses this week's Freshly Made Sketches layout from Jen B where I challenged myself to embrace the diagonal and got creative with my diecut sentiment - take a look:


I added a 'd' from the 'adventure' die and added it to the 'inspire' die in the Sweet Silhouettes set and combined with a 'be' from the Rooted In Nature set to create my sentiment and backed it with a black strip for a chalkboard effect, then anchored it with a stamped and punched red apple that I added a couple of clear epoxy dots too for a little shine:


And I finished off the inside with an inspirational quote from the 'Silhouette Scenes' stamp set: 


Here is the visual summary of the key products used on today's projects for you to pin for easy reference:


You can see all of my Product and 'How To' summaries on my 'How To - Tips and Techniques' Pinterest board in case you've missed any. 

Before you reach for your ink and papers, check out what our amazing team has created to inspire you this week:

Here's a quick recap of our challenge rules:
 
1.  Create a new paper project
2.  Upload your creation to your blog with a link back to us and provide a direct link to the post featuring your challenge submission.
3.  Please link your card to no more than four challenges, TOTAL.
4.  Have FUN!

You can see all of my 'How To' summaries on my 'How To - Tips and Techniques' Pinterest board in case you've missed any. 

Enjoy your day; we have no special plans today and the weather is looking pretty poor, so I think it will be baking and board games for us! I'll be back tomorrow with another project. Until then, happy stampin'!


Stampin' Up! Supplies Used: 

Table built using Product Table Builder by The Crafty Owl - Independent Stampin' Up! Demonstrator.
 
 
Table built using Product Table Builder by The Crafty Owl - Independent Stampin' Up! Demonstrator.

Pampered Pets Layered Birthday Card

by Joanne James15. August 2020 19:25

Today I'm sharing a card for the current challenge over at Festive Friday where they are celebrating National Dog Day which i'm also linking up over at The Card Concept where they have a cute inspiration photo featuring a dog front and centre: 


I have been looking for an opportunity to break into the products in my Pampered Pets suite and this challenge gave me the perfect reason - take a look:


Here's the low-down on today's card:

Pampered Pets - A collection featuring cute cats and dogs, the Pampered Pets Suite is perfect for cards for animal lovers. I decided to make a birthday card for a dog-mad friend of one of the James Juniors. She loved it! Today's card is definitely all about the layers - there are 11 in total!

Pets Dies - The dies in the suite not only cut out the images in the stamp set, but also fit some of the dogs on the DSP and since I was featuring several of the paper designs on my card today, I also die cut one of the cute dogs too. Check out another neat die trick - did you notice that the horizontal die piece that features pawprints? Don't throw away the inside pieces if you are going to use the negative space diecut - the 'paws' also make cute hearts when turned the other way up - I used mine in front of my dog. You're welcome ;-)

Suite Treats - The Pampered Pets Suite has a ton of cute elements that can be used to decorate your creations, including ribbon, twine and these cute heart and bone trinket embellishments, one of which I added to my dog's collar:

I know I only needed three items from the inspo list on my card today, but I couldn't resist going to town on this card: I included red, black, baker's twine, heart, paw print, dog, bone and embossing (heat-embossed sentiment). I think stripes and a love/loyalty sentiment are the only two things I didn't include!!

Here is the visual summary of the key products used on today's project for you to pin for easy reference:


You can see all of my 'How To' summaries on my 'How To - Tips and Techniques' Pinterest board in case you've missed any. 

Enjoy your evening and I'll be back tomorrow with another project. Until then, happy stampin'!


Stampin' Up! Supplies Used:

Table built using Product Table Builder by The Crafty Owl - Independent Stampin' Up! Demonstrator.


Peek A Boo Sunflowers For AYSI 232

by Joanne James14. August 2020 12:00


Today I'm sharing my design team card for our new challenge over at As you See It where it's time for a colour challenge:


Whilst sunflowers are by no means mandatory for this week's colour challenge, my card today was totally inspired by this week's challenge badge - take a look:


Here's the low-down on today's card:

Not A Jar of Sunflowers - I used one one of the flower toppers featuring sunflowers from the Jar of Flowers set to create both a stemmed bunch and a layered group on today's card. For the layered bunch in the bottom window, I used my Stamparatus to stamp a mirror image, so that it would create a uniform display. I coloured them with my Blends (I used a combination of Dark Mango Melody and Dark Daffodil Delight to achieve a colour close to Crushed Curry) and fussy cut them, before popping them up on dimensionals. I tucked in some wooden stems and added a double-linen bow to my tied bunch for added decoration. 

Peek A Boo Florals - My florals and sentiment are nestled in the apertures cut using one of the new Peek A Boo dies; co-ordinating with the fabulous 'Have A Hoot' stamp set, I decided to use this window die piece to create a focal point for my florals and sentiment instead of owls today. I also embossed this panel with the Pinewood Planks 3D embossing folder for added texture, again inspired by our challenge photo.

Banner Year Greeting - Finally the greeting on my card comes from the new 'Banner Year' stamp set. This will be a super useful set with lots of teeny tiny images and sentiments for this time of year. Again, this set is designed to co-ordinate with the new Banners Pick A Punch punch, but I decided to mask it to enable me to stamp the words one under each other to fit my square. A Cajun Craze enamel heart from my stash finished my card.

Here is the visual summary of the key products used on today's project for you to pin for easy reference:


You can see all of my 'How To' summaries on my 'How To - Tips and Techniques' Pinterest board in case you've missed any. 


Here's a summary of our challenge rules:

  • Create any card, scrapbooking page, 3D project or packaging   project that fits the challenge.
  • Please include the challenge graphic and link back to the challenge in your blog post. Turn off word verification so we can leave you lots of lovely comments. Make sure you link the post not the whole blog to the Linky. Use #AYSIXXX when uploading to a public gallery.
  • If you’re unsure about ‘the rules’, check the details under the Challenge Guidelines tab on the As You See It Challenge homepage.
  • In a colour challenge, black or other neutral can be used in outlines and sentiments but no other colours should be included. Stampin’ Up colours are used for reference but colours that are a close match are welcome.

We look forward to seeing your creations in the AYSI gallery.

Enjoy your day. The temperatures are blissfully cooler in the UK today and this can only mean one thing - no excuse now to not do the cleaning! I'll be back tomorrow with another project. Until then, happy stampin'!


Stampin' Up! Supplies Used:

Table built using Product Table Builder by The Crafty Owl - Independent Stampin' Up! Demonstrator.

Life Is Beautiful New Home Card

by Joanne James12. August 2020 21:00

Today I'm sharing a card using the current Fab Friday sketch and this week's palette over at Color Throwdown:


I procrastinated over this sketch for some time - should I showcase some patterned paper? In the end my need for a new home card led me to create a great #SimpleStamping card using nothing more than stamps, ink and paper - take a look:


Here's the low-down on today's card:

Life Is Beautiful - The tree and sentiment on today's card come from the new stamp set 'Life Is Beautiful', inspired by Million Sales Achiever LeeAnn Greff. This is a lovely set with the ability to dress the tree for all seasons. I chose to use the CTD fresh, summery colours along with the cute bird house and bird pair from the set for my card. 

Welcome Home -  I thought the bird house would make this a perfect set for a 'new home' card. I needed one for a dear friend of mine who has left her life in London where she has lived for some 20 years to return to Wales and the town where we grew up. I used a sentiment on the inside of my card from a retired set because 'welcome home' seemed appropriate:


#SimpleStamping - I decided not to use any framelits or diecuts on today's card as I wanted to give an example of #SimpleStamping with nothing more than stamps, ink and paper. I really love the result - sometimes less really is more! 

Here is the visual summary of the key products used on today's project for you to pin for easy reference:


You can see all of my 'How To' summaries on my 'How To - Tips and Techniques' Pinterest board in case you've missed any. 

Enjoy your evening and I'll be back tomorrow with another project. Until then, happy stampin'!


Stampin' Up! Supplies Used:

Table built using Product Table Builder by The Crafty Owl - Independent Stampin' Up! Demonstrator.


Friendly Silhouettes Diecut Sunset Celebrate You Card

by Joanne James11. August 2020 20:30

A super late post today as I have been busy celebrating - as of today I am officially the mother of not one, but two, teenagers! Lots of present opening, special meals, ice cream cake and candles and no time for crafting, but I wouldn't have it any other way! Luckily I made a card last week using the inspiration photo and sketch over at Inspired By so thought I'd share that with you today. Here's the inspiration photo and sketch:


It just so happens that I used the same dies, the Friendly Silhouettes Dies, that I used for my last Inspired By entry - here's a different take:


Some simple diecuts ( I used the retired 'Celebrate You' celebrate die for my sentiment) brought my card together in a jiffy, with a little stamping using the 'Friend like You' stamp set on the inside to finish: 


Here is the visual summary of the key products used on today's project for you to pin for easy reference:


You can see all of my 'How To' summaries on my 'How To - Tips and Techniques' Pinterest board in case you've missed any. 

Enjoy your evening and I'll be back tomorrow with another project. Until then, happy stampin'!


Stampin' Up! Supplies Used:

Table built using Product Table Builder by The Crafty Owl - Independent Stampin' Up! Demonstrator.

Playful Patterns HB2U Birthday Cards

by Joanne James10. August 2020 18:25

Today I'm sharing a couple of cards I made using this week's Freshly Made Sketches layout:

I thought Kim's sketch this week was great with so many possibilities, especially for a patterned paper lover like me! I decided that I would try and be faithful to the diagonal stripes too so reached for my Playful Patterns pack and created a teen-inspired birthday card - take a look:


Here's the low-down on today's card:

I used my Playful Alphabet Dies to create a 'text speak' birthday sentiment and layered them onto a stitched square, using the colours of the designer series paper to determine my colour choices. I then added some simple stamping to the inside of my card:


A few Playful Patterns resin dots complete my card. I liked this card so much, I made another one in a similar colourway using another strip of the same paper:


Here they are together - which colourway do you prefer?


I know this kind of text speak isn't to everyone's taste, but as I find myself making more and more birthday cards for teenagers, I know this will be a top choice when the children go rifling through by box looking for a last-minute card! Here is the visual summary of the key products used on today's project for you to pin for easy reference:


You can see all of my 'How To' summaries on my 'How To - Tips and Techniques' Pinterest board in case you've missed any. 

Another quick Monday post for me as I've been busy today preparing for a milestone birthday of one of the James Juniors tomorrow - more on that later in the week! Enjoy your envening and I'll be back tomorrow with another project. Until then, happy stampin'!


Stampin' Up! Supplies Used:

Table built using Product Table Builder by The Crafty Owl - Independent Stampin' Up! Demonstrator.

Mini Catalogue

BROWSE THE CATALOGUE

The mini catalogue is now live! Read and download your copy here.

Shop Online

Access my online shop 24 x 7, 365 days of the year:

Current April hostess code:

VDKNV7BH

Shop Online

Join My Team

It's always a great time to join Stampin’ Up! New team members can get £130 worth of products for only £99 + free business supplies + free shipping + all the fun being a part of Stampin’ Up! Stampin' Up! has something for everyone: join my growing team and benefit from my support to enjoy Stampin' Up! however you choose.

If you're interested, call me for a chat to understand how I can help you realise your goals. Alternatively, if you have already decided to sign up and you just can't wait, please click here for the link to the online form where you can sign up and order your starter kit right away! 

Latest Kit!

Stampin Cut and Emboss

The Rock Legend Kit has all you need to make 8 cards with coordinating envelopes. Along with the new Panda Friends Kit, both are available from January 4th for just £14 each - get yours here!

2023-24 Annual Catalogue

BROWSE THE CATALOGUE

Click on the catalogue for a full list of current SU! supplies - if you would like to order any of the items featured, please drop me a line at [email protected] or give me a call on 07773 421446 - I'd be happy to help.

New Online Exclusives

There are new products available exclusively in the online store from 5 March - check them out here.

About Me

Hi I'm Joanne and live in Northampton and when I'm not looking after my husband and two beautiful children, am an avid crafter with a passion for all things Stampin' Up!

I must confess that I have never been a big rubber stamper - until I discovered Stampin' Up! that is. I love the fact that I can get such great results with co-ordinating stamps, inks, papers and punches - the possibilities are endless! Join me on my stamping journey as I share the things I love and be inspired to create amazing things yourself!

Follow Me

Monthly Newsletter

Box Builder

Click the button above to use Box Buster to create your custom box design using the Envelope Punch Board!

Kits Collection Now Available!

Stampin Cut and Emboss

The new Kits Collection from Stampin' Up! is now available!

Click here to see the current kits available and order yours online today.

I Design For


Stampin' Up Stuff

This is my personal blog and is not endorsed by Stampin’ Up! I hope you find it a plentiful source of ideas and personal inspiration but please don't copy my designs for contest submission or use for classes, publication or sale without express permission.