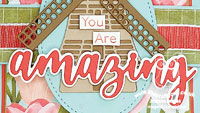
Windmill Flowering Tulip Fields Mother's Day Card With Belly Band PP580

by Joanne James27. February 2022 09:00

Today it's Sunday and time for this week's new challenge over at The Paper Players! It's the turn of the fabulous Anne Marie to host this week and she has my favourite, a sketch challenge, for you to work with:
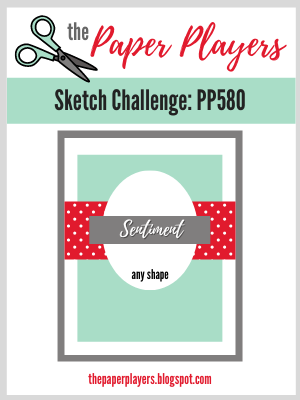
    

I do love a good sketch and this week I really went to town! I have been making lots of cards with the 'Tulip Fields' bundle as it was the feature bundle for my online class last week and I decided that the layout of Anne Marie's sketch was perfect for a diecut windmill for the central focal point and the beginnings of what turned out to be a rather special card - take a look:
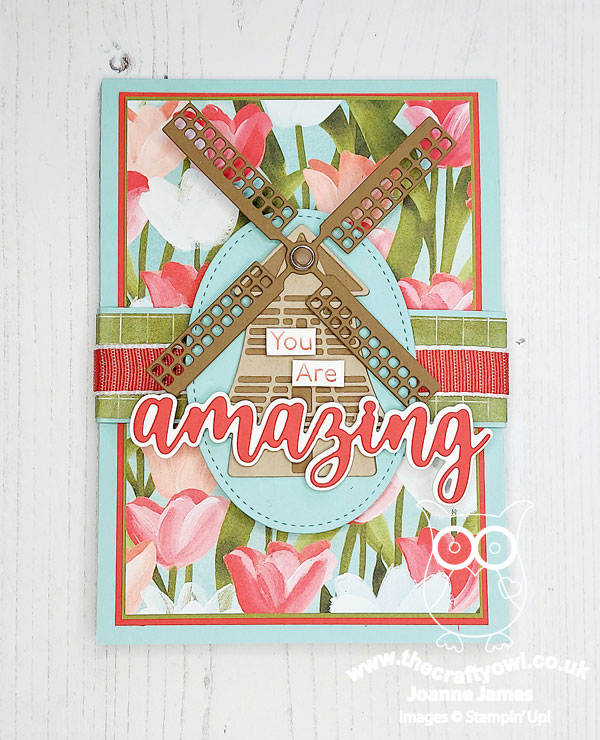
 

Here's the low-down on today's card:

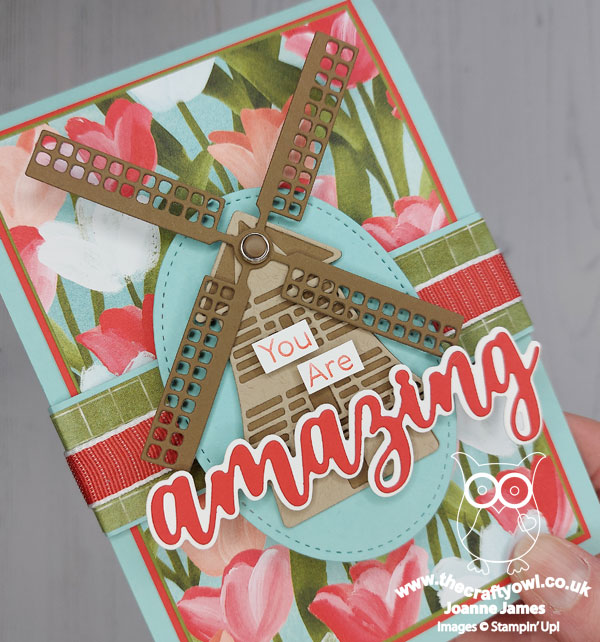
Many Layers - This is a card of many layers - which means I'm also playing along with the ladies at Just Add Ink this week where I chose 'layers' and patterned paper as my two things. More on patterned paper in a moment, but firstly those layers! I can count 13 on the front of my card alone (not including the band of ribbon!) - and there are even more inside! I used a (retired) stitched oval diecut as a base for my windmill cut using the Windmill dies and added a sentiment combining stamped words taken from 'Art Gallery' and a layered 'amazing' cut using the Amazing Thanks Dies. I attached these to a horizontal band as the focal point for the front of my card.You can see the layered loveliness in more detail below:
A Belly Band Surprise - The layered windmill is in fact attached to a belly band decorated with a strip of DSP, which when removed reveals the beautiful red, pink and white tulips of the Flowering Fields DSP in all it's glory, along with a sentiment made from a combination of some partial stamping from a stamp in the 'Flowering Tulips' stamp set and the word 'Mother's' cut using the Word Wishes Dies:
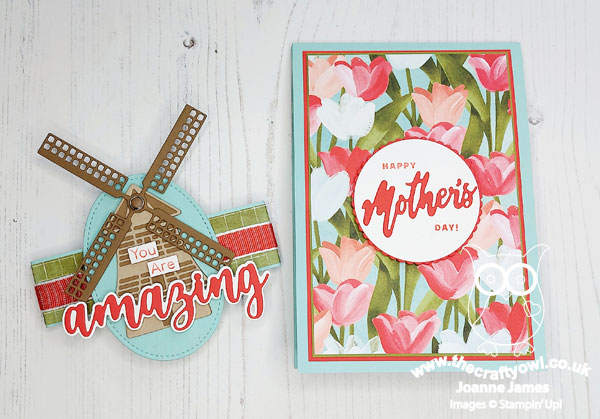
 

With Mother's Day here in the UK only a few weeks away, this was a great opportunity to get ahead and make my Mother's Day card. I love that the layered circle greeting sits below the windmill oval of the belly band and is only revealed when the belly band is removed. 

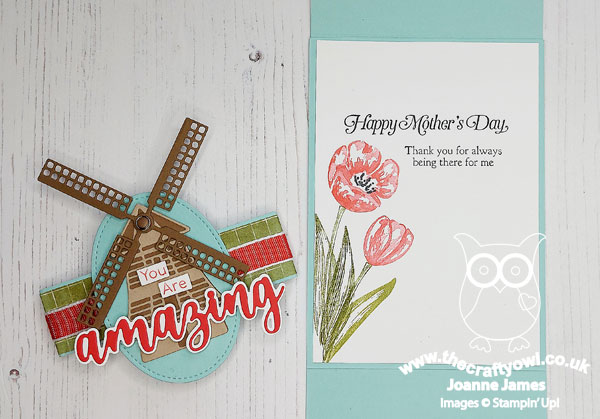
Mother's Day Details - The surprises don't end there though. My card has an additional flap, so when it's opened you see this panel, also decorated with another piece of Flowering Fields DSP and a trio of tulips cut with the Tulips Dies:
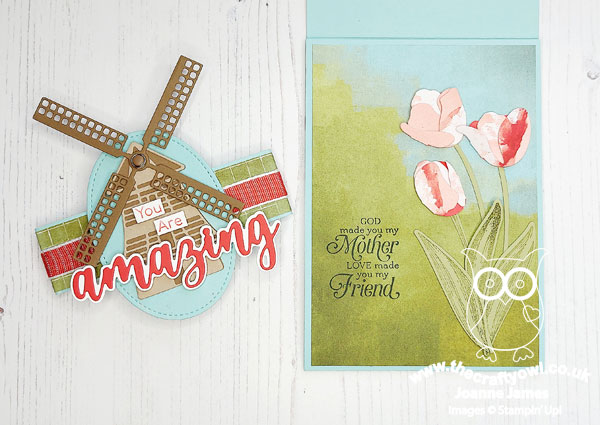
 

 These Tulips Dies are amazing - they create the most amazing dimensional tulips! I cut mine from another pattern in the Flowering Fields DSP pack; it is actually a Petal Pink sky with white and red clouds, but I like the mottled effect that it gives the tulips and they compliment the pattern on the front of the card:
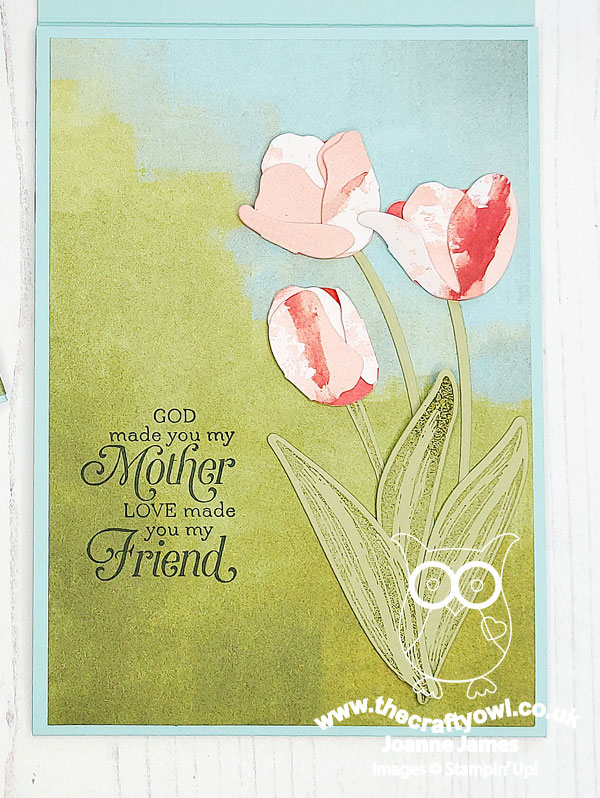
 

The sentiment, along with the one on the inside of the card is from the retired stamp set 'Strong and Beautiful'. This set is a keeper - the words in this set are so perfect for special female cards. when you open the next flap, the inside panel is revealed. I bordered the edge of the bottom panel with a trio of tulip border dies (I might add another diecut windmill behind these tulips - now that I am looking at it again this panel is a little light on decoration compared to the others):
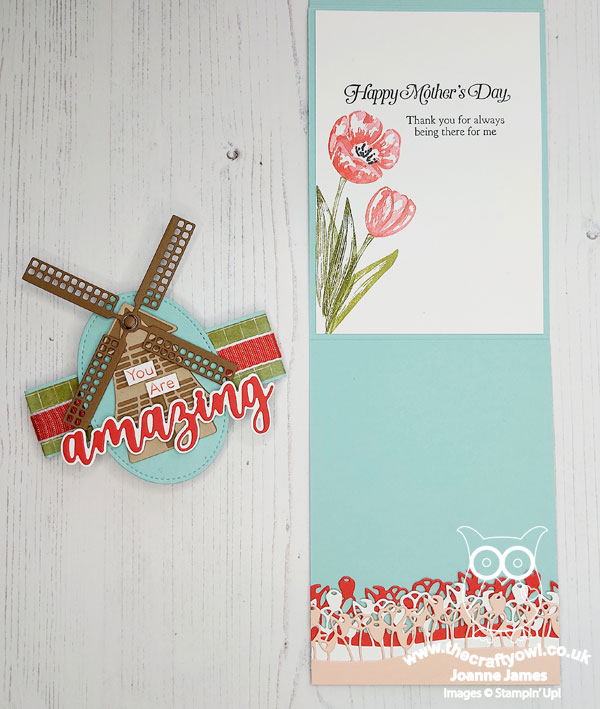
 

 And here's a close-up of the innermost panel, decorated with some layered tulips stamped with the 'flowering Tulips' stamp set:
 

As you can imagine, all those layers make for a bulkier than usual card, so I will be making a custom box-envelope to enclose it in. That's a job for another day though! This kind of card does take a long time to make, but it is worth it - I love the end result and know my Mum will appreciate it too.

Here is the visual summary of the key products used on today's project for you to pin for easy reference:
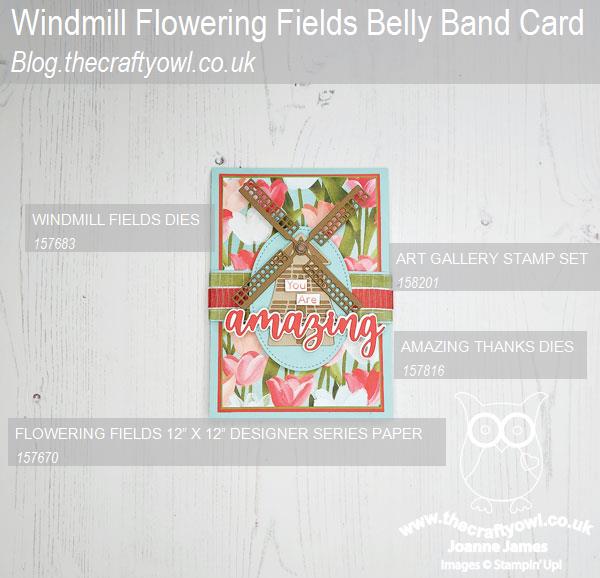
 

You can see all of my Product and 'How To' summaries on my 'How To - Tips and Techniques' Pinterest board in case you've missed any. 

Before you reach for your ink and papers, check out what our amazing team has created to inspire you this week:

Here's a quick recap of our challenge rules:
 
1.  Create a new paper project
2.  Upload your creation to your blog with a link back to us and provide a direct link to the post featuring your challenge submission.
3.  Please link your card to no more than four challenges, TOTAL.
4.  Have FUN!

Enjoy your day; we are hoping for another restful Sunday, mainly centred around cooking and eating - we are cooking a Turkish recipe for dinner today for the first time, so that should be fun! I'm also hoping to squeeze in another movie this afternoon - last week's 'Encanto' proved a big hit so this week we might go for 'Sing 2' - hope it's as good as the first one!

I'll be back tomorrow with another project. Until then, happy stampin'!


Stampin' Up! Supplies Used: 
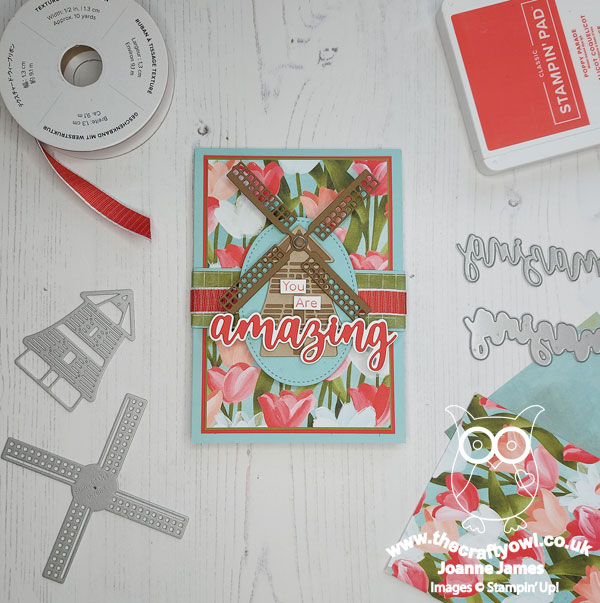
Table built using Product Table Builder by The Crafty Owl - Independent Stampin' Up! Demonstrator.

Kangaroo and Company Card For Mum AYSI 249

by Joanne James30. April 2021 12:00


Today I'm sharing my design team card for our new challenge over at As You See It where it's time for a sweet colour challenge:


Don't those macarons look delicious? I love those sugary colours and thought they would look perfect combined with the photo inspiration over at Fusion this week! I don't have a mum & baby giraffe pair in my stash, but I do have...kangaroos! So I set to work and this is what I came up with:


 Here's the low-down on today's card:

Kangaroo and Company - You've seen me use this set before for Valentine's, but it is perfect for cute cards for a range of occasions. There is a baby joey that fits in the mummy's pouch, but today I went in favour of the younger freestanding kangaroo who has just delivered his mum a beautiful big bunch of flowers, coloured in our challenge colours. 

Strong and Beautiful - Mother's Day has been and gone here in the UK, but I decided to choose a sentiment from the retiring 'Strong and Beautiful' stamp set (now available for the bargain price of £9.20!) that works for mums, or any special person, that you want to give a special thank you to. I love the sentiments in this set - they really are wonderful for celebrating special women in the broadest sense. I sat my young kangaroo on my sentiment strip so that he didn't look like he was floating in mid air, and I like that this makes him more central to the design than he would otherwise have been at floor level. 

A Hidden Message - Whilst my main sentiment is the one I talked about above, I couldn't resist adding another to the fun 'reveal' when you pull out the flowers from the pouch:

I know this feature has more appeal on cards for youngsters, but I think my Mum will find it fun too! It's so easy to do, as the Kangaroo Dies cut the slit in the pouch perfectly - no added effort required. I'm also linking today's card up with the ladies over at SUO Challenges where the theme is 'Animal Kingdom' and they are asking us to feature animals big and small on our cards.

Here is the visual summary of the key products used on today's project for you to pin for easy reference:


You can see all of my 'How To' summaries on my 'How To - Tips and Techniques' Pinterest board in case you've missed any. 

Here's a summary of our challenge rules:

  • Create any card, scrapbooking page, 3D project or packaging project that fits the challenge.
  • Please include the challenge graphic and link back to the challenge in your blog post. Turn off word verification so we can leave you lots of lovely comments. Make sure you link the post not the whole blog to the Linky. Use #AYSIXXX when uploading to a public gallery.
  • If you’re unsure about ‘the rules’, check the details under the Challenge Guidelines tab on the As You See It Challenge homepage.
  • In a colour challenge, black or other neutral can be used in outlines and sentiments but no other colours should be included. Stampin’ Up colours are used for reference but colours that are a close match are welcome.

Enjoy your day; my Fridays are always busy, so I'll keep this short and see you again tomorrow with another project. Until then, happy stampin'!

Stampin' Up! Supplies Used:

Table built using Product Table Builder by The Crafty Owl - Independent Stampin' Up! Demonstrator.

Eclectic One Layer Diamond Card

by Joanne James29. April 2021 21:40

I have been super busy this week preparing for the launch of the new Stampin' Up! annual catalogue next week so blogging has had to take something of a back seat, although I did want to squeak in a quick post today with a card I made at the weekend for the current challenge over at Less Is More:


One layer diamonds - now that was a challenge! I employed an old die and a sentiment from the retiring 'Strong and Beautiful' stamp set to come up with this super simple card:


I used the diamond die from the retired Eclectic Layers Thinlits die set to emboss the outline of the diamond onto my card front, then infilled the facets with Crystal Effects and Dazzling Diamonds glitter powder. I added my sentiment in Night of Navy to complete my card. Love that sentiment!!

So what do you think? It's one of those cards that meets the brief and the sparkle makes it very pretty in real life, but I feel it maybe needs a little something more? Or maybe not - you decide!

Enjoy your evening and I'll be back tomorrow with another project. Until then, happy stampin'!


Delighted that this card along with my other entry earned me LIM Monthly winner for April - yay!

Strong & Beautiful Starry Congratulations Card

by Joanne James20. October 2020 19:25

Today I'm sharing a card that is based on the current Fab Friday Challenge sketch, which I love:


I decided it would be the perfect layout for a card I needed to make for the newest member of my Stampin' Up! team who recently achieved a 'rising star' milestone for consistent sales during her first quarter; an achievement to be celebrated! Here's my card:


Here's the low-down on today's card:

Shoot For The Stars - I thought the starry flourish from the Stitched Stars Dies was perfect for the flourish in the sketch and totally fitting with my congratulatory theme, so I cut it out of copper foil for a swirl of shiny stars.

Brightly Gleaming - I picked up on the starry theme with a piece of Brightly Gleaming designer paper and used the Night of Navy/copper colour combo as the basis for the rest of my card. I also added a narrow copper scalloped border and a trio of copper star embellishments to my card. I love this paper - great for all kinds of occasions, not just Christmas.

Strong & Beautiful - The 'Strong and Beautiful' stamp set has some wonderful empowering sentiments and I chose to feature two on today's card; one on the front of this card and another on the inside:


Here is the visual summary of the key products used on today's project for you to pin for easy reference:


You can see all of my 'How To' summaries on my 'How To - Tips and Techniques' Pinterest board in case you've missed any. 

Enjoy your evening and I'll be back tomorrow with another project. Until then, happy stampin'!


Stampin' Up! Supplies Used:

Table built using Product Table Builder by The Crafty Owl - Independent Stampin' Up! Demonstrator.

Strong and Beautiful Delightfully Detailed Watercolour

by Joanne James21. May 2020 08:00


Today I'm sharing a card that was inspired by the current Fusion Challenge that also meets the watercolour brief over at TGIF Challenges this week:


I went all-in with the Fusion sketch and photo inspiration and even created a watercolour background for my piece of Delightfully Detailed laser-cut paper -  take a look:


I generally avoid watercolour backgrounds like this as they always seem to end up a sludgy mess, but I was quite pleased to have created this one on my second attempt. I paired it with a sentiment from the 'Strong and Beautiful' stamp set which works for the Fusion theme of 'You are Enough' and split the sentiment into two parts, heat embossing the first part in white on the front of my card. This is the only thing I wish I'd done differently, as it's quite difficult to see on the photo against the pale pink background. This photo shows it a little clearer: 


I added a sprinkling of sequins and then finished my sentiment inside my card, adding another offcut of lasercut paper:


Here is the visual summary of the key products used on today's project for you to pin for easy reference:


You can see all of my 'How To' summaries on my 'How To - Tips and Techniques' Pinterest board in case you've missed any. 

We have the last of CE exams part one today with History first thing, followed by an online unboxing of my pre-order with my online class ladies late morning - I'm not sure who is looking forward to that more, them or me! I then have a rather boring afternoon of housework lined up - I can put it off no more! Enjoy your day and I'll be back tomorrow with another project. Until then, happy stampin'!


Stampin' Up! Supplies Used:

Table built using Product Table Builder by The Crafty Owl - Independent Stampin' Up! Demonstrator.

Grace's Garden For A True Friend

by Joanne James13. May 2020 20:00

Today I'm sharing a card inspired by both the photo and the sketch over at Inspired By and the colours over at Hand Stamped Sentiments, which compliment the Inspired By photo perfectly:


As soon as I saw the Inspired By photo, I thought of the 'Grace's Garden' stamp set which is all about country garden florals. Here's the low-down on today's card:

This card was fairly quick for me to create as I had a selection of flowers stamped and diecut in my snippets box that were leftover from a recent class, so I simply got them out and coloured them with my Stampin' Blends, and added them to my Subtles-embossed card base. I heat embossed my sentiment in white, from the 'Strong and Beautiful' stamp set, such a great set for female-related sentiments. This one is a lovely way to let that special friend know how much they mean to you - I think I will pair this one with a surprise treat for one of my besties who I haven't seen in ages just to let her know I'm thinking of her. On that note I'm also linking today's card up with the ladies over at SUO Challenges too where they are 'Celebrating Women' - something that is always worthwhile as far as I'm concerned.

Here is the visual summary of the key products used on today's project for you to pin for easy reference:


You can see all of my 'How To' summaries on my 'How To - Tips and Techniques' Pinterest board in case you've missed any. 

Enjoy your evening and I'll be back tomorrow with another project. Until then, happy stampin'!


Stampin' Up! Supplies Used:

Table built using Product Table Builder by The Crafty Owl - Independent Stampin' Up! Demonstrator.

Strong & Beautiful Country Floral Monochromatic Card

by Joanne James26. February 2019 22:00

Today I'm sharing a card for this week's challenge over at Just Add Ink where the focus is on embossing:


Dry embossing, heat embossing, embossing paste - so many possibilities and all are in the mix with some great samples from the design team this week. I'm also linking up over at SUO Challenges for #SUOC217 since I am using one of my current favourites from the second Sale-A-Bration release that went live on 15th February, the new Country Floral Dynamic Textured Impressions Embossing Folder: 


Here's the low-down on today's card:

Country Floral - I really wanted to make the most of those flowers and decided to try out a technique that I hadn't tried before, where I inked the inside of my embossing folder before embossing my white cardstock so that my flowers remained white on an inked negative space. Whilst I liked the effect, the ink was too bold for the effect I wanted, so I decided to try something else that was new to me - I used my Light Petal Pink Blends marker and coloured the space completely. Time consuming? Yes. Worth it? Totally! The card looks even better in real life than in the photo; so soft and pretty.

Strong And Beautiful - Whilst my card is delicate and feminine in colour and style, the sentiment is from a great set in the seasonal catalogue that is perfect for cards for strong, confident women. It's called 'Strong and Beautiful' and contains some wonderful and uplifting sentiments. I stamped mine using Petal Pink ink on Whisper White and punched it out using the Everyday Label Punch and positioned it alongside a fancy bow made from the Floral Romance Variegated Ribbon which ties beautiful, soft bows. My sentiment resolves on the inside of my card with 'Thank you for always being there for me'. How lovely is that?

One Colour Wonder - I've made a few monochromatic cards lately - I must be on a roll! This one is particularly soft and pink and feminine and with good reason: it's headed to a dear friend of mine who is Mum to two boys so, along with her husband, is rather outnumbered in her household so rarely does the 'girly' thing so this is most definitely for her.

Here is the visual summary of the key products used on today's project for you to pin for easy reference:


You can see all of my 'How To' summaries on my 'How To - Tips and Techniques' Pinterest board in case you've missed any. 

I really love this embossing folder and have another card showcasing an alternative colouring technique to share with you later this week, so do pop back if you would like to see more samples.

Enjoy your evening and I'll be back tomorrow with another project. Until then, happy stampin'!


Stampin' Up! Supplies Used:

Table built using Product Table Builder by The Crafty Owl - Independent Stampin' Up! Demonstrator.

New Online Exclusives

There are new products available exclusively in the online store from 5 November - check them out here.

Latest Kits!

Stampin Cut and Emboss

The Layered Landscapes Kit and Nature's Paintings Kit are the latest kits in the online store - get yours here!

Shop Online

Access my online shop 24 x 7, 365 days of the year:

Current November hostess code:

9NKXDTTR

Shop Online

Mini Catalogue

BROWSE THE CATALOGUE

'Tis The Season - the new Stampin' Up! Mini Catalogue is here! For more details and to download your copy click here

Scrapbooking

Stampin' Up! has introduced a new range of 12x12" scrapbooking product and kit - the full range is now available to purchase online. To download a copy of the new digital Scrapbooking Catalogue click here.

2024-25 Annual Catalogue

BROWSE THE CATALOGUE

Click on the image to download your copy of the 2024-25 annual catalogue. For a full list of current SU! supplies, go to my online store. If you would like any help or advice, please drop me a line at joanne@thecraftyowl.co.uk or give me a call on 07773 421446 - I'd be happy to help.

Join My Team

It's always a great time to join Stampin’ Up! New team members can get £130 worth of products for only £99 + free business supplies + free shipping + all the fun being a part of Stampin’ Up! Stampin' Up! has something for everyone: join my growing team and benefit from my support to enjoy Stampin' Up! however you choose.

If you're interested, call me for a chat to understand how I can help you realise your goals. Alternatively, if you have already decided to sign up and you just can't wait, please click here for the link to the online form where you can sign up and order your starter kit right away! 

About Me

Hi I'm Joanne and live in Northampton and when I'm not looking after my husband and two beautiful children, am an avid crafter with a passion for all things Stampin' Up!

I must confess that I have never been a big rubber stamper - until I discovered Stampin' Up! that is. I love the fact that I can get such great results with co-ordinating stamps, inks, papers and punches - the possibilities are endless! Join me on my stamping journey as I share the things I love and be inspired to create amazing things yourself!

Follow Me

Monthly Newsletter

Box Builder

Click the button above to use Box Buster to create your custom box design using the Envelope Punch Board!

Kits Collection Now Available!

Stampin Cut and Emboss

The new Kits Collection from Stampin' Up! is now available!

Click here to see the current kits available and order yours online today.

I Design For


Stampin' Up Stuff

This is my personal blog and is not endorsed by Stampin’ Up! I hope you find it a plentiful source of ideas and personal inspiration but please don't copy my designs for contest submission or use for classes, publication or sale without express permission.