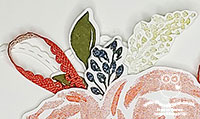
Bloom And Grow Yellow Floral Thank You CCS 414

by Joanne James6. April 2021 13:00

It's Tuesday and time for a new challenge over at CAS Colours & Sketches. Wei is hosting this month and our first challenge of the month is a colour challenge: 


For my card today I used the sketch layout over at Fusion along with our colours this week for some pretty florals and start the process of saying goodbye to one of my favourite floral sets in the annual catalogue - take a look:


Here's the low-down on today's card:

Bloom And Grow - I love the floral boughs in the 'Bloom and Grow' stamp set that a perfect for a spot of colouring and chose a simple floral that allowed for all three challenge colours to be featured then die cut with the co-ordinating Budding Blooms Dies. 

In Stitches - There are also a few stitched elements to my card today: I placed my sentiment on a Stitched Shapes circle and added a stitched scalloped border from the 'Stitched Me Mine' Dies to my white panel. Both of these die sets are also retiring at the end of the month - so if you don't have them, grab them whilst you still can.

Balancing Black - Having considered stamping my sentiment black-on-white straight onto my panel, I eventually opted for the reverse and heat embossed my sentiment on black. It provided better contrast and really compliments the Bumblebee yellow I think, whilst not encroaching overly on my 'white space':

So what do you think? I'd love you to leave me a comment below with your thoughts! Here is the visual summary of the key products used on today's project for you to pin for easy reference:


You can see all of my 'How To' summaries on my 'How To - Tips and Techniques' Pinterest board in case you've missed any. 

As a reminder, for our colour challenges, you must use all of the stated challenge colours. You may also use neutral colours; however, the challenge colours should be the most noticeable ones featured on your card. We use Stampin' Up! color names for reference, but you are welcome to use any other companies' products as long as you match the challenge colours as closely as possible.

Enjoy your day and I'll be back tomorrow with another project. Until then, happy stampin'!


Stampin' Up! Supplies Used:

Table built using Product Table Builder by The Crafty Owl - Independent Stampin' Up! Demonstrator.

Hello From The Snail Mail Postman Slimline Card

by Joanne James20. February 2021 21:59

I managed to squeeze in a little craft time this afternoon and made a card that's been buzzing around in my head for a while - love it when that happens and I finally get the opportunity to get my thoughts into paper! It is for the following challenges: 


I used Julee's Mojo Monday sketch and some of my Snail Mail designer series papers featuring the colours over at Hand Stamped Sentiments and made a colourful slimline card - take a look:


This card really is all about the designer paper; in addition to the base layers, I fussy cut one of the postman snails from the DSP to feature on my postage stamp diecut square - isn't he just the cutest?!


A speech bubble and heart embellishment, along with a stitedch scallop border and twine bow were all that was needed to complete my card. I also added a little decoration to my envelope' using another of the stamps in the 'Snailed It' stamp set:


I'm also linking today's card over at Global Design Project #GDP279 where they have an animal theme this week.

Here is the visual summary of the key products used on today's project for you to pin for easy reference:


You can see all of my 'How To' summaries on my 'How To - Tips and Techniques' Pinterest board in case you've missed any. 

Enjoy your evening and I'll be back tomorrow with another project for our new theme challenge over at The Paper Players. Until then, happy stampin'!


Stampin' Up! Supplies Used:

to follow

Love In The Scrap Bin For TTT 98

by Joanne James28. January 2021 17:00

It's Thursday and time for a new challenge over at TicTacToe! It's the turn of Team X to host this week and the lovely Felicita is our featured designer this week. This is the fun board that we are playing along with: 


When I was sorting through my scrap bin the other week for our Speed Stamping Scrap Bin Challenge over at As You See It (you can see those cards in my previous post here), I had a whole bunch of black, red and gold bits and pieces, lots of which were heart shaped, so I thought I would use them for my TicTacToe card today. Here's what I came up with:


Here's the low-down on today's card:

I went both down the first column and across the third row of our TicTacToe grid with today's card, completing both 'red-free-sentiment' and 'sentiment-embellishment-diecut' I had a red tone-on-tone stamped heart, a row of black diecut hearts (Stitched Be Mine Dies), some leftover strips of foiled DSP and gold glimmer paper and a gold foil diecut from the 'Joy To The World' Paper Pumpkin kit from before Christmas; I held onto the French 'amour' pieces as I thought they would be perfect for a Valentine's card too. I layered all of my pieces together then added a trio of Real Red resin hearts to compliment my large red heart and add a little additional pop of red. You can see the dimension on my simple layered cluster better below:


No product summary or supply list for today's card as it contains lots of retired bits and pieces. It does feel good to get a few more things used up though! I'm linking today's card up over at Festive Friday as it uses red, gold and foil paper and at The Spot where they are all about getting your heart on this week. 

A tictactoe board offers so many creative possibilities - how does this week's board inspire you? Why not have a go? We would love to see you in the gallery and who knows - you might be selected for Designer's Choice and be eligible to be a guest designer on a future challenge. 

Enjoy your day; I'll be back tomorrow with another project. Until then, happy stampin'!


Beautiful Friendship and Emptying The Scrap Box AYSI 241

by Joanne James8. January 2021 13:00

Today I'm sharing my design team card for our first challenge of the new year over at As you See It. We have a fresh new look thanks to Heather and Amy and I am the hostess for this week, starting us off this year with a Speed Stamping challenge. I always find myself getting distracted by the process of tidying my craft room in the new year (well, I have to make room for all of the new things Santa brought me!) so I thought this would be a good opportunity to rummage through the scrap bin and use up some of those crafty leftovers and put them to good use:
So the idea of the speed challenge is that you create a card in under 10 minutes. Thankfully this doesn't include the time to plan out your ideas; the clock only begins the minute you start to construct. Now for today's challenge I am more thankful for free planning time than ever; why? This was my scrap box before I started this challenge:
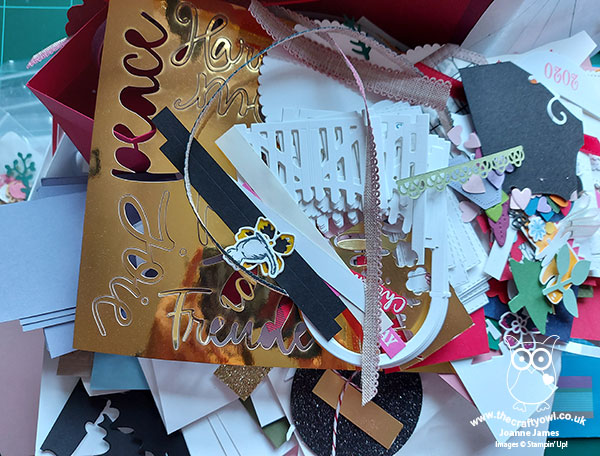
 

Yes, out of control in epic proportions! I haven't been through it in some time!! So first things first: I sorted through the box, made piles of things that co-ordinated in terms of colour/style/theme and created a number of piles, so that I could take each in turn and create something with it:
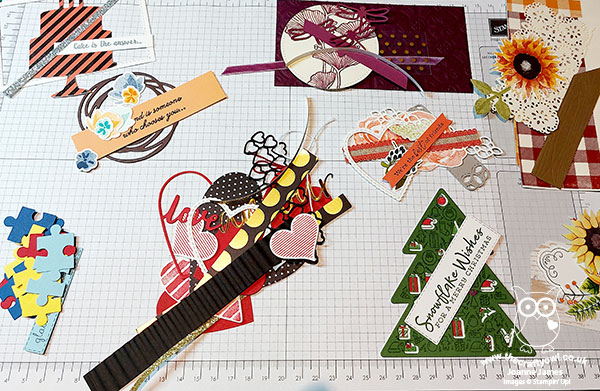
 

I ended up making a whole bunch of cards and managed to time and photograph a few of them to share with you in today's post. So here's my first card, which uses some flowers from Beautiful Friendship and Fabulous Florals stamp sets, along with a sentiment from Free As A Bird, some diecuts and an offcut of Terracotta Tile scalloped linen ribbon:
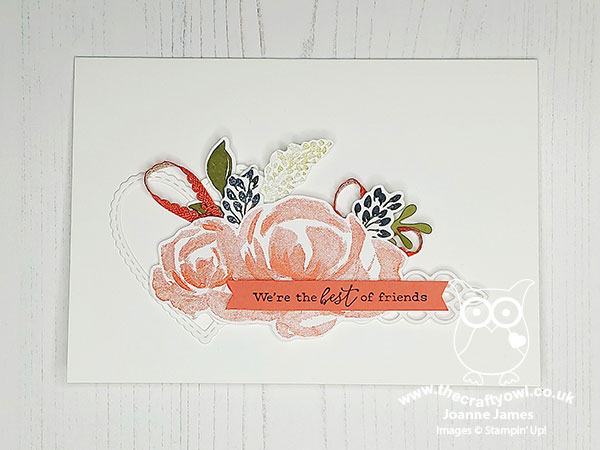
 

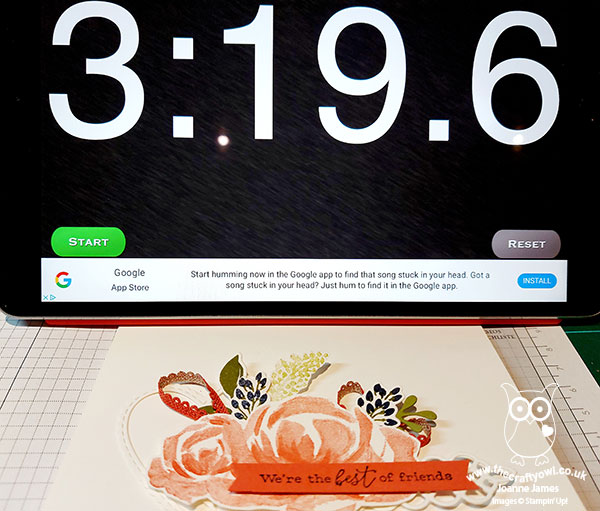
Every single one of these pieces was already cut and stamped in my box, so all I needed to do was cut a card base, layer and arrange in place, which took a record 3 minutes 19 seconds:
 

This card was so quick, I also pulled together a few more from the other bundles of mostly retired bits and pieces. Here's one of my favourites in Very Vanilla and Rich Razzleberry/Blackberry Bliss, with touches of gold:
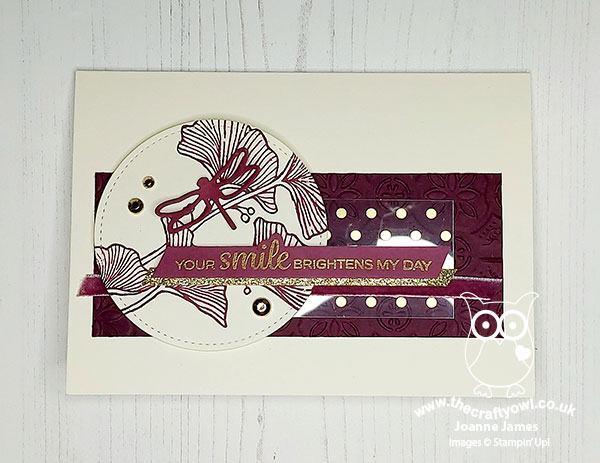
 

This one took a little longer at 8 minutes 10 seconds, but still within a 10 minute window. Here's another:
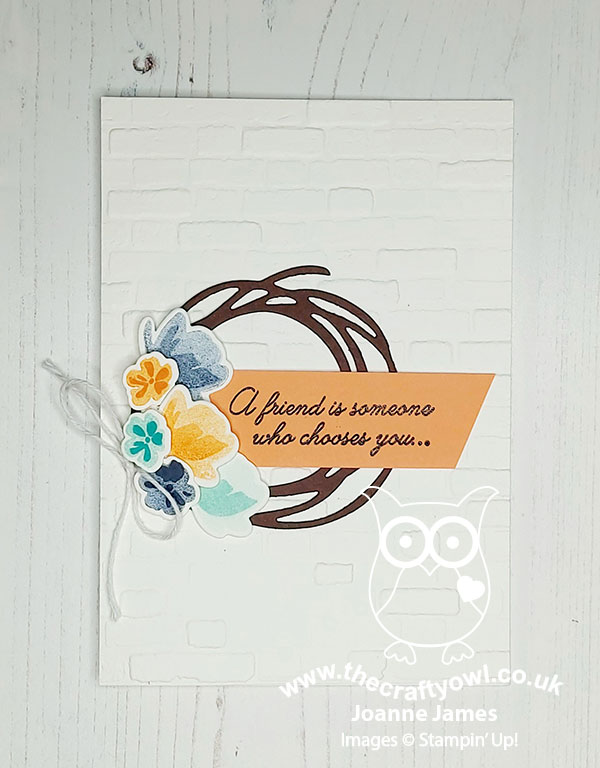
 

The brick-embossed cardbase was already in my box so this was a super quick make too, at just 2 minutes and 21 seconds. The quickest card was this one though, at just 2 minutes and 21 seconds:
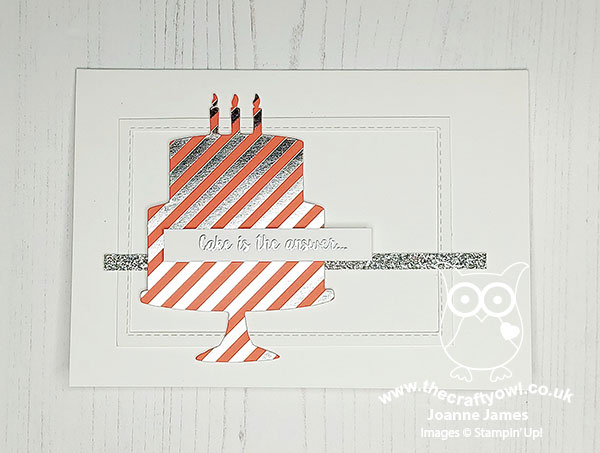
 

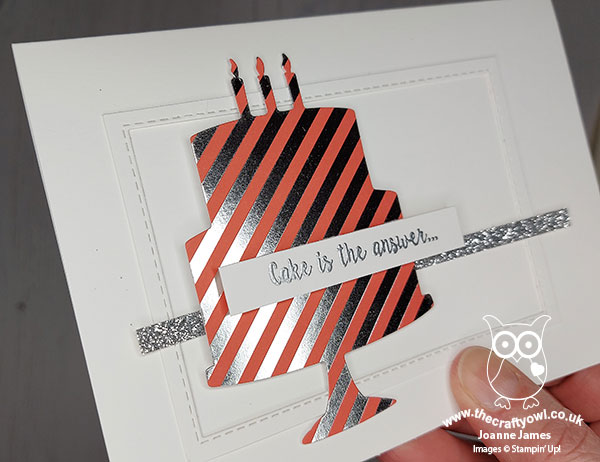
This one uses a foil-striped diecut and a heat embossed sentiment that is easier to see at an angle:
 

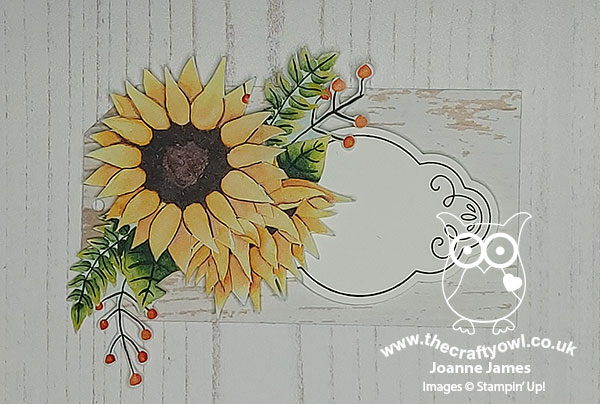
And finally I made a gift tag with another pile of scraps:
 

I've since completed another 5 cards too with the other bits and pieces. My scrap box is much depeleted and I've gained additional space on my desk - bonus!

Here is the visual summary of the key products used on today's project for you to pin for easy reference:
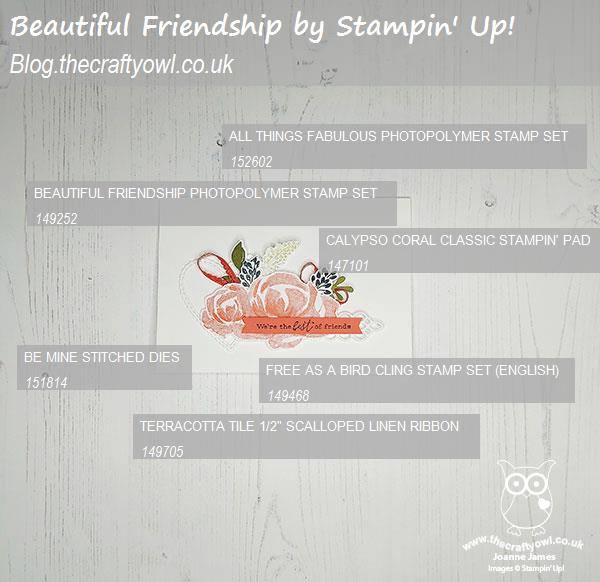
 

You can see all of my 'How To' summaries on my 'How To - Tips and Techniques' Pinterest board in case you've missed any. 

Here's a summary of our challenge rules:

  • Create any card, scrapbooking page, 3D project or packaging project that fits the challenge.
  • Please include the challenge graphic and link back to the challenge in your blog post. Turn off word verification so we can leave you lots of lovely comments. Make sure you link the post not the whole blog to the Linky. Use #AYSIXXX when uploading to a public gallery.
  • If you’re unsure about ‘the rules’, check the details under the Challenge Guidelines tab on the As You See It Challenge homepage.
  • In a speed stamping challenge, please time yourself and say in your post how long your card took to complete. 
We look forward to seeing your creations in the AYSI gallery.

Enjoy your day and I'll be back tomorrow with another project. Until then, happy stampin'!


Stampin' Up! Supplies Used (main card only):

Table built using Product Table Builder by The Crafty Owl - Independent Stampin' Up! Demonstrator.

Lovely You Stitched Heart Triangle Panel Card

by Joanne James10. July 2020 20:47

Today I'm sharing a card that started out with the colour palette over at CAS Colours and Sketches and Lee Ann's sketch this week over at Freshly Made Sketches:


I ended up creating a sheet of my own DSP too so will also be linking up over at the new-to-me challenge The Spot too. Here's my card: 

Here's the low-down on today's card:

Lovely You DSP - I was immediately drawn to the CAS Colours and Sketches colour palette this week as I'm a big fan of Brights and whilst Pacific Point was one of the three ink pads that I first purchased when I was new to Stampin' Up! so many years ago, it's a colour I don't often use these days. I would never have chosen this trio of colours to work with, but I absolutely love the vibrant, bright combination and will definitely use it again. I held an online class featuring the 'Lovely you' stamp set earlier this week and as is my 'new normal' since my move to online classes, I always host a number of additional demonstration sessions in between classes for anyone to attend that use the same set and highlight other ways it can be used. In our class we created a DSP using one colour per stamp then created a one sheet wonder set of cards, by cutting our DSP in a certain way to give various panels. I wanted to show that these stamps would also be great as multi-coloured images using Stampin' Write markers to colour each of the parts of the flowers on each stamp with a different colour. I shared a sample I made earlier in the week using this technique for a single flower (if you missed it you can see that card that I posted earlier this week here) and knew that these more intense colours would work to great effect and work for the same idea of creating your own piece of patterned paper. Here's my finished paper before I cut it into sections:


Stampin' Write Markers Two Ways - In addition to inking the individual flower elements, I also used my Stampin' Write markers to ink my sentiment easily using two different colours, highlighting the word 'heart' in Gorgeous Grape - this is so much easier to do with a marker than with ink pads.  

A Stitched Heart - I decided this sentiment would work perfectly in a heart shape, so created an outlined heart using my Stitched Be Mine dies. I need to shorten my sentiment to fit it into my heart, so inked it twice in stages and stamped it in such a way that it would both fit into the heart shape and accommodate a fussy cut flower for decoration - you can see the detail below:


Finally I added a couple of blue sequins and a white twine bow to complete the decoration on my card. 

I actually made two cards, since once that rectangle was cut into triangles I had another 2 opposing triangles and didn't want to let them go to waste so made a second card too with an identical centrepiece:


Here are both cards together:


I finished these cards and love them - they are so me!! Here is the visual summary of the key products used on today's project for you to pin for easy reference:


You can see all of my 'How To' summaries on my 'How To - Tips and Techniques' Pinterest board in case you've missed any. 

Lastly, I've been experimenting with some video lately and I did make a little time lapse video (no audio - that proved a little too challenging for my technical skills!) that shows how I put my card together:

Do you find this kind of thing useful? I'd be really interested to know whether this is the kind of thing you would like to see more of. 

Enjoy your day - the sun is shining here - finally! - so I may do some gardening, combined with a little cooking later on. I'll be back tomorrow with another project. Until then, happy stampin'!


Stampin' Up! Supplies Used:

Table built using Product Table Builder by The Crafty Owl - Independent Stampin' Up! Demonstrator.

Ornate Border Dies Inlaid Diecut Thank You Card

by Joanne James17. April 2020 20:18

Yay it's Friday! I feel more than ever the need to start my post with the day of the week just to remind myself - is it me or do they all seem to blur into one these days?! Today I'm sharing a card that I made using this week's Color Throwdown colours: 


I wanted to have a play with my new Ornate Border Dies having seen a lovely stencilled card that my friend LeAnne created with hers. When I saw these colours and the quilt in the photo though I thought they would be nice for a little inlaid diecutting - take a look:


Here's the low-down on today's card:

Ornate Border Dies - The new Ornate Border Dies are part of the early release Ornate Garden Release. I knew I would love these dies as soon as I saw them! I did have a few erroneous cuts before I realised which side the die was cutting the outer edge on, but once I'd worked this out I was fine. I cut the die three times: once in Basic Black for my mat, then again in Smoky Slate and Real Red, and used these latter two to inlay the flowers and leaves into my black panel. 

Take Your Pick - You might think that inlaid diecutting is a tricky business and whilst it does take a little while, there is one tool that can make it really easy: the Take your Pick tool. That end with a little bob of blue tac is super useful for easily picking up tiny pieces and dropping them into the spaces in the die openings. I can highly recommend one - adding adhesive sheets to the back of your cardstock before diecutting helps from a gluing perspective too.

So Sentimental - For my panel I used a piece of retired gingham DSP from Sale-A-Bration last year and I finished my card with a thank you sentiment from the 'So Sentimental' set and cut it out with one of the co-ordinating Stitched So Sweetly Dies. I added a scrap of red ribbon and my card was done!

Here is the visual summary of the key products used on today's project for you to pin for easy reference:


You can see all of my 'How To' summaries on my 'How To - Tips and Techniques' Pinterest board in case you've missed any. 

We took part in a family online quiz yesterday, hosted (virtually, of course!) by some friends of ours with lots of other friends online which was great fun. Determined to continue in a similar vein and do something different again today, I joined an online 'pilates for runners' class, run by the physio that has been treating me for my frozen shoulder rehabilitation. I'm keen to get back to running but am nowhere near fit enough at the moment, plus it's more fun to cycle with the Juniors whilst they are at home. It was tough but I thoroughly enjoyed it - I'm sure my glutes will feel be feeling the effects tomorrow though! What are you doing to make each day a little different to the one that went before? Enjoy your evening and I'll be back tomorrow with another project. Until then, happy stampin'!


Stampin' Up! Supplies Used:

Table built using Product Table Builder by The Crafty Owl - Independent Stampin' Up! Demonstrator.

Welcome Bunny Pastel New Baby Card

by Joanne James2. March 2020 20:30

Happy Monday everyone! I need to have a productive week this week - my to-do list is long! - this week's post maybe a little short and sweet - so let's go!


I still had the 'Welcome Easter' stamp set out on my desk having made this card last week, so decided to use the colours over at Just Add Ink where I haven't managed to play along in a while (hello lovely JAI ladies!) and this week's CAS(E) This Sketch layout from the lovely Brian King and an altogether different look to create a sweet baby card - take a look:


Here's the low-down on today's card:

I grabbed a piece of Pleased As Punch DSP for the pink check layer and added a horizontal piece with a stitched diecut border detail before anchoring with my bunny. I stamped him on Shimmery White cardstock in Smoky Slate, then used my aquapainter to colour him in, keeping the colours soft and muted and layered on a scalloped circle.

Now whilst I used the CAS(E) This Sketch layout, I may well get thrown out with this card as I broke my own clean and simple rule here - not only did I add a sprinkle of adhesive-backed sequins, but I also tied the Soft Sea Foam panel with a piece of Whisper White crinkle seam binding ribbon! In my defence, this ribbon is so soft and lightweight, it squishes to nothing (good for cards that need to be mailed!) and I kind of figured since it was a new baby card, a little embellishment makes it special. Not much of a defence to Brian and the CTS design team - if it helps, I used this sketch for another card that I'm going to share later in the week that is perfectly CAS in everyway, as Mary Poppins would say. 

So what do you think - is that little guy sweet or what?! He reminds me of Thumper from the Disney classic 'Bambi', (another Disney reference - not that I'm counting down to a special vacation to the happiest place on earth or anything...) but I digress...! 

Here is the visual summary of the key products used on today's project for you to pin for easy reference:


You can see all of my 'How To' summaries on my 'How To - Tips and Techniques' Pinterest board in case you've missed any. 

Enjoy your evening and I'll be back tomorrow with some exciting Sale-A-Bration news so do come back to find out more. Until then, happy stampin'!


Stampin' Up! Supplies Used:

Table built using Product Table Builder by The Crafty Owl - Independent Stampin' Up! Demonstrator.


New Online Exclusives

There are new products available exclusively in the online store from 5 November - check them out here.

Latest Kits!

Stampin Cut and Emboss

The Layered Landscapes Kit and Nature's Paintings Kit are the latest kits in the online store - get yours here!

Shop Online

Access my online shop 24 x 7, 365 days of the year:

Current November hostess code:

9NKXDTTR

Shop Online

Mini Catalogue

BROWSE THE CATALOGUE

'Tis The Season - the new Stampin' Up! Mini Catalogue is here! For more details and to download your copy click here

Scrapbooking

Stampin' Up! has introduced a new range of 12x12" scrapbooking product and kit - the full range is now available to purchase online. To download a copy of the new digital Scrapbooking Catalogue click here.

2024-25 Annual Catalogue

BROWSE THE CATALOGUE

Click on the image to download your copy of the 2024-25 annual catalogue. For a full list of current SU! supplies, go to my online store. If you would like any help or advice, please drop me a line at joanne@thecraftyowl.co.uk or give me a call on 07773 421446 - I'd be happy to help.

Join My Team

It's always a great time to join Stampin’ Up! New team members can get £130 worth of products for only £99 + free business supplies + free shipping + all the fun being a part of Stampin’ Up! Stampin' Up! has something for everyone: join my growing team and benefit from my support to enjoy Stampin' Up! however you choose.

If you're interested, call me for a chat to understand how I can help you realise your goals. Alternatively, if you have already decided to sign up and you just can't wait, please click here for the link to the online form where you can sign up and order your starter kit right away! 

About Me

Hi I'm Joanne and live in Northampton and when I'm not looking after my husband and two beautiful children, am an avid crafter with a passion for all things Stampin' Up!

I must confess that I have never been a big rubber stamper - until I discovered Stampin' Up! that is. I love the fact that I can get such great results with co-ordinating stamps, inks, papers and punches - the possibilities are endless! Join me on my stamping journey as I share the things I love and be inspired to create amazing things yourself!

Follow Me

Monthly Newsletter

Box Builder

Click the button above to use Box Buster to create your custom box design using the Envelope Punch Board!

Kits Collection Now Available!

Stampin Cut and Emboss

The new Kits Collection from Stampin' Up! is now available!

Click here to see the current kits available and order yours online today.

I Design For


Stampin' Up Stuff

This is my personal blog and is not endorsed by Stampin’ Up! I hope you find it a plentiful source of ideas and personal inspiration but please don't copy my designs for contest submission or use for classes, publication or sale without express permission.