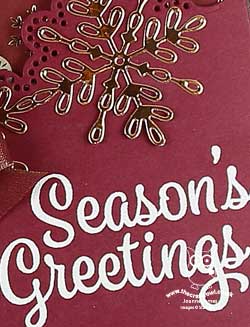
Copper and Merry Merlot Swirly Snowflakes Christmas Card and Triangular Gift Box

by Joanne James23. September 2018 09:00


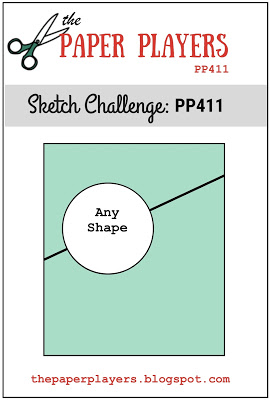
Today it's Sunday and time for this week's new challenge over at The Paper Players! It's the turn of the fabulously creative Jaydee to host this week and she has my favourite, a sketch challenge, for you to work with:
    

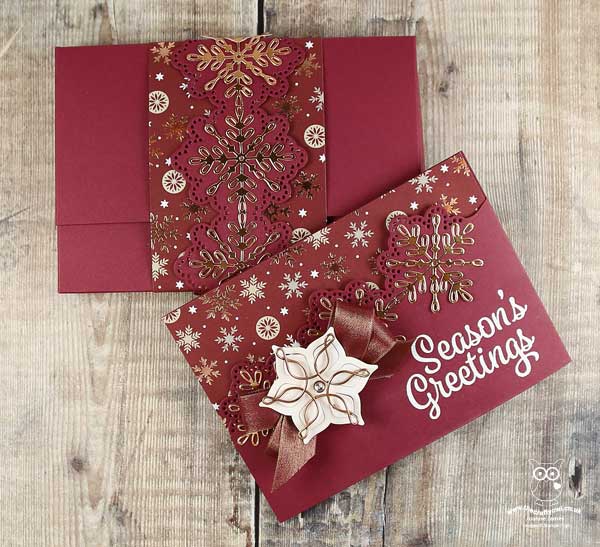
I decided to continue getting a headstart on my Christmas card making preparations (so my projects are perfect for the challenge over at TGIF Challenges too this week) and spent a few hours making a more involved boxed Christmas card with a matching gift box too. First things first - here's my card:
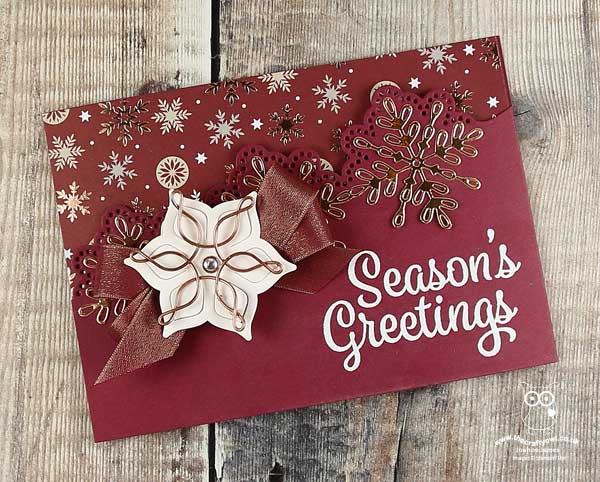
 

Here's the low-down on today's card:

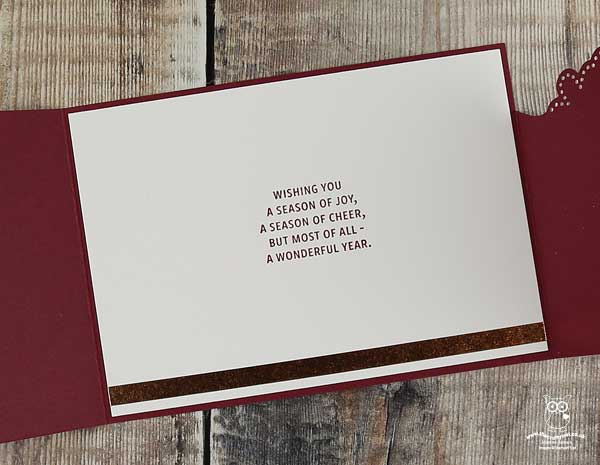
Diagonal Swirly Snowflake Border - Whilst I love a good sketch, I often struggle with the concept of a diagonal. I decided to alter the dimensions of Jaydee's sketch and create a horizontal fold out card as I wanted to use my Swirly Snowflakes Thinlits Dies to create a layered diagonal edge and I needed the extra width to balance my card and fit the entire border in (I'm sure she will allow me this liberty ;-) ). I snipped away the straight edge of my copper foil snowflakes and added a sentiment embossed in white, before adding my embellishment (more on that below). My card opens from the right to reveal a complete panel of my favourite copper-embossed Joyous Noel Specialty Designer Series Paper, then the left hand side lifts to reveal the sentiment inside, embellished with a narrow strip of copper washi tape:
Christmas Copper Snowflakes - I created a layered embellishment on the front of my card, using one of the copper snowflake wire elements as the centrepiece. I layered this with a Shimmery White diecut from the Eastern Medallions Thinlits set, with a centre of a clear epoxy droplet on a copper sequin, all layered up on a fancy double bow in the gorgeous Merry Merlot and Copper Reversible Ribbon. This showy embellishment adds a lot of dimension to the front of my card, so much so that it wouldn't fit in a standard envelope. Instead, I made a box with a co-ordinating belly band closure:
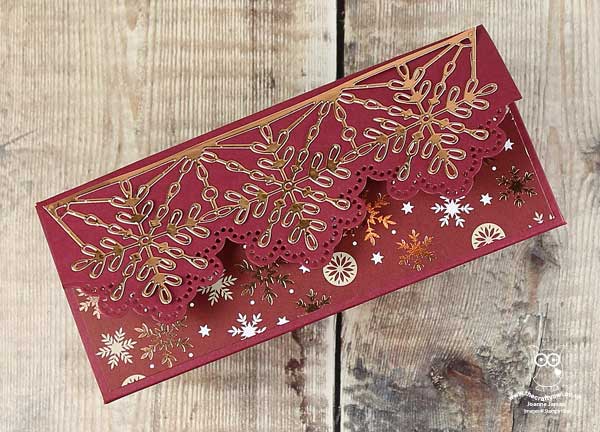
A Gift Box To Match - This kind of card takes a little while to make and is destined for someone who I know will appreciate the effort and time taken to create it. Whilst I was fully 'in the zone', I decided to create a co-ordinating gift box with a magnetic closure. The box measures approx. 15cm x 6cm x 5cm, so not huge but large enough for a small gift to accompany my card. I created a triangular box with a decorative flap created using the Swirly Snowflakes Thinlits for the border detail, based on this one I'd seen on Pinterest. I decorated the front panel of my box with more of that gorgeous Joyous Noel DSP too: 
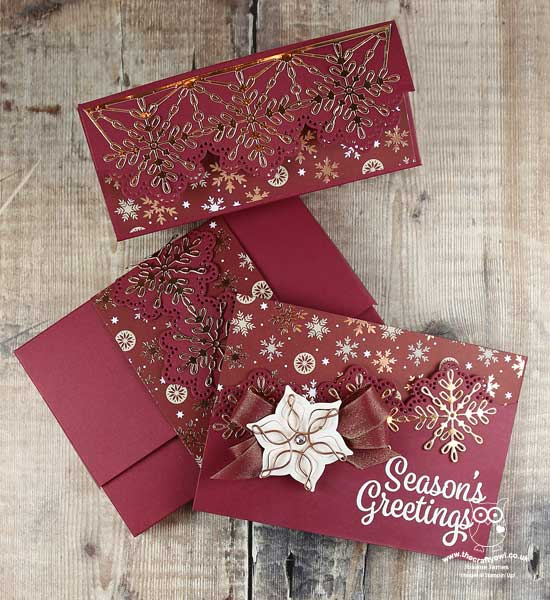
And here's one last photo of all three of my project elements together - I hope you will agree, a lovely Christmas set in rich, festive colours:
 

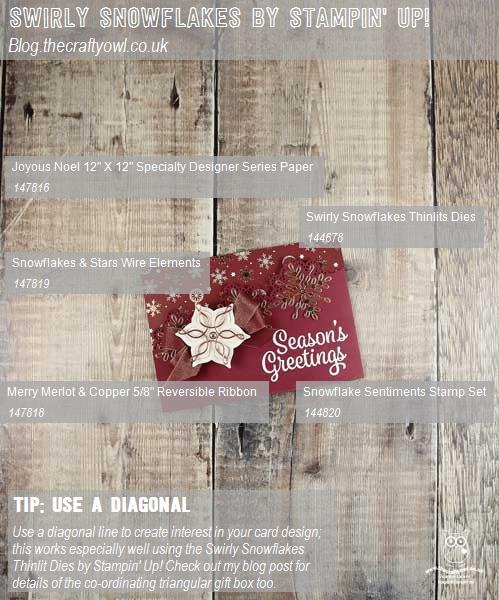
Here is the visual summary of the key products used on today's project for you to pin for easy reference:
 

You can see all of my Product and 'How To' summaries on my 'How To - Tips and Techniques' Pinterest board in case you've missed any. 

Before you reach for your ink and papers, check out what our amazing team has created to inspire you this week:

Here's a quick recap of our challenge rules:
 
1.  Create a new paper project
2.  Upload your creation to your blog with a link back to us and provide a direct link to the post featuring your challenge submission.
3.  Please link your card to no more than four challenges, TOTAL.
4.  Have FUN!

You can see all of my 'How To' summaries on my 'How To - Tips and Techniques' Pinterest board in case you've missed any. 

Thank you Jaydee for a great sketch - who would have thought that it would have resulted in 3 projects in one go!

Enjoy your day; the weather has been dreadful here the past couple of days so I'm hoping I get the longer straw and get to stay home and craft whilst hubby takes the James Juniors to hockey trials this afternoon. I'll be back tomorrow with another project. Until then, happy stampin'!


Stampin' Up! Supplies Used: 

Table built using Product Table Builder by The Crafty Owl - Independent Stampin' Up! Demonstrator.

Wrapped In The Warmth Of Christmas

by Joanne James8. January 2018 21:00

In an effort to be organised in 2018, I am going to make a concerted effort to make Christmas cards throughout the year so I'm having a break from the 'new' today and have a Christmas card to share with you that was inspired by the following challenges:


The team over at SUO Challenges are inviting cards that fit with the theme of 'Brr! Baby it's cold outside', which I paired with the sketch over at Handstamped Sentiments, a new-to-me challenge and a little dry embossing for Stamps Ink Paper to come up with this cosy little number:


Here's the low-down on today's card:

Wrapped In The Warmth of Christmas - I used the sentiment from 'Snowflake Sentiments' as the starting point for my card. I'm so glad this set is on carryover and will be available for a little longer. No snowflakes on this card though - it's all about the warm and cosy! 

A Chunky Knit - I added some great texture with my dry embossed background - a little difficult to see in the photos because of the contrast in colours and I'm a little over-exposed, but it is definitely reminiscent of warm, woollen sweaters which is exactly what I think of when it's cold outside. 

Sweater Weather - I needed a little bit of pattern to bring my elements together and found this piece of retired DSP that was just what I was looking for to complete my card. A few candy dots to finish and my first Christmas card of 2018 is complete! 

Here is the visual summary of the key products used on today's project for you to pin for easy reference:


You can see all of my 'How To' summaries on my 'How To - Tips and Techniques' Pinterest board in case you've missed any. 

I'll be back tomorrow with another project. Until then, happy stampin'!


Stampin' Up! Supplies Used:

Table built using Product Table Builder by The Crafty Owl - Independent Stampin' Up! Demonstrator.

Swirly Snowflakes Thinlits Square Easel Christmas Card

by Joanne James8. December 2017 12:00

It's Friday and finally I've managed to squeeze in a blog post to share with you - hurrah! Today I'm sharing another card using the Snowflake Sentiments bundle - and just like my card for The Paper Players on the Sunday before last (you can see that card here if you missed it), it uses the thinlits in a rather unusual way. I'm also linking up with the team over at Stamp Ink Paper who are looking for snow-themed creations this week:

I decided to make an easel card  - this is what it looks like closed:


This is what it looks like open:


And finally here's another shot from above, that shows the detail of the front edge and my sentiment, which I stamped in Versamark and heat embossed onto a label punched with the Everyday Label Punch:


I wanted to make a special card that really showcased the versatility of the Swirly Snowflakes Thinlits Dies, so I used the edge thinlits to create two layered squares and finished it with a stitched square, onto which I stamped a snowflake from the co-ordinating Snowflake Sentiments set in Versamark and heat embossed it in gold. I finished with one of the super-sparkly faceted gems to create a focal centrepiece. Creating a card like this is not for the faint-hearted - it took a fair amount of partial die cutting and snipping of the gold piece to remove excess pieces in order to have a symmetrical design, but it was so worth it - the finished card has a real 'wow' factor, I love it!

I'm pleased to see that the Snowflake Sentiments stamp set and Swirly Snowflakes Thinlits Dies are on carryover and will remain available beyond the end of the Autumn-Winter catalogue - this means lots more opportunities to create with this set! They won't be available as a bundle though, so if you want the 10% saving, be sure to snap them up before January 2nd - just click on the link in the supplies list at the bottom of today's post.

Here is the visual summary of the key products used on today's project for you to pin for easy reference:


You can see all of my 'How To' summaries on my 'How To - Tips and Techniques' Pinterest board in case you've missed any. 

Enjoy your day and I'll be back around lunchtime tomorrow with a special post as I'm the guest designer over at Inspired By All The Little Things this week. My project contains a Spring-Summer sneak-peek too so be sure to come back and take a look. Until then, happy stampin'!


Stampin' Up! Supplies Used:

Table built using Product Table Builder by The Crafty Owl - Independent Stampin' Up! Demonstrator.

Snowflake Sentiments For The Paper Players PP372

by Joanne James26. November 2017 09:00

It's Sunday and time for this week's new challenge over at The Paper Players! It's my turn to host this week and I have my favourite kind of challenge, a sketch, for you all to work with:


My card today is all about the snowflakes and uses the Snowflake Sentiments bundle - take a look:


Here's the low-down on today's card:

Snowflake Inspiration - I used the piece of snowflake patterned paper from the Christmas Round The World DSP pack as the starting point for my card today; the dark grey reminds me of a snowy sky and is the perfect backdrop for those pale blue and white snowflakes.

Swirly Snowflake Border - The paper pairs beautifully with the stamps and thinlits in the Snowflake Sentiments bundle. I used the Swirly Snowflake thinlits to create my layered border and snowflake embellishment. The detail on these delicate cuts makes for some really pretty pieces, especially when cut from Dazzling Diamonds glimmer paper - the snowflakes are so sparkly against the Pool Party layer and the grey of the background paper. The thinlits are designed to cut with a straight edge to one side of the border, but I wanted them to be a mirror image so I snipped away the excess from the snowflakes and cut the background piece in the same way.

Open To Interpretation - I added a ribbon and bow to my sketch as I don't often add bows to the front of my card, yet when I came to make my card, I chose not to add a bow as I didn't want to obscure the detail of those pretty snowflakes, although I did add a strip of ribbon between the border layers. I also moved up the position of my snowflake embellishment to provide a better balance with the positioning of my sentiment. These changes don't make my card 'wrong' - they are just one way to interpret the sketch. I can't wait to see how it inspires you!

Here is the visual summary of the key products used on today's project for you to pin for easy reference:


You can see all of my Product and 'How To' summaries on my 'How To - Tips and Techniques' Pinterest board in case you've missed any. 

Before you reach for your ink and papers, check out what our amazing team has created to inspire you this week:

The Paper Players Design Team
 
 
Here's a quick recap of our challenge rules:
 
1.  Create a new paper project
2.  Upload your creation to your blog with a link back to us and provide a direct link to the post featuring your challenge submission.
3.  Please link your card to no more than four challenges, TOTAL.
4.  Have FUN! 


I look forward to seeing your interpretations of my sketch in the gallery this week. Enjoy the rest of your weekend as it will be over all too quickly; we are ice-skating later with the swimming squad - our first Christmas party of the season! I'll be back tomorrow with another project; until then, happy stampin'!


Stampin' Up! Supplies Used: 

Table built using Product Table Builder by The Crafty Owl - Independent Stampin' Up! Demonstrator.

Painted Harvest Christmas Wreath CAS Card

by Joanne James11. October 2017 20:51

Wednesday already?! Just time for a really quick share of another clean-and-simple Christmas Wreath using the Painted Harvest stamp set that I made with some ladies in a Christmas card class a couple of weeks ago:


Here's the low-down on today's card:

A Christmas Wreath - Today's Painted Harvest stamp set Christmas wreath uses the largest of the petal stamps, stamped once in Wild Wasabi then rotated through 180 degrees before inking and stamping again in Garden Green over the top. This gives a much fuller, more dimensional wreath than the one on Monday's card. I then used the small dot stamp to stamp my Real Red berries.

Painted Autumn - I added a narrow strip of Painted Autumn designer series paper to my card; I love that the reverse side of our papers often feature a more neutral design, such as these watercoloured stripes, that lend themselves to more than just autumn/fall projects. Some of the ladies in my class used the leafy pattern on the reverse of this strip and I must say that looked great too. I'm so happy the Painted Autumn papers are included in the 'buy 3, get 1 free' offer on designer series paper this month too - all the more reason to stock up!

Season's Greetings - Today's card features a big, bold sentiment from the 'Snowflake Sentiments' set, perfect for today's card and not a snowflake in sight!

Here is the visual summary of the key products used on today's project for you to pin for easy reference:


You can see all of my 'How To' summaries on my 'How To - Tips and Techniques' Pinterest board in case you've missed any. 

Hopefully I'll be back tomorrow with another project. Until then, happy stampin'!


Stampin' Up! Supplies Used:

Table built using Product Table Builder by The Crafty Owl - Independent Stampin' Up! Demonstrator.

Current Promotions

Stampin Cut and Emboss

Save up to 30% off on all your favourite kits from 1 to 31 October! 

Click here to see the current kits available and order yours online today.

Join My Team

It's always a great time to join Stampin’ Up! During October you can get even more in your starter kit! New team members can get £160 worth of products for only £99 + free business supplies + free shipping + all the fun being a part of Stampin’ Up! Stampin' Up! has something for everyone: join my growing team and benefit from my support to enjoy Stampin' Up! however you choose.

If you're interested, call me for a chat to understand how I can help you realise your goals. Alternatively, if you have already decided to sign up and you just can't wait, please click here for the link to the online form where you can sign up and order your starter kit right away! 

Shop Online

Access my online shop 24 x 7, 365 days of the year:

Current October hostess code:

9NKXDTTR

Shop Online

Scrapbooking

Stampin' Up! has introduced a new range of 12x12" scrapbooking product and kit - the full range is now available to purchase online. To download a copy of the new digital Scrapbooking Catalogue click here.

Mini Catalogue

BROWSE THE CATALOGUE

'Tis The Season - the new Stampin' Up! Mini Catalogue is here! For more details and to download your copy click here

2024-25 Annual Catalogue

BROWSE THE CATALOGUE

Click on the image to download your copy of the 2024-25 annual catalogue. For a full list of current SU! supplies, go to my online store. If you would like any help or advice, please drop me a line at joanne@thecraftyowl.co.uk or give me a call on 07773 421446 - I'd be happy to help.

Latest Kits!

Stampin Cut and Emboss

The Christmas Ornaments Kit and Card Keeper Kit are the latest kits in the online store - get yours here!

New Online Exclusives

There are new products available exclusively in the online store from 5 November - check them out here.

About Me

Hi I'm Joanne and live in Northampton and when I'm not looking after my husband and two beautiful children, am an avid crafter with a passion for all things Stampin' Up!

I must confess that I have never been a big rubber stamper - until I discovered Stampin' Up! that is. I love the fact that I can get such great results with co-ordinating stamps, inks, papers and punches - the possibilities are endless! Join me on my stamping journey as I share the things I love and be inspired to create amazing things yourself!

Follow Me

Monthly Newsletter

Box Builder

Click the button above to use Box Buster to create your custom box design using the Envelope Punch Board!

Kits Collection Now Available!

Stampin Cut and Emboss

The new Kits Collection from Stampin' Up! is now available!

Click here to see the current kits available and order yours online today.

I Design For


Stampin' Up Stuff

This is my personal blog and is not endorsed by Stampin’ Up! I hope you find it a plentiful source of ideas and personal inspiration but please don't copy my designs for contest submission or use for classes, publication or sale without express permission.