by Joanne James5. July 2014 16:08Not quite the early card I'd hoped for today - no time between the theatre and swimming gala, but I'm here now! Today's card is made with the challenge over at Fusion in mind. I saw the inspiration photo and just had to have a go - I love the bold poppies and stripes on that dress!
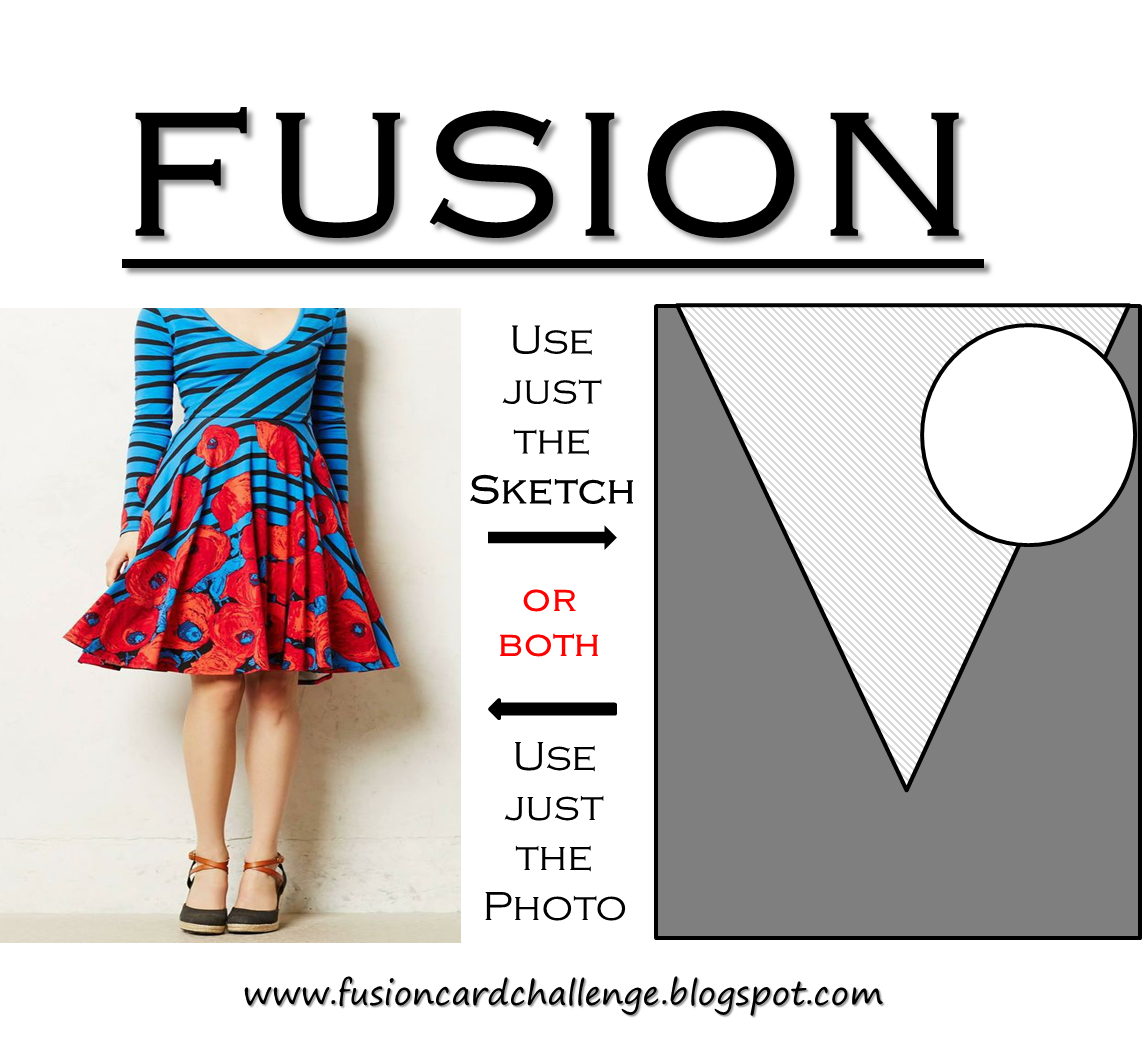
I decided the sketch wasn't for me so went with my own layout and this is what I came up with:
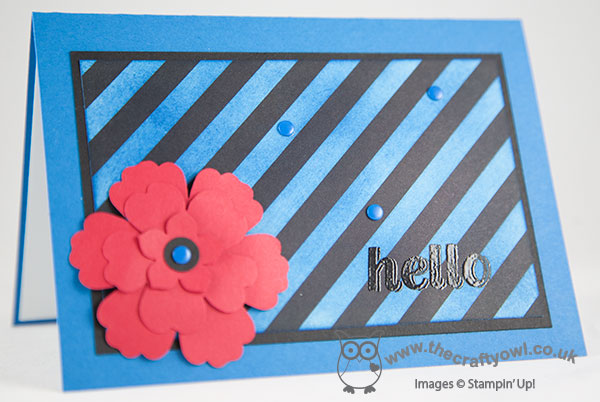
A bright and cheery 'hello' card, with a Real Red punched and layered flower set against the bold black and blue striped background. Wondering where I found my DSP? It's actually a piece of the retired Kaleidescope DSP which was originally black and white striped; I simply sponged the white stripes with Pacific Point ink to achieve the look I was after. Not a task for the faint-hearted - my hands were so blue afterwards I looked like I'd been Smurfed, but I was really pleased with the effect so it was worth it. I then finished it off with a simple 'hello' greeting (from the retired 'Simply Celebrate' stamp set) stamped in Versamark and heat embossed in black so that it would stand out against the striped background. A few blue candy dots just finish things off.
That's all from me today; back tomorrow with my first Design Team card for the Paper Players. until then, happy stampin'!
Stampin' Up! Supplies Used:
by Joanne James14. May 2014 21:40I've had a busy couple of days preparing swaps and finishing my preparations for the Stampin' Up! event at Telford on Saturday and I've still got more to do! Today I'm sharing my card for this week's challenge over at Less is More, where Chrissie and the team are looking for one layer thank you cards. I decided to try something something a little different, using my retired but never-to-be parted with Expressions Thinlits. Here is my card:
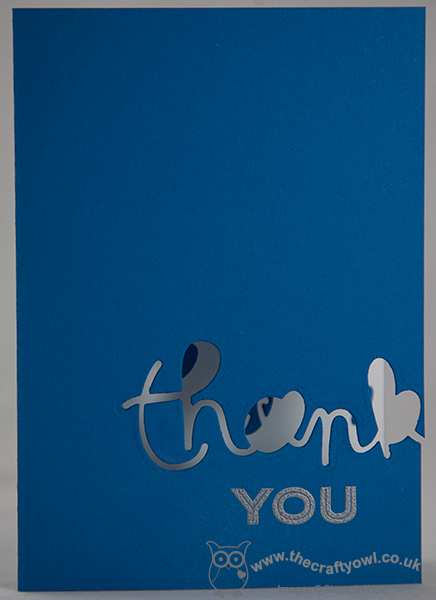
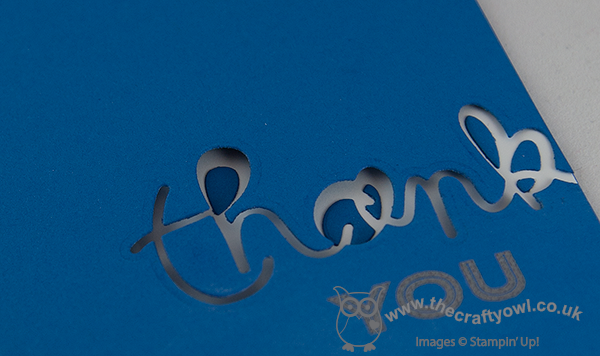
I decided to make a thank you card that would be suitable for a male, or at the very least gender neutral - so I went for a nice bright blue. Now I know the eagle-eyed amongst you are thinking - but the framelit says 'thankful', right? Well that's true - as I only wanted the 'thank' part, I positioned it over the edge of the card and cut it to the edge so that it looks as if the writing is going off the edge of the card. I adhered the cut-out pieces from the middle of the word to the inside of the card, to maintain the definition of the lettering - you can see it more clearly on the photo below:
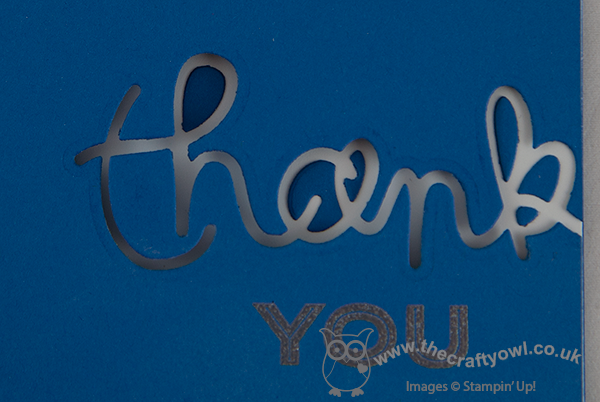
To finish my sentiment, I inked up the 'you' from the 'thank you' sentiment in the 'Simply Celebrate' set and heat embossed it with silver embossing powder. A clean and simple thank you card that's just a little bit different! I'm also linking my card up to 'Addicted to CAS', where the current challenge is appropriately 'off the edge'. Right, I'm off to get my nails done!
Back tomorrow with another project; until then, happy stampin'!
Stampin' Up! Supplies Used:
by Joanne James8. May 2014 14:54Hello everyone - my second video in a week! I'm cheating slightly, as I actually shot this video weeks ago but haven't got around to editing it until now. I made a lovely concertina fold Mother's Day card a while ago using the Scalloped Tag Topper Punch - you can see my original card here - which was based on a similar card made by Julie Kettlewell (you can see Julie's original card here). Having just gone to update my original post with the link to today's video, I realise I didn't mention her in my original post, which was very remiss of me and a complete oversight on my part, as I even mentioned her in today's video. Needless to say, I have now updated the original post!
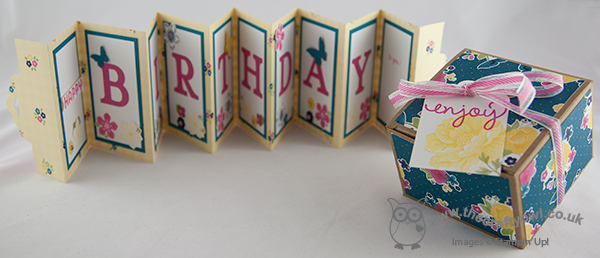
I love this concertina fold card style - it's great if you need a card that's just a little different. I made another card based on my original one, this time adapting it to a birthday card for a friend of mine who always puts so much thought into cards for others, I thought she deserved something special for her birthday too; here's my latest scalloped tag topper punch concertina fold card:

The dimensions are exactly the same as my original card - there is still enough space to stamp 'happy' on one panel, with 'birthday' spelled out on the subsequent panels leaving the last panel blank for your message (I also stamped a little 'to you!' on this panel, just to complete my message). I also decorated one of the Stampin' Up! Kraft gift boxes with some co-ordinating Gingham Garden DSP to make some pretty packaging for my accompanying gift - finished with a tag made with the Scalloped Tag Topper Punch - well, what else?! Here's a picture of both pieces together:
So, if you would like to make a Scalloped Tag Topper Concertina Fold Card - either for the forthcoming international Mother's Day or a birthday card, here's my video tutorial showing you everything you need to know:
If you would like to purchase any of the Stampin' Up! supplies featured in today's project, just contact me or click on the links in the table below to go straight to my online store.
Back tomorrow with another project; until then, happy stampin'!
Stampin' Up! Supplies Used:
83ecd8a3-a7da-4843-9788-9cf4d23e90f5|0|.0|96d5b379-7e1d-4dac-a6ba-1e50db561b04
Tags: 3D Projects, boxes, Kraft Gift Boxes, Gingham Garden, Typeset Alphabet, video tutorial, Stampin' Up, Stampin' Up Card, Stampin' Up Card ideas, Stampin' Up Supplies, Shop online, Scalloped Tag Topper Punch, Simply Celebrate, Stippled Blossoms, Petite Petals, Petite Petals Punch, Itty Bitty Punches, Fabulous Phrases, See Ya Later
3D Projects | Boxes | Cards | Stamping | Video Tutorials
by Joanne James21. March 2014 20:48There are 10 days left until the end of Sale-A-Bration. Lots of you have taken advantage of the extra hostess benefits on offer to host a party or received one or more of the great free gifts on offer with every £45 spend. Today I thought I would take the opportunity to remind you of the benefits of joining Stampin' Up! as a demonstrator during Sale-A-Bration:
- The starter kit will be £99 and includes products of your choice up to the value of £150 - this is a whopping £51 of extra product!
- You will also receive a business supplies pack including annual and seasonal catalogues, order forms, etc.
- You will receive a 20% discount on every order you place
- You will also receive a 30% discount on the first order you place over £150 within the first 30 days of sign up
- You will receive 2 free months of Demonstrator Web Services
- If you reach £225 sales within the first quarter (ending 30th June 2014), you will maintain your demonstrator status until 30th September. If you don't, your demonstrator status will lapse, but without penalty; you have no obligation to purchase anything other than your starter kit if you don't want to.
- If you join my growing team, you will get to benefit from my knowledge, help and support in addition to that of one of the UK's most successful teams of demonstrators and the considerable resources provided by Stampin' Up itself. You will receive your own team welcome pack from me, along with your own complimentary copy of my demonstrator software Product Table Builder worth £35
Here's part of the welcome pack I sent to one of the lovely ladies who joined my team recently, designed to co-ordinate with a card I made for the Mojo Monday challenge recently (you can read more about how I made the card here):
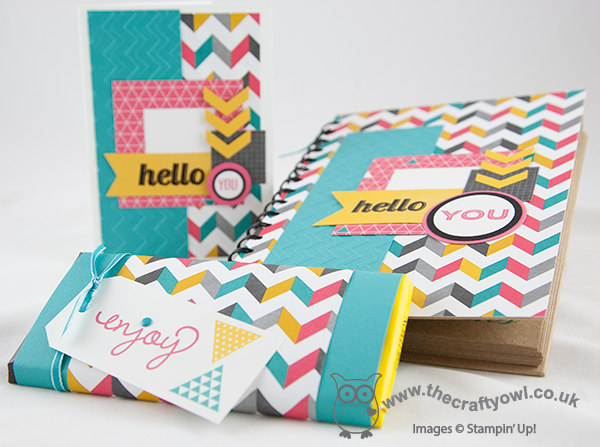
In addition she also received a handbook and other items that will be useful as she grows her Stampin' Up! business. Whether you want to feed your own crafting habit by having access to discounted craft supplies, or would like to earn a little (or a lot!) extra income and run your own business, I am here to support you in any way I can.
You have just 10 days to take advantage of the enhanced Sale-A-Bration sign up offer: contact me on 07773 421446 or joanne@thecraftyowl.co.uk if you would like to know more or alternatively sign up here today!
Back tomorrow with another project; until then, happy stampin'!
Stampin' Up! Supplies used:
a8ef88e1-1272-4286-8774-c6b7a2c0963c|0|.0|96d5b379-7e1d-4dac-a6ba-1e50db561b04
Tags: Kaleidoscope, Simply Celebrate, Perfect Pennants, Chevron Textured Embossing Folder, Circles Framelits, Square Framelits, Stampin' Up, Stampin' Up Card, Stampin' Up Card ideas, Stampin' Up Supplies, Chevron Border Punch
3D Projects | Cards | Join My Team | Product Table Builder | Sale-a-bration | Stamping
by Joanne James8. March 2014 20:54Today's card is one I designed for this week's Mojo Monday sketch challenge, where I was attracted by the layout and the 'frame' element that is central to the sketch:
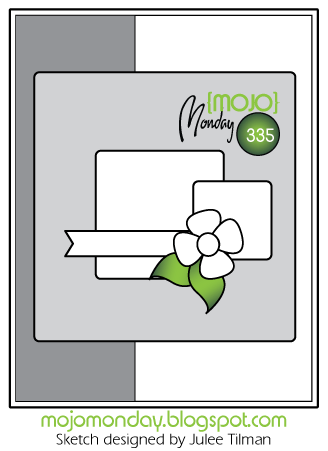
Here is my take on the sketch:
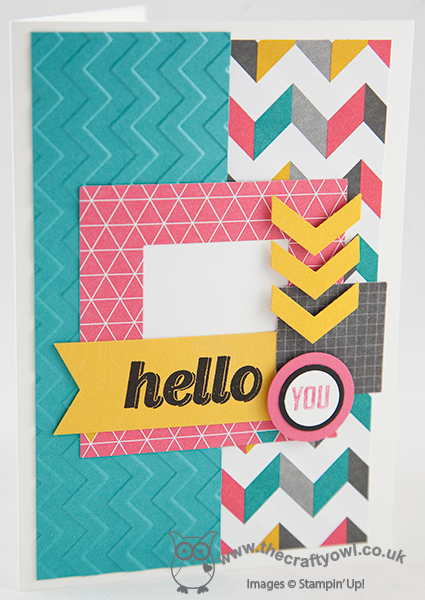
My card is a riot of graphic patterns and colour, using the Kaleidoscope Designer Series Paper as the inspiration for my colour scheme. I added a layer of texture with a Bermuda Bay panel that I dry-embossed with my Chevron Textured Impressions Embossing Folder, then layering the various elements in contrasting papers and finishing with a banner of Crushed Curry that I stamped with Versamark and heat embossed in black embossing powder to give it a lovely sheen. Cutting my frame was easy with the aid of my square framelits - this is one of those times when they are invaluable. I popped my chevron punched pieces on dimensionals, using them to draw the eye to my button 'You' (this is a partial stamp of the 'You & Me' stamp in the Perfect Pennants set).
I'm not one for mix-and-match of patterns as a rule, but sometimes it's ok to step outside of your comfort zone. I hope you're all enjoying your weekend; the weather has been much warmer and brighter here in the UK today - we managed to get some time outside in the garden today, which made a nice change.
Back tomorrow with another project; until then, happy stampin'!
Stampin' Up! Supplies Used:
e877f062-6a34-43c5-93b8-102c7a75c658|0|.0|96d5b379-7e1d-4dac-a6ba-1e50db561b04
Tags: Chevron Border Punch, Chevron Textured Embossing Folder, circle punch, Circles Framelits, Square Framelits, Stampin' Up, Stampin' Up Card, Stampin' Up Card ideas, Stampin' Up Supplies, Shop online, Perfect Pennants, Kaleidoscope, Simply Celebrate
Cards | Stamping