Frames And Flowers Quickest Ever Thank You Card For AYSI325

by Joanne James7. June 2024 12:00

Today I'm sharing my design team card for our new challenge over at As you See It where it's time for our speed stamping challenge - and I chose the theme:


Thank you cards! I use thank you cards more than any other kind of card and it's good to have some speedy designs on hand. I was actually a little short on crafty time this week so speed stamping week couldn't have come at a better time! I knew exactly where I was headed for my quick card - take a look at what I came up with and then I'll fill you in on the details:


Here's the low-down on today's card:

Ready, Set ... - As we always say with a speed challenge, preparation is key. Think about your design and gather your supplies before the timer starts - this will make for a quicker execution. Mount your stamps, open your ink pads and you will be ready to start with the stopwatch. Here are all my supplies, in addition to my Tombo glue and trimmer, which is just out of view:


For a really quick card think about shortcuts - my shortcut on today's card is the Frames & Flowers designer series paper. The precut die-cut designs in the pack are a huge timesaver - a ready made decoration. I chose a sheet of patterned paper for my background, then one of the co-ordinating large foliage diecuts that had space for a printed sentiment.

Go! - Now to the timed action! I took my card base and added a pieces of designer series paper to the front of it. I then stamped the word 'thanks' in Pretty Peacock across the centre of the diecut (I used the retired 'Biggest Wish' stamp set but I've included a shop link below to a current one that would make a great alternative) the added this to the centre of my card base, using dimensionals:


I finished with a selection of co-ordinating gems to finish my card.

Result - That's all there is to it - a great #simplestamping card where the designer paper definitely takes the strain! How long did it take to make this card? 

Just 2 minutes and 42 seconds - at that speed, you could even make multiples in the space of 10 minutes! The Frames & Flowers papers really are fabulous and great for all kinds of speedy cards; at £9.50 for a pack, they're super reasonable too!

Here is the visual summary of the key products used on today's project for you to pin for easy reference:


You can see all of my 'How To' summaries on my 'How To - Tips and Techniques' Pinterest board in case you've missed any. 

Here's a summary of our challenge rules:

  • Create any card, scrapbooking page, 3D project or packaging project that fits the challenge.
  • Please include the challenge graphic and link back to the challenge in your blog post. Turn off word verification so we can leave you lots of lovely comments. Make sure you link the post not the whole blog to the Linky. Use #AYSIXXX when uploading to a public gallery.
  • If you’re unsure about ‘the rules’, check the details under the Challenge Guidelines tab on the As You See It Challenge homepage.
  • In a speed stamping challenge, please time yourself and say in your post how long your card took to complete. 
We look forward to seeing your creations in the AYSI gallery.

Enjoy your day and I'll be back tomorrow with another project. Until then, happy stampin'!


Stampin' Up! Supplies Used:

Shop link to the Frames & Flowers 12" x 12" Designer Series Paper £9.50: click here

Table built using Product Table Builder by The Crafty Owl - Independent Stampin' Up! Demonstrator.

Playful Pets Birthday Card

by Joanne James6. May 2024 19:30

I've been decorating today so a super quick card to share that I made yesterday. I was continuing to challenge myself with diagonal layouts and made a super quick card for the challenge over at Time Out Challenges using up a bunch of retired Playful Pets designer paper that was perfect for their inspiration photo this week:

Here's my card:


I used the retired 'Biggest Wish' stamp set for my diagonal greeting and paired my puppy paper with some Pecan Pie gingham.

That's all from me - back with a card made using lots of new things tomorrow!

Hello Friend Tortoise CCS535

by Joanne James16. April 2024 13:00

It's Tuesday and time for a new challenge over at CAS Colours & Sketches. First up - a confession! I got my dates mixed up and I actually used this sketch last week for my Tuesday post - you can see that card here if you missed it - but since this week is actually CAS Colours and Sketches week, I'm showing you another way to use it! This week's challenge is a sketch challenge and Rachel has asked that we use a trio of balanced shapes. Feel free to flip or rotate the sketch when making your card and remember the shapes you choose don't have to be squares. 


I paired Rachel's fun sketch with the 'take 5' challenge over at Color Dare this week (I ended up using all 5 colours) and created a simple notecard to say hello to a friend - take a look:


Here's the low-down on today's card:

I tweaked Rachel's sketch slightly and balanced my stamped and diecut tortoise from 'Playing In The Rain' onto a stacked sentiment from the 'Biggest Wish' stamp set, stamped in Flirty Flamingo. In place of the sentiment on the sketch, I added some flowers - perhaps the meadow where my tortoise had picked his daisy? 


My colours do seem a little off today for some reason, with my pink letters looking almost coral; my sage greens are also looking a little darker than they are in real life; notwithstanding, I like this second take on the sketch and the stacked sentiment is a fun idea too. The 'Biggest Wish' stamp set is retiring at the end of this month, although its companion set 'More Wishes' is staying, so if you are wanting to take advantage of the full combination of greetings, be sure to pick up this set before it's too late.

Here is the visual summary of the key products used on today's project for you to pin for easy reference:


You can see all of my 'How To' summaries on my 'How To - Tips and Techniques' Pinterest board in case you've missed any. 

Enjoy your day and I'll be back tomorrow with another project. Until then, happy stampin'!


Stampin' Up! Supplies Used:

Table built using Product Table Builder by The Crafty Owl - Independent Stampin' Up! Demonstrator.

Biggest Wish Happy Birthday With Trusty Toolbox

by Joanne James22. February 2024 09:00

Today I'm sharing another card using one of the current Sale-A-Bration free products that I've been using but haven't shared a project that features it in a while - what can I say, so many goodies, so little time! So today it's the turn of the Trusty Toolbox designer series paper - take a look:


Here's the low-down on today's card:

No Co-ordinating Product? No Problem! - The Trusty Toolbox designer series paper co-ordinates with the Trusty Tools bundle that can be found on page 56 of the mini catalogue, but you don't need the bundle to have a lot of fun with these papers! They are great for creating layered cards with lots of fun patterns and the tools themselves are so easy to fussy cut as I've done on today's card. 

Biggest Wish - I went with a diagonal design to give me the opportunity to fit in lots of lovely tools and paired my design with a birthday greeting from the 'Biggest Wish' stamp set - a great sentiment-only set:


And Another Thing - If you look closely at my card, you will see that none of the tools are shown in their entirety; I actually used a bunch of tools cut from the edges of the paper and used my diagonal to 'hide' their incomplete portions - waste not, want not, right? I also used a few more to decorate the inside of my card:

A few enamel dots were all that I needed to complete this fun masculine card that makes the most of these free papers!

Here is the visual summary of the key products used on today's project for you to pin for easy reference:


You can see all of my 'How To' summaries on my 'How To - Tips and Techniques' Pinterest board in case you've missed any. 

I'm also linking this card up for a second entry over at TGIF Challenges where the theme this week is Sale-A-Bration.

Enjoy your day; it's still raining cats and dogs here in the UK so I will most definitely be spending the day indoors - I'm not sure that the ground can take any more! I'll be back tomorrow with another project. Until then, happy stampin'!

Framing Foliage Autumn Thanks PP662

by Joanne James15. October 2023 08:00

Today it's Sunday and time for this week's new challenge over at The Paper Players! It's my turn to host this week and I have a seasonal clean and simple challenge for us to work with:
 

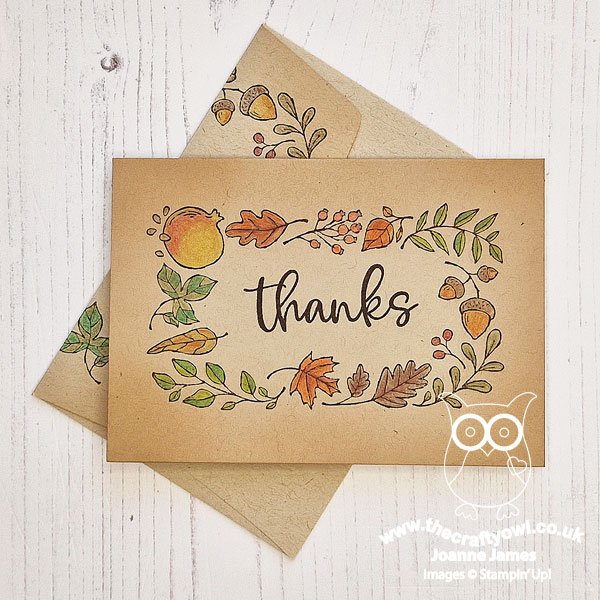
Signs of autumn - this can mean so many things but for me is summed up above all in the changing colours of the leaves on the trees as I drive through the countryside each day. The 'Framing Foliage' host stamp set has a lovely autumnal frame made of leaves, fruit and berries that is perfect for clean and simple cards - take a look:
 

Here's the low-down on today's card:

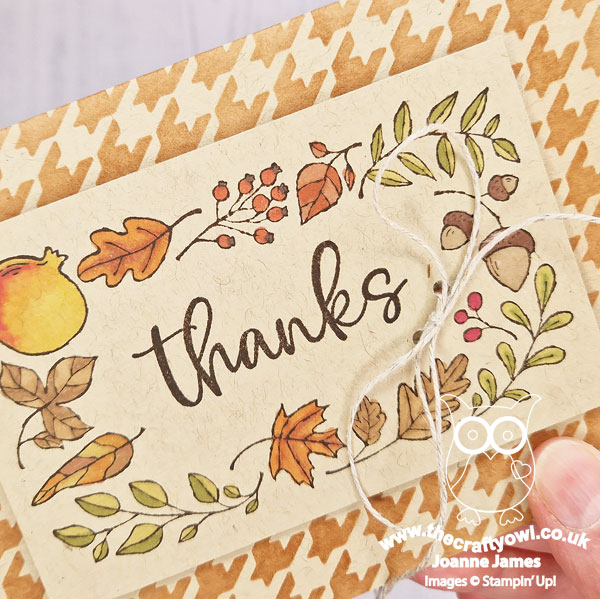
#SimpleStamping - Firstly, did you miss the Framing Foliage stamp set in the current mini catalogue? It's on page 79 and is an exclusive stamp set that can be purchased with Stampin' Rewards earned when you host your own Stampin' Up! party (or place a single order of a qualifying amount). For my clean and simple design I decided to go with a one layer, #simplestamping card: stamps, ink and paper and nothing more. I stamped the frame, my 'thanks' sentiment from 'Biggest Wish' stamp set in Early Espresso on a kraft notecard and having added a little Crumb Cake ink to the edges of my card base with a blending brush, I coloured the details of the frame with my watercolour pencils. I also stamped a partial frame onto the outer envelope flap and coloured that to coordinate. Super simple - done! I don't make smaller notecards often, although it's a great size to pop into customer order bags, so I made a few of these and that's where they'll be headed.

Stepped Up - Whilst I had everything out on my desk, I thought I'd also create a second, stepped up version to show how a few additional elements can enhance the basic design. This time I used a standard size card base and added a pattern to my cardfront using a blending brush and some Copper Clay ink with the houndstooth pattern Abundant Beauty Decorative Mask. I stamped the frame onto a second piece of cardstock, cropped it closely then this time coloured the elements with my Stampin' Blends markers. 
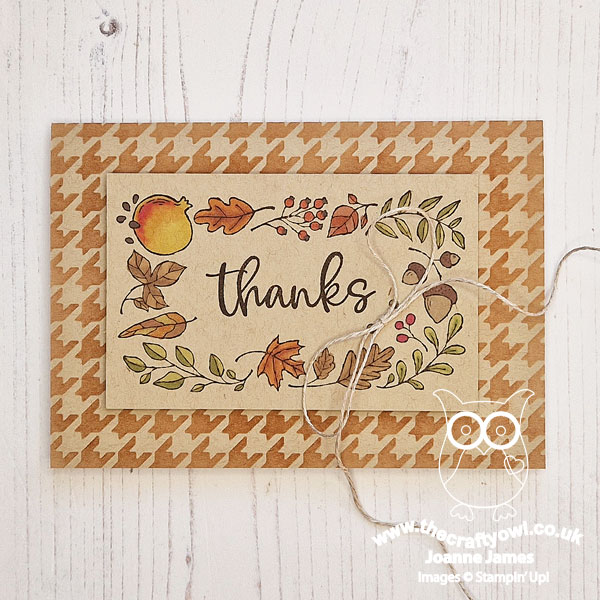
Before adding my stamped panel to my cardbase with dimensionals, I punched a couple of holes and thread some linen thread through, tying in a bow. I could have just glued on my bow, but one of our Guest Designers currently, the lovely Fran Wing, has such creative ways of adding thread to her cards I thought I'd take a leaf out of her book and try something a little different!
 

So one design, two ways - which one do you prefer? Both are fairly clean and simple and I think I prefer the second one if I'm honest, but the first one is I think a great example of #SimpleStamping and how you don't need much in the way of supplies to create a decent card. 

I'm linking up my first card today with the team over at CASOnSunday where their current challenge theme is also autumn; my second card I'm linking up over at The Alphabet Challenge Blog where they are currently on 'N is for Nature'. 

Here is the visual summary of the key products used on today's project for you to pin for easy reference:
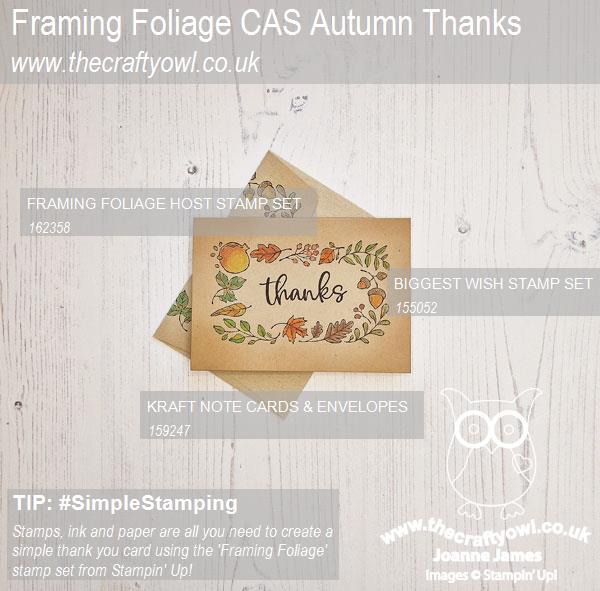
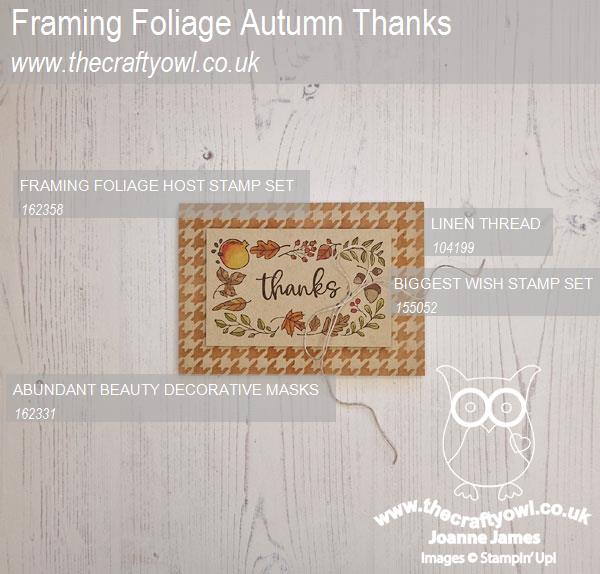


You can see all of my Product and 'How To' summaries on my 'How To - Tips and Techniques' Pinterest board in case you've missed any. 

Before you reach for your ink and papers, check out what our amazing team has created to inspire you this week:

Here's a quick recap of our challenge rules:
 
1.  Create a new paper project
2.  Upload your creation to your blog with a link back to us and provide a direct link to the post featuring your challenge submission.
3.  Please link your card to no more than four challenges, TOTAL.
4.  Have FUN!

Enjoy your day; I have no special plans so am hoping to enjoy some cooking and crafting in equal measure! I'll be back tomorrow with another project. Until then, happy stampin'!


Stampin' Up! Supplies Used: 
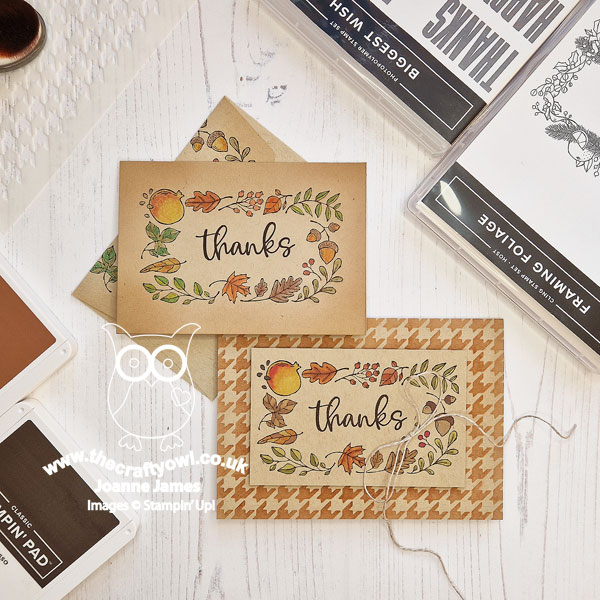
Table built using Product Table Builder by The Crafty Owl - Independent Stampin' Up! Demonstrator.

Biggest Wish Hap-Bee Birthday TTT 222

by Joanne James17. August 2023 18:00

It's Thursday and time for a new challenge over at TicTacToe! It's the turn of Team X to host this week and the lovely Betty is our featured designer this week. This is the fun board that we are playing along with: 


I went down the middle column with designer paper, free and birthday; I used the sketch over at Tuesday Morning Sketches for my layout and thought I'd play along with the lovely ladies over at Just Us Girls this week where the word of the week is 'bee'. I took the opportunity to use up some old honeycomb designed paper and went for a punny sentiment on my card today - take a look:


Here's the low-down on today's card:

I wanted a big, bold sentiment for those panels so decided on HAPPY BIRTHDAY from the stamp set 'Biggest Wish', but instead of stamping the HAPPY in its entirety, I masked off the PY and replaced with a bee punched from my ladybug builder punch for a punny sentiment. I punched the body in black, added some yellow stripes and a pair of vellum wings liberally coated with clear Wink of Stella - you can see the sparkle below:

I completed my card with a trio of hexagonal enamel dots to continue the honeycomb shape and bee theme. So what do you think? Does the punny sentiment work? I hope today's card makes you smile!

Here is the visual summary of the key products used on today's project for you to pin for easy reference:


You can see all of my Product and 'How To' summaries on my 'How To - Tips and Techniques' Pinterest board in case you've missed any. 

A tictactoe board offers so many creative possibilities - how does this week's board inspire you? Why not have a go? We would love to see you in the gallery and who knows - you might be selected for Designer's Choice and be eligible to be a guest designer on a future challenge. 

Enjoy your day; ... I'll be back tomorrow with another project. Until then, happy stampin'!


Stampin' Up! Supplies Used: 

Table built using Product Table Builder by The Crafty Owl - Independent Stampin' Up! Demonstrator.

Around The Bend CAS Thank You Card CCS 504

by Joanne James7. February 2023 13:00

It's Tuesday and time for a new challenge over at CAS Colours & Sketches. We are into the second month of the year and I am your hostess for February! Our first challenge is a colour challenge: 


For my card today I took the opportunity to have another play with my Around the Bend Dies and create a clean and simple thank you card - take a look:


Here's the low-down on today's card:

Today's card features the detailed corner die. I added a piece of Country Gingham Balmy Blue check to my Balmy Blue card base, then overlaid a piece of white featuring the corner diecut on top. Onto this white panel, I stamped a simple 'thanks' from the 'Biggest Wish' stamp set and added a diecut flower with leaves using other dies in the set:

 I love the embossed detail on the diecuts in this set - it adds interest and allows a single flower to take centre stage, with nothing else needed to compliment that pretty corner detail.

Here is the visual summary of the key products used on today's project for you to pin for easy reference:


You can see all of my 'How To' summaries on my 'How To - Tips and Techniques' Pinterest board in case you've missed any. 

As a reminder, for our colour challenges, you must use all of the stated challenge colours. You may also use neutral colours; however, the challenge colours should be the most noticeable ones featured on your card. We use Stampin' Up! color names for reference, but you are welcome to use any other companies' products as long as you match the challenge colours as closely as possible.

Enjoy your day; I'm looking forward to catching up on some crafting before a super-late school run this evening; the youngest of the James Juniors is having to forgo his weekly club hockey practice in order to participate in a whole school House Singing competition. Apparently his house is singing 'I Will Survive' by Gloria Gaynor - having listened to the practice, I'm not sure the audience will, but there we are!!

I'll be back tomorrow with another project. Until then, happy stampin'!


Stampin' Up! Supplies Used:

Table built using Product Table Builder by The Crafty Owl - Independent Stampin' Up! Demonstrator.
 

Biggest Wish Slimline Card Featuring Slim Card Dies

by Joanne James28. February 2022 14:27

Today I'm sharing a second card that I made last week; squeaking this one in for the current challenge over at The Card Concept - check out their inspiration photo:


I love the nautical colours and strong geometrical prints in the inspiration photo and though they would be perfect for a similarly coloured clean and layered card featuring the Slim Card Dies - take a look at what I came up with:


Here's the low-down on today's card:

I diecut the slim card die with the angles lines out of 4 different colours of cardstock, then paper-pieced the negative pieces back into the diecut outline for some fun nautical stripes. 

I didn't have a boat that was the right size for this card (the new Sailboat Builder Punch would have been perfect, but the boats in the 'Sailing Home' set were both too small) but on closer inspection I noticed there were a number of black dogs in the photo too, so thought a black labrador silhouette punched with my now retired Dog Builder Punch would work a treat. I added him to a sentiment stamped with the 'Biggest Wish' stamp set that was stamped and cut out with one of the Painted Labels Dies: 


And that was my card complete! Stampin' Up! even has a new range of slimline envelops the perfect size for my finished card, so I don't have to make my own - bonus!

I have a friend with a black labrador that looks just like this one so I think that's where this card will be headed when their birthday rolls around. The Slim Card Dies are super easy to use and great for paper-piecing; not only that, if you save all of the pieces you can make a number of cards in one go - here's a shot of the other cards I started to make whilst making this one:


One of them still needs a sentiment and they both require additional decoration, but it's good to have the bases already made. 

Here is the visual summary of the key products used on today's project for you to pin for easy reference:


You can see all of my 'How To' summaries on my 'How To - Tips and Techniques' Pinterest board in case you've missed any. 

Enjoy the rest of your day and I'll be back tomorrow with another project and some exciting news for the month of March. Until then, happy stampin'!


Stampin' Up! Supplies Used:

Table built using Product Table Builder by The Crafty Owl - Independent Stampin' Up! Demonstrator.

A Colourful Biggest Birthday Wish TTT128

by Joanne James26. August 2021 18:00

It's Thursday and time for a new challenge over at TicTacToe! It's the turn of Team X to host this week and our fearless leader Felicita is our featured designer this week. This is the fun board that we are playing along with: 


I loved Felicita's board this week and I could have chosen so many routes! I ended up using this week's Global Design Project #GDP306 sketch for my layout and going diagonally across the board from bottom left to top right with birthday/free/balloon (it also fits the second row of any colour ink/free/any shape die) for a simple and colourful birthday card - take a look:


Here's the low-down on today's card:

Pattern Party - I used a sheet of fun, colourful stripey paper from the Pattern Party host pack as the background for my card - this totally inspired my bright colour scheme today! I love the way this frames my central scalloped panel.

Ombre Biggest Wish - My central panel is cut with one of the Scalloped Contours Dies and I used it to create a focal point ombre 'happy' sentiment overlaid with a fussy-cut birthday, both from the 'Biggest Wish' stamp set. Love these big, bold fonts, that are useful in lots of ways.

What No Penguin? - The balloons I featured on my card are from the 'Penguin Place' stamp set - and yes, not a penguin in sight! When I originally started my card, I was intent on adding one but in the end decided I liked it just like this. I fussy cut my balloons and strings and added them to my panel for a final pop of colour.

Here is the visual summary of the key products used on today's project for you to pin for easy reference:


You can see all of my Product and 'How To' summaries on my 'How To - Tips and Techniques' Pinterest board in case you've missed any. 

A tictactoe board offers so many creative possibilities - how does this week's board inspire you? Why not have a go? We would love to see you in the gallery and who knows - you might be selected for Designer's Choice and be eligible to be a guest designer on a future challenge. 

Enjoy your day; I am taxi service to hockey training this evening -  we are starting to ramp up as the new season approaches! I'll be back tomorrow with another project. Until then, happy stampin'!


Stampin' Up! Supplies Used: 

Table built using Product Table Builder by The Crafty Owl - Independent Stampin' Up! Demonstrator.

Sale-A-Bration 2025

It's time for Sale-A-Bration 2025! Shop, host and earn benefits between 7 January - 28 February. Download your copy of the Sale-A-Bration brochure here!

Mini Catalogue

BROWSE THE CATALOGUE

New Year, new products - the new Stampin' Up! Mini Catalogue is here! For more details and to download your copy click here

Shop Online

Access my online shop 24 x 7, 365 days of the year:

Current January hostess code:

M7ZT6XFK

Shop Online

Join My Team

And when you join during Sale-A-Bration, new team members can build your starter kit by choosing £130 worth of products for only £99 + free business supplies + free shipping and either TWO Stampin' Write marker sets and the exclusive Handmade Designs stamp set OR an additional £30 in FREE products. Stampin' Up! has something for everyone: join my growing team and benefit from my support to enjoy Stampin' Up! however you choose.

If you're interested, call me for a chat to understand how I can help you realise your goals. Alternatively, if you have already decided to sign up and you just can't wait, please click here for the link to the online form where you can sign up and order your starter kit right away! 

Scrapbooking

Stampin' Up! has introduced a new range of 12x12" scrapbooking product and kit - the full range is now available to purchase online. To download a copy of the new digital Scrapbooking Catalogue click here.

Latest Kits!

Stampin Cut and Emboss

The Birthday Bash Kit is just one of the latest kits in the online store - get yours here!

2024-25 Annual Catalogue

BROWSE THE CATALOGUE

Click on the image to download your copy of the 2024-25 annual catalogue. For a full list of current SU! supplies, go to my online store. If you would like any help or advice, please drop me a line at joanne@thecraftyowl.co.uk or give me a call on 07773 421446 - I'd be happy to help.

New Online Exclusives

There are new products available exclusively in the online store from 7 January - check them out here.

About Me

Hi I'm Joanne and live in Northampton and when I'm not looking after my husband and two beautiful children, am an avid crafter with a passion for all things Stampin' Up!

I must confess that I have never been a big rubber stamper - until I discovered Stampin' Up! that is. I love the fact that I can get such great results with co-ordinating stamps, inks, papers and punches - the possibilities are endless! Join me on my stamping journey as I share the things I love and be inspired to create amazing things yourself!

Follow Me

Monthly Newsletter

Box Builder

Click the button above to use Box Buster to create your custom box design using the Envelope Punch Board!

Kits Collection Now Available!

Stampin Cut and Emboss

The new Kits Collection from Stampin' Up! is now available!

Click here to see the current kits available and order yours online today.

I Design For


Stampin' Up Stuff

This is my personal blog and is not endorsed by Stampin’ Up! I hope you find it a plentiful source of ideas and personal inspiration but please don't copy my designs for contest submission or use for classes, publication or sale without express permission.

DSP Special Release

Check out 3 popular designer series paper designs in fresh new colourways! Available exclusively in the online store from 3 December - check them out here