I've had a few days break from the blog as I make the most of the last few days of the long summer holiday before the James Juniors head back to school next week. I'm back today though and I'm sharing my design team card for our new challenge over at As you See It where it's time for a theme challenge:

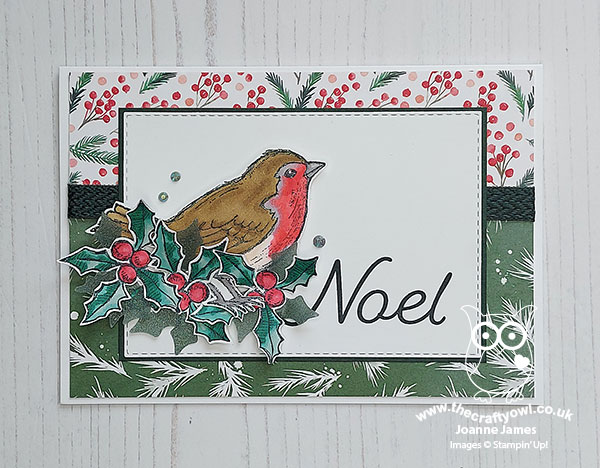
I used the great sketch over at Sunday Stamps for my layout this week. So many options for that central panel but with our theme this week of 'up in the air' I decided to feature a festive feathered friend on mine - take a look:
Here's the low-down on today's card:
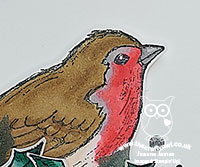
Happy Holly Days - First up, I have a little story for you! I can't tell you how many UK Leadership training events I've attended over the years where I've been in meetings where we've brainstormed ideas for future catalogues, and if I had a penny for every time the request for a traditional Christmas robin has been made I would be rich by now! The cardinal gets featured frequently in the Stampin' Up! catalogue and whilst he is a common visitor for many in Stampin' Up!'s global markets, the robin is a particularly European bird and doesn't travel as far south as the USA. As such, our requests have often fallen on deaf ears - until now! This year's mini catalogue has a beautiful robin just waiting to be coloured, so I had to scoop him up and I'm so glad to give him his first outing on my card today.
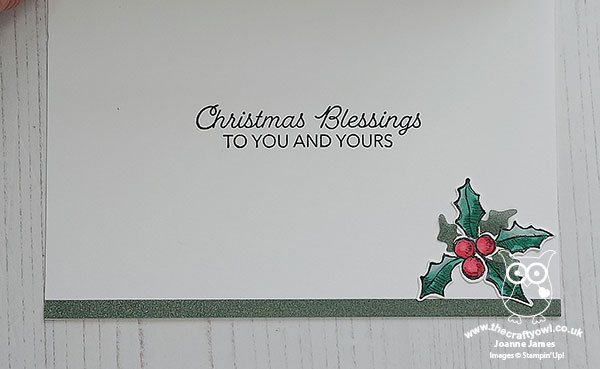
I've seen some interesting colours applied to this bird as I've browsed the internet, but my robin is true to type! His tummy is maybe a little more red than a real-life bird, since they are actually more of an orange-red colour, but I wanted to emphasise the red so went with Poppy Parade Blends and made mine a full-on 'robin red breast'. As for this set, not only does it have this lovely robin and some holly to colour (more on that in a moment) but it has some lovely sentiments for both the outside and inside of your cards. I used a large 'Noel' on the front of my card, then continued on the inside with this one:
Shimmer With The Holly Border - In addition to the holly in the stamp set, which I coloured and fussy cut and adhered around the feet of my robin, the stamp set is bundled with a holly border punch. I didn't use the border pattern in my design today, instead I punched it out of some Evening Evergreen vellum and then adhered the leaves in between my stamped ones for some extra sparkly detail:
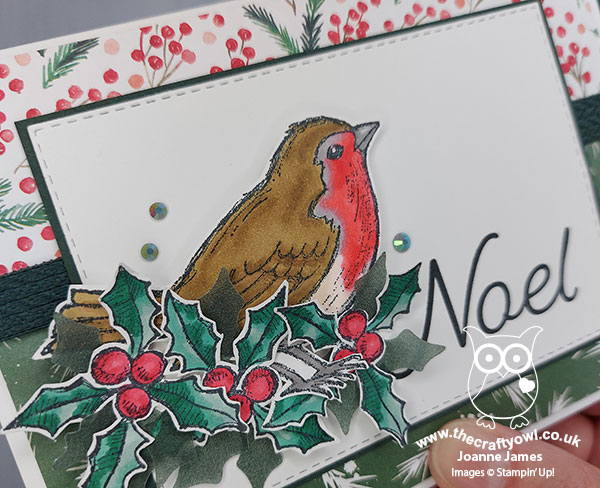
I did wonder if I was a little over-enthusiastic about this, but I do like the little added shimmer it adds to the card. Once complete I also wished I'd splattered my white rectangular panel as I felt it was a little too 'clean' (if there can ever be such a thing!) but I didn't want to remake or deconstruct, so added a trio in in-colour gems to break up the space and add a little more sparkle instead.
Painted Christmas - For my split background panel, I chose two patterns from the Painted Christmas DSP pack. There are some lovely foliage patterns in this pack and I had a hard time choosing just two. I covered the join with some lovely dark green chevron weaved ribbon to complete my card.
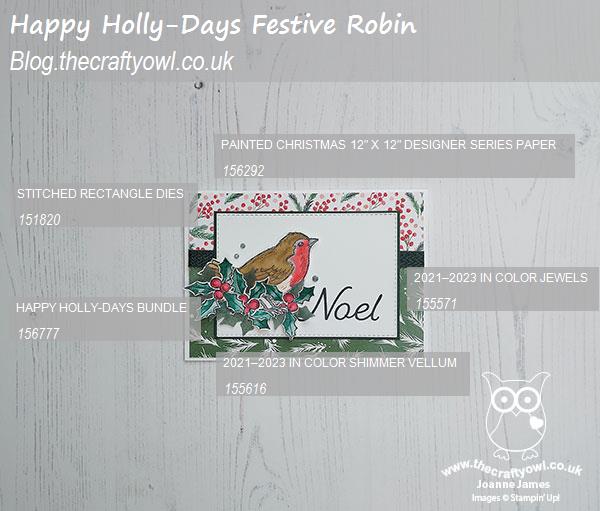
Here is the visual summary of the key products used on today's project for you to pin for easy reference:
You can see all of my 'How To' summaries on my 'How To - Tips and Techniques' Pinterest board in case you've missed any.
So what do you think? I really love this robin and am on a mission to feature him on lots of cards this season, especially since he has been so longed-for in terms of stamp sets! In the meantime, what will you choose to feature for our 'up in the air' theme this week?
Here's a summary of our challenge rules:
- Create any card, scrapbooking page, 3D project or packaging project that fits the challenge.
- Please include the challenge graphic and link back to the challenge in your blog post. Turn off word verification so we can leave you lots of lovely comments. Make sure you link the post not the whole blog to the Linky. Use #AYSIXXX when uploading to a public gallery.
- If you’re unsure about ‘the rules’, check the details under the Challenge Guidelines tab on the As You See It Challenge homepage.
We look forward to seeing your creations in the AYSI gallery.
Enjoy your day; the James Juniors are off to get pre-school haircuts today and Ben for one needs it - the yeti currently has nothing on him!! Rebecca is actually going in for Sixth Form Induction day this afternoon and she is so excited! I'll be back tomorrow with another project. Until then, happy stampin'!
Stampin' Up! Supplies Used: