Berry Blessings For You PP526

by Joanne James31. January 2021 09:00

Today it's Sunday and time for this week's new challenge over at The Paper Players! It's the fifth Sunday of the month so the lovely Laurie is hosting this week and she has a fun tic-tac-toe challenge board for us to work with:


I used Julee's current Mojo Monday sketch as the basis for my card and went top left to bottom right on the diagonal across the board with die cut-embossing-blue for another fruity card for you this week - take a look:


Here's the low-down on today's card:

Berry Blessings - Today's card is all about the free - free product that is! Both the stamp set and the designer series papers on today's card are part of the Berry Blessings bundle that is one of the free products available with a Stampin' Up! order of £90 or more during Sale-A-Bration. I love the designer papers that feature both the blueberries and raspberries in the bundled stamp set and also the strawberries from the Sweet Strawberry bundle - fruity patterns and also some fabulous checks and plaid. This card is all about the blues and greens, so I chose two plaids that would co-ordinate with my blueberry focal point. They just so happen to also be perfect for Stesha's takeover at TGIF Challenges this week where they are all about the plaid too. I also used the stamp set for the sentiment and a little extra stamping on the inside of my card too:


Stitched Shapes - The layers of Julee's sketch allowed me to fully indulge of my love of stitched shapes: rectangles for the background and then a circle as the base for my fussy cut berries. These are my most used of all my dies and the circles are for sure a staple - I just love the way they elevate a humble shape into something just a little bit more.

It's In The Details - I did a lot of fussy cutting on my berries and leaves, so wanted to add only a few extra small details. The embossing that completes my tic-tac-toe line is both dry embossing using my favourite Subtles folder on the white layer, and a white heat-embossed sentiment on my blue sentiment banner. I also added a simple white twine bow (with my banner that makes my two things from the Just Add Ink list this week) and a single pearl to the centre of my blue flower. You can see those finishing touches better below:


I really love how this card came together. Pacific Point was one of the first ink pads I ever bought when I started stamping, yet it isn't a colour I use often now so it was great to get it out for this card. I love that most of the rest of the product that I used was free - links to the store below if you'd like to snap up this bundle too!

Here is the visual summary of the key products used on today's project for you to pin for easy reference:


You can see all of my Product and 'How To' summaries on my 'How To - Tips and Techniques' Pinterest board in case you've missed any. 

Before you reach for your ink and papers, check out what our amazing team has created to inspire you this week:

Here's a quick recap of our challenge rules:
 
1.  Create a new paper project
2.  Upload your creation to your blog with a link back to us and provide a direct link to the post featuring your challenge submission.
3.  Please link your card to no more than four challenges, TOTAL.
4.  Have FUN!

You can see all of my 'How To' summaries on my 'How To - Tips and Techniques' Pinterest board in case you've missed any. 

Enjoy your day; we were forecast more snow here in the UK this weekend, but yesterday both James Juniors were disappointed to find temperatures had plummeted but it was more like freezing rain than snow. Today they will be hoping for the proper white stuff so that we can build another snowman! If not, we have some cooking to do and we might even get cracking on a knitting project that we've been promising to start for a while. I'll be back tomorrow with another project. Until then, happy stampin'!


Stampin' Up! Supplies Used: 

Table built using Product Table Builder by The Crafty Owl - Independent Stampin' Up! Demonstrator.

Hippo Happiness and Wishing You A Warm and Toasty Cool Yule

by Joanne James23. November 2020 11:00


Today it's Monday and the start of a new week! I've had a Paper Pumpkin craft along with some of my lovely customers, putting together our 'Joy To The World' kits already this morning and now it's time for today's creative post! I'm sharing a couple of cards for a couple of challenges. The first of these is a card using Narelle's cute sketch over at Freshly Made Sketches and the colours at CAS Colours and Sketches:


The CAS Colours & Sketches colours intrigued me and I made my card in a landscape format to accommodate my slightly longer sentiment and took a short break from creating Christmas cards to make a  quick birthday card - take a look:


Here's the low-down on today's card:

I kept it simple and used block colours for my background squares and stamped a little hippo from the 'Hippo Happiness' stamp set in Basic Grey on the central one with a stamped flower that I fussy cut and added behind her ear. I then added a sentiment and finished my card with an equally punny sentiment inside:


Here is the visual summary of the key products used on today's project for you to pin for easy reference:


You can see all of my 'How To' summaries on my 'How To - Tips and Techniques' Pinterest board in case you've missed any. 


My second card uses the colours over at Color Throwdown and the current layout over at CAS(E) This Sketch:


After last Friday's post where I declared that I find myself avoiding Rich Razzleberry as a colour these days, I saw it was one of the trio in the Color Throwdown colours this week and loved the combination with aqua and vanilla, so reached for it to create another Christmas card - take a look:


Here's the low-down on today's card:

A bold banner of purple and a rather snazzy hat and scarf combo to adorn my skating polar bear, but the real star of this card is the lovely snowflake-embossed Pool Party Panel that sits behind him and adds a lovely element of texture:


I fussy cut the polar bear to finish, but that is no real hardship - it's quite easy to do with some sharp paper snips.

Here is the visual summary of the key products used on today's project for you to pin for easy reference:


You can see all of my 'How To' summaries on my 'How To - Tips and Techniques' Pinterest board in case you've missed any. 

I'll be back again shortly with another post with notice of the 'Merry and Bright' 24 hour flash sale that starts at 10.50pm tonight, so check back for that - you won't want to miss it! Until then, happy stampin'!


Stampin' Up! Supplies Used - Card 1:

Table built using Product Table Builder by The Crafty Owl - Independent Stampin' Up! Demonstrator.
 
 
Stampin' Up! Supplies Used - Card 2:
 
Table built using Product Table Builder by The Crafty Owl - Independent Stampin' Up! Demonstrator.

Best Dressed Fabulous Birthday Card

by Joanne James20. May 2020 09:00


Today I'm sharing a card for the current challenge over at Fab Friday where they have a great sketch:

You all know how much I love a good sketch, although if truth be told I almost didn't make it to using this one; all that open space I was spoilt for choice as to how to interpret it. In the end, as I was sorting out my retiring supplies inspiration struck and this is what I came up with:


Here's the low-down on today's card:

A Fabulous Sentiment - A sI was clearing the shelves, it occurred to me that the sentiment on today's card, from the retiring 'Stitched All Around' stamp set, would compliment the Best Dressed designer series papers perfectly. So I stamped it on a banner flagged with that most useful of punches, the Triple Banner Punch, and off I went!

Best Dressed - I love the 'Best Dressed' papers; whilst the stamp set and dies in the Best Dressed Suite are on carryover, the other items, including these papers aren't, so if you love them too you need to stock up now.

Finishing Touches - A card for a fabulous person needs a rather fabulous bow to finish I think, so made a double bow combining some Lovely Lipstick ribbon with some white polka dot tulle ribbon. I also fussy cut a couple of perfume bottles from the leftover scraps of DSP to decorate the inside of my card - waste not, want not and all that:


Here is the visual summary of the key products used on today's project for you to pin for easy reference:


You can see all of my 'How To' summaries on my 'How To - Tips and Techniques' Pinterest board in case you've missed any. 

Today sees the last of the Common Entrance exams for Master James this week. We then have another week of half-term revision before the final week of back to back exams the week after. Enjoy your day and I'll be back tomorrow with another project. Until then, happy stampin'!


Stampin' Up! Supplies Used:

Table built using Product Table Builder by The Crafty Owl - Independent Stampin' Up! Demonstrator.

Bonanza Buddies Toucan Birthday Cards For PP485

by Joanne James5. April 2020 09:00

Today it's Sunday and time for this week's new challenge over at The Paper Players! It's the turn of the fabulous LeAnne to host this week and she has a fun theme challenge for you to work with:


Cards featuring animals you would find at the zoo! Well, since none of us are able to visit the zoo in the current climate, our gallery this week will be the next best thing! Armed with the current sketch over at the Global Design Project this week I knew exactly where I was headed - take a look:


Here's the low-down on today's card:

Party Toucan - I had to reach for the Bonanza Buddies suite for my card today and that fun party toucan in particular - I love visiting these colourful birds at the zoo! I used a piece of Bonanza Buddies paper, featuring lions and koala bears too, as the base pattern, then fussy cut one of the larger toucans carrying balloons from another sheet of paper. There isn't much stamping on today's card - just a greeting on the front and then a co-ordinating sentiment inside and another toucan, stamped this time in the corner:


A Doily Banner - The banner that I used from my sentiment on the front of my card is from the Doily Wishes DIe set - it was the perfect size and shape to fit under the stitched circle that I used to back my toucan. 

Twocan Toucan - This card was a quick and easy make and a great storecupboard standby so I decided to make two at the same time as it was not twice the effort once everything was to hand. On my second card I used a different toucan, this time one wearing a party hat:


 I love the bright colours of these fun birthday cards and they are perfect for any gender too. Here's one last photo of both my cards together:


Here is the visual summary of the key products used on today's project for you to pin for easy reference:


You can see all of my Product and 'How To' summaries on my 'How To - Tips and Techniques' Pinterest board in case you've missed any. 

Before you reach for your ink and papers, check out what our amazing team has created to inspire you this week:

Here's a quick recap of our challenge rules:
 
1.  Create a new paper project
2.  Upload your creation to your blog with a link back to us and provide a direct link to the post featuring your challenge submission.
3.  Please link your card to no more than four challenges, TOTAL.
4.  Have FUN!

You can see all of my 'How To' summaries on my 'How To - Tips and Techniques' Pinterest board in case you've missed any. 

Enjoy your day; we are forecast a warm day here in the UK so we will be undoubtedly spending some of our time outside in the garden. Yesterday was gorgeous and the James girls went for a long bike ride for our daily exercise yesterday, passing all of the sheep in the fields with their newborn lambs, frolicking about without a care in the world. Oh to be a lamb right now! I'll be back tomorrow with another project. Until then, happy stampin'!


Stampin' Up! Supplies Used: 

Table built using Product Table Builder by The Crafty Owl - Independent Stampin' Up! Demonstrator.

Hello Cupcake Simple Sale-A-Bration Birthday Card

by Joanne James31. January 2019 22:25

I've had a busy day so just time to pop in with a quick post to share a simple birthday card that is super quick to make - take a look:

For this week's take on #SimpleStamping I have a CASE (Copy And Share Everything) of one of the samples in the current Sale-A-Bration brochure featuring the Hello Cupcake stamp set - a simple card base with a white panel and a flagged banner (I used the Triple Banner Punch to flag my ends, but you could cut them by hand using scissors), a single stamped image courtesy of the 'Hello Cupcake' stamp set, 3 ink colours and an optional sprinkle of self-adhesive sequins. Really easy to recreate with minimal supplies - just what #SimpleStamping is all about. 

Here is the visual summary of the key products used on today's project for you to pin for easy reference: 


You can see all of my 'How To' summaries on my 'How To - Tips and Techniques' Pinterest board in case you've missed any. 

I'll be back tomorrow with another project. Until then, happy stampin'!


Stampin' Up! Supplies Used:

Table built using Product Table Builder by The Crafty Owl - Independent Stampin' Up! Demonstrator.

Truly Tailored Dapper Day Masculine Card

by Joanne James26. March 2018 21:00

Happy Monday everyone! Yes it's a late post following a busy day as always, but as promised I have another card using yesterday's sketch over at The Paper Players that is also perfect for this week's TGIF Challenge:


I loved this sketch and in addition to yesterday's party-themed cards (you can see those here if you missed them) also used it to make a fun masculine card - I didn't post it yesterday as my PP teamie, the lovely Jan Clothier, had the same idea and used the same set, so I saved mine until today. It also demonstrates one of my favourite ways to use my Stampin' Write markers - take a look:


Here's the low-down on today's card:

True Gentleman - Classic patterns and elongated hexagons make the True Gentleman Suite tasteful, tailored and irresistible; this is how the catalogue describes this suite and whilst this isn't a set that sits at the top of my list, I do love the DSP patterns and colours (surprise, surprise!) and the clean, block style of the fonts in the Truly Tailored stamp set. And whilst I haven't used it here, the Tailored Tag Punch is a lovely modern, angular label that can be used with many other sets too. There are traditional masculine browns in this suite, but I chose to feature the brighter blues and greens on my card today, picking out the Crushed Curry yellow from the plaid background pattern with my baker's twine bow for an additional pop of colour.

Direct To Stamp - I used my Stampin' Write markers in one of my favourite ways on today's card; by colouring the sentiment directly with my markers, I was able to use both Tranquil Tide and Night of Navy on one stamp. I was also able to highlight certain areas of the stamp in order to alter the layout: if you compare my stamped image to that of the original stamp in the table below, you will see I omitted the moustache altogether and split the top line of the sentiment and stamped it on the upper portion of my circle, with the remainder on the bottom leaving a space in between.

Build A Bowtie - I decided to put that space between my custom-coloured sentiment to good use and add a bowtie - not a stamped one though, rather one punched with the Bow Builder Punch - dapper indeed! I finished the centre of my bow with a little of the textured corduroy ribbon that I used to edge my panel too as a fun finishing touch.

I also used two different colour markers on one stamp on the inside of my card too - although can't seem to find the photo of that, so will have to retake and add it to my post later.

Here is the visual summary of the key products used on today's project for you to pin for easy reference:


You can see all of my Product and 'How To' summaries on my 'How To - Tips and Techniques' Pinterest board in case you've missed any. 

I'll be back tomorrow with a couple of fun and simple Easter projects. Until then, happy stampin'!


Stampin' Up! Supplies Used: 

Table built using Product Table Builder by The Crafty Owl - Independent Stampin' Up! Demonstrator.

A Picture Perfect Party Birthday Celebration PP386

by Joanne James25. March 2018 09:00

It's Sunday and time for this week's new challenge over at The Paper Players! It's the turn of my amazing friend Claire to host this week and she has my favourite, a sketch challenge, for you to work with:
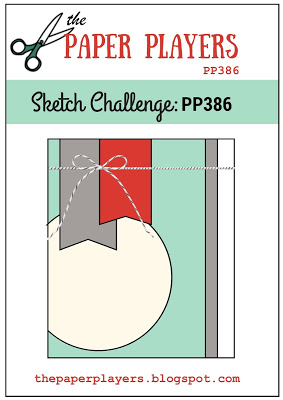
 

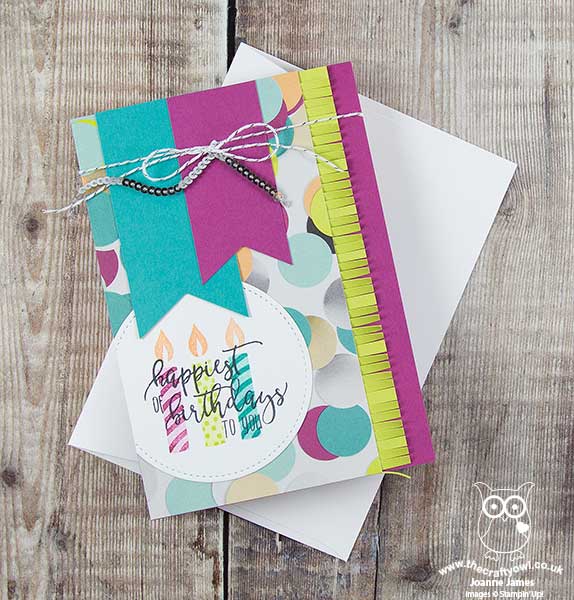
I could have gone so many ways with this sketch! I have not one, but two cards, to share with you today - both with a fun party theme. Here's the first one - take a look:
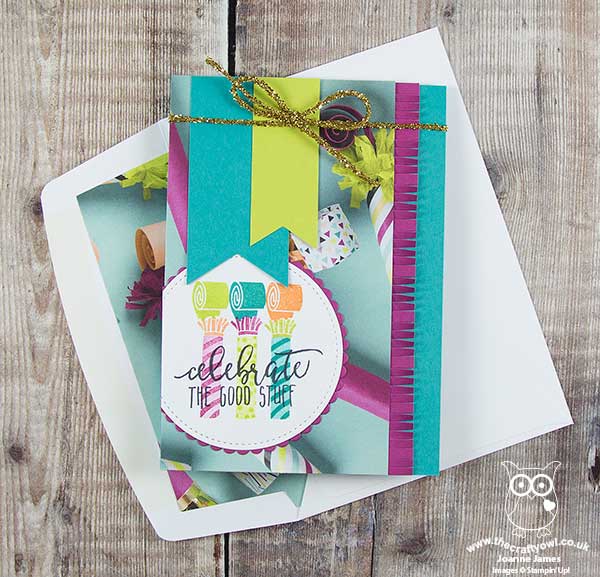
 

Here's the low-down on today's card:

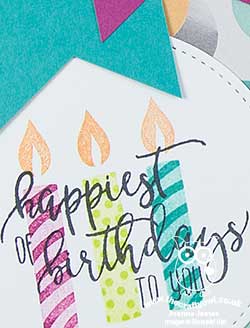
Picture Perfect Party - Both of my cards today feature papers with the bold, photographic images featured in the Picture Perfect Party DSP Stack. In bright, celebratory colours, these papers are perfect for a large expanse of background and work really well as the background for my fun, party-themed cards. I used the offcut from my card panel to continue the decoration through to my envelope to with a colourful envelope liner.

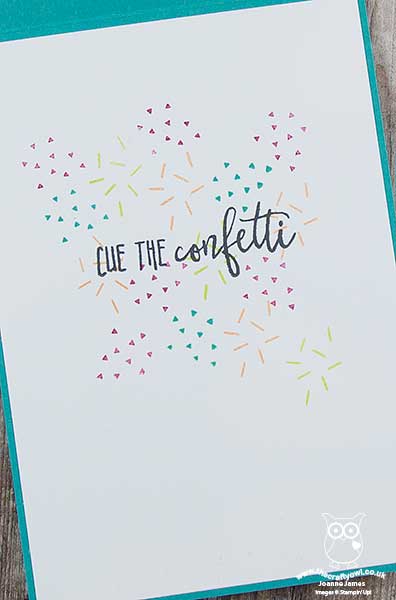
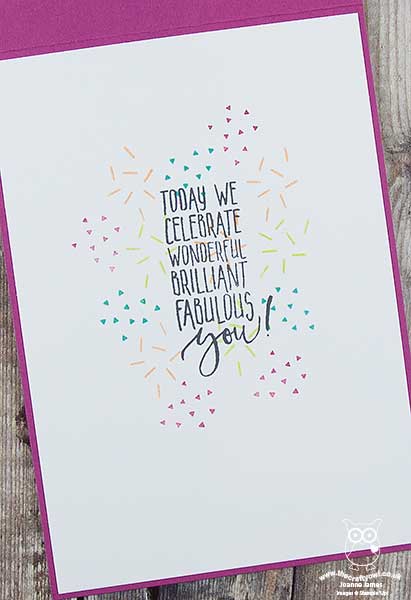
Picture Perfect Birthday - I used the co-ordinating Picture Perfect Birthday stamp set to decorate the sentiment circles on the front of my card. I was lucky to receive this set free when I attended Onstage last November, which really was fortunate for me as I think this is a set I might otherwise have overlooked. It contains some great, scripted fonts that work for birthdays and more general celebrations and has some fun confetti, candle, tooter and ribbon bow images too. In addition to using it to decorate the outside of my card, I added a little colour to the inside too:
 

Finishing Touches - To finish my cards, I added some gold tinsel trim and a strip of fringed cardstock to the one above and some silver baker's twine and mini silver sequin trim with a strip of fringed cardstock to the card below:
 

And here's the inside of this card too:
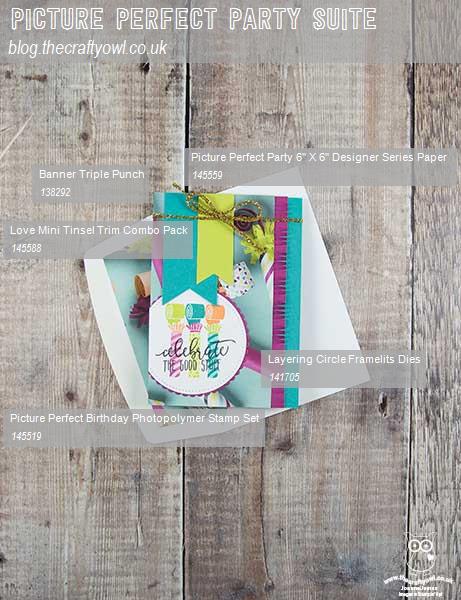
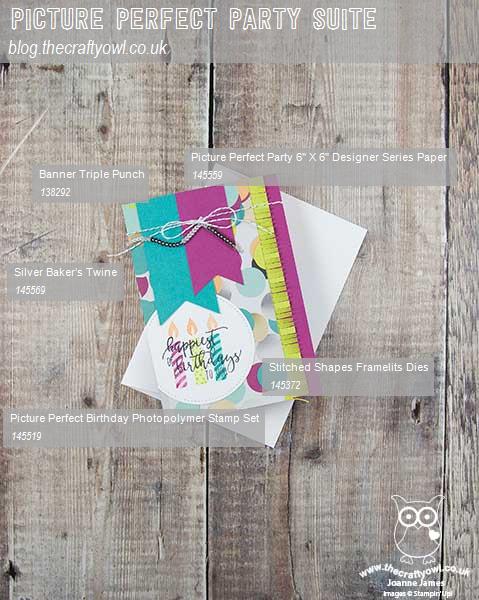
Two cards using the same layout and supplies, each with a different pattern and sentiment. The Picture Perfect Party Suite is perfect for creating batches of birthday cards with a minimum of supplies. Here is the visual summary of the key products used on today's project for you to pin for easy reference:


You can see all of my Product and 'How To' summaries on my 'How To - Tips and Techniques' Pinterest board in case you've missed any. 

Before you reach for your ink and papers, check out what our amazing team has created to inspire you this week:

Here's a quick recap of our challenge rules:
 
1.  Create a new paper project
2.  Upload your creation to your blog with a link back to us and provide a direct link to the post featuring your challenge submission.
3.  Please link your card to no more than four challenges, TOTAL.
4.  Have FUN!

I can't wait to see what you create with this week's sketch and look forward to visiting your blogs this week! Enjoy the rest of your weekend as it will be over all too quickly. We are minus one James Junior who is away on a short hockey tour for a few days, so will be spending the day researching hurricanes with James Junior number 2 for a geography project in between a little crafting too I hope!

I'll be back tomorrow with another project that also uses this same sketch but has a totally different feel, so do come back and take a look at that card; until then, happy stampin'!


Stampin' Up! Supplies Used: 

Table built using Product Table Builder by The Crafty Owl - Independent Stampin' Up! Demonstrator.

Celebrate Amazing You

by Joanne James13. February 2018 21:00

Today I'm sharing a card that I made in one of my February card classes that I haven't yet shared here on my blog - take a look:


Here's the low-down on today's card:

What's Better Than Free? - What's better than free? Not a lot in my book, especially when it's free Stampin' Up! goodies too! Sale-A-Bration is all about giving you more - whether you spend, host a party or join as a demonstrator with Stampin' Up! during this awesome promotion. You can read more about it here. Today's card features 2 free Sale-A-Bration items: the first is the 'Amazing You' stamp set, which I used to decorate the sentiment label, inside panel and envelope of my card. As with the other stamp sets that can be yours free with a £45 purchase, these stamp sets will only be available during Sale-A-Bration - once the promotion is over, we will say goodbye to them forever, so it's important you place your order before the end of March in order to benefit.

Amazing You - The second free item on today's card is the 'amazing' die cut from the 'Celebrate You' thinlits dies; these can be yours with a £90 purchase. These thinlits co-ordinate with the 'Amazing You' stampset - but will also be available beyond the end of Sale-A-Bration as they are going to be in the new 2018-19 annual catalogue. I am so thrilled that these thinlits are carrying over - they really are a great size and style to work on lots of different projects. 

Touches of Texture - The gold glimmer sentiment diecut is definitely the star of this card - all that sparkle and shine, along with some texture that makes this a rather tactile card. There are lots of other elements that add texture to this card too - the banner embossed with the hexagonal embossing folder, some twine, along with the leaves and the cutout background panel.

Here is the visual summary of the key products used on today's project for you to pin for easy reference:


You can see all of my 'How To' summaries on my 'How To - Tips and Techniques' Pinterest board in case you've missed any. 

I'll be back tomorrow with another project. Until then, happy stampin'!


Stampin' Up! Supplies Used:

Table built using Product Table Builder by The Crafty Owl - Independent Stampin' Up! Demonstrator.


Bird Banter Toucan Thank You

by Joanne James29. January 2018 18:00

I've had a busy but hugely productive day today (love days like those!) and am popping in with a quick post from me with a card I made yesterday to squeeze in for this week's challenge over at Freshly Made Sketches


This is such a lovely little sketch from Jen, it seemed a shame not to use it (although I did flip it and use the mirror image so that my bird would be pointing towards my sentiment rather than away from it). I had so much fun with Saturday's Bird Banter card (you can see that card here if you missed it) that I thought I would use the set again this time featuring the colourful toucan - take a look:


Here's the low-down on today's card:

Bird Banter - Today it's the turn of the toucan and his accompanying punny sentiment - these funnies just crack me up! I searched up some images of toucans online before deciding on my colours and then used my Blends to colour him, with the exception of his eye and the top of his beak - I used my Lemon-Lime Twist Stampin' Write marker for that as I wanted to get a real zing of green. I stamped him twice: once directly onto my banner, then again on some scrap cardstock and fussy cut this out. This way I was able to fussy cut out his body only and pop it up onto dimensionals aligned with the banner image, without needing to fussy cut his legs.

A Time-Saving Tip  - Now I love a bit of fussy cutting, but I know that it's not for everyone. Whilst I was happy to fussy cut my toucan and the larger flowers, the tiny ones were too fiddly. Instead I used a small circle punch (my circle punch from the retired Itty Bitty Shapes Punch Pack) and punched them out; much easier and I don't think it loses anything in terms of detail - what do you think?

A Tone-On-Tone Thankyou - I could have stopped there, but instead decided to add a little tone-on-tone stamping to my background panel by stamping the 'thank you so much' stamp from Thankful Thoughts repeatedly to create a customised background that reinforces the sentiment of my card. 

I remembered to stamp and colour my envelope (yay!) and that completes my card. I just love that this set really lends itself to bright colours and fun cards - another one for my stash!

Here is the visual summary of the key products used on today's project for you to pin for easy reference:


You can see all of my 'How To' summaries on my 'How To - Tips and Techniques' Pinterest board in case you've missed any. 

I'll be back tomorrow with another project. Until then, happy stampin'!


Stampin' Up! Supplies Used:

Table built using Product Table Builder by The Crafty Owl - Independent Stampin' Up! Demonstrator.

Brightly Lit Christmas 3 Ways From Simple To Stepped Up - Part 1

by Joanne James11. December 2017 22:09

It's a little while since I shared a 'one stamp set, three ways' post with you showing you three cards using one suite and how to use the products within that suite to create cards that range from simple to stepped up. Today is the first of two posts that will do just that - this time featuring the Christmas Around The World Suite and the Brightly Lit Christmas Bundle that you can find on pages 28-29 of the 2017 Autumn-Winter seasonal Stampin' Up! catalogue that I used in a class a couple of months ago.

The Brightly Lit Christmas stamp set has a fun collection of festive banners that co-ordinate with a basic lamppost design and when paired with the co-ordinating Christmas Lamppost Thinlits Dies can be used to make the most ornate and detailed 3D traditional lamppost designs. The set is great for quick and easy and more complex cards with a real 'wow' factor.  

Clean and Simple - Quick And Easy - If you're short on time or new to crafting, this set is great for a simple card like this one:


All you need to do is take a sheet of Extra Thick Whisper White for your card base and mat layer, stamp your lamppost and hanging banner directly onto the card front and sponge a little yellow ink for lamp light, use the wreath bauble stamp to add some snowflakes (stamp in Versamark and add Dazzling Diamonds glitter) and a red ribbon bow and your card is done. Festive red and the subtle sparkling snowflakes help this simple card to have a big impact.

Step It Up - If you have a bit more time and are feeling more adventurous, using a few extra tools and embellishments will allow you to 'step up' your card and create something with a little more depth and detail, whilst still relatively easy to make:


My second card follows the same basic layout as the first, still using just the stamps from the Brightly Lit Christmas set, however this time I've stamped only the top portion of the lamppost and masked off the lower portion and used the Carols of Christmas stamp set and co-ordinating Card Front Builder Dies to cut out some festive poinsettia flowers to adorn the lamppost, centred with some gold enamel shapes, added a couple of twists of red and gold ribbon behind and a couple of background banners using the Triple Banner Punch, one of which is a contemporary tartan to add a bold splash of colour. 

My third card is a real 'wow' - but you'll have to come back for Part 2 for that one!

Here are the visual summaries of the key products used on today's projects for you to pin for easy reference:

Card 1:


Card 2:


You can see all of my 'How To' summaries on my 'How To - Tips and Techniques' Pinterest board in case you've missed any. 

I'll be back soon with the third card in this set, which is my absolute favourite. Until then, happy stampin'!


Stampin' Up! Supplies Used:

Card 1:

Table built using Product Table Builder by The Crafty Owl - Independent Stampin' Up! Demonstrator.


Card 2:

Table built using Product Table Builder by The Crafty Owl - Independent Stampin' Up! Demonstrator.

New Online Exclusives

There are new products available exclusively in the online store from 5 November - check them out here.

Latest Kits!

Stampin Cut and Emboss

The Layered Landscapes Kit and Nature's Paintings Kit are the latest kits in the online store - get yours here!

Shop Online

Access my online shop 24 x 7, 365 days of the year:

Current November hostess code:

9NKXDTTR

Shop Online

Mini Catalogue

BROWSE THE CATALOGUE

'Tis The Season - the new Stampin' Up! Mini Catalogue is here! For more details and to download your copy click here

Scrapbooking

Stampin' Up! has introduced a new range of 12x12" scrapbooking product and kit - the full range is now available to purchase online. To download a copy of the new digital Scrapbooking Catalogue click here.

2024-25 Annual Catalogue

BROWSE THE CATALOGUE

Click on the image to download your copy of the 2024-25 annual catalogue. For a full list of current SU! supplies, go to my online store. If you would like any help or advice, please drop me a line at joanne@thecraftyowl.co.uk or give me a call on 07773 421446 - I'd be happy to help.

Join My Team

It's always a great time to join Stampin’ Up! New team members can get £130 worth of products for only £99 + free business supplies + free shipping + all the fun being a part of Stampin’ Up! Stampin' Up! has something for everyone: join my growing team and benefit from my support to enjoy Stampin' Up! however you choose.

If you're interested, call me for a chat to understand how I can help you realise your goals. Alternatively, if you have already decided to sign up and you just can't wait, please click here for the link to the online form where you can sign up and order your starter kit right away! 

About Me

Hi I'm Joanne and live in Northampton and when I'm not looking after my husband and two beautiful children, am an avid crafter with a passion for all things Stampin' Up!

I must confess that I have never been a big rubber stamper - until I discovered Stampin' Up! that is. I love the fact that I can get such great results with co-ordinating stamps, inks, papers and punches - the possibilities are endless! Join me on my stamping journey as I share the things I love and be inspired to create amazing things yourself!

Follow Me

Monthly Newsletter

Box Builder

Click the button above to use Box Buster to create your custom box design using the Envelope Punch Board!

Kits Collection Now Available!

Stampin Cut and Emboss

The new Kits Collection from Stampin' Up! is now available!

Click here to see the current kits available and order yours online today.

I Design For


Stampin' Up Stuff

This is my personal blog and is not endorsed by Stampin’ Up! I hope you find it a plentiful source of ideas and personal inspiration but please don't copy my designs for contest submission or use for classes, publication or sale without express permission.