by Joanne James8. May 2014 14:54Hello everyone - my second video in a week! I'm cheating slightly, as I actually shot this video weeks ago but haven't got around to editing it until now. I made a lovely concertina fold Mother's Day card a while ago using the Scalloped Tag Topper Punch - you can see my original card here - which was based on a similar card made by Julie Kettlewell (you can see Julie's original card here). Having just gone to update my original post with the link to today's video, I realise I didn't mention her in my original post, which was very remiss of me and a complete oversight on my part, as I even mentioned her in today's video. Needless to say, I have now updated the original post!
I love this concertina fold card style - it's great if you need a card that's just a little different. I made another card based on my original one, this time adapting it to a birthday card for a friend of mine who always puts so much thought into cards for others, I thought she deserved something special for her birthday too; here's my latest scalloped tag topper punch concertina fold card:

The dimensions are exactly the same as my original card - there is still enough space to stamp 'happy' on one panel, with 'birthday' spelled out on the subsequent panels leaving the last panel blank for your message (I also stamped a little 'to you!' on this panel, just to complete my message). I also decorated one of the Stampin' Up! Kraft gift boxes with some co-ordinating Gingham Garden DSP to make some pretty packaging for my accompanying gift - finished with a tag made with the Scalloped Tag Topper Punch - well, what else?! Here's a picture of both pieces together:
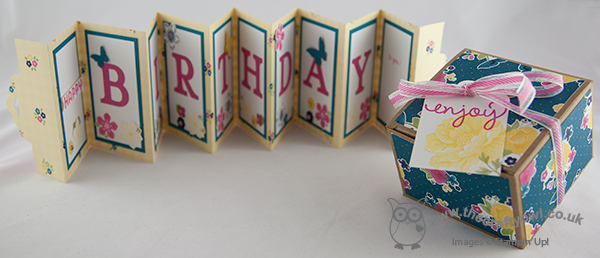
So, if you would like to make a Scalloped Tag Topper Concertina Fold Card - either for the forthcoming international Mother's Day or a birthday card, here's my video tutorial showing you everything you need to know:
If you would like to purchase any of the Stampin' Up! supplies featured in today's project, just contact me or click on the links in the table below to go straight to my online store.
Back tomorrow with another project; until then, happy stampin'!
Stampin' Up! Supplies Used:
83ecd8a3-a7da-4843-9788-9cf4d23e90f5|0|.0|96d5b379-7e1d-4dac-a6ba-1e50db561b04
Tags: 3D Projects, boxes, Kraft Gift Boxes, Gingham Garden, Typeset Alphabet, video tutorial, Stampin' Up, Stampin' Up Card, Stampin' Up Card ideas, Stampin' Up Supplies, Shop online, Scalloped Tag Topper Punch, Simply Celebrate, Stippled Blossoms, Petite Petals, Petite Petals Punch, Itty Bitty Punches, Fabulous Phrases, See Ya Later
3D Projects | Boxes | Cards | Stamping | Video Tutorials
by Joanne James19. March 2014 20:33Today I want to share with you another use for one of my new favourite punches - the scalloped tag top punch. This really is such a versatile punch that can be used in so many ways. There are lots of variations on how it can be used to make an unusual card closure - today's card is a fun, concertina style Mother's Day card, where the scalloped tag top punch is used to add detail to the closure. This is what the card looks like 'closed':
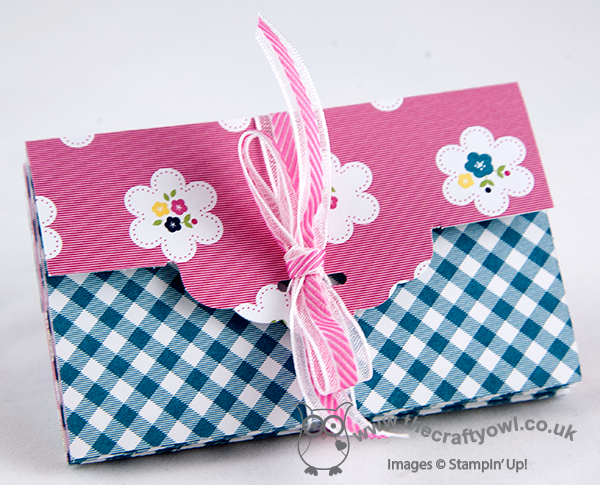
Ribbon is threaded through the punch out hole and around the card and tied in a bow to keep it shut, then when you undo the ribbon and open the card out, you see the message inside:
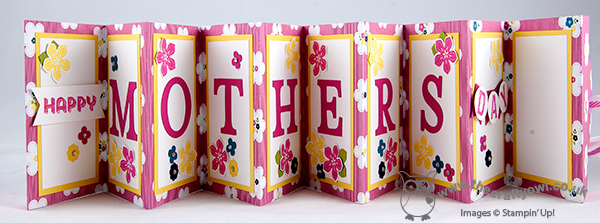
These cards are such fun to make and so easy. All you need is one sheet of 12" x 12" for the basic card. I used a sheet of the Gingham Garden DSP for my card, and layered the inside panels with Whisper White matted on Daffodil Delight. I cut the letters for 'Mothers' with my Typeset Alphabet die, but you could easily use an alphabet stamp set such as Morning Post or Notable Alphabet if you have one instead. I took the word 'Happy' from one of the 'See Ya Later' Sale-A-Bration stamp sets and the letters for 'Day' from my Sketched Alphabet individual stamps before punching out and layering on a mini banner. I then decorated with flowers stamped and punched from the Petite Petals bundle and the Itty Bitty Punches set in colours that co-ordinated with my chosen DSP. The last panel is left blank for you to write your personalised Mother's Day message.
I had intended to shoot a video tutorial on how to make one of these cards to accompany my series of Scalloped Tag Top Punch video tutorials, but time has not been on my side so I haven't managed it yet; I will look to complete one in the next week or so and when I do will update my blog with the link.
The best bits about this card: it's one of those projects where you don't have to deliberate over which side of your DSP to use, as you see both sides (dilemma avoided, for once) and also because of the closure, you don't need an envelope - this is a card and envelope in one! This style of card would work for lots of other occasions too - why not have a go and see what you come up with.
Back tomorrow with another project; until then, happy stampin'!
Stampin' Up! Supplies Used:
496e722e-02bc-47d9-8908-08b02d818f3c|0|.0|96d5b379-7e1d-4dac-a6ba-1e50db561b04
Tags: ABC-123 Sketch Alphabet & Numbers, Banner Punch, circle punch, See Ya Later, Shop online, Stampin' Up, Stampin' Up Card, Stampin' Up Card ideas, Stampin' Up Supplies, Typeset Alphabet, Scalloped Tag Topper Punch, Big Shot, Mother's Day, Gingham Garden
Cards | Stamping
by Joanne James19. March 2014 20:33Today I want to share with you another use for one of my new favourite punches - the scalloped tag top punch. This really is such a versatile punch that can be used in so many ways. There are lots of variations on how it can be used to make an unusual card closure - today's card is a fun, concertina style Mother's Day card, where the scalloped tag top punch is used to add detail to the closure. I saw a similar card to this on Julie Kettlewell's blog here and liked it so much I decided to create one. This is what the card looks like 'closed':

Ribbon is threaded through the punch out hole and around the card and tied in a bow to keep it shut, then when you undo the ribbon and open the card out, you see the message inside:

These cards are such fun to make and so easy. All you need is one sheet of 12" x 12" for the basic card. I used a sheet of the Gingham Garden DSP for my card, and layered the inside panels with Whisper White matted on Daffodil Delight. I cut the letters for 'Mothers' with my Typeset Alphabet die, but you could easily use an alphabet stamp set such as Morning Post or Notable Alphabet if you have one instead. I took the word 'Happy' from one of the 'See Ya Later' Sale-A-Bration stamp sets and the letters for 'Day' from my Sketched Alphabet individual stamps before punching out and layering on a mini banner. I then decorated with flowers stamped and punched from the Petite Petals bundle and the Itty Bitty Punches set in colours that co-ordinated with my chosen DSP. The last panel is left blank for you to write your personalised Mother's Day message.
I had intended to shoot a video tutorial on how to make one of these cards to accompany my series of Scalloped Tag Top Punch video tutorials, but time has not been on my side so I haven't managed it yet; I will look to complete one in the next week or so and when I do will update my blog with the link. Updated 8/5/14 - here is my video tutorial on how to make this card:
The best bits about this card: it's one of those projects where you don't have to deliberate over which side of your DSP to use, as you see both sides (dilemma avoided, for once) and also because of the closure, you don't need an envelope - this is a card and envelope in one! This style of card would work for lots of other occasions too - why not have a go and see what you come up with.
Back tomorrow with another project; until then, happy stampin'!
Stampin' Up! Supplies Used:
ea819749-b0b7-4e51-82ac-2f6a767b1ba6|0|.0|96d5b379-7e1d-4dac-a6ba-1e50db561b04
Tags: ABC-123 Sketch Alphabet & Numbers, Banner Punch, circle punch, See Ya Later, Shop online, Stampin' Up, Stampin' Up Card, Stampin' Up Card ideas, Stampin' Up Supplies, Typeset Alphabet, Scalloped Tag Topper Punch, Big Shot, Mother's Day, Gingham Garden
Cards | Stamping | Video Tutorials
by Joanne James6. February 2014 12:18A bright and cheery post for you today! The weather here in the UK has been less than favourable in recent weeks, with torrential rain, winds and severe flooding in some areas. Whilst I'm not a fan of this time of year myself, I feel thankful that we haven't been impacted by the weather as much as some people. Whilst I know today's card won't fix the country's weather problems, if you're in a part of the country that's struggling I hope at least it raises a smile. The theme over at 'Less is More' this week is 'rainbows' and that's where I took the inspiration from for today's card:
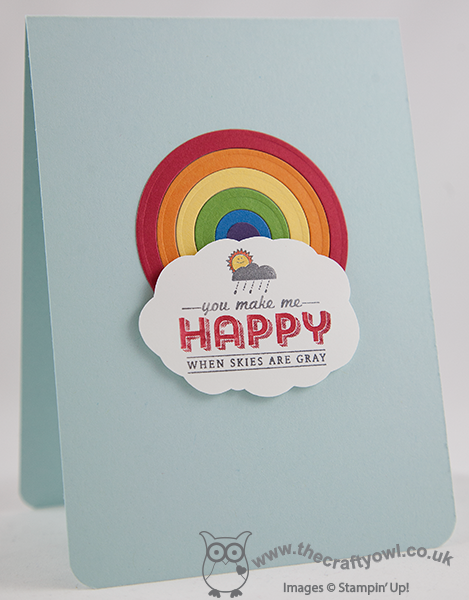
This is certainly a 'less is more' card for me; I created a rainbow using a selection of Brights cardstock using my circles framelits, and stamped my 'See ya later' sale-a-bration stamp onto a cloud that I actually cut out freehand using my Word Bubble framelits as a guide (I needed my cloud to be larger than the framelit size to accommodate the sentiment). I wanted my rainbow to 'disappear' into the cloud so made my rainbow extend beyond a semi-circle.
I think this card has a real feel-good factor about it - rainbows have that effect on you, don't you think? If you'd like more multi-coloured inspiration, pop on over to Less is More and take a look at the other entries - it's also their 3rd birthday this week, so happy birthday wishes to Chrissie, Jen and Mandi and congratulations on such an inspiring blog.
I'm off on a Thai cookery course tonight - I've done a couple of these themed cookery evenings before and they're such fun. Lots of cooking in the kitchen, then you get to sit down and eat the delicious output, without having to do the washing up!!
Back tomorrow with another project; until then, happy stampin'!
Stampin' Up! Supplies Used:
by Joanne James31. January 2014 08:55Another early post from me today - I must be organised, or at least more organised than usual! Today's card uses the sketch over at Create with Connie and Mary for the 2014 Spring Collection Challenge. Here is the sketch:
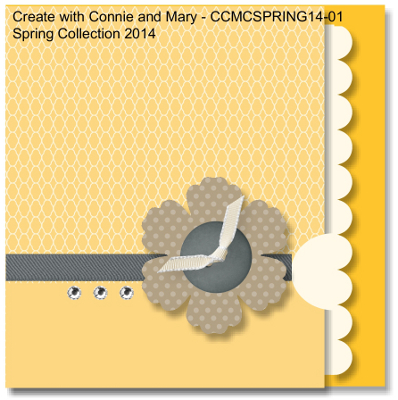
Having enjoyed the 'reveal' aspect of the hidden message tag card I made for the Paper Players yesterday, I thought I would do something similar with this card - the cut-away and the scalloped edge layer seemed to be calling for a pull-out. So here is my card:
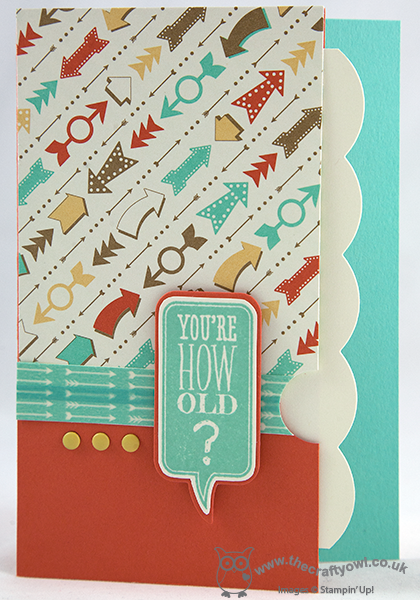
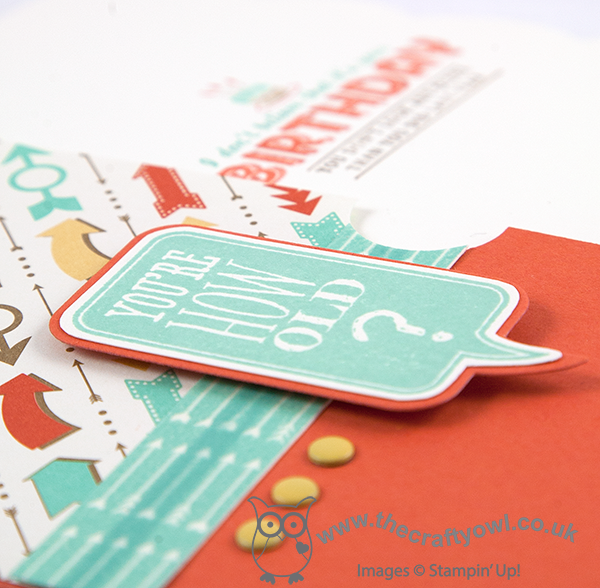
This is the first time I've used the new Retro Fresh Designer Series paper and I love it - the colours are, well retro and fresh!! I made the pattern a feature of my card and embellished with another of the Just Sayin' word bubbles, this time layered and mounted on a base cut with the co-ordinating Word Bubbles framelits - don't you just love a matching framelit?! (and you save 15% if you buy them together) I also created a joining piece from the new Retro Fresh washi tape which I stuck on some Very Vanilla cardstock (I love how the little arrows draw your eye to the speech bubble).
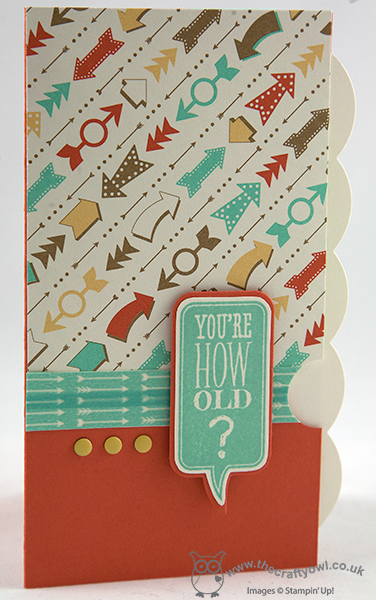
I chose to make a pocket from the top layer so that the scalloped edge section could be pulled out to reveal another of the 'See Ya Later' Sale-A-Bration stamps, that I coloured with my Tangerine Tango, Coastal Cabana and Baked Brown Sugar Stampin' Write markers:
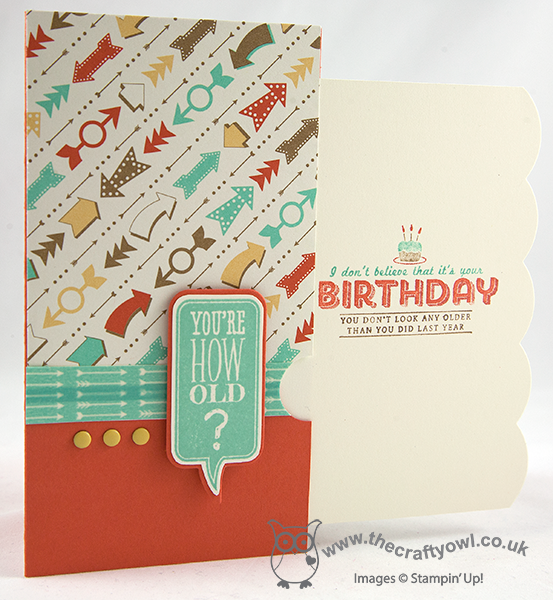
I made this card for a friend of mine who is celebrating a 'significant birthday' this week; I'll spare her modesty by not revealing her age, but let's just say the sentiment on this card just seemed very appropriate! I'm also going to link this card up with Create With Connie and Mary's colour challenge this week, which I didn't see until after I made my card but is featuring the colour palette that I've used this week:
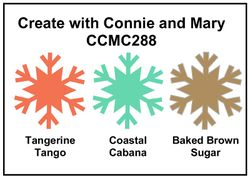
I am loving these colours - might have to try and do another card or two now I've opened that new paper pack!
EDIT: By popular request, here are the dimensions for the above card:
- Tangerine Tango Card Base: 14.9cm x 18.5cm (scored at 8cm)
- Retro Fresh DSP: 10cm x 8cm
- Extra Tangerine Tango Bottom Front Section: 4.9cm x 8cm
- Attach the DSP to the bottom orange front section using the Retro Fresh washi tape
- Attach this panel front to the front card base on 3 sides only with Tombo (the section measuring 8cm x 14.9cm as opposed to the larger section measuring 10.5cm x 14.9cm) - this creates the pocket
- Very Vanilla Insert: 12.5cm x 8cm, edged with the Large Scallop Edgelit
- Adhere a strip of Coastal Cabana cardstock measuring 3cm x 14.9cm to the inside edge of the back panel of the card base
I'm off to watch Rebecca play in a netball match this afternoon - pray for fine weather for me, or at least that the match gets moved onto the indoor court! Back tomorrow with another project; until then, happy stampin'!
Stampin' Up! Supplies Used:
by Joanne James29. January 2014 22:26Today I'm sharing my entry to this week's Paper Players challenge, which has this great sketch by Ann Schach as the starting point:
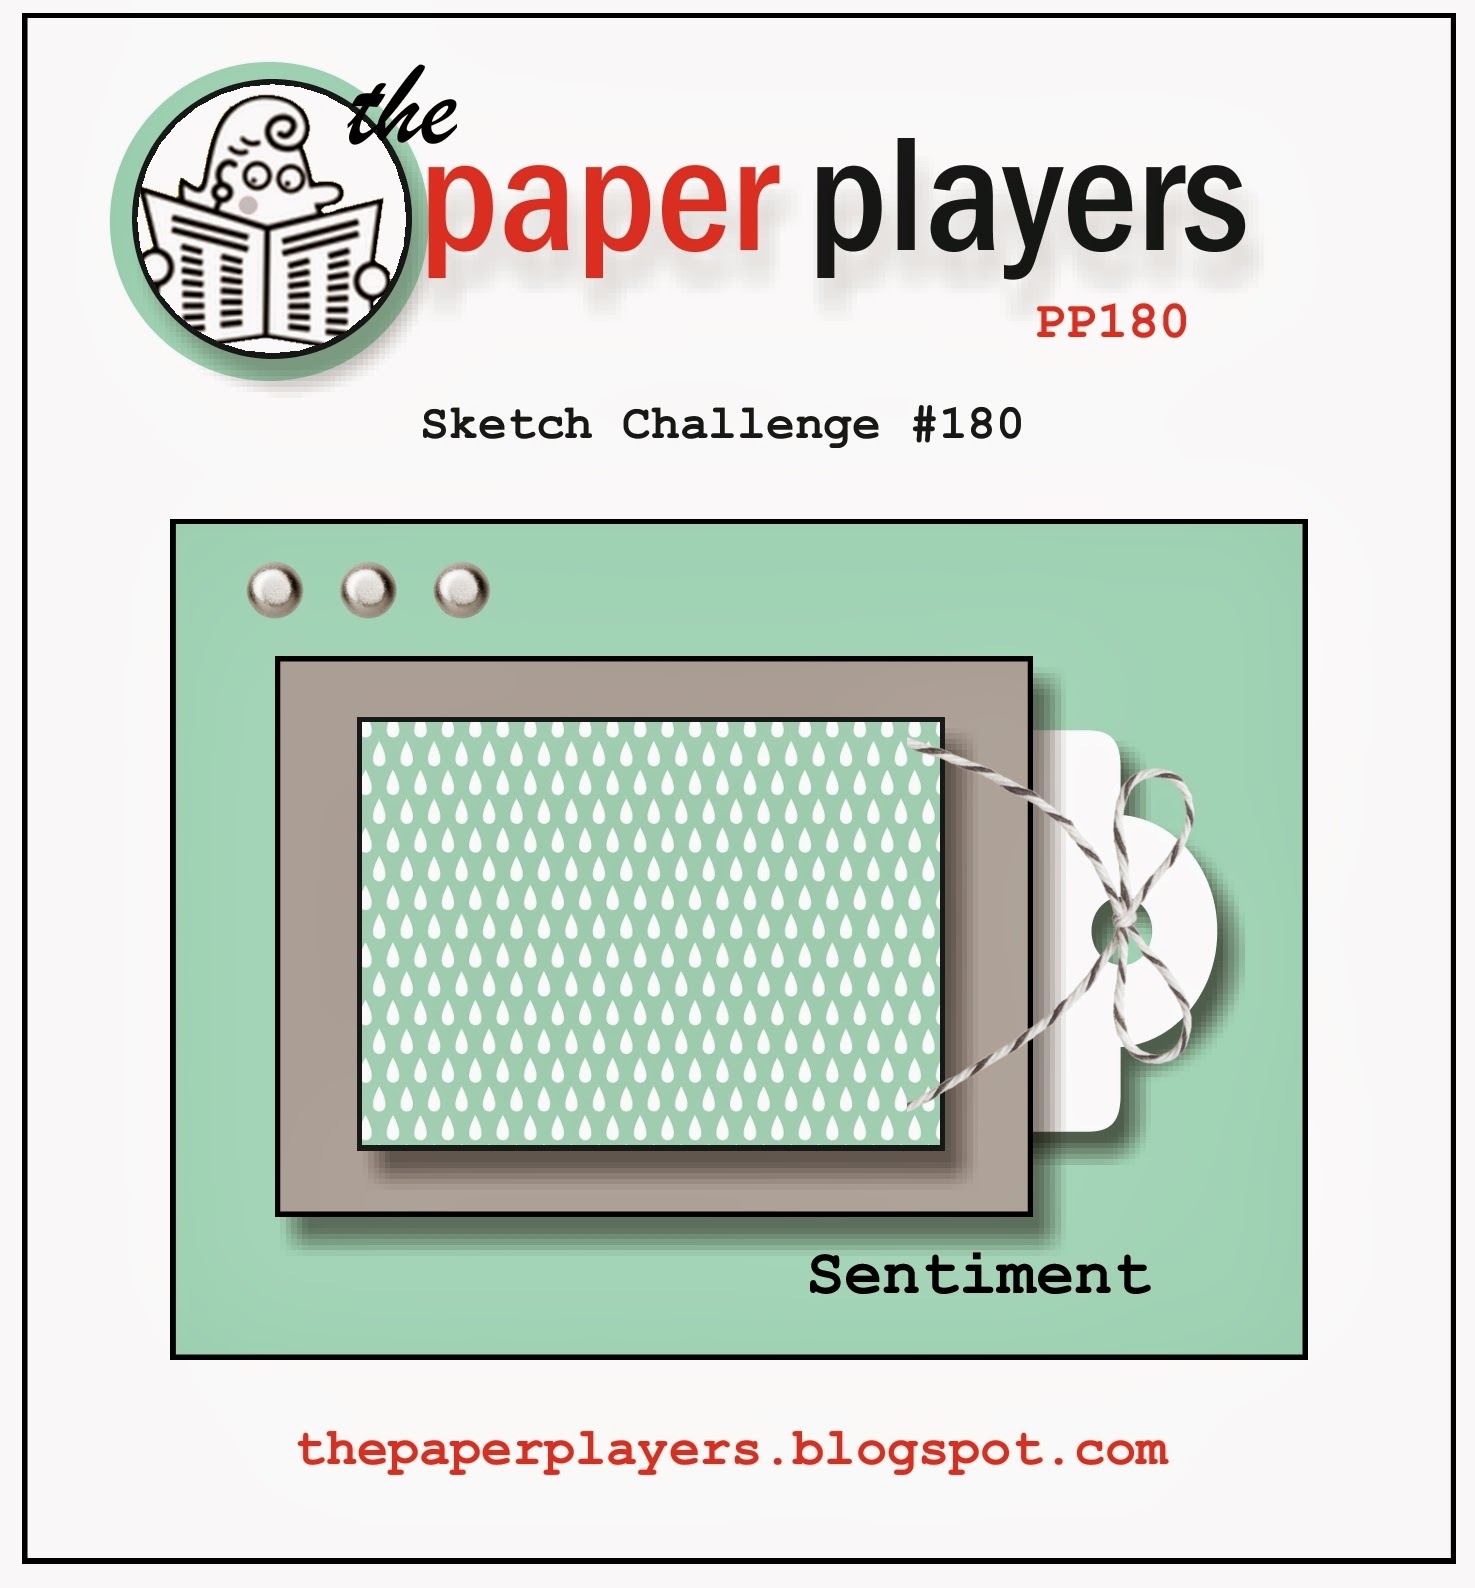
I love the idea of the 'hidden message' tag on the front of this card. I got out some Sale-A-Bration goodies and another new stamp from the Spring-Summer catalogue and this is the card that I came up with:
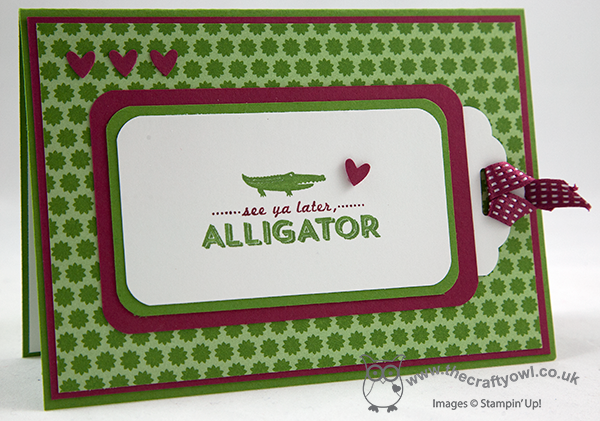
This is the outside of my card, using the alligator stamp from the 'See Ya Later' stamp set - free with a £45 spend during Sale-A-Bration. I chose the bold in-colours of Gumball Green and Raspberry Ripple for my card and I partially inked my stamp using Stampin' Write markers, as I didn't want to include the bottom bit of the sentiment - and this is the reason why:
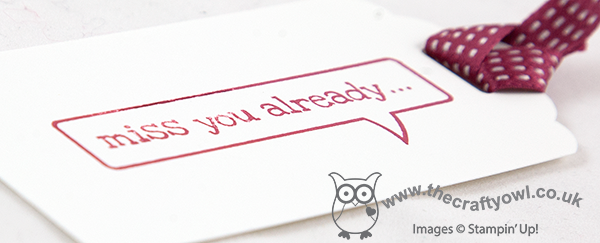
I made a pull-out tag with the new Scalloped Top Tag Punch and stamped it with one of the Just Sayin' word bubble stamps - how cute is that?! Here's another photo of it sticking out of the card at a jaunty angle (not so sure about this now, but seemed like a good idea at the time!!):
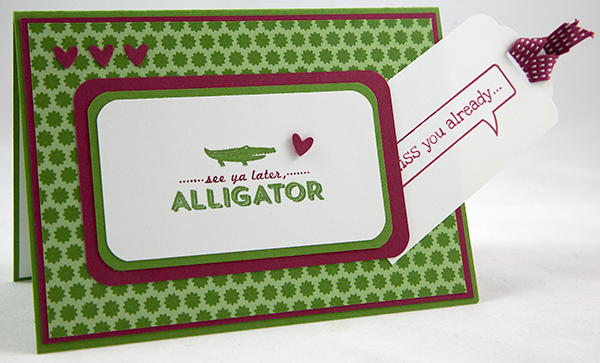
Some ribbon to pull the tag and a few hearts punched out using my trusty owl punch complete this card. I like this idea a lot and am sure I will be using this layout again. If you like it too, pop on over to the Paper Players page and check out this week's Design Team inspiration; there's some great work there and I particularly love Ann's card - the detail is amazing!
I'm off to get on with the big basket of ironing that I've been putting off for too many days now; still, I'm meeting up with some of my Stampin' Up! team this afternoon, so that is definitely something nice to look forward to.
Back tomorrow with another card; until then, happy stampin'!
Stampin' Up! Supplies Used:
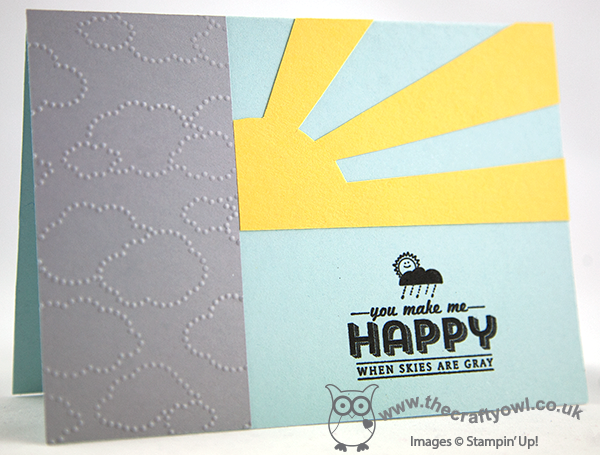
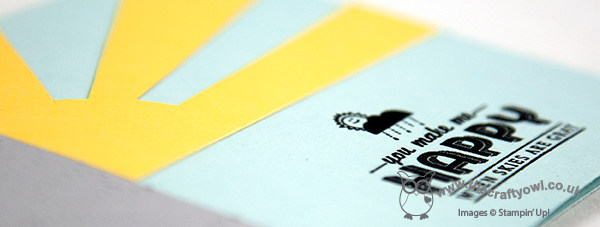
by Joanne James26. January 2014 20:50Today's card uses a stamp from another of the forthcoming Sale-A-Bration stamp sets called 'See Ya Later': a collection of 4 stamps each featuring a fun phrase. Today's card seems quite appropriate given the weather that we've been having in the UK this weekend; here's my card:
My layout was inspired by the sketch over at CAS Colours & Sketches this week:
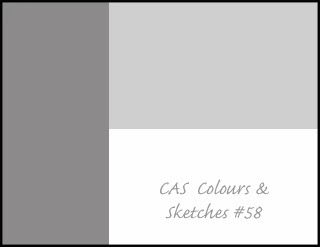
I embossed the Smoky Slate panel with the Cloudy Day embossing folder - this item is retired, but is still currently available on the clearance rack if you'd like to snap up a bargain - it just fits with the sentiment of this stamp. I stamped the sentiment in Versamark and embossed with black embossing powder so that it would stand out on the finished card. The real star of this card though is the bright sunburst coming out from behind the clouds, which just lifts the subtle grey and Soft Sky blue to another level.
I'm also linking today's card up with CAS-ual Fridays, where the challenge is to use blocks of colour in your design.

With the rain and the almighty storm with thunder and lightening yesterday afternoon, this card is sure to brighten your day!
Back tomorrow with another project; until then, happy stampin'!
Stampin' Up! Supplies Used: