Get Well Soon Dad!

by Joanne James9. June 2014 23:10

Today I'm sharing a card I made using this week's sketch over at CAS(E) This Sketch and the lovely colours at Colour Q:


 My Dad had a knee replacement operation last week and so I wanted to send him a 'get well soon' card that would brighten his day - here is my card:

I used a base of Night of Navy along with a mat in Tangerine Tango and using the sticking plaster from an old 2013 Sale-A-Bration set, Patterned Occasions (minus the attached sentiment), stamped it in the challenge colours and cut them out and adhered them to my card following the sketch layout. I coupled them with a simple 'get well soon' sentiment from the ever-so-useful Delightful Dozen stamp set (due to retire at the end of this month) and added a tiny Bashful blue heart punched with my trusty owl punch to finish.

I love the look of the stuck-on sticky plasters, which works so well with the get well theme - I'm sure my Dad wishes his knee could have been fixed that easily!

Back tomorrow with another card; until then, happy stampin'!


Stampin' Up! Supplies Used:

Table built using Product Table Builder by The Crafty Owl - Independent Stampin' Up! Demonstrator.


Whole Latte Love

by Joanne James21. February 2014 22:37

One last quick post from me today - call it an early post for tomorrow! I saw the current sketch over at Retrosketches and was really keen to have a go as I managed to squeeze in a little extra crafting time this afternoon, so thought I would combine it with the challenge over at Addicted to CAS this week:

Now I don't have a current coffee stamp, but I do have a cute little stamp that was part of one of last year's Sale-A-Bration sets that I knew would fit the bill. Here is my card: 

I used coffee as the inspiration for my colour scheme too, with my base card of Early Espresso picked up in the co-ordinating baker's twine. I coloured my coffee cup in red to give a pop of colour and embossed my card base with the Decorative Dots Textured Impressions Embossing Folder to add texture and interest.

That's all from me; I'm off to catch up on a little late night TV. Back tomorrow with another project; until then, happy stampin'!


Stampin' Up! Supplies Used:

Table built using Product Table Builder by The Crafty Owl - Independent Stampin' Up! Demonstrator.


Wishing You a Day as Perfect as You Are - Masking Technique

by Joanne James24. April 2013 17:58

I was having a sort out in my craft box and found this card that I actually made in our January demonstrator training session, but haven't yet shared with you. It was designed by Monica Gale and is a great example of how you can use shapes and dies to make your own mask and create some lovely effects. So here is the card:


This card is quite different in design to the kind of thing that comes naturally to me - in particular, I had to be almost held down before I could bring myself to crumple the cardstock that has the stamped image on! - yet this, along with the torn edges, give the card a real 'vintage' feel. This card also showcases a great technique - by creating your own mask, you can create an outline image that can give your card a different perspective.

For this card, I made a mask using vellum cardstock and one of the Delicate Doilies Sizzlits. By adding a thin layer of Tombow glue to the back of the shape and allowing it to dry (wait until the glue turns from white to clear in colour), you can create a repositionable mask. This was then placed onto the Early Espresso card and sprayed with Vanilla Shimmer Smooch Spritz. When you then remove the mask, you are left with the mask shape and detail. Another tip to achieve a uniform ripped edge: hold all three sheets of card together and tear, holding one hand steady and tearing the card with the other by pulling towards you. The hints of Rich Razzleberry card and ribbon, along with the sparing use of silver glimmer paper, add a much needed edge to an otherwise quite muted card. The stamp used here is one of this year's Sale-A-Bration stamps from the set Vintage Verses, but this layout would work with lots of other stamps - the ones in the 'From My Heart' set would work particularly well I think.

So not my usual style, but lots of creative food for thought. That's one of the great things about being a Stampin' Up! demonstrator; regular training sessions are great for pushing you out of your stamping comfort zone and encouraging you to try new techniques and ideas. If you would like to benefit from the development resources that Stampin' Up! has to offer, then there's never been a better time to sign up; you can find the full details of the current promotion that runs until May 30th here.

Back tomorrow with another project - until then, happy stampin'!


Stampin' Up Supplies:

Stamps: Vintage Verses (Sale-A-Bration - retired)

Cardstock: Sahara Sand, Rich Razzleberry, Early Espresso, First Edition Specialty Paper, Silver Glimmer Paper

Ink/Stampin' Write Markers: Rich Razzleberry

Tools: Bitty Butterfly Punch, 7/8" Scallop Circle Punch, Itty Bitty Punches

Finishing Touches: Basics Pearls, 1/4"Rich Razzleberry Stitched Grosgrain Ribbon, Vanilla Shimmer Smooch Spritz

Another Spring Sampler Trio

by Joanne James8. April 2013 21:13

I've been really busy in my craft room today, creating swaps for a training event next weekend; not yet finished, so will share later in the week. Meanwhile, with another simple Spring Sampler card - this time a trio of stamps on a one layer card:

In order to achieve a 'false' layering effect, the three stamped images are on the 'inside' of the card and pop through the windows at the front which are outlined to give definition. The front of the card is then stamped with the sentiment 'Bloomin' Marvelous' - retired Sale-A-Bration I know, but seemed to fit so well with my gardening pictoral story/theme. Lastly, I added a rhinestone to the tulip in the bottom frame to add interest.

As much as I love simple cards, I do find one layer cards such a challenge! Tomorrow I'll show you another one I made with a similar layout to this one, but with more layers; you can compare and see the difference. Until then, happy stampin'!


Stampin' Up Supplies:

Stamps: Spring Sampler, Bloomin' Marvelous (Sale-A-Bration 2013 - retired)

Cardstock: Whisper White

Ink/Stampin' Write Markers: Raspberry Ripple, Gumball Green, Crumb Cake

Tools: 1 1/4" Square Punch, Stamp-a-ma-jig

Finishing Touches: Basic Rhinestones


My First Stampin' Up! Online Video Tutorial - How To Mount Stamps

by Joanne James5. April 2013 20:03

Another big news day today - although this is more of a personal milestone for me: I have filmed my first online video tutorial!! Videos are useful for sharing all kinds of tips and techniques and I'm hopeful this will be the first of many.

I decided my first video would be a 'basics' introduction to stamps and in particular how to mount your wood and clear mount stamps, along with some tips and hints to get the best results from clear mount stamps. Whilst this may seem obvious to a seasoned stamper, I've spoken to a few people recently who are new to stamping and this is something that they would definitely have benefited from. So ladies, this is for you!

It also features a quick notecard made using the Petite Curly Label Punch; this punch, previously a Sale-A-Bration item, is now available to purchase in the main catalogue until June 30th. Along with either the Pretty Petites Sale-A-Bration stamp set or the Ciao, Baby! stamp set featured in the Spring-Summer seasonal catalogue, this punch is great for layering with the larger label punch or using on its own to create super quick cards. 

So, here is the link to my video, which is hosted on my YouTube video channel:

Here is a picture of a thank you card I made recently to pop in with a customer order, using the same punch:
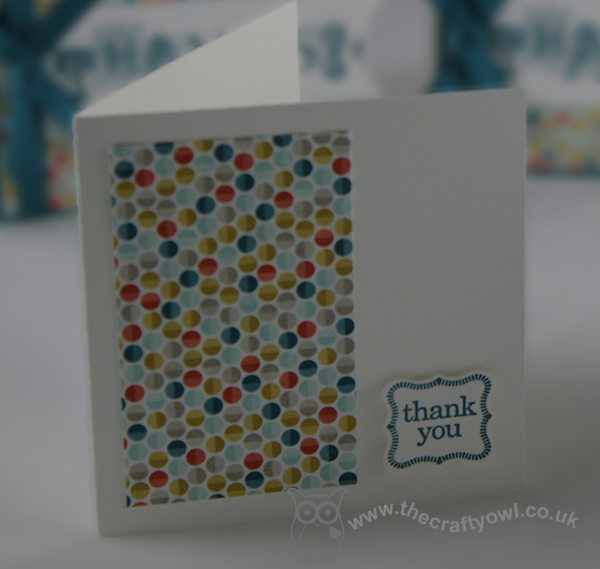
This kind of punch is great if you've got lots of cards to make or just want to add some detail to a 3" square.

Do leave me a comment to let me know what you think of my first video; if there's anything else you would like to see a video tutorial on, then do let me know.

Back tomorrow with more stamping delights - until then, happy stampin'!


Stampin' Up Supplies:

Stamps: Ciao, Baby!, Pretty Petites (Sale-A-Bration - retired)

Cardstock: Whisper White, Regal Rose, Melon Mambo, Pink Pirouette, Pretty in Pink, Sycamore Street DSP (Sale-A-Bration - retired)

Inks: Island Indigo, Melon Mambo

Tools: Petite Curly Label Punch, 1 1/4" Square Punch


Madison Avenue Easter Cross

by Joanne James24. March 2013 22:39

It's snowing outside - again! - so I've spent the day hibernating, with a combination of crafting and 'daring Monopoly' to quote my son (I'm not sure how this differs to regular monopoly, but it was fun all the same!) Lots of new things to share with you this week, but for now back on the Easter theme today, albeit with a great use of a recent Sale-A-Bration stamp set.

I saw this card by Amanda at the Craft Spa here and thought it was a really neat idea so just had to have a go at recreating it. Armed with my trusty Stamp-a-ma-jig, here's my card: 


No sentiment, as I didn't have one that fitted neatly, but still a great additional use for the Madison Avenue border stamp. Easy to decorate, as the Itty Bitty Punch shapes fit perfectly inside. Quite effective, don't you think?

Back tomorrow with more Easter treats! Until then, happy stampin!


Stampin' Up Supplies:

Stamps: Madison Avenue

Cardstock: Crumb Cake, Whisper White, Island Indigo, Pool Party

Ink: Island Indigo

Tools: Stamp-a-ma-jig, Itty Bitty Punches

Finishing Touches: Rhinestone Basic Jewels


Tags: , , , , , , ,

Cards | Sale-a-bration | Stamping

Thanks A Ton!

by Joanne James23. March 2013 21:00

Sale-A-Bration is over for another year, so today I'm sharing a thank you card designed by Bekka Prideaux at our last team training session using one of the free Sale-A-Bration sets, Patterned Occasions: 

I SO love this elephant and the colour combination of the Daffodil Delight with the Rich Razzleberry is really zingy I think. So to all of my Sale-A-Bration customers, thanks a ton - this one's for you!

Until next time, happy stampin'!


Stampin' Up! Supplies:

Cardstock: Daffodil Delight, Rich Razzleberry, Whisper White, Sycamore Street DSP

Stamps: Patterned Occasions

Ink/Stampin' Write Markers: Rich Razzleberry, Daffodil Delight, Gumball Green

Finishing Touches: 1/4" Rich Razzleberry Stitched Grosgrain Ribbon

Tools: Stamp-a-ma-jig, Scallop Border Punch

Peepo Bunny Rabbit Punch Art

by Joanne James21. March 2013 22:06

So today's card was a case of something similar I saw on Pinterest which I actually made as a birthday card for a special 7 year old recently who is just mad about rabbits. I thought I would share today as it could just as easily be adapted to an Easter card. This is the front:

I used the 'Memorable Moments' stamp set to create the 'Happy 7th Birthday' - this is a great set that allows you to create custom birthday and anniversary greetings for pretty much any number combination. The outline stamp also fits the Labels Framelits perfectly. I love the idea of the rabbit hopping into his hidey-hole, only to open the card and see him reappear on the inside.


Here's a close-up of the inside: 

You can see the detail of his face and the subtle sponging just adds texture and character to his features. My favourite has to be the extra-large pompom tail on the front though I just love it!

So only one more day of Sale-A-Bration left - if you have an order to place or would like to sign up for the enhanced starter kit, you've got less than 24 hours to get in touch with me, so don't delay!

Back tomorrow with more Easter ideas - might even show something using one of the Sale-A-Bration sets, for all you early-birds who already have your free stamp sets and are looking for more great ways in which to use them. Until then, happy stampin'!


Stampin' Up Supplies:

Stamps: Memorable Moments, Woodgrain. Inside greeting is from a retired set - the current set 'A Word For You' is very similar though.

Cardstock: Crumb Cake, Whisper White, Basic Black, Pretty in Pink, Gumball Green

Inks: Pretty in Pink, Chocolate Chip

Tools: Itty Bitty Punches, Large Oval, Small Oval, Circle Punch (various sizes), Ornament Punch, Owl Punch (for nose), Labels Framelits, Trimmer

Finishing Touches: Basics pearls.


Two Minute Tuesday Easter Card

by Joanne James20. March 2013 22:14

Well, the weather outside has been raining on and off all day - so much for the first day of Spring! I have another Easter card for you today, a 4" square card that literally took only a couple of minutes to make: 

I wanted something plain and simple, but with some bold colour to remind me of brighter days. The images are from the Spring Sampler set in the Spring-Summer catalogue. I love the versatility of this set and have lots more to share with you over the coming days, so stay tuned. The sentiment is a partial stamp from the Wacky Wishes set again - this is the only Easter sentiment I own, so I warn you now you'll definitely be seeing more of this!

I have had a busy couple of days, with a day in London at the Biscuiteers Icing Cafe icing Easter biscuits yesterday and a 'Sounds of Spring' music concert at school this evening - I am willing the weather to get warmer and hoping it will soon oblidge! A class assembly tomorrow based on the musical 'Matilda', which should be fun and another Easter concert next week - don't you just love the end of term?

Also, whilst I remember - there was a video link about the new borders scoring plate missing from my last post; this has now been fixed, so if you'd like to see it, it's there now. One last reminder - Sale-a-bration finishes this Friday, so if you would like to place a £45 order and receive one of the 17 free gifts, or if you would like to sign up as a demonstrator and take advantage of the 25% extra free offer where you receive £162.50 worth of product on your starter kit for £99, you only have 2 days left to do so. Hopefully back tomorrow with some more Easter treats; until then, happy stampin'!


Stampin' Up Supplies:

Stamps: Spring Sampler, Wacky Wishes

Cardstock: Whisper White, Tempting Turqouise, Melon Mambo, Daffodil Delight

Ink: Tempting Turqouise, Melon Mambo, Daffodil Delight

Tools: 1 1/4" circle punch, circle die


Tea Shoppe Mother's Day Card

by Joanne James8. March 2013 22:26

I've been making lots of cards with my Tea Shoppe set this week, so I thought that today I would share the card I made for my Mother for Mother's Day on Sunday. I'm safe in sharing, as I know she won't see my blog. As for my Mother-in-law, don't worry if you're reading this - yours will look quite different! 

I made a larger card than usual (A5), so that I could fit a nice stack of the large tea cup stamp. Using a Very Vanilla base, I thought this card would look nice in shades of blue. I stamped the cups in Marina Mist, Pool Party and Bashful Blue and I masked the top two, so that they looked like they were balancing in a stack. I raised the central panel and used a piece of the More Amore Designer Series Paper on the base as it co-ordinated perfectly. The card was finished with some Marina Mist ribbon and a sentiment from the 'For My Family' stamp set; this is a great stamp set, allowing you to build a sentiment for any occasion. A few pearls on the flowers to add detail were added to the cups and there you have it. This card could just as easily be used for a birthday card or other femal occasion card, not only Mother's Day.

If you like this card, be sure to come back to see what else I've been making with this set. I'm off to the land of nod now (it's been a long week!) Until next time, happy stampin'!


Stampin' Up Supplies:

Stamps: Tea Shoppe, For My Family

Cardstock: Very Vanilla, Bashful Blue, More Amore DSP

Ink: Bashful Blue, Pool Party, Marina Mist, Basic Grey

Tools: Large Oval Punch, Stampin' Dimensionals, Sponge Daubers

Finishing Touches: Marina Mist 1/8" Taffeta Ribbon,  Pearl Basic Jewels

Tags: , , , , , , ,

Cards | Stamping

New Online Exclusives

There are new products available exclusively in the online store from 5 November - check them out here.

Latest Kits!

Stampin Cut and Emboss

The Layered Landscapes Kit and Nature's Paintings Kit are the latest kits in the online store - get yours here!

Shop Online

Access my online shop 24 x 7, 365 days of the year:

Current November hostess code:

9NKXDTTR

Shop Online

Mini Catalogue

BROWSE THE CATALOGUE

'Tis The Season - the new Stampin' Up! Mini Catalogue is here! For more details and to download your copy click here

Scrapbooking

Stampin' Up! has introduced a new range of 12x12" scrapbooking product and kit - the full range is now available to purchase online. To download a copy of the new digital Scrapbooking Catalogue click here.

2024-25 Annual Catalogue

BROWSE THE CATALOGUE

Click on the image to download your copy of the 2024-25 annual catalogue. For a full list of current SU! supplies, go to my online store. If you would like any help or advice, please drop me a line at joanne@thecraftyowl.co.uk or give me a call on 07773 421446 - I'd be happy to help.

Join My Team

It's always a great time to join Stampin’ Up! New team members can get £130 worth of products for only £99 + free business supplies + free shipping + all the fun being a part of Stampin’ Up! Stampin' Up! has something for everyone: join my growing team and benefit from my support to enjoy Stampin' Up! however you choose.

If you're interested, call me for a chat to understand how I can help you realise your goals. Alternatively, if you have already decided to sign up and you just can't wait, please click here for the link to the online form where you can sign up and order your starter kit right away! 

About Me

Hi I'm Joanne and live in Northampton and when I'm not looking after my husband and two beautiful children, am an avid crafter with a passion for all things Stampin' Up!

I must confess that I have never been a big rubber stamper - until I discovered Stampin' Up! that is. I love the fact that I can get such great results with co-ordinating stamps, inks, papers and punches - the possibilities are endless! Join me on my stamping journey as I share the things I love and be inspired to create amazing things yourself!

Follow Me

Monthly Newsletter

Box Builder

Click the button above to use Box Buster to create your custom box design using the Envelope Punch Board!

Kits Collection Now Available!

Stampin Cut and Emboss

The new Kits Collection from Stampin' Up! is now available!

Click here to see the current kits available and order yours online today.

I Design For


Stampin' Up Stuff

This is my personal blog and is not endorsed by Stampin’ Up! I hope you find it a plentiful source of ideas and personal inspiration but please don't copy my designs for contest submission or use for classes, publication or sale without express permission.