Sunshine And Rainbows With Just My Type PP684

by Joanne James7. April 2024 08:00

Today it's Sunday and time for this week's new challenge over at The Paper Players! It's the turn of the fabulous Anne Marie to host this week and she has a fun theme challenge for us to work with:
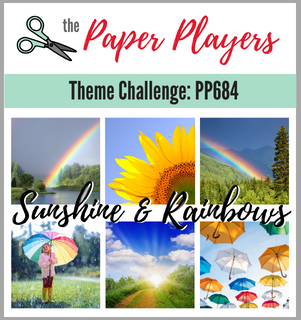
    

Sunshine and rainbows! You can take your inspiration from anything relating to sunshine, rain and rainbows with some great inspiration on our badge this week. I decided to take Anne Marie's theme quite literally and built my card around a sentiment from the 'Just My Type' stamp set that includes both elements - take a look:
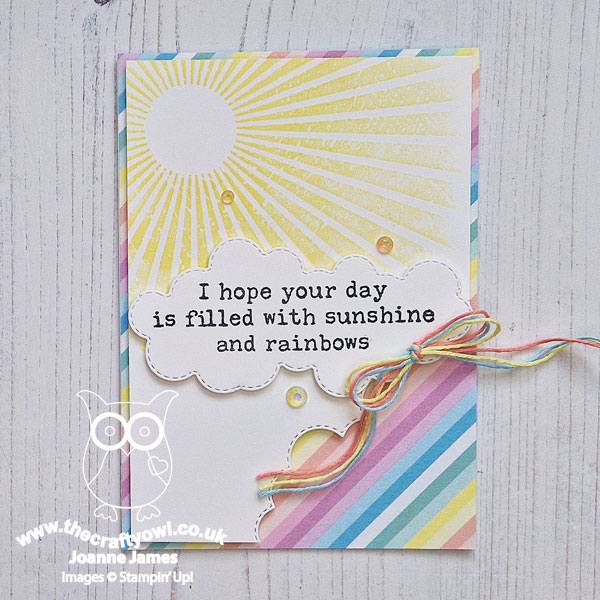
 

Here's the low-down on today's card:

Saying Goodbye - It's that time of year when we are getting ready to say goodbye to lots of products in both the mini and annual catalogues and today's card is a celebration of some of my favourites: the 'Just My Type' stamp set that my sentiment hails from, the 'Rays of Light' background stamp that I used to create my sunshine shining through the clouds, the Basic Borders Dies that I used for my cloud cutaway, the Lighter Than Air rainbow-striped paper and the iridescent gems are all leaving us at the end of the month. Many of these will be available at a substantial discount from 9th April onwards and all will be available only whilst stocks last - so be sure to place your order in a timely manner if you don't want to miss out!

Lighter Than Air Rainbow Stripes - Instead of stamping a rainbow alongside my rays of sunshine, I decided to use a sheet of rainbow-striped pastel designer series paper from the Lighter Than Air pack. I made my stamped layer slightly smaller than my card base to give a rainbow border then used one of my Basic Borders Dies to create the cloud-shaped cut-away, revealing the detail of the paper in all of its striped glory. Since the team over at Time Out are asking us to feature stripes for their current challenge, I'm linking my card there too.

Borders and Clouds - Having used my cloud-shaped Basics Borders Die to create the corner cutaway to reveal more of my rainbow stripes, I decided that I wanted to put my sentiment into a cloud too. Since I didn't have a die large enough, I used my border die to create my own custom cloud:
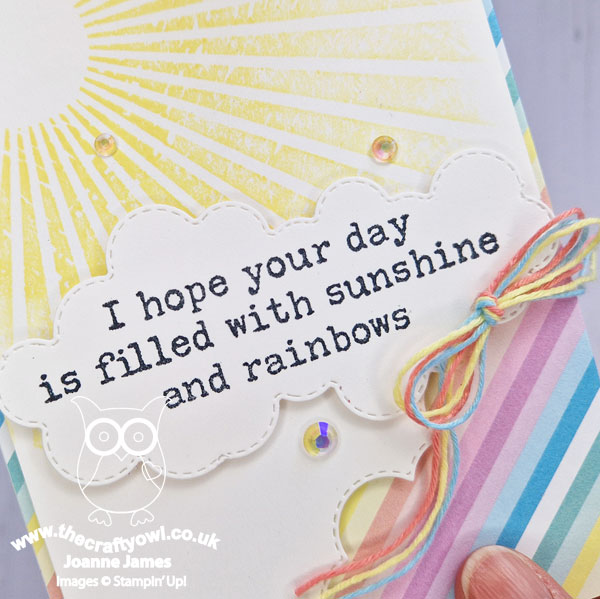
A triple coloured twine bow and a sprinkling of iridescent gems complete today's card. 

Here is the visual summary of the key products used on today's project for you to pin for easy reference:
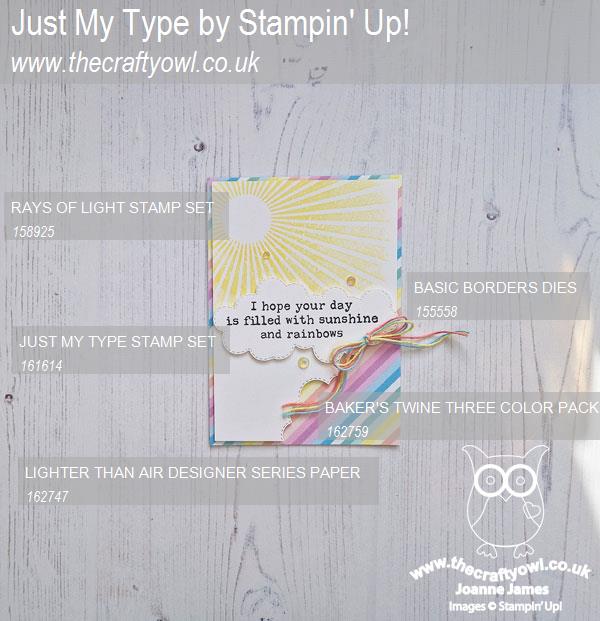
 

You can see all of my Product and 'How To' summaries on my 'How To - Tips and Techniques' Pinterest board in case you've missed any. 

Before you reach for your ink and papers, check out what our amazing team has created to inspire you this week:

Here's a quick recap of our challenge rules:
 
1.  Create a new paper project
2.  Upload your creation to your blog with a link back to us and provide a direct link to the post featuring your challenge submission.
3.  Please link your card to no more than four challenges, TOTAL.
4.  Have FUN!

Enjoy your day; I am enjoying having the eldest of the James Juniors home from university so will be making the most of the next few days before she returns to her studies for the final term of the year - I can't quite believe her first year is almost done! I'll be back soon with another project. Until then, happy stampin'!


Stampin' Up! Supplies Used: 
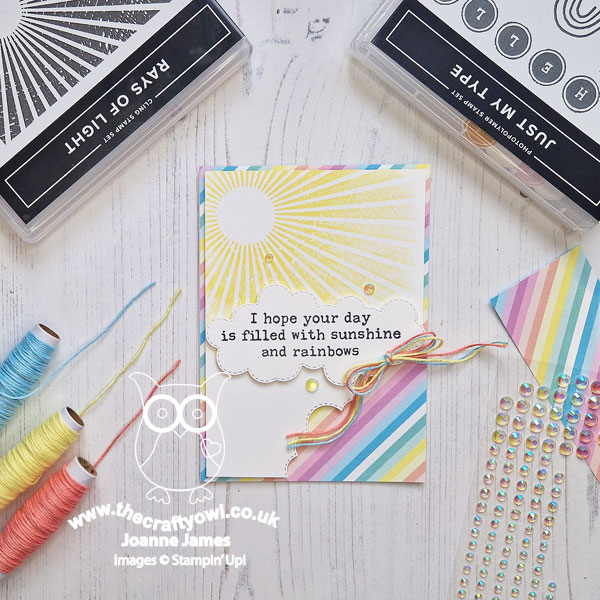
Table built using Product Table Builder by The Crafty Owl - Independent Stampin' Up! Demonstrator.

Circle Sayings Beachy Peek A Boo Fancy Fold For AYSI 306

by Joanne James25. August 2023 12:00

Today I'm sharing my design team card for our new challenge over at As you See It where it's time for a seasonal theme challenge chosen by Deborah:


At the beach - wouldn't I like to be there right now? I most definitely would, but instead a card will have to do! I decided to feature sun, sea and sand on today's card which is also a fancy fold - take a look:


 Here's the low-down on today's card:

Circle Sayings - Today's card is a Peek-A-Boo fancy fold: when closed you see one thing in the window, then as you open the card the panel slips aside to reveal a second image or message. The Circles Sayings stamp set is perfect for this style of fancy fold card - it has lots of co-ordinating stamp images and sentiments that can be mixed and matched to create fun combinations. I used the sea and sun image for my first image, along with a fussy-cut partial sentiment attached to the frame and I paired it with the 'warm hello' sentiment, along with shells and sand for the peek-a-boo reveal:


Rays of Light - I wanted to add some additional colour to the front of my card, but without distracting from my seaside image. I decided on some ton-on-tone stamped detail using the Rays of Light stamp set, radiating out from the stamped image and fading into the base. Because I wanted my rays to radiate from the image, they wouldn't reach to the opposite edge of my card, so I added an Azure Afternoon ribbon and bow to balance my design. You can see the detail on the stamped image below, including some snowflake puff paint that I added to the wave foam for some extra dimension:


Peek-A-Boo Fancy Fold - This fold is really not tricky to execute - you just need to ensure the circle aperture is positioned correctly on each layer to ensure they align and that each of the mechanism panels are cut to the correct size. Here's a video that shows the peek-a-boo action:

Isn't that fun?! You can see another example of a card I made with this design here. I'm linking this one up over at The Paper Craft Crew where 'fun folds' is their theme this week.

Here is the visual summary of the key products used on today's project for you to pin for easy reference:


You can see all of my 'How To' summaries on my 'How To - Tips and Techniques' Pinterest board in case you've missed any. 

Here's a summary of our challenge rules:

  • Create any card, scrapbooking page, 3D project or packaging project that fits the challenge.
  • Please include the challenge graphic and link back to the challenge in your blog post. Turn off word verification so we can leave you lots of lovely comments. Make sure you link the post not the whole blog to the Linky. Use #AYSIXXX when uploading to a public gallery.
  • If you’re unsure about ‘the rules’, check the details under the Challenge Guidelines tab on the As You See It Challenge homepage.
We look forward to seeing your creations in the AYSI gallery.

Enjoy your day and I'll be back tomorrow with another project. Until then, happy stampin'!


Stampin' Up! Supplies Used:

Table built using Product Table Builder by The Crafty Owl - Independent Stampin' Up! Demonstrator.

Rays of Summer Sunshine For AYSI 304

by Joanne James28. July 2023 12:00

Today I'm sharing my design team card for our new challenge over at As you See It where it's time for a seasonal 'fill in the blank' challenge chosen by the lovely Jane:


There's so much to love about summer: vacations, an abundance of home grown vegetables, trips to the beach, longer days ... but for me the best thing of all about summer is an abundance of sunshine! I don't need the heat but I definitely welcome the brightness that the extra sunshine brings; it lifts my mood and I am so much more productive too. So my clean and simple card today focuses on sunshine and I decided to CASE the designer, Susan Wong, over at Global Design Project too - take a look:


Here's the low-down on today's card:

Copy and Selectively Edit - I used the same layout as Susan's card, the inked ombre effect and a banner tag sentiment details, but no nighttime camping scene for me! I masked a circle on my white cardbase and stamped the 'Rays of Light' stamp inside it, using Daffodil Delight, Pumpkin Pie and Calypso Coral inks and building the colour from the centre of the sunshine outwards. I added a couple of diecut clouds and added my sentiment to a yellow banner tag, as my sun was very hot and orange in colour and I wanted to bring out more yellow. I tied my tag with gold twine and added a trio of (retired) gold glimmer enamel dots to complete my card:

I'm also linking today's card up over at CAS on Friday where they currently have a theme of 'summer' too. As an aside, I will be guest designer for them for their next challenge, so you will definitely want to check them out :-) It's actually been quite grey here in the UK this week, so I'm hoping that August will see the return of the summer sunshine that I crave!

Here is the visual summary of the key products used on today's project for you to pin for easy reference:


You can see all of my 'How To' summaries on my 'How To - Tips and Techniques' Pinterest board in case you've missed any. 

Here's a summary of our challenge rules:

  • Create any card, scrapbooking page, 3D project or packaging project that fits the challenge.
  • Please include the challenge graphic and link back to the challenge in your blog post. Turn off word verification so we can leave you lots of lovely comments. Make sure you link the post not the whole blog to the Linky. Use #AYSIXXX when uploading to a public gallery.
  • If you’re unsure about ‘the rules’, check the details under the Challenge Guidelines tab on the As You See It Challenge homepage.
  • In a Fill in the Blank challenge, complete the sentence in the Challenge Banner with the phrase that is true for you and create your project using the words you used. Tell us what you said in your blog or on your site.
We look forward to seeing your creations in the AYSI gallery.

Enjoy your day and I'll be back on Sunday with another project. Until then, happy stampin'!


Stampin' Up! Supplies Used:

Table built using Product Table Builder by The Crafty Owl - Independent Stampin' Up! Demonstrator.

Sending Sunshine With Rays of Light for JUGS674

by Joanne James8. April 2023 05:00

Today I'm sharing my second card for my Guest Designer spot over at Just Us Girls. This week it's word week:


Sunshine - could this be any more uplifting?! I decided to CASE Ann's card over at Global Design Project #GDP388 and pair a couple of old favourites with a new-to-me stamp from the annual catalogue for my card - take a look:


Here's the low-down on today's card:

Instead of fussy cut flowers, I flipped Ann's design and used simple white clouds, diecut with my Basic Borders Dies, for the top and bottom elements and saved the detail for my sunny panel behind.

I recently purchase the Rays of Light background stamp and thought it would be the perfect way to show the warm sunshine streaming down between the clouds. In a nod to Ann's card, I stamped it onto a piece of yellow Hues of Happiness designer series paper, inking my stamp in a blend of Daffodil Delight and retiring Mango Melody. The patterned/floral sides of this paper are what you most often see showcased, but the reverse coloured sides are beautiful too. The stamp itself has a lovely textured surface and I think this is enhanced with the faux brushstrokes on the designer paper.


Like Ann I did use the Sending Smiles bundle for my sentiment, keeping with a bold, black diecut 'sending' and then adding a more appropriate stamped element to my bottom cloud in an ombre of the two yellows I used for the sunshine. I added a few adhesive-backed milky dots in Mango Melody to complete my card (these are currently in the retiring sale and available at a discount in my online store here). Mango Melody ink pads are unfortunately no longer available - those departing colours are flying off the shelves!

There is something so cheery about sunshine cards I think - I can't wait to see what the Design Team and JUGS gallery has in store this week!

Here is the visual summary of the key products used on today's project for you to pin for easy reference:


You can see all of my 'How To' summaries on my 'How To - Tips and Techniques' Pinterest board in case you've missed any. 

Enjoy your day and I'll be back tomorrow with another project. Until then, happy stampin'!


Stampin' Up! Supplies Used:

Table built using Product Table Builder by The Crafty Owl - Independent Stampin' Up! Demonstrator.
 

New Online Exclusives

There are new products available exclusively in the online store from 5 November - check them out here.

Latest Kits!

Stampin Cut and Emboss

The Layered Landscapes Kit and Nature's Paintings Kit are the latest kits in the online store - get yours here!

Shop Online

Access my online shop 24 x 7, 365 days of the year:

Current November hostess code:

9NKXDTTR

Shop Online

Mini Catalogue

BROWSE THE CATALOGUE

'Tis The Season - the new Stampin' Up! Mini Catalogue is here! For more details and to download your copy click here

Scrapbooking

Stampin' Up! has introduced a new range of 12x12" scrapbooking product and kit - the full range is now available to purchase online. To download a copy of the new digital Scrapbooking Catalogue click here.

2024-25 Annual Catalogue

BROWSE THE CATALOGUE

Click on the image to download your copy of the 2024-25 annual catalogue. For a full list of current SU! supplies, go to my online store. If you would like any help or advice, please drop me a line at joanne@thecraftyowl.co.uk or give me a call on 07773 421446 - I'd be happy to help.

Join My Team

It's always a great time to join Stampin’ Up! New team members can get £130 worth of products for only £99 + free business supplies + free shipping + all the fun being a part of Stampin’ Up! Stampin' Up! has something for everyone: join my growing team and benefit from my support to enjoy Stampin' Up! however you choose.

If you're interested, call me for a chat to understand how I can help you realise your goals. Alternatively, if you have already decided to sign up and you just can't wait, please click here for the link to the online form where you can sign up and order your starter kit right away! 

About Me

Hi I'm Joanne and live in Northampton and when I'm not looking after my husband and two beautiful children, am an avid crafter with a passion for all things Stampin' Up!

I must confess that I have never been a big rubber stamper - until I discovered Stampin' Up! that is. I love the fact that I can get such great results with co-ordinating stamps, inks, papers and punches - the possibilities are endless! Join me on my stamping journey as I share the things I love and be inspired to create amazing things yourself!

Follow Me

Monthly Newsletter

Box Builder

Click the button above to use Box Buster to create your custom box design using the Envelope Punch Board!

Kits Collection Now Available!

Stampin Cut and Emboss

The new Kits Collection from Stampin' Up! is now available!

Click here to see the current kits available and order yours online today.

I Design For


Stampin' Up Stuff

This is my personal blog and is not endorsed by Stampin’ Up! I hope you find it a plentiful source of ideas and personal inspiration but please don't copy my designs for contest submission or use for classes, publication or sale without express permission.