Just Add Color Card and Tea Bag Holder For The Paper Players PP392

by Joanne James6. May 2018 09:00

It's Sunday and time for this week's new challenge over at The Paper Players! It's the turn of our fearsome leader, the fabulous Nance, to host this week and she has a rather pretty theme challenge for you to work with:
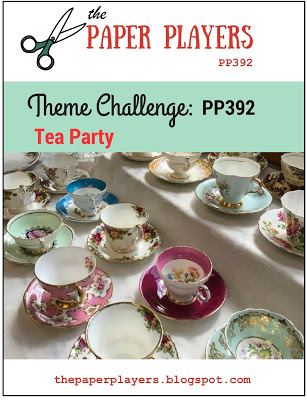
    

This challenge was made for me as I am a dedicated tea drinker! Coffee not so much, but I can drink as many as 10 cups of tea a day on average - definitely my drink of choice! I don't have much current product with a tea theme though, so wondered how I was going to tackle Nance's challenge this week, when I remembered the colouring paper in the current catalogue and voila - both my card and an accompanying little tea-related gift were created! First up, my card:
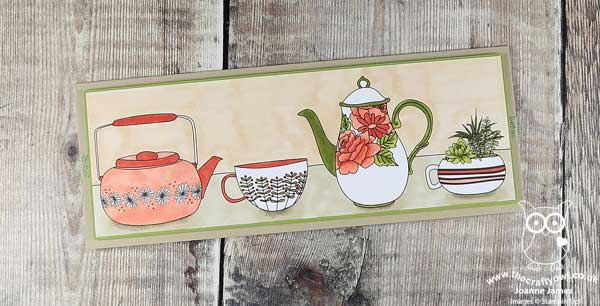
 

Here's the low-down on today's card:

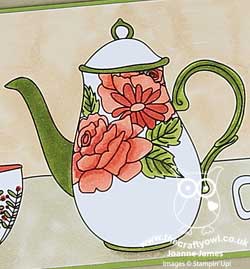
Just Add Color - One of the patterns in the Just Add Color Specialty Designer Series Paper pack is a sheet covered in all kinds of tea cups and teapots, so I cut a strip from the top of a sheet of paper, grabbed my Stampin' Blends and got to work. I went for a longer, thinner card this week and allowed the DSP pattern to dictate the dimensions for my card base.

Get Blending - Given that some of the teacups contain succulents rather than tea, this week's colour palette over at The Color Throwdown was perfect for my project. I used my Calypso Coral, Old Olive and Crumb Cake Blends, with the top portion coloured in Ivory. This paper is both very thick and matt, so alcohol markers do not blend quite as well as they do on Whisper White. This is particularly noticable on the larger areas such as the table and wall behind the teaset, however I quite like the effect - it gives an almost chalk effect, like rough plaster, so certainly works on my card.

Anyone For Tea? - Having completed my card, I was left with an offcut of DSP with a teapot and teacup. Rather than put this in my scrap box never to be seen again, I decided to use it up so coloured it and made a little tea bag holder containing a few wrapped tea bags that I could gift with my card. I also added a sentiment from the retired set 'Have A Cuppa', mounted on a punched scallop circle - here it is:
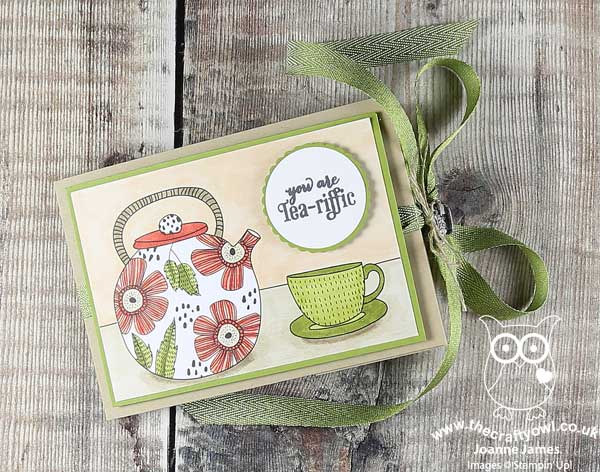
 

I cut my tea bag holder larger than was actually needed to accommodate the tea bags, as I didn't want to cut down the DSP; I just made my wrap and tea bag envelope holders, made with the Envelope Punch Board, slightly larger too. This is what it looks like on the inside - I used some Whole Lot of Lovely designer series paper for my little tea bag envelope pockets:
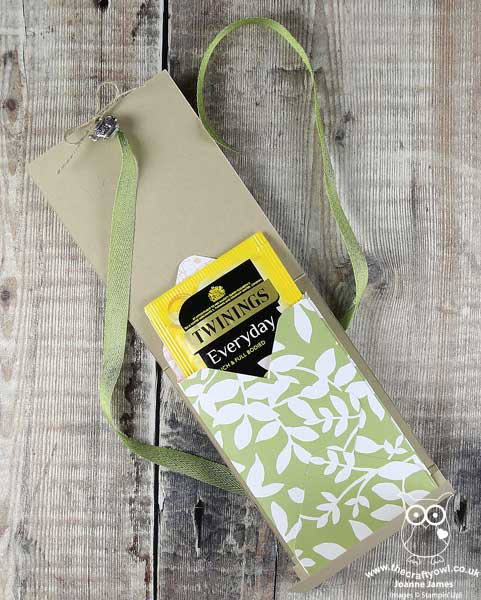
 

Did you spot the little tea pot trinket embellishment too? This is retired but it's at times like this I'm so glad I hoard these bits and pieces, as it finished off my package a treat :-) I love this fun set - I think I might send it to my Mum, as she is a keen tea drinker too.

Here is the visual summary of the key products used on today's project for you to pin for easy reference:
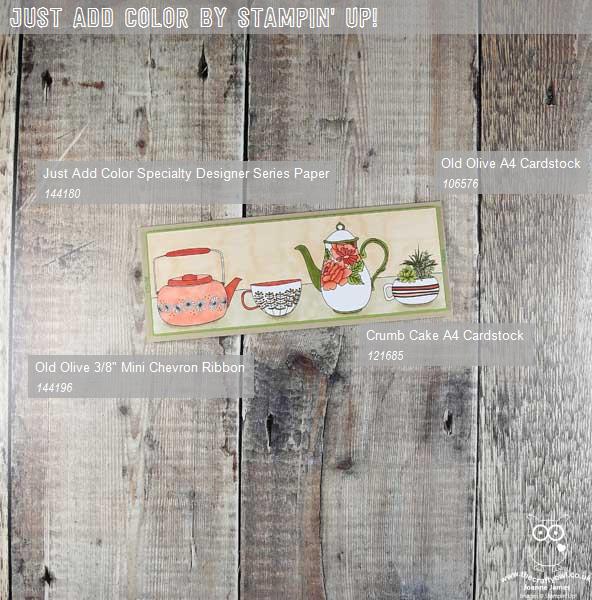
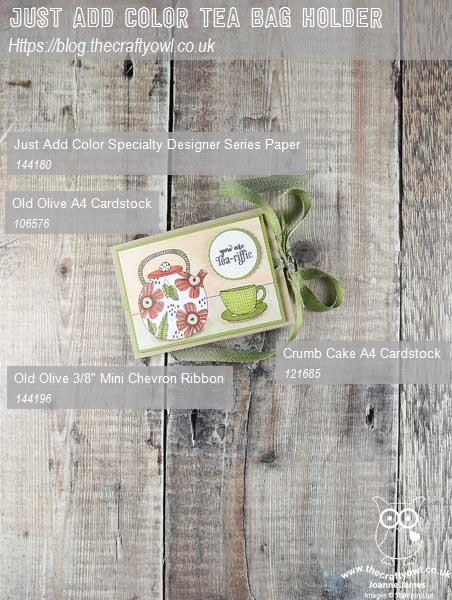


You can see all of my Product and 'How To' summaries on my 'How To - Tips and Techniques' Pinterest board in case you've missed any. 

Before you reach for your ink and papers, check out what our amazing team has created to inspire you this week:

Here's a quick recap of our challenge rules:
 
1.  Create a new paper project
2.  Upload your creation to your blog with a link back to us and provide a direct link to the post featuring your challenge submission.
3.  Please link your card to no more than four challenges, TOTAL.
4.  Have FUN!

I can't wait to see how you interpret this week's theme and look forward to visiting your blogs this week! Enjoy the rest of your weekend - we have a 3 day weekend here in the UK as it's a national Bank Holiday on Monday and for once the weather is glorious, so I will definitely be outside making the most of it. I'll be back tomorrow with another project; until then, happy stampin'!


Stampin' Up! Supplies Used: 

Table built using Product Table Builder by The Crafty Owl - Independent Stampin' Up! Demonstrator.

You Are Tea-rrific Cuppa Card

by Joanne James24. March 2016 08:05

Today it's time for a new challenge over at Create With Connie and Mary and this week we have a great sketch for you:


I decided to go with bright colours and tea cups today - here is my card:

Today's card is all about colour and is surprisingly easy to recreate with a few key supplies:

Have A Cuppa Designer Series Paper - The 'Have a Cuppa' Designer Series Paper Stack is choc-full of tea-themed designs in bold, bright patterns and colours. This paper works hard to earn its place on a card but as a result allows the remaining elements to be simplified, so that it can really shine. I used many of the dsp colours for the other blocks of colour on my card.

Cups and Kettles Framelits Dies - The only thing stamped on today's card is the sentiment; the patterned cup is courtesy of the Big Shot and the Cups and Kettles Framelits; with three cups and patterns to choose from, decorated tea cups are quick to produce. I also added an Itty Bitty punched heart to mine - just because!

Add a trinket - The simple design of my cup needed just a little something to finish - I decided a cute little Have A Cuppa Embellishment in the form of a silver teapot and cup, tied with Bermuda Bay stitched ribbon, would be just the ticket. These are perfect addition to a card or gift and add an antique charm to an otherwise modern card.

This card is a fun, punny way to share with someone the high regard in which they are held.

Here's the visual summary of the key supplies used to make today's card for easy reference:


Do visit the other Design Team members to see how they interpreted this week's sketch; there's lots of inspiration over on their blogs too! We have some new designers joining the team this week so do pay them a visit and see what they have to offer.

Enjoy your day and I'll be back tomorrow with another project; until then, happy stampin'!


Stampin' Up! Supplies Used:

  • Have A Cuppa Designer Series Paper Stack
  • A Nice Cuppa Photopolymer Bundle
  • Bermuda Bay 1/8" Stitched Ribbon
  • Have A Cuppa Embellishments
  • Whisper White A4 Thick Cardstock
  • Melon Mambo Classic Stampin' Pad
  • Melon Mambo A4 Cardstock
  • Pool Party A4 Cardstock
  • Bermuda Bay A4 Cardstock
  • Crushed Curry A4 Cardstock


Tags: , , , , , ,

Cards | Shop Online | Stamping

You're Just The Sweetest Apple Of My Eye Card

by Joanne James11. March 2016 22:35

A busy day so a late post from me today with a card for this week's Retrosketches challenge:

I went with brights and lemons today using my new 'Apple Of My Eye' stamp set and a sentiment with a twist:

This card is all about the lemons! Even with this relatively clean and simple design, they are three key features of today's citrus-themed card:

Apple of My Eye Stamp Set - The focal point lemon and the sentiment on today's card are from this stamp set, which also contains cherries, pears and apples of course. A fun set that will be useful, amongst other things, for teacher's thank you's too. Today's sentiment is one of three in the set and probably my favourite. I know it doesn't totally fit with lemons, but 'You're just the most sour' so doesn't have the same ring to it! This stamp can also be punched out with a 1 3/4" Circle Punch, so easy-peasy - no fussy cutting required.

Have a Cuppa Designer Series Paper Stack - This paper stack has some great cup and teapot designs, but there are also some great generic patterns too. I used three different patterns of paper on my card, all featuring lemons or leaves - great for citrus tea, but also perfect just for lemons! This sketch layout is also perfect for using up those scraps of designer paper that are left over from other projects. 

A Trio of Embellishments - There are also a number of embellishments that I added to this card to make it complete: some Crushed Curry It's My Party Enamel Dots, a small Classy Designer Button tied with a piece of Crushed Curry baker's twine (if you look up close it is ridged just like the segments of the lemon too!) and the flesh of the lemon has been liberally painted with Wink of Stella to add a subtle touch of citrus sparkle!

Here's today's visual summary of the key things needed to make today's card for easy reference:


Yellow is one of my most favourite colours and I just love this bright and lemony monochromatic card - so fresh!

I'll be back tomorrow with another project; until then, happy stampin'!


Stampin' Up! Supplies Used:

Table built using Product Table Builder by The Crafty Owl - Independent Stampin' Up! Demonstrator.
 

There's Always Time For Tea Masked Teacups Card

by Joanne James18. February 2016 08:05

Today it's time for a new challenge over at Create With Connie and Mary and this week we have a colour combination for you:


This colour combination is straight out of the Have A Cuppa Designer Series Paper Stack and whilst not one I would naturally be drawn to, I decided to create a colour-blocked card using a selection of the papers and the trio of cups stamp from the co-ordinating 'A Nice Cuppa' stamp set:

I selectively inked each of the cups in the trio in each of the challenge colours, then created a trio of panels featuring cups in each of the same colours to go behind each one and made a short technique video tutorial to show you how I did it, which you can see here:

I added a tiny teaspoon charm from the Have A Cuppa Embellishments set to a Bermuda Bay stitched ribbon bow and attached this to one of the cup handles as a finishing touch. Isn't that teaspoon just the cutest?! I think this cup stamp looks great stamped in a single colour, however inking in a variety of colours adds definition to the shape of the individual cups. The busy paper makes a good background too, as there isn't much of it on show so it doesn't overwhelm. 

Do visit the other Design Team members to see what they did with this week's colours; there's lots of inspiration over on their blogs too!

Enjoy your day and I'll be back tomorrow with another project; until then, happy stampin'!


Stampin' Up! Supplies Used:

  • Have A Cuppa Designer Series Paper Stack
  • A Nice Cuppa Photopolymer Stamp Set
  • Have A Cuppa Cardstock Pack
  • Have A Cuppa Embellishments
  • Bermuda Bay 1/8" Stitched Ribbon
  • Whisper White A4 Thick Cardstock
  • Wisteria Wonder Classic Stampin' Pad
  • Melon Mambo Classic Stampin' Pad
  • Bermuda Bay Classic Stampin' Pad
  • Punch Corner Project Life

Tags: , , , , , ,

Cards | Shop Online | Stamping

Chip And Mrs Potts Cups and Kettle Framelits Card

by Joanne James28. January 2016 08:05

Today it's time for a new challenge over at Create With Connie and Mary and this week we have a great sketch for you:


Now as my regular readers know I love a good sketch but it wasn't actually the sketch that inspired my card today; I was working on a couple of projects at the same time and had my Cups and Kettle Framelits Dies still out on my desk from my Paper Players card (if you missed it you can see that card here) and the minute I set eyes on that little cup (or it might even be a milk jug, I'm not sure) I just knew it would be perfect to make Chip, the little cup from Disney's movie 'The Beauty and The Beast' - you know the little guy I mean?

Image result for mrs potts and chip (Copyright Disney)

Paired with a customised teapot for Mrs Potts, Chip's Mum, this sketch gave me the perfect layout to showcase my fun characters - here's my finished card:

Now I know I'm biased since I made the card, but aren't that pair just the cutest?! So how did I make them? Here are the key component parts you need:

  • Basic teapot and cup cut from Shimmery White cardstock (I reversed my cup for the above card as I wanted the characters to be looking at each other)
  • Cupbase and teapot base made from the base of the other cup framelit cut from Wisteria Wonder
  • Cut an extra teapot and cup in Daffodil Delight and trim off the handles and some strips to edge the bases
  • Cut three of the looped framelit pieces, one each in Daffodil Delight, Tempting Turquoise and Pink Pirouette. Detach and use one whole yellow loop to line the cup. Snip the blue and pink ones in half across the middle and glue them in alternating colours to the Wisteria Wonder base.
  • Cut a teapot lid out of Wisteria Wonder and add a Pink Pirouette candy dot to the lid top. 
  • Cut two pieces of the wave shapes, one each from Daffodil Delight and Wisteria Wonder. Paper-piece them together and adhere to the teapot edge to create the frill.
  • Punch some eyes using the circle from the owl builder punch, adding eyelids and eye lashes to Mrs Potts and cut the eyebrows and mouths freehand with paper snips. 
  • Lastly, don't forget to snip to add Chip's chip!

I stamped a faint heart on the background, added a strip of 'Have a Cuppa' designer series paper and a heart boarder, along with my sentiment, to complete my card. Punch art-type cards like this are sometimes time-consuming to create, but so worth it I think for a special card!

Do visit the other Design Team members to see how they interpreted this week's sketch; there's lots of inspiration over on their blogs too!

Enjoy your day and I'll be back tomorrow with another project; until then, happy stampin'!


Stampin' Up! Supplies Used: 

Table built using Product Table Builder by The Crafty Owl - Independent Stampin' Up! Demonstrator.

You Are Tea-riffic Teapot Card

by Joanne James24. January 2016 09:00

It's Sunday and time for a new challenge over at The Paper PlayersThis week it is the turn of the lovely Nance to host and she has my favourite type of challenge, a sketch, for you to play along with:

For my card this week I was inspired to use my Cups and Kettle Framelits Dies and co-ordinating 'Have A Cuppa' Designer Series Paper Stack for a fun card:


My colour scheme was taken directly from the paper stack and my card is otherwise really quite self explanatory. I added a White Perfect Accent to my teapot lid and some clear Wink of Stella to the steam heart above the spout for added shimmer. I love the bright colours in these papers and the many little elements in the framelit set - endless creative possibilities! 

Before you reach for your ink and papers, check out what our amazing team has created to inspire you this week:

The Paper Players Design Team
 
 
Here's a quick recap of our challenge rules:
 
1.  Create a new paper project
2.  Upload your creation to your blog with a link back to us and provide a direct link to the post featuring your challenge submission.
3.  Please link your card to no more than four challenges, TOTAL.
4.  Have FUN! 


I look forward to seeing what you create with this week's theme. We have a an important day of sport today: Ben is playing basketball this morning and no hockey this week as Rebecca has an afternoon of swimming with County trials today - wish us luck!

Back tomorrow with another project; until then, happy stampin'!


Stampin' Up! Supplies Used: 

Table built using Product Table Builder by The Crafty Owl - Independent Stampin' Up! Demonstrator.


New Online Exclusives

There are new products available exclusively in the online store from 5 November - check them out here.

Latest Kits!

Stampin Cut and Emboss

The Layered Landscapes Kit and Nature's Paintings Kit are the latest kits in the online store - get yours here!

Shop Online

Access my online shop 24 x 7, 365 days of the year:

Current November hostess code:

9NKXDTTR

Shop Online

Mini Catalogue

BROWSE THE CATALOGUE

'Tis The Season - the new Stampin' Up! Mini Catalogue is here! For more details and to download your copy click here

Scrapbooking

Stampin' Up! has introduced a new range of 12x12" scrapbooking product and kit - the full range is now available to purchase online. To download a copy of the new digital Scrapbooking Catalogue click here.

2024-25 Annual Catalogue

BROWSE THE CATALOGUE

Click on the image to download your copy of the 2024-25 annual catalogue. For a full list of current SU! supplies, go to my online store. If you would like any help or advice, please drop me a line at joanne@thecraftyowl.co.uk or give me a call on 07773 421446 - I'd be happy to help.

Join My Team

It's always a great time to join Stampin’ Up! New team members can get £130 worth of products for only £99 + free business supplies + free shipping + all the fun being a part of Stampin’ Up! Stampin' Up! has something for everyone: join my growing team and benefit from my support to enjoy Stampin' Up! however you choose.

If you're interested, call me for a chat to understand how I can help you realise your goals. Alternatively, if you have already decided to sign up and you just can't wait, please click here for the link to the online form where you can sign up and order your starter kit right away! 

About Me

Hi I'm Joanne and live in Northampton and when I'm not looking after my husband and two beautiful children, am an avid crafter with a passion for all things Stampin' Up!

I must confess that I have never been a big rubber stamper - until I discovered Stampin' Up! that is. I love the fact that I can get such great results with co-ordinating stamps, inks, papers and punches - the possibilities are endless! Join me on my stamping journey as I share the things I love and be inspired to create amazing things yourself!

Follow Me

Monthly Newsletter

Box Builder

Click the button above to use Box Buster to create your custom box design using the Envelope Punch Board!

Kits Collection Now Available!

Stampin Cut and Emboss

The new Kits Collection from Stampin' Up! is now available!

Click here to see the current kits available and order yours online today.

I Design For


Stampin' Up Stuff

This is my personal blog and is not endorsed by Stampin’ Up! I hope you find it a plentiful source of ideas and personal inspiration but please don't copy my designs for contest submission or use for classes, publication or sale without express permission.