Forever And Always Valentines Card CCS455

by Joanne James1. February 2022 13:00

This is my second post of today - to read all about the pre-release of skin-tone Blends and the exclusive 'All Together' bundle, please see my earlier post here.

It's Tuesday and time for a new challenge over at CAS Colours & Sketches. YoonYoung is hosting this month and our first challenge is a colour challenge: 


These colours are perfect for Valentine's so I dug out a bunch of my favourite retired Valentine's bits and pieces and along with the Try Stampin' on Tuesday sketch and some inspiration from my talented blog friend Kim Singdahlsen, I set to work! This is what I came up with:


Here's the low-down on today's card:

I absolutely loved this card that Kim made for last week's Freshly Made Sketches challenge - isn't that stencilled background amazing?! I didn't have anything similar in my stash, but decided that the TSOT sketch was perfect for a trio of (retired Sweet & Sassy Framelits) diecut hearts in this week's challenge colours, so I made my own stencil from a retired Detailed Hearts Die and blended all three colours into the central background circle to bring the diecuts together. I added a diecut and stamped sentiment from another retired stamp and die set, 'Forever & Always' and the Always Dies to complete my card:


These will always be some of my most favourite Valentine's items - so timeless and therefore super useful! 

Here is the visual summary of the key products used on today's project for you to pin for easy reference:


You can see all of my 'How To' summaries on my 'How To - Tips and Techniques' Pinterest board in case you've missed any. 

As a reminder, for our colour challenges, you must use all of the stated challenge colours. You may also use neutral colours; however, the challenge colours should be the most noticeable ones featured on your card. We use Stampin' Up! color names for reference, but you are welcome to use any other companies' products as long as you match the challenge colours as closely as possible.

Enjoy your day and I'll be back tomorrow with another project. Until then, happy stampin'!


Stampin' Up! Supplies Used:

Table built using Product Table Builder by The Crafty Owl - Independent Stampin' Up! Demonstrator.

Red Glimmer Detailed Hearts Love You Always Card PP528

by Joanne James14. February 2021 09:00

Today it's Sunday and time for this week's new challenge over at The Paper Players! It's the turn of the fabulous Jaydee to host this week and she has a timely colour challenge for you to work with:
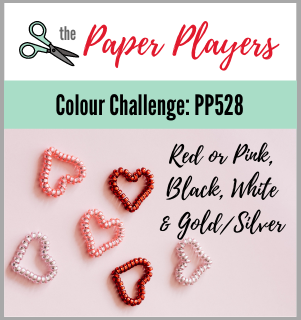
       

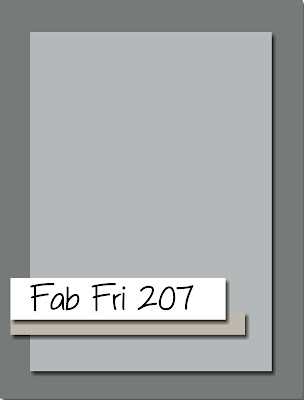
I chose red and silver to pair with black and white for my card and since today is Valentine's Day I was also inspired by the glittery hearts in our challenge photo this week to create something using the Fab Friday sketch that also meets the clean and simple 'hearts' code word over at Addicted to CAS - take a look:
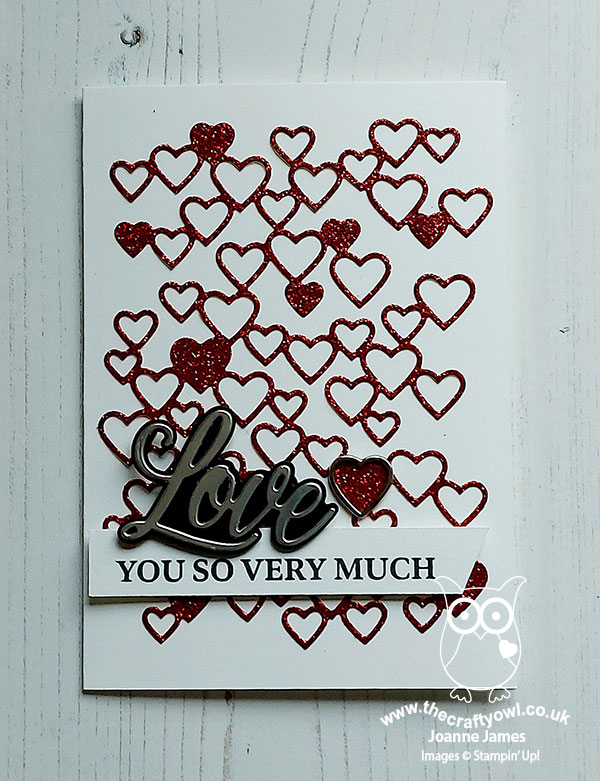
 

Here's the low-down on today's card:

All Heart - I decided that the Fab Friday sketch panel was perfect to showcase the Detailed Hearts Dies in the annual catalogue. When I went to my dieset I discovered I had one already cut in retired red glimmer paper, as I'd used the heart pieces on a previous project, so rather than cut another in Real Red I thought I would use this one for a sparkly centrepiece.

Love Always - For my focal point I decided to add a layered 'love' diecut using my Always Dies, with a black base and silver foil centre - I just love these dies and it's nice to pair them with an older die for a fresh look. I also added another touch of silver by adding a heart charm to one of the solid hearts on my glimmer paper:
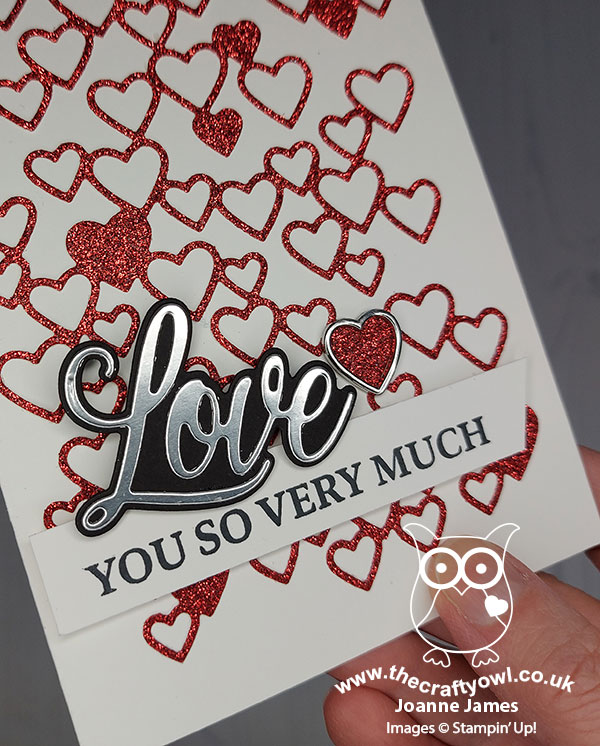
I've been looking for an opportunity to use these on a project and finally today's card provided the perfect opportunity, as the two shapes mirrored each other perfectly. 

And Forever - I finished the sentiment on the ffront of my card by stamping with the 'Forever & Always' stamp set and carried this over to the inside of my card too, and added a few more of those glittery hearts for a simple decoration:
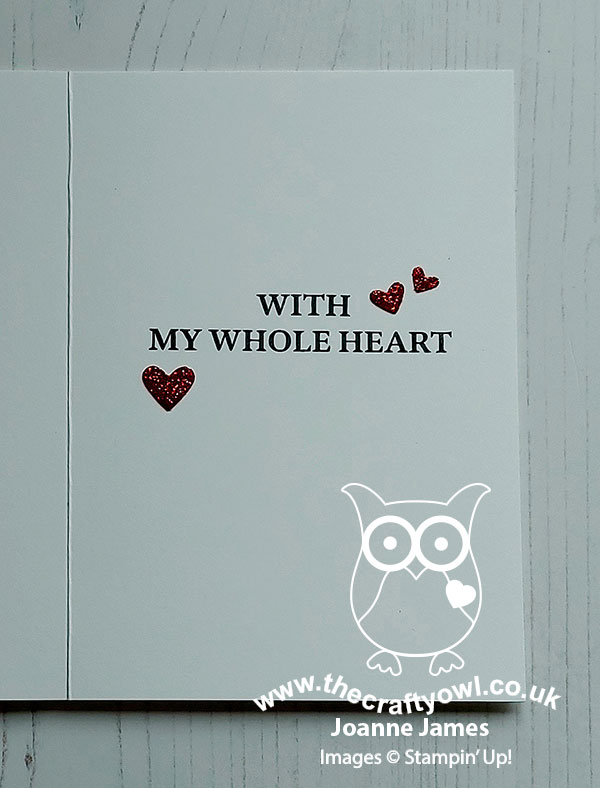
 

This is one of those cards that whilst it is all love and red hearts, it doesn't have to be a Valentine's card. I will be sending mine to a certain young lady in my house who is something of a magpie as far as glitter is concerned and I know she will love it!

Here is the visual summary of the key products used on today's project for you to pin for easy reference:
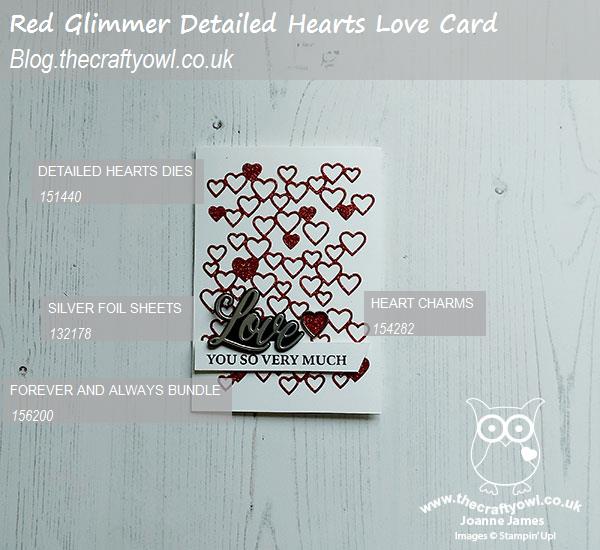
 

You can see all of my Product and 'How To' summaries on my 'How To - Tips and Techniques' Pinterest board in case you've missed any. 

Before you reach for your ink and papers, check out what our amazing team has created to inspire you this week:

Here's a quick recap of our challenge rules:
 
1.  Create a new paper project
2.  Upload your creation to your blog with a link back to us and provide a direct link to the post featuring your challenge submission.
3.  Please link your card to no more than four challenges, TOTAL.
4.  Have FUN!

You can see all of my 'How To' summaries on my 'How To - Tips and Techniques' Pinterest board in case you've missed any. 

Enjoy your day; are you doing anything special to celebrate Valentine's Day? We had a family Valentine's dinner yesterday evening and will be sharing a special breakfast today, along with a rather elaborate choolate fondue this evening. So it's all about the food in the James household! I'll be back tomorrow with another project. Until then, happy stampin'!


Stampin' Up! Supplies Used: 

Table built using Product Table Builder by The Crafty Owl - Independent Stampin' Up! Demonstrator.

Forever and Always With Love VIntage Heart

by Joanne James10. February 2021 22:30

Today I'm sharing a quick card that I made at the weekend for the current challenge over at Inspired By this week where they have the most beautiful vintage linen hearts in their inspiration photo:

Despite my vast collection of patterned paper, I couldn't find anything with a ditsy floral pattern for my hearts in the same colourway as the inspiration photo, so instead I chose a retired pattern (apologies I cannot remember the name) went for a co-ordinating colour palette and built up from there - take a look:


Here's the low-down on today's card:

I used my Forever and Always dies again and paired them with the hearts from the Stitched Be Mine Dies to create my heart, with a subtle embossed top piece to mimic the linen look of the hearts in the photo:


A few additional flowers, pearls and a double linen bow all add to the vintage feel. A rather unconventional colour palette for a Valentine's card, but this card would work as well to send anyone a heartfelt message at any time, I think.

Here is the visual summary of the key current products used on today's project for you to pin for easy reference:


You can see all of my 'How To' summaries on my 'How To - Tips and Techniques' Pinterest board in case you've missed any. 

Enjoy your evening and I'll be back later in the week with another project. Until then, happy stampin'!


Stampin' Up! Supplies Used:

Table built using Product Table Builder by The Crafty Owl - Independent Stampin' Up! Demonstrator.

Forever and Always With Oh So Ombre

by Joanne James30. January 2021 20:40

I hope you are all enjoying your weekend so far! I'm popping by with a quick post with my card for this week's Freshly Made Sketches challenge:

Jen B's sketch was perfect for me to dig out my Forever & Always bundle again and try out an idea that I had using the free Sale-A-Bration Oh So Ombre paper - take a look:


Here's the low-down on today's card:

I had seen this card by Mary Deatherage on Pinterest and wanted to explore the idea of diecutting the centre from a piece of Oh So Ombre DSP and flipping it and this sketch provided the perfect opportunity. I decided to use the Forever & Always bundle for my design; the key to getting a good result is to use the Stamparatus, as you need to have both flowers in an exactly opposing position and then the die needs to be placed absolutely centrally, before cutting. You then flip the central panel and add the sentiment.

I stamped a couple of flowers, then masked them to add in some leaves. I cut out my central panel using my scalloped stitched rectangle Stitched So Sweetly Dies before adding a diecut and stamped sentiment, with a few enamel dots to finish. Popping the central panel up on dimensionals also adds a shadow from the black mat below:


Doesn't it create such an interesting effect? Unable to stop there, I also applied the same technique on a Bermuda Bay background using the Friends Are Like Seashells set:


This time I stamped my shells, again with some masking, and sentiment and added some pearls to finish:


I used the free Sale-A-Bration Oh So Ombre papers as my background, but you could equally create your own ombre background with a sponge brayer or blender brushes. These cards are quite addictive - I think the idea could be used for lots of sets! Here's a shot of both cards together - do you have a favourite?


Here is the visual summary of the key products used on today's projects for you to pin for easy reference:


And my second card:


You can see all of my 'How To' summaries on my 'How To - Tips and Techniques' Pinterest board in case you've missed any. 

Enjoy your evening and I'll be back tomorrow with another project for this week's new challenge over at The Paper Players. Until then, happy stampin'!


Stampin' Up! Supplies Used:

Table built using Product Table Builder by The Crafty Owl - Independent Stampin' Up! Demonstrator.

Black and White With Love TGIF297

by Joanne James7. January 2021 15:00

Today I'm sharing a card that I made with this week's colour challenge over at TGIF Challenges in mind:

I had a piece of black and white True love Designer Series Paper out on my desk after making this card, so decided instead if tidying it away to use it up and this black and white challenge seemed like a great opportunity. This is what I came up with:


Here's the low-down on today's card:

I used lots of the same elements as my previous card, including those gorgeous Always Dies. This time I diecut my 'Love' 3 times and stacked it to create a dimension diecut and combined it with a reverse white-on-black 'with'. There are lots of ways you can combine sentiments using these dies and they don't all have to be with weddings/anniversaries/Valentines in mind; the sentiment on my card is sufficiently generic that it could be used for anything. Again I added some of those matt dots, along with some twine to jazz up my scalloped rectangle. I offset this layer slightly to show a wider piece of the DSP behind, as the pattern got a little lost when it was centred and I really like the effect. And that's all there was to it!

If you love working with black and white as a combo, you should definitely check out the TGIF DT cards and the gallery this week - there are some great examples to feast your eyes on!

Here is the visual summary of the key products used on today's project for you to pin for easy reference:


You can see all of my 'How To' summaries on my 'How To - Tips and Techniques' Pinterest board in case you've missed any. 

Enjoy your day and I'll be back tomorrow with another project. Until then, happy stampin'!


Stampin' Up! Supplies Used:

Table built using Product Table Builder by The Crafty Owl - Independent Stampin' Up! Demonstrator.

Forever and Always With True Love - A Winning Combination

by Joanne James2. January 2021 21:00

Happy new year lovely readers! I hope you have all enjoyed a restful Christmas and peaceful new year with your nearest and dearest. I have enjoyed a craft-free break over the festive period, instead spending some quality time with my family and indulging in some of my other passions, such as Lego building, board games and book reading. I am slowly getting back to crafting; I have lots of new goodies to play with so am looking forward to sharing some of those with you.Today I'm sharing a card I made for the current challenge over at Freshly Made Sketches:

I love this sketch by Jennifer T and decided to create a layered sentiment and start cutting in to my new pack of True Love black and white designer series paper for my card - take a look:


I diecut the larger of my 'always' outlines out of the patterned paper and after adding some colour to the blooms on the paper with my Flirty Flamingo Blends, I popped this panel up on dimensionals. I cut the narrower 'always' out of Basic Black that I first adhered to a foam sheet and then inset this into the aperture onto the background layer and added a stamped 'forever &' to complete my sentiment, with a trio of black mat dots to finish. I also added some coloured DSP to the flap of my envelope too for a co-ordinated finishing touch.

You can see the dimension of the sentiment and the colour detail better here:


Here is the visual summary of the key products used on today's project for you to pin for easy reference:


You can see all of my 'How To' summaries on my 'How To - Tips and Techniques' Pinterest board in case you've missed any. No online store links as these products are not available to purchase until 5th January.

Enjoy your evening and I'll be back tomorrow with my first challenge post for The Paper Players. Until then, happy stampin'!


Stampin' Up! Supplies Used:

Table built using Product Table Builder by The Crafty Owl - Independent Stampin' Up! Demonstrator.

New Online Exclusives

There are new products available exclusively in the online store from 5 November - check them out here.

Latest Kits!

Stampin Cut and Emboss

The Layered Landscapes Kit and Nature's Paintings Kit are the latest kits in the online store - get yours here!

Shop Online

Access my online shop 24 x 7, 365 days of the year:

Current November hostess code:

9NKXDTTR

Shop Online

Mini Catalogue

BROWSE THE CATALOGUE

'Tis The Season - the new Stampin' Up! Mini Catalogue is here! For more details and to download your copy click here

Scrapbooking

Stampin' Up! has introduced a new range of 12x12" scrapbooking product and kit - the full range is now available to purchase online. To download a copy of the new digital Scrapbooking Catalogue click here.

2024-25 Annual Catalogue

BROWSE THE CATALOGUE

Click on the image to download your copy of the 2024-25 annual catalogue. For a full list of current SU! supplies, go to my online store. If you would like any help or advice, please drop me a line at joanne@thecraftyowl.co.uk or give me a call on 07773 421446 - I'd be happy to help.

Join My Team

It's always a great time to join Stampin’ Up! New team members can get £130 worth of products for only £99 + free business supplies + free shipping + all the fun being a part of Stampin’ Up! Stampin' Up! has something for everyone: join my growing team and benefit from my support to enjoy Stampin' Up! however you choose.

If you're interested, call me for a chat to understand how I can help you realise your goals. Alternatively, if you have already decided to sign up and you just can't wait, please click here for the link to the online form where you can sign up and order your starter kit right away! 

About Me

Hi I'm Joanne and live in Northampton and when I'm not looking after my husband and two beautiful children, am an avid crafter with a passion for all things Stampin' Up!

I must confess that I have never been a big rubber stamper - until I discovered Stampin' Up! that is. I love the fact that I can get such great results with co-ordinating stamps, inks, papers and punches - the possibilities are endless! Join me on my stamping journey as I share the things I love and be inspired to create amazing things yourself!

Follow Me

Monthly Newsletter

Box Builder

Click the button above to use Box Buster to create your custom box design using the Envelope Punch Board!

Kits Collection Now Available!

Stampin Cut and Emboss

The new Kits Collection from Stampin' Up! is now available!

Click here to see the current kits available and order yours online today.

I Design For


Stampin' Up Stuff

This is my personal blog and is not endorsed by Stampin’ Up! I hope you find it a plentiful source of ideas and personal inspiration but please don't copy my designs for contest submission or use for classes, publication or sale without express permission.