Pastel Peekaboo Easter Bunnies

by Joanne James9. April 2026 20:00

Today I'm sharing a card that I wanted to share at the weekend, but with the business at Easter and the fabulous weather we've been having here in the UK for the early part of this week, I've been distracted by the outdoors and away from my craft room. So that is why I have a final Easter card for you today that was made with the following challenges in mind:


The team at Inkspirational are all about the Clean and Simple this week, with the option of things beginning with E - which is also the theme over at AAA Cards - so the eggs on my Easter card should be perfect. I'm also sharing my Easter card over at Inspire.Create where the theme is Easter too. You know how much I love the Peekaboo Die from a Pocketful of Happiness, so I decided to make another card with it - take a look:


 Here's the low-down on today's card:

This one is super simple: I wanted to preserve as much white space as possible and keep things really clean and simple, so I cut out the die in white and added it to a white cardbase, then paper-pieced the eggs in the negative spaces in a trio of pastel colours (Pretty In Pink, Peach Pie and Lemon Lolly), alternating each one:


A simple sentiment from the retired 'Welcome Easter' stamp set was all I need to complete my card. 

That's all from me -  I'll be back tomorrow with another project. Until then, happy stampin'!


Easter Time Ephemera Bunny Wishes

by Joanne James24. March 2026 08:00


Today I'm sharing another Easter card that I made for the Easter challenge over at Festive Friday (I chose rabbit, Easter eggs and easter greeting from the Inspo List) and for Inkspire Me who are also celebrating Easter:


I wanted to make another card using the Easter Time Mix & Match Ephemera pack, this time in blues and yellows. Here's my card:

Here's the low-down on today's card:

This time I used a Daffodil Delight card base and layered a cluster of blue and yellow ephemera pieces, finishing with my bunny at the centre. I added some brass butterflies and a twine bow, along with stacked diecut sentiment from the retired Word Wishes Dies:


 So many pretty details and chock-full of spring colour!

Here is the visual summary of the key products used on today's project for you to pin for easy reference:


You can see all of my 'How To' summaries on my 'How To - Tips and Techniques' Pinterest board in case you've missed any. 

Enjoy your day and I'll be back tomorrow with another project. Until then, happy stampin'!


Easter Time Pinks For FMS728

by Joanne James20. March 2026 09:00

Today I'm sharing an Easter card that uses Narelle's layout over at Freshly Made Sketches:


I'm also playing along with the Easter challenge over at Festive Friday (I chose rabbit, Easter eggs and easter greeting from the Inspo List). Here's my card:


Here's the low-down on today's card:

I paired a piece of retired dotty Brights designer series paper in Flirty Flamingo on a Basic White card base with a collection of of bits and pieces from the Easter Time Mix & Match Ephemera pack, along with a sentiment from the retired 'Easter promise' stamp set:


I included a floral wreath, bunny and Easter eggs with a few extra florals too. This turned out a little busier than I initially intended, as I needed to balance the elements, but I quite like the finished result. Hopefully Narelle and the FMS team can see the essence of the sketch; it did seem a shame to cover up so much of the floral wreath, but I think sometimes you need to be bold with these diecut pieces so that they don't look 'lost'. That's my theory anyway ;-)

Here is the visual summary of the key products used on today's project for you to pin for easy reference:


You can see all of my 'How To' summaries on my 'How To - Tips and Techniques' Pinterest board in case you've missed any. 

Enjoy your day and I'll be back tomorrow with another project. Until then, happy stampin'!


Choose Happy Easter Bunny Card and Bunny Chocolate Treats PP734

by Joanne James20. April 2025 08:00

Today it's Sunday and time for this week's new challenge over at The Paper Players! It's the turn of the fabulous Elizabeth to host this week and she has a sweet clean and simple challenge for us to work with:


Since it's Easter Sunday, I had to go with another Easter bunny on my card today - take a look:


Here's the low-down on today's card:

I used the cute little bunny from the 'Choose Happy' stamp set for my bunny, coloured him with pink Stampin' Blends and added him to a tag that I made using one of the Something Fancy Dies:

The colours were taken from the strip of Wildflower Birthday designer series paper that I used behind, and a sentiment along with a few enamel dots and sequins were all I needed to finish my super simple card. Having made my card, I also took the opportunity to make some quick co-ordinating Easter bunny treats:


I was inspired by these bunnies here, but adapted the measurements to fit a smaller Lindt chocolate ball. They really are so simple - all you need is a 10.5" x 2" strip of designer paper, folded in half lengthways then score at 1", 2.75", 4", 5.25", 6", 6.5", 7", 7.75" and 9.5" intervals, using a bone folder to round the body and ear sections to create the bunny shape:


They are so easy you could make the basic shape in a few minutes - if you're quick, you might still have time to get them done to add to your Easter table!

Here is the visual summary of the key products used on today's project for you to pin for easy reference:


You can see all of my Product and 'How To' summaries on my 'How To - Tips and Techniques' Pinterest board in case you've missed any. 

Before you reach for your ink and papers, check out what our amazing team has created to inspire you this week:

Here's a quick recap of our challenge rules:
 
1.  Create a new paper project
2.  Upload your creation to your blog with a link back to us and provide a direct link to the post featuring your challenge submission.
3.  Please link your card to no more than four challenges, TOTAL.
4.  Have FUN!

Enjoy your day; I hope it's filled with more chocolate eggs than are strictly good for you! I'll be back tomorrow with another project. Until then, happy stampin'!


Stampin' Up! Supplies Used: 

Table built using Product Table Builder by The Crafty Owl - Independent Stampin' Up! Demonstrator.

Cheerful Critters Easter Cards

by Joanne James15. March 2024 09:00

Today I have a double post day! I'll be back later with my card for our new challenge over at As You See It, but first I'm guesting over at CAS on Friday! I won Challenge 277 with this card, so I was asked to join the ladies as their guest this week for their new challenge where the theme is 'Easter'. I'm a little thin on current Easter-themed supplies, so I dug into my retired stash for some old sets that I could use in a new way. Here's my card for the new CAS on Friday challenge that also uses the colours over at Color Throwdown this week: 


Here's the low-down on today's card:

I've always loved the little sign-holding characters in the retired 'Cute Critters' stamp set and I thought that the bunny would make a cute clean and simple Easter card when combined with a suitable sentiment. For my bunny I paired her with a sentiment from the retired 'Basket Bunch' stamp set and simply coloured with my Stampin' Blends:


Perfect for a simple card to accompany an Easter egg gift.

I had so much fun with this card that I decided to make another slightly stepped-up version using the chick in the 'Cheerful Critters' set, this time featuring the colours over at Hand Stamped Sentiments:


I backed my card with a piece of Inked Botanicals plaid paper and used one of the Everyday Details Dies to diecut my stamped and coloured panel, with a sentiment from the another retired stamp set, 'Arrange A Wreath':


I'm also linking my second card up over at SUO Challenges where the theme is also Easter/Spring.

This was a fun dip into the retirement box to use some old stamps in new ways. Do you ever do this? Do leave me a comment below - I'd love to hear your thoughts.

Enjoy your morning and I'll be back later with my card for our new challenge over at As You See It. Until then, happy stampin'!


Countryside Inn Easter Card AYSI318

by Joanne James1. March 2024 13:00

It's the 1st of March: Sale-A-Bration is over for another year and to any fellow Welsh readers out there - Happy St David's Day! No daffodils here though; today I'm sharing my design team card for our new challenge over at As you See It where it's time for a seasonal theme challenge chosen by me:


I thought Easter would be a good theme for our challenge this week given that it's at the end of this month, although it did mean I had to get creative as I haven't purchased any new Easter sets and I don't have the Easter Bunny set in the annual catalogue either. Never fear though - I got creative! This is what I came up with:


 Here's the low-down on today's card:

Countryside Inn - I noticed that one of the papers in the Countryside Inn pack has a rabbit in the pattern that I thought would make a sweet background for an Easter card and this set the tone for my whole card. I used a Boho Blue card base and balanced it with another of the patterns in the pack.  

Easter Bunny - I used a simple white rabbit punched with the Easter Bunny Punch as my focal point and stamped my greeting onto it directly - for those of you that picked up the 'Heartfelt Hellos' stamp set during Sale-A-Bration, this is where this sentiment comes from. A trimmed ribbon bow was all the decoration my rabbit needed: 


Everyday Details - You may recognise the layout of my card: it's this week's Paper Players layout that I used for my card on Sunday. The rabbit is in place of the hot air balloon, and on today's card instead of a row of clouds, I created a layered border using one of the Everyday Details Dies, adding pearls to the diamond centres for a little added detail.

I'm pleased with how my card finished up; it's also a great way to show how the same layout can be used in different ways. 

Here is the visual summary of the key products used on today's project for you to pin for easy reference:


You can see all of my 'How To' summaries on my 'How To - Tips and Techniques' Pinterest board in case you've missed any. 

Here's a summary of our challenge rules:

  • Create any card, scrapbooking page, 3D project or packaging project that fits the challenge.
  • Please include the challenge graphic and link back to the challenge in your blog post. Turn off word verification so we can leave you lots of lovely comments. Make sure you link the post not the whole blog to the Linky. Use #AYSIXXX when uploading to a public gallery.
  • If you’re unsure about ‘the rules’, check the details under the Challenge Guidelines tab on the As You See It Challenge homepage.
We look forward to seeing your creations in the AYSI gallery.

Enjoy your day; I am taking a well-earned break today following my final trips to both my local charity shop and waste tip respectively, which signify the end of my loft clearance project this week. Hopefully I will make it back into my craft room and I'll have something to come back and share with you tomorrow. Until then, happy stampin'!


Easter Bunnies Are Not Just For Easter PP634

by Joanne James2. April 2023 08:00

Today it's Sunday and time for this week's new challenge over at The Paper Players! It's the turn of the fabulous Jaydee to host this week and she has a theme challenge for us to work with:


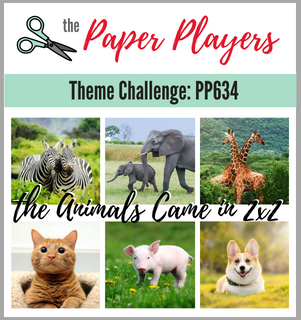
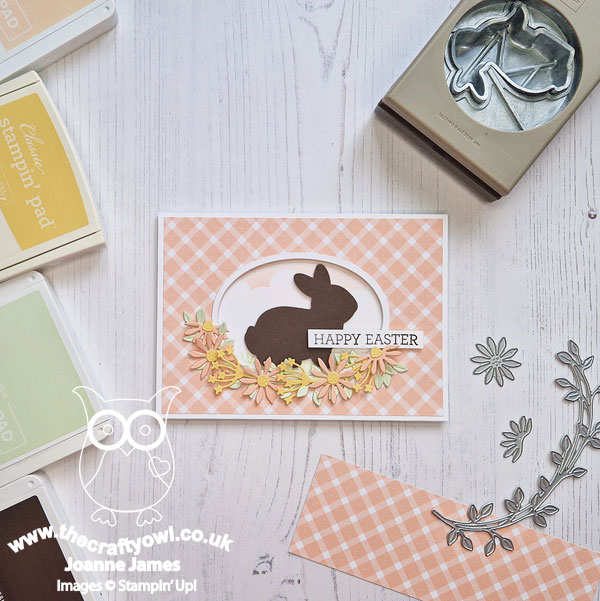
The animals came in two by two - feature two animals on your card, how fun! I actually have two cards to share with you today: I made my Paper Players card after I made the first one, so I'll share that one first so that the second one makes a bit more sense! My first card is an Easter card using Jen T's layout over at Freshly Made Sketches and the current Colour Inkspiration colour palette:

    May be an image of text

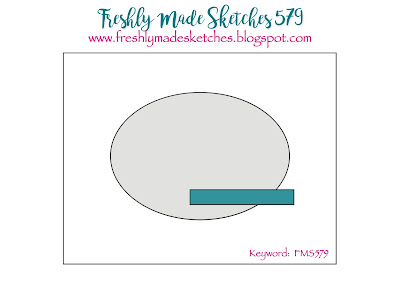
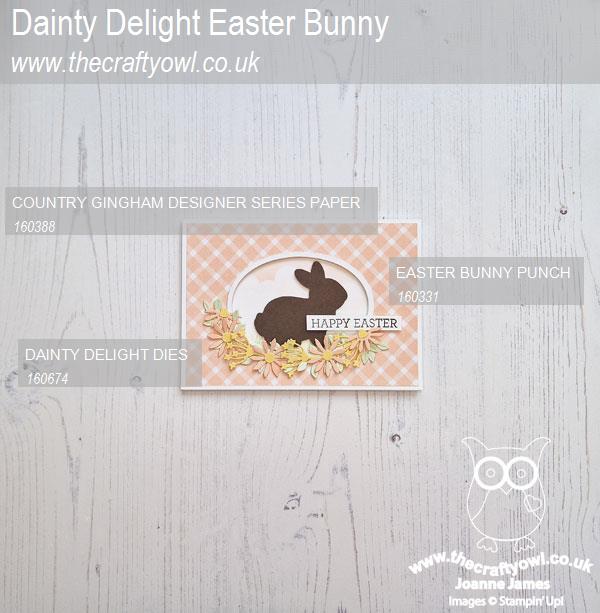
I thought the oval layout would be perfect for two bunnies and the colour palette would be just the ticket for a dark chocolate brown bunny and some floral decoration courtesy of the Dainty Delight Dies - take a look:


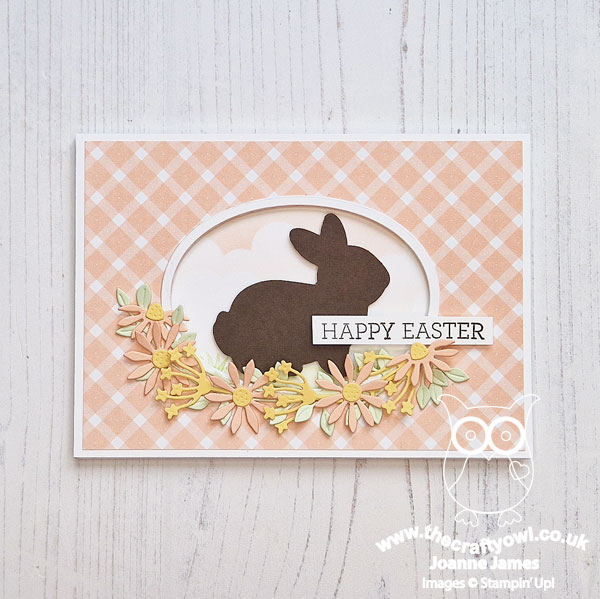
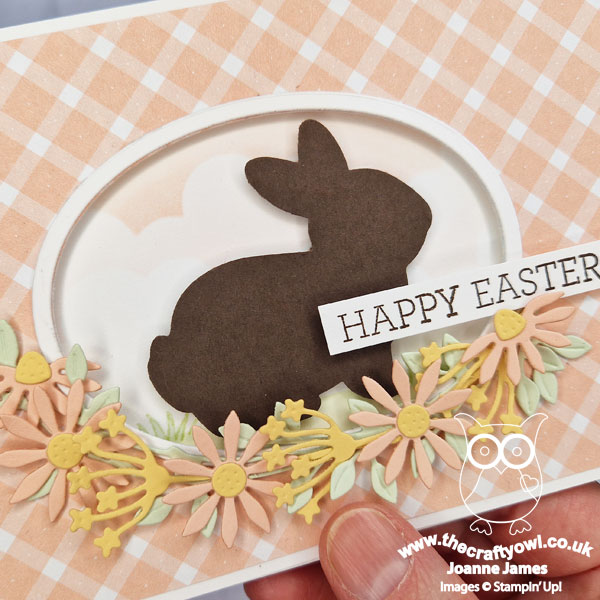
Whilst the layout worked beautifully for one bunny, two were definitely a squeeze, so having added some soft clouds and grass to surround my single bunny, I decided to add an Easter sentiment from the retired set 'Crazy About You'. This is such a pretty colour combo and I love the embossed detail on the Dainty Delight flowers and leaves too:


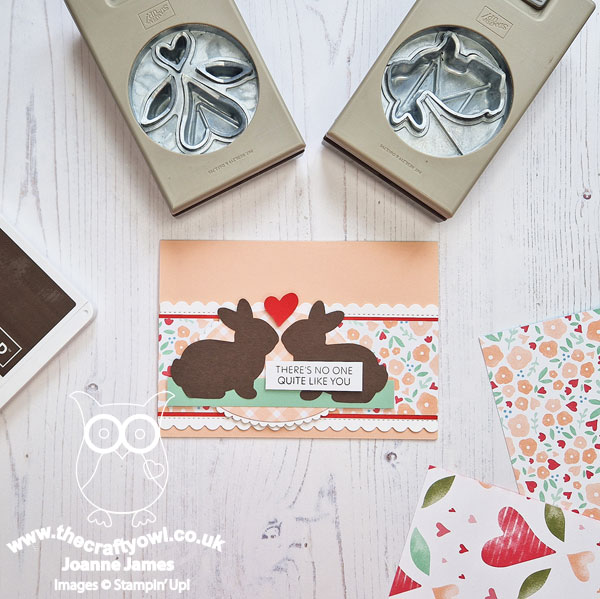
I then moved on to card two. I punched another bunny so that I had another pair and also had the country gingham oval left over from my first card that I still wanted to use up, so this time I switched to the current Sketch Saturday layout and decided to play along with the challenge over at TGIF Challenges and look at what other scraps and offcuts I had that would co-ordinate with my gingham oval.


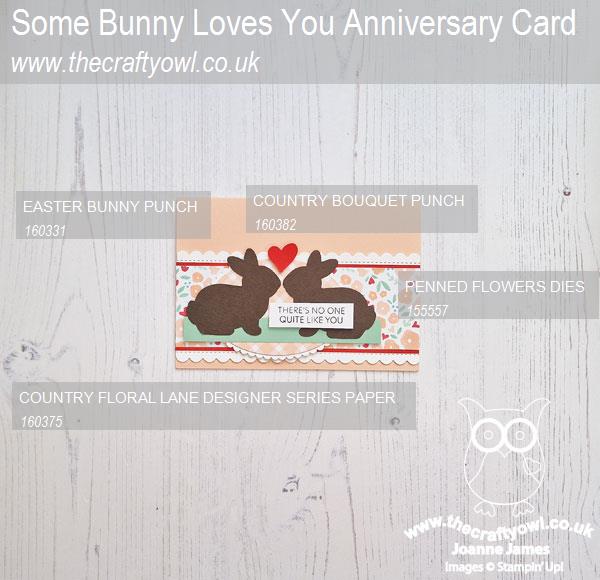
I actually had quite a few! A strip of Country Floral designer paper leftover from a previous project, an offcut of Mint Macaron and some offcut strips of Wisper White that were just wide enough to cut a couple of borders with my Penned Flowers Dies and a scrap of Poppy Parade. This is what I came up with:


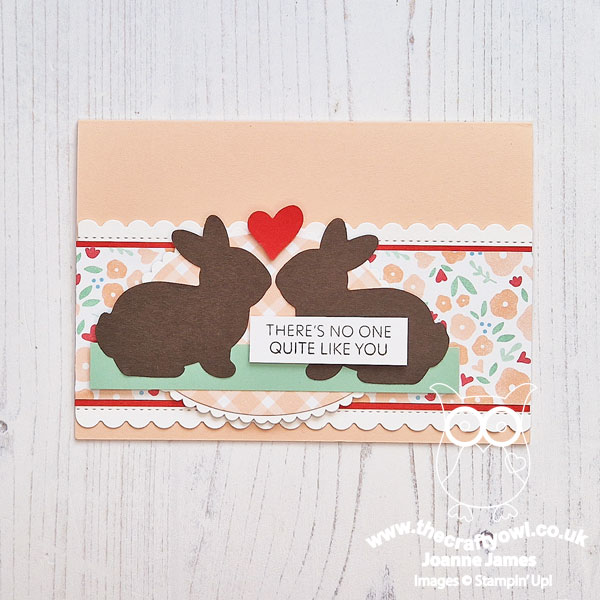
I used a Petal Pink card base and this time positioned my bunnies mirroring each other, with a punched heart between them. I really wanted a 'Some bunny loves you' sentiment but alas, I don't have one in my collection so went with this one from the retired Sale-A-Bration set 'Thanks A Bunch' instead:


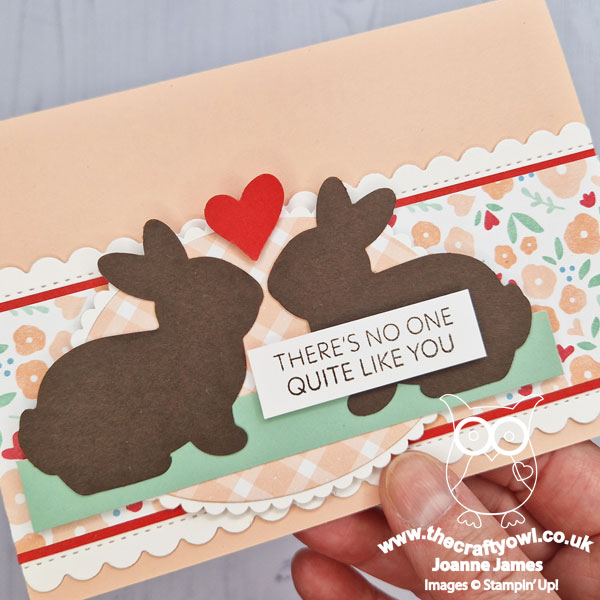
I think this would make a sweet anniversary card;. It actually came together quite quickly by collecting up a bunch of leftover bits and pieces and more importantly - I managed to accommodate my two bunnies this time!

Here is the visual summary of the key products used on today's projects for you to pin for easy reference:


You can see all of my Product and 'How To' summaries on my 'How To - Tips and Techniques' Pinterest board in case you've missed any. 

Before you reach for your ink and papers, check out what our amazing team has created to inspire you this week:

Here's a quick recap of our challenge rules:
 
1.  Create a new paper project
2.  Upload your creation to your blog with a link back to us and provide a direct link to the post featuring your challenge submission.
3.  Please link your card to no more than four challenges, TOTAL.
4.  Have FUN!

Enjoy your day; I am off to an extra hockey game today and then we have the start of the Easter holidays, which for us means the start of serious revision season in the James household - not much in the way of excitement here! I'll be back tomorrow with another project. Until then, happy stampin'!


Stampin' Up! Supplies Used: 

Table built using Product Table Builder by The Crafty Owl - Independent Stampin' Up! Demonstrator.


Ink Blended Penned Flowers Easter Card TTT202

by Joanne James30. March 2023 15:00

It's Thursday and time for a new challenge over at TicTacToe! It's the turn of Team X to host this week and the lovely Betty is our featured designer this week. This is the fun board that we are playing along with: 


I took the third column of diecuts, pastel colours and Easter and using the colour palette over at Hand Stamped Sentiments I created an Easter card for the theme at Global Design Project #GDP387 - take a look:


Here's the low-down on today's card:

The design of my card was inspired by a summer-themed card I'd seen on Pinterest that featured a modern block sentiment when I was looking for ink blending inspiration. I wanted my sentiment to fit inside a square, so used my (retired) Playful Alphabet Dies as they were just the right shape and size. I blended all three colours using blending brushes onto a sheet of white cardstock - once in defined rows (I cut my sentiment square from this piece) and then on randomly on a larger area; I used this piece to diecut my two flower elements using the Penned Flowers Dies. I recommend you colour your cardstock before you diecut the pieces rather than afterwards, as this helps you avoid dark edges. Once I'd coloured my square and cut it out using the Stylish Shapes Dies, I diecut out the letters, then cut the same letters again in white and inset them into the negative space:


 I backed the whole thing onto a panel of neutral Smoky Slate grey and added a few iridescent rhinestones for a little extra sparkle. The letters I diecut from the outside square panel didn't go to waste; I used them for the sentiment on the inside of my card, with an extra diecut piece for decoration:


I also decorated the envelope with the stamp from the Hand Painted Petals stamp set for a little extra detail. Not a bunny, chick or Easter egg in sight, but I think this is a pretty Easter card nonetheless and I'm really pleased with the way it turned out. It just goes to show you don't always need to have themed supplies in order to make a card for a particular occasion - you just have to get creative with what you have in your stash!

Here is the visual summary of the key products used on today's project for you to pin for easy reference:


You can see all of my Product and 'How To' summaries on my 'How To - Tips and Techniques' Pinterest board in case you've missed any. 

A tictactoe board offers so many creative possibilities - how does this week's board inspire you? Why not have a go? We would love to see you in the gallery and who knows - you might be selected for Designer's Choice and be eligible to be a guest designer on a future challenge. 

Apologies that it's been a little quiet around here; I've been single parenting this week and so have had very little opportunity to get in my craft room and when I have, my creative mojo has been struggling to craft under pressure! I still feel like I'm catching up on that lost hour from the clocks going back on Sunday; the James Juniors break up for the Easter holidays tomorrow and I have to say, the end of term can't come soon enough! I'll be back tomorrow with another project for our new challenge over at Festive Friday. Until then, happy stampin'!


Stampin' Up! Supplies Used: 

Table built using Product Table Builder by The Crafty Owl - Independent Stampin' Up! Demonstrator.

Easter Bunny Punch Easter Card PP630

by Joanne James5. March 2023 08:00

Today it's Sunday and time for this week's new challenge over at The Paper Players! It's my turn to host this week I've a theme challenge for us to work with:


We are still some weeks away, but it's always good to be prepared so I thought we could get a start on our Easter cards. I used Karren's super-versatile layout over at Freshly Made Sketches this week and set to work. I ended up making two cards - take a look at the first one:


Here's the low-down on today's card:

Country Lane and a Punched Easter Bunny - I haven't used these papers for a while, but I knew that this pretty floral from the Country Lane designer series paper pack would be the perfect pattern to form the basis of the colour scheme for today's card. I wanted a clean white bunny as my focal point and the darker background sets it off perfectly:

I added a little punched flower to my bunny for a little extra decoration.

A Step Up - Having made my initial card, I decided to create a second one with an extra layer and some tied baker's twine - just a small extra detail but it does add a little something extra:

 The sentiment is from a retired set called 'Welcome Easter' - obviously, any of the current Easter sets could be substituted. Here's a photo of both cards together so that you can compare:

A Little Interior Decoration - Another sentiment and a border of leftover paper decorates the inside of my card:


That's all there is to it - nice and straightforward! I love the Easter Bunny Punch but wasn't so keen on the drawings in the coordinating stamp set but I think this card shows that it works without too.

Here is the visual summary of the key products used on today's project for you to pin for easy reference:


You can see all of my Product and 'How To' summaries on my 'How To - Tips and Techniques' Pinterest board in case you've missed any. 

Before you reach for your ink and papers, check out what our amazing team has created to inspire you this week:

Here's a quick recap of our challenge rules:
 
1.  Create a new paper project
2.  Upload your creation to your blog with a link back to us and provide a direct link to the post featuring your challenge submission.
3.  Please link your card to no more than four challenges, TOTAL.
4.  Have FUN!

Enjoy your day; I'll be back tomorrow with another project. Until then, happy stampin'!


Stampin' Up! Supplies Used: 

Table built using Product Table Builder by The Crafty Owl - Independent Stampin' Up! Demonstrator.


Dainty Flowers For You At Easter TTT198

by Joanne James23. February 2023 16:00

It's Thursday and time for a new challenge over at TicTacToe! It's the turn of Team X to host this week and the lovely Felicita is our featured designer this week. This is the fun board that we are playing along with: 


I went across the middle row with Easter, free and floral and had some fun fussy cutting some of my Sale-A-Bration designer series papers - take a look:


Here's the low-down on today's card:

The Dainty Flowers designer series papers that are free with a £45 purchase during Sale-A-Bration are just lovely! I made a few different cards with these papers for my open house, but haven't gotten around to sharing them here. There is one sheet that has some beautiful oval frames of wildflowers and whilst you could use them as a simple frame for a stamped sentiment I had cut out some of them and wanted to show my customers how they can be used in different ways. I created a split panel using a sheet with a half oval and another half featuring one of the other patterns in the pack, and added a sentiment combining elements of the Love For You Dies with a retired Easter sentiment and added another staggered layer of fussy cut flowers: 


You do need to be a fan of fussy cutting to achieve this effect as these flowers are tiny, but I think it's worth it! The addition of a trio of brushed brass butterflies completes my Easter card.

The team over at TGIF Challenges are featuring Sale-A-Bration products so I'm linking today's card there - and remember, if you'd like to snap up these Dainty Flowers papers you have just 5 more days to do so, so head on over to my online store now!

Here is the visual summary of the key products used on today's project for you to pin for easy reference:


You can see all of my Product and 'How To' summaries on my 'How To - Tips and Techniques' Pinterest board in case you've missed any. 

A tictactoe board offers so many creative possibilities - how does this week's board inspire you? Why not have a go? We would love to see you in the gallery and who knows - you might be selected for Designer's Choice and be eligible to be a guest designer on a future challenge. 

Enjoy your day; I'll be back tomorrow with another project. Until then, happy stampin'!


Stampin' Up! Supplies Used: 

Table built using Product Table Builder by The Crafty Owl - Independent Stampin' Up! Demonstrator.

2026 Jan-Apr Mini Catalogue

The Stampin' Up! 2026 Jan-Apr Mini Catalogue is now live! Click on the image to download your copy.

Product of The Month

Stampin Cut and Emboss

The exclusive Product of the Month can be yours for only £5 when you spend £70 or more in a single order. Make sure you purchase ASAP because once it's sold out, it's gone for good! See this month's exclusive product here.

Shop Online

Access my online shop 24 x 7, 365 days of the year:

Shop Online

New Online Exclusives

There are new products available exclusively in the online store from 3 March - check them out here.

Stampin' Up! Craft Classes

The Lovely Blossoms class featuring the Lovely Blossoms Suite Collection will be held on 19 February and is available to purchase from 3 February; get the full details here.

Virtual Card Retreat

During this two-day virtual event, you’ll create 15 fabulous cards, craft with a community that loves card making, learn new techniques, and interact on a personal level with fellow crafters and Stampin’ Up! staff. Get your kit and register for the class here.

Latest Kits!

Stampin Cut and Emboss

Happy Happenings and Best Ever are the latest kit additions to the online store - get yours here!

2025-26 Annual Catalogue

BROWSE THE CATALOGUE

Click on the image to download your copy of the 2025-26 annual catalogue. For a full list of current SU! supplies, go to my online store. If you would like any help or advice, please drop me a line at joanne@thecraftyowl.co.uk or give me a call on 07773 421446 - I'd be happy to help.

Join My Team

It's always a great time to join Stampin’ Up! New team members can get £130 worth of products for only £99 + free business supplies + free shipping + all the fun being a part of Stampin’ Up! Stampin' Up! has something for everyone: join my growing team and benefit from my support to enjoy Stampin' Up! however you choose. Join during February and you will receive a new Stampin' Positioner too!

If you're interested, call me for a chat to understand how I can help you realise your goals. Alternatively, if you have already decided to sign up and you just can't wait, please click here for the link to the online form where you can sign up and order your starter kit right away! 

About Me

Hi I'm Joanne and live in Northampton and when I'm not looking after my husband and two beautiful children, am an avid crafter with a passion for all things Stampin' Up!

I must confess that I have never been a big rubber stamper - until I discovered Stampin' Up! that is. I love the fact that I can get such great results with co-ordinating stamps, inks, papers and punches - the possibilities are endless! Join me on my stamping journey as I share the things I love and be inspired to create amazing things yourself!

Follow Me

Monthly Newsletter

Box Builder

Click the button above to use Box Buster to create your custom box design using the Envelope Punch Board!

I Design For


Stampin' Up Stuff

This is my personal blog and is not endorsed by Stampin’ Up! Stampin' Up! is a registered trademark of Stampin' up! Inc. I hope you find my blog a plentiful source of ideas and personal inspiration but please don't copy my designs for contest submission or use for classes, publication or sale without express permission.