Love is Kindness and Blessed Easter TTT196

by Joanne James9. February 2023 16:00

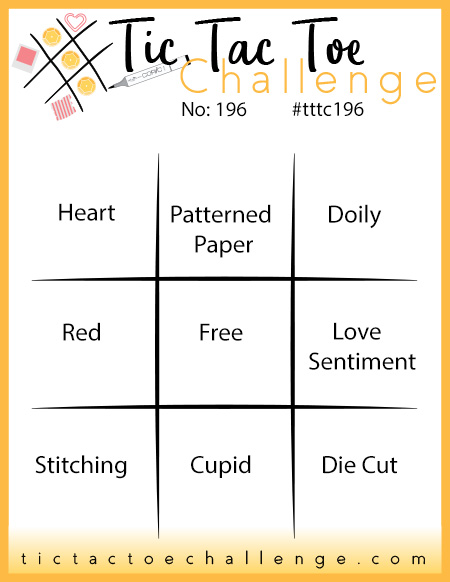
It's Thursday and time for a new challenge over at TicTacToe! It's the turn of Team X to host this week and the lovely Elizabeth is our featured designer this week. This is the fun board that we are playing along with: 
       RRCB 199

I took the diagonal of heart/free/diecut on our board (it also works for the first column heart/red/stitching) and was totally inspired by the image over at The Card Concept too for my clean and layered card - those pretty tulips and the chalkboard hearts. This led me to go rooting through my retired stamps for the perfect stamp - and I ended up finding not one but two stamps, so I made two cards! Since they are old stamps and my colours also match the current challenge over at Retro Rubber (I used pink, white and green) I'm linking up there too. So here's my first card - take a look:
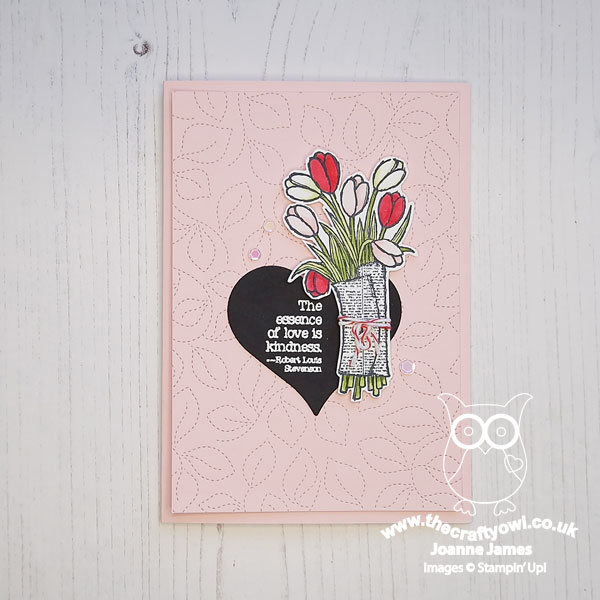
 

Here's the low-down on today's card:

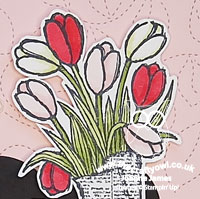
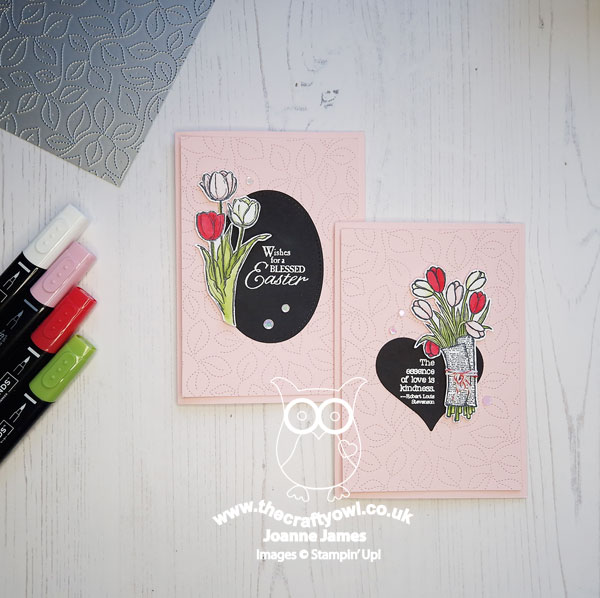
Love Is Kindness - 'Love is Kindness' is a stamp from way back in 2015 but one I couldn't part with! I love those wrapped tulips and that sentiment quote is just so beautiful and true. It is actually a single wood-mount stamp, but for today's card I stamped just the sentiment first in Versamark onto Basic Black cardstock so that I could heat emboss it in white and cut it out with my (retired) Sweet & Sassy Hearts Framelit Dies. I then stamped the stamp again in black onto white cardstock, so that I could fussy cut the tulips and colour them with my Stampin' Blends. I added a piece of Sweet Sorbet baker's twine before adding to the edge of my chalkboard heart. 
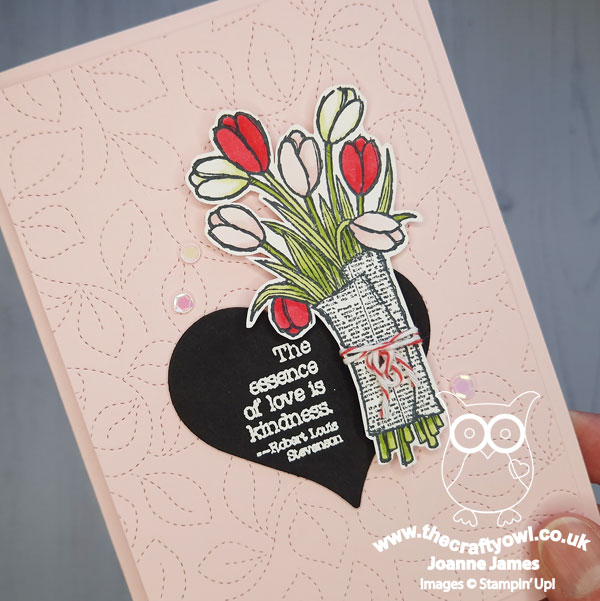
 

Stitched Greenery - The background for both of my cards features the current Stitched Greenery coverplate die. I don't use this nearly enough - it gives such a delicate background detail and adds interest without overwhelm. A few complimentary pink sequins was the final finishing touch for my cards - here's a photo of them both together:
 

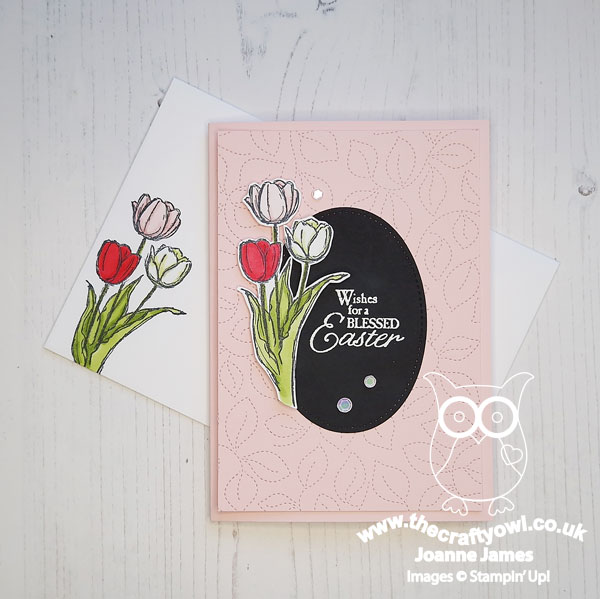
A Blessed Easter Bonus - As I mentioned above, whilst rooting through my retired stamps, the next one on the shelf was 'Blessed Easter' from 2014 and I thought these tulips would also work in this colourway. I switched out the heart for an oval and added an Easter sentiment. A little extra envelope decoration on this one too:
 

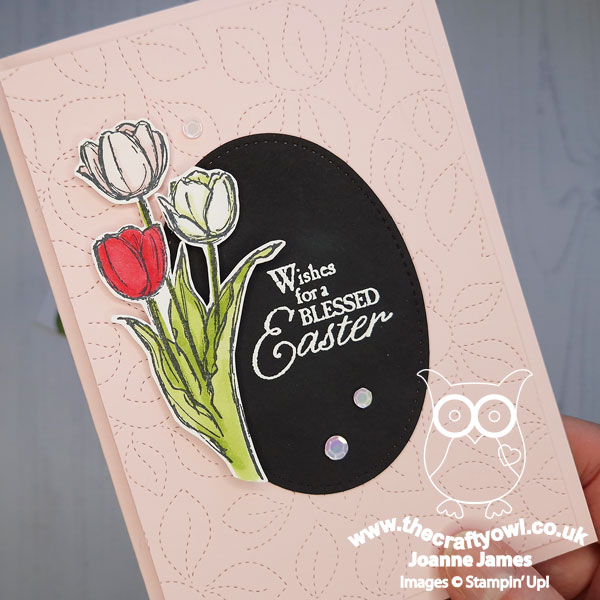
 Here's a close up of this one - which version do you prefer? Do leave me a comment below - I'd love to hear your thoughts. 
 

I have to say for me I think the first one wins - but I love them both and hope you enjoyed seeing the same idea with two different sets.

Here is the visual summary of the key products used on today's project for you to pin for easy reference:
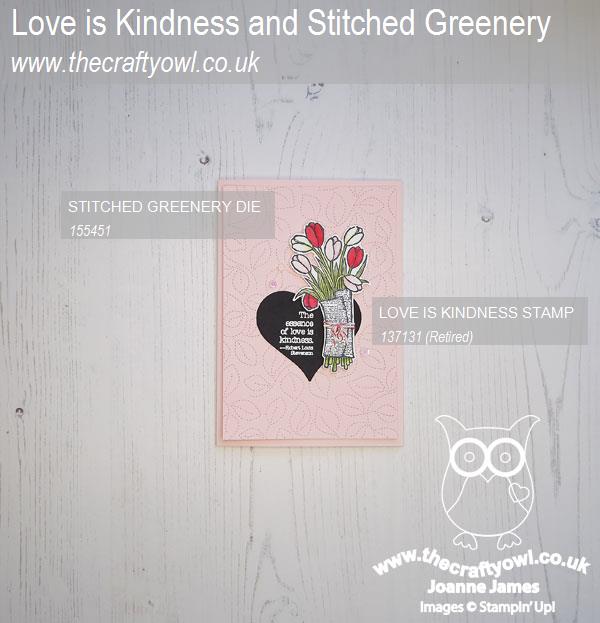
 

You can see all of my Product and 'How To' summaries on my 'How To - Tips and Techniques' Pinterest board in case you've missed any. 

A tictactoe board offers so many creative possibilities - how does this week's board inspire you? Why not have a go? We would love to see you in the gallery and who knows - you might be selected for Designer's Choice and be eligible to be a guest designer on a future challenge. 

Enjoy your day; I'll be back tomorrow with another project. Until then, happy stampin'!


Stampin' Up! Supplies Used: 
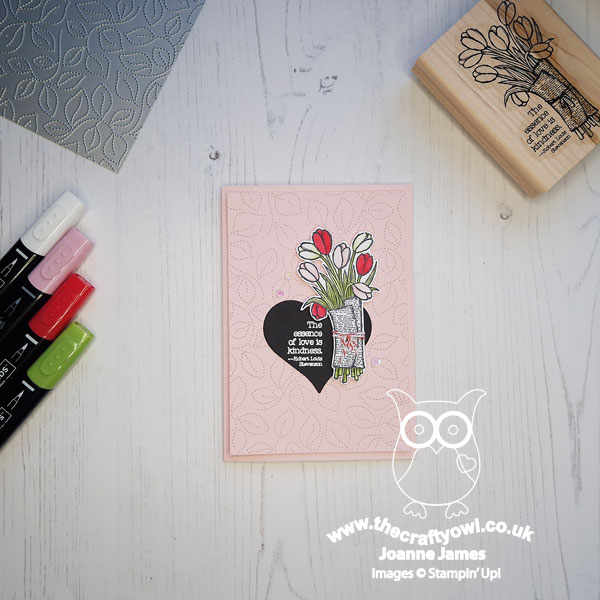
Table built using Product Table Builder by The Crafty Owl - Independent Stampin' Up! Demonstrator.


Blessed Easter Tulips

by Joanne James31. March 2021 11:54

Today I'm sharing a quick Easter card that I made for the current challenge over at Inspired By:

I love the textured paint effect of those brightly coloured tulips and I needed a couple of extra Easter cards, so I brought out my retired 'Blessed Easter' stamp and got colouring - take a look:


I went for a simple 'stamp and colour' although I did take the opportunity to frame my spring tulips with one of the new Stitched With Whimsy Dies for an extra touch of detail to my panel. I liked this card so much I made another too, this time on a Daffodil Delight card base - here's a photo of them together:


Here is the visual summary of the key products used on today's project for you to pin for easy reference:


You can see all of my 'How To' summaries on my 'How To - Tips and Techniques' Pinterest board in case you've missed any. 

Enjoy your day and I'll be back tomorrow with another project. Until then, happy stampin'!


Stampin' Up! Supplies Used:
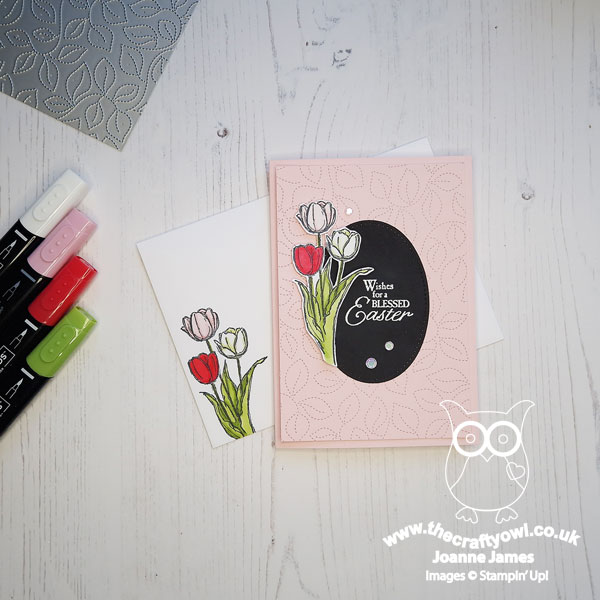
Table built using Product Table Builder by The Crafty Owl - Independent Stampin' Up! Demonstrator.

Blessed Easter Pink Tulips

by Joanne James5. April 2014 20:27

Another tulip card for you today - no apologies, I love this stamp! This card was inspired by the flecked pink tulips I received from my James juniors for Mother's Day last week. This card features this stamp used in another different way, this time to create an outlined background panel:

In splitting the tulips away from the sentiment on the original stamp, this makes it really easy to use the tulips for non-Easter cards, as I've done here. I used a Whisper White base, then stamped the tulips in Rose Red on a strip of Pink Pirouette cardstock. I then stamped the tulips again, this time in Black Stazon on watercolour paper and coloured with inks and my Aquapainter and cut out using my oval framelits and mounted on a second oval in Rose Red.

That's all for today; tomorrow's card may well have to be a 'get well soon' card as this afternoon my young son appears to have succumbed to the chicken pox - his THIRD dose in just 6 years!!! I didn't think this was even possible, but his itchy spots tell me otherwise. On the upside, at least it's the Easter holidays, so he should be over it by the time the new term starts :-)

Back tomorrow with another card; until then, happy stampin'!


Stampin' Up! Supplies Used:

Table built using Product Table Builder by The Crafty Owl - Independent Stampin' Up! Demonstrator.


Blessed Easter Scallop Tag Closure Card

by Joanne James4. April 2014 20:55

Today I'm sharing another card from this week's classes - this time one of the scallop tag-closure cards that are all the rage at the moment in a lovely, deep purple. Here is my card: 

The card is a standard A6 size (10.5cm x 14.9cm), but instead of being scored down the centre of the cardstock, I scored at 8.5cm and 19cm, marked the centre point and having guided the cardstock over the punch guides, I punched using the Scalloped Tag Topper Punch and trimmed away the excess on either side of the punched section. I love this punch - it really is so useful for tags, bookmarks, boxes, fancy cards and everything in between!

I also used my Aquapainter to colour this card, but instead of using watercolour paper I actually used Whisper White cardstock - I wanted to show my class attendees the differences in effect when you use different paper types. The sentiment was also stamped separately and punched out, which worked better on the narrower section. We split our sentiment away from the tulips at the start to allow for more flexibility when stamping, so this was really easy with no masking required.

That's all from me today; I'm entertaining family this weekend and off to play tooth fairy to my eldest this evening, who lost another of her baby teeth today - just need to make sure she's asleep first :-)

Back tomorrow with another card; until then, happy stampin'!


Stampin' Up! Supplies Used:

Table built using Product Table Builder by The Crafty Owl - Independent Stampin' Up! Demonstrator.


Hardwood Meets Tulips

by Joanne James2. April 2014 17:22

Another quick post from me today before I head out for my second card class of the week with another of the cards that we are making, featuring the 'Blessed Easter' stamp. This time I paired the stamp with the Hardwood background - love this stamp, especially in Smoky Slate grey:

Unlike yesterday's card, I also used my Aquapainter to blend in some Smoky Slate ink around the tulips to create some subtle shading; shading in this way really makes the flowers stand out.

More lovely cards to share using this stamp in due course; off now to pack for my class.

Back tomorrow with another project - a rather special one too! until then, happy stampin!


Stampin' Up! Supplies Used:

Table built using Product Table Builder by The Crafty Owl - Independent Stampin' Up! Demonstrator.


Tags: , , , , , , , ,

Cards | Stamping

Real Red Tulips

by Joanne James1. April 2014 15:31

Hello everyone! I can't quite believe it but James Juniors have broken up from school for their Easter holidays today - aargh! Where did that term go? Anyway, on the upside that will mean a few weeks of fun with hopefully not too much holiday homework. Today I've another quick post as I'm out hosting a crafty Stampin' Up! party this evening, so I'm blogging early (for me!) and thought I would share one of this week's class cards. In this month's classes my ladies are learning watercolouring techniques using Aquapainters and we are using the 'Blessed Easter' stamp set. All this month's cards are quite simple in design, as the aim is to spend the majority of the class time focusing on watercolouring and practising the technique rather than doing lots of stamping, cutting and sticking. Here is the first of this week's cards:

A Real Red card base and Pear Pizzazz panel, with the tulips and sentiment stamped onto watercolour paper using Jet Black Stazon and then coloured using the corresponding coloured inks and our Aquapainters. I think all the ladies in yesterday's class were pleasantly surprised at how easy it was to get a great result and the nice thing is even though everyone had the same tools, the cards all looked really different, depending on the individual shading and detail on the tulips. To finish we embellished with a piece of Real Red grosgrain ribbon.

That's all from me - I'm off to pack my bags for later. Back with more tulips later in the week; until then, happy stampin'!


Stampin' Up! Supplies Used:

Table built using Product Table Builder by The Crafty Owl - Independent Stampin' Up! Demonstrator.


Tags: , , , , , , ,

Cards | Classes | Stamping

New Online Exclusives

There are new products available exclusively in the online store from 5 November - check them out here.

Latest Kits!

Stampin Cut and Emboss

The Layered Landscapes Kit and Nature's Paintings Kit are the latest kits in the online store - get yours here!

Shop Online

Access my online shop 24 x 7, 365 days of the year:

Current November hostess code:

9NKXDTTR

Shop Online

Mini Catalogue

BROWSE THE CATALOGUE

'Tis The Season - the new Stampin' Up! Mini Catalogue is here! For more details and to download your copy click here

Scrapbooking

Stampin' Up! has introduced a new range of 12x12" scrapbooking product and kit - the full range is now available to purchase online. To download a copy of the new digital Scrapbooking Catalogue click here.

2024-25 Annual Catalogue

BROWSE THE CATALOGUE

Click on the image to download your copy of the 2024-25 annual catalogue. For a full list of current SU! supplies, go to my online store. If you would like any help or advice, please drop me a line at joanne@thecraftyowl.co.uk or give me a call on 07773 421446 - I'd be happy to help.

Join My Team

It's always a great time to join Stampin’ Up! New team members can get £130 worth of products for only £99 + free business supplies + free shipping + all the fun being a part of Stampin’ Up! Stampin' Up! has something for everyone: join my growing team and benefit from my support to enjoy Stampin' Up! however you choose.

If you're interested, call me for a chat to understand how I can help you realise your goals. Alternatively, if you have already decided to sign up and you just can't wait, please click here for the link to the online form where you can sign up and order your starter kit right away! 

About Me

Hi I'm Joanne and live in Northampton and when I'm not looking after my husband and two beautiful children, am an avid crafter with a passion for all things Stampin' Up!

I must confess that I have never been a big rubber stamper - until I discovered Stampin' Up! that is. I love the fact that I can get such great results with co-ordinating stamps, inks, papers and punches - the possibilities are endless! Join me on my stamping journey as I share the things I love and be inspired to create amazing things yourself!

Follow Me

Monthly Newsletter

Box Builder

Click the button above to use Box Buster to create your custom box design using the Envelope Punch Board!

Kits Collection Now Available!

Stampin Cut and Emboss

The new Kits Collection from Stampin' Up! is now available!

Click here to see the current kits available and order yours online today.

I Design For


Stampin' Up Stuff

This is my personal blog and is not endorsed by Stampin’ Up! I hope you find it a plentiful source of ideas and personal inspiration but please don't copy my designs for contest submission or use for classes, publication or sale without express permission.