Today I'm sharing the third and final card from my recent technique class featuring the Moroccan Suite of products. Each of the ladies received a share of the products in the suite - designer series papers, ribbon and twine as well as the Moroccan Nights stamp set and the aim was to create a trio of cards that showcased each of the elements.
This card is all about the paper and features a different way to showcase one of the wonderful patterns of the Moroccan Designer Series Paper - take a look:
Here's the low-down on today's card:
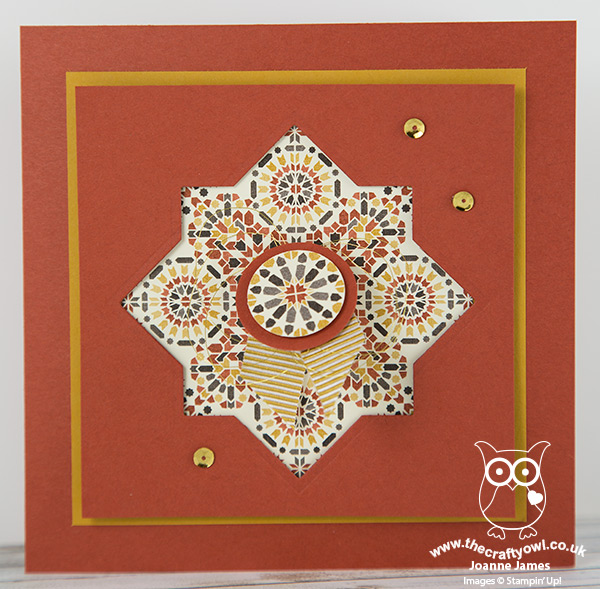
Moroccan Tiles - The papers in this set contain some colourful traditional Moroccan-inspired mosaic patterns, some of which work for backgrounds and some which deserve to be a feature in their own right; the paper on this card today is, in my view, one such pattern. There is no stamping required, as the wonderful rustic colours of the paper do all the hard work for you. I didn't even include a sentiment on the front of my card, as I didn't want it to spoil the geometrical layout - there is plenty of space inside the card to stamp a sentiment of your choosing.
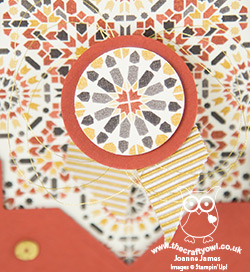
It's Hip To Be Square - Having spent much time considering the patterns in the Moroccan Designer Series Paper pack, I finally decided today's paper was the one that I wanted to showcase in a feature frame. I made my frame by overlaying two of the square framelits from the Layered Square Framelits set; I used the framelits measuring and - this image shows you how I decided which ones would give me the aperture I needed:

Framelits are great for creating windows and apertures, in addition to the perfect square mat or layer. I simply centred mine onto my card front and cut them one at a time, cutting the square one first then overlaying the second one in an offset diamond shape. You can create a corner frame piece to help you line up your framelits and ensure they are perfectly central if you need to.
Medallion Centre - To finish my card I punched out a co-ordinating circle from the remainder of my paper (highlighted by the small square in the image above), backed it with another punched circle of Cajun Craze and mounted it on a dimensional with a twist of the Delightful Dijon 5/8" Mini Striped Ribbon and some metallic gold thread.
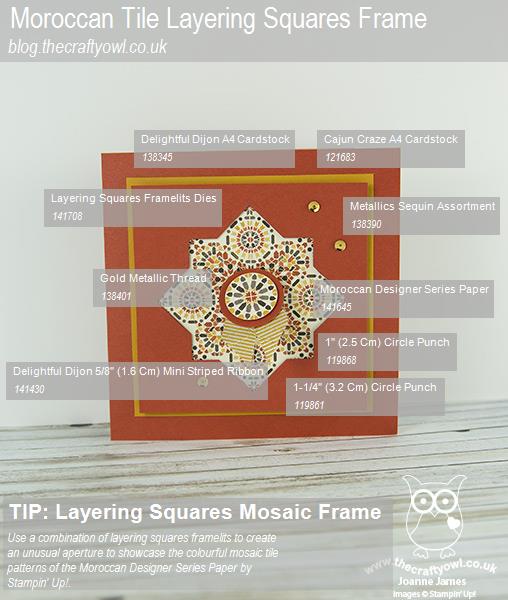
Here is the visual summary of the key products used on today's project for you to pin for easy reference:
You can see all of my 'How To' summaries on my 'How To - Tips and Techniques' Pinterest board in case you've missed any.
I hope you like this trio of cards using the Moroccan Suite of products. If you live in or around Northampton and would like to join me for some creative fun, you can check out my schedule of forthcoming classes here - I would love you to join me!
Enjoy your day and I'll be back tomorrow with this week's card for our new challenge over at The Paper Players; until then, happy stampin'!
Stampin' Up! Supplies Used: