Today it's Sunday and the first of September; where is the year disappearing?! It's time for this week's new challenge over at The Paper Players and it's the turn of the fabulous LeAnne to host this week and she has a fun theme challenge for you to work with:

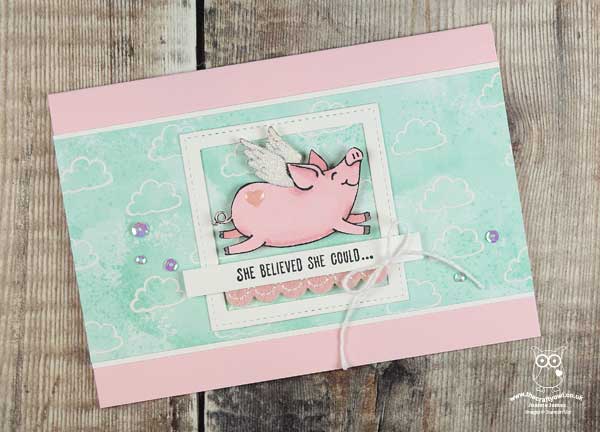
I had limited options for today's theme: cows, pigs or ducks! Limits are often helpful though as they really help focus the mind. I was so tempted to use my current farmyard favourite, those funny cows from the 'Over The Moon' set, however I decided to give some love to one of my other farmyard friends that has been a little neglected of late and took the opportunity to play along with the fourth week of the Freshly Made Sketches celebrations too - take a look:
Here's the low-down on today's card:
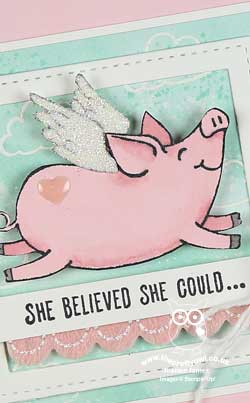
This Little Piggy - Whilst pigs are often to be found down on the farm, I'm not sure you'd see many of the flying variety! I do love this flying porcine creature though and I decided that on today's card she really needed wings to be proud of, so I created a stand-out pair in white glimmer paper and paper-pieced them - how cool are they?!
Artistic Touches - I used some of the patterned paper and felt accessories from the Follow Your Art Suite on my card today, heat embossing some clouds in white across my designer paper for added detail, along with a white twine bow.
Frame It - I did a creative interpretation of the FMS sketch today and created a continuous scene, using a frame created from a pair of square Stitched Shape Framelits to draw the eye to my pig and sentiment and keep true to the sketch, rather than create my scene on a central square.
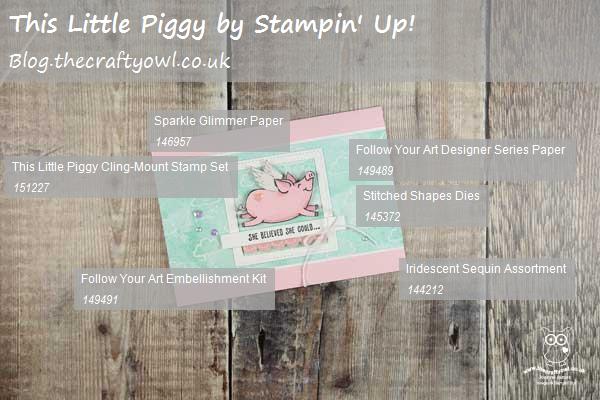
Here is the visual summary of the key products used on today's project for you to pin for easy reference:
You can see all of my Product and 'How To' summaries on my 'How To - Tips and Techniques' Pinterest board in case you've missed any.
Before you reach for your ink and papers, check out what our amazing team has created to inspire you this week:
The Paper Players Design Team
Here's a quick recap of our challenge rules:
1. Create a new paper project
2. Upload your creation to your blog with a link back to us and provide a direct link to the post featuring your challenge submission.
3. Please link your card to no more than four challenges, TOTAL.
4. Have FUN!
You can see all of my 'How To' summaries on my 'How To - Tips and Techniques' Pinterest board in case you've missed any.
Enjoy your day; we are enjoying the last few days of the summer holiday before the James Juniors begin a new school year later this week. I'll be back tomorrow with another project. Until then, happy stampin'!
Stampin' Up! Supplies Used: